Copy the security.json created with new credentials and paste/store it in the path
mentioned below:
e.g., C:\solr-9.7.0\security.json
Upload the security.json file to each of the ZooKeeper instances. Open the Command
Prompt as Administrator, Navigate to SOLR_HOME\bin
and execute the command below to upload configuration file to each of ZooKeeper
instances:
This will create a User with preferred username and
Password.
Figure 1. Installation of SOLR – Authentication
For below points following, use the username and password created wherever applies.
Execute the below APIs in browser to ensure that Solr is
running with authentication and authorization enabled.
http://<IP>:<SOLRPORT>/solr/admin/authentication
http://<IP>:<SOLRPORT>/solr/admin/authorization
Enter the username “Enter the USERNAME Configured in security.json file” and password
“Enter the PASSWORD Configured in security.json file” when prompted on browser. If the
message “authorization.enabled”:true is displayed, it confirms that authorization has been
enabled successfully..
Execute the below API as POST request on any of rest clients such as Postman or Curl.
Select Basic Authentication and provide Username and Password as created in above steps
under Authorization tab. This creates a new user with UserName to be further used as
<user_name> in credentials.
http://<IP>:<SOLRPORT>/solr/admin/authentication
In Basic Authentication provide the following:
Username: “Enter the USERNAME Configured in security.json file”
Password: “Enter the PASSWORD Configured in security.json file”
In Body tab, select input as Raw JSON (application/json) and provide the below
input.
{
"Set user": {"<username> “: "<password> “}
}
e.g. –
This will create user with username: <username> and password: <password>
Now, a Solr user has been created with UserName and Password
that was mentioned in above step set-user.Figure 2. Installation of SOLR – Authentication
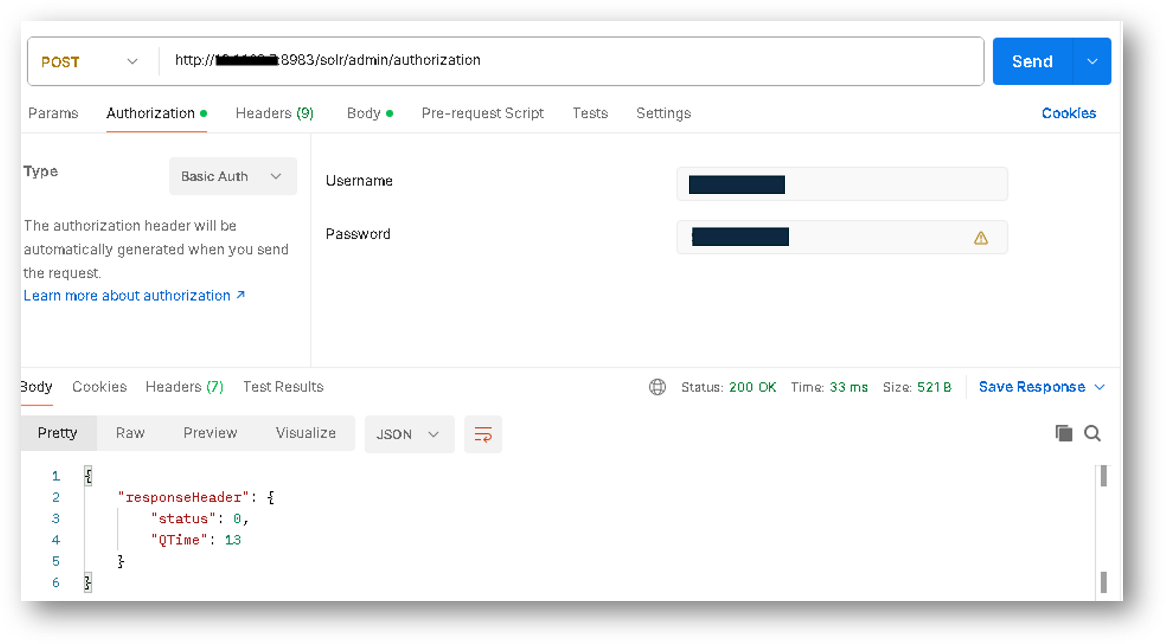
Execute the below API as POST request in any of rest client such as Postman or Curl and
Select Basic Authentication with Username as “Enter the USERNAME Configured in security.json
file” and Password as “Enter the PASSWORD Configured in security.json file” under
Authorization tab and set the user role using Post request with the URL specified
below:
This step will provide admin rights to the user which will be mentioned in
<username> tab.
http://<IP>:<SOLRPORT>/solr/admin/authorization
Enter the respective IP and Solr Port.
In the Body tab, select input as raw JSON (application/json) and provide the below
input.
Username: Provide the username that was created using set-user.
{“set-user-role": {"<username> “: ["admin"]}}
Execute the below API as POST request in any of rest client such as Postman or Curl and
Select Basic Authentication with Username as “Enter the USERNAME Configured in security.json
file” and Password as “Enter the PASSWORD Configured in security.json file” and this step
will set the user permission.
Enter the respective IP and Solr Port.
http://<IP>:<SOLRPORT>/solr/admin/authorization
In the Body tab, select input as raw JSON (application/json) and provide the below
input.