Security.json configuration changes
Note:
This section is used to create usernames and passwords for
Solr.
- This step requires the security.json file (that is created with required security
content) present in folder named “Solr_9_Prereq.zip” from path mentioned in source field.
Open the security.json, file.
Figure 1. Security.json Configuration Changes 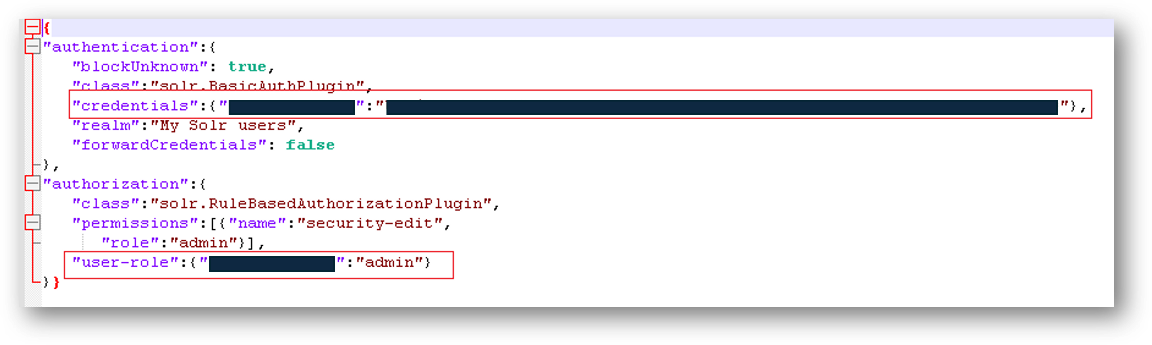
- Edit the fields highlighted in the above Figure to change username and password.
- To change username name, Edit it to the preferred username.Note:It is advisable to keep note of the username for future references.
“credentials”: {“<username>”:””} - After adding preferred username name, generate preferred hashed password. Copy the script
mentioned below and put in a new notepad and save the notepad as
solr_hash_pwd.py.
import hashlib import base64 import random import string def hash_and_salt_solr_password(password): salt = '‘. join (random.choice(string.ascii_lowercase + string.digits) for _ in range(16)) salted_password = (salt + password). encode () hash_buffer_first_pass = hashlib. sha256(salted_password). digest () hash_buffer_second_pass = hashlib. sha256(hash_buffer_first_pass). digest () hash_base64 = base64.b64encode(hash_buffer_second_pass). decode () salt_b64 = base64.b64encode(salt.encode()).decode() return hash_base64 + " " + salt_b64 password = input ("Enter password: ") print(hash_and_salt_solr_password(password))Note:Please maintain the required indentation.Figure 2. Security.json Configuration Changes (Cont.) 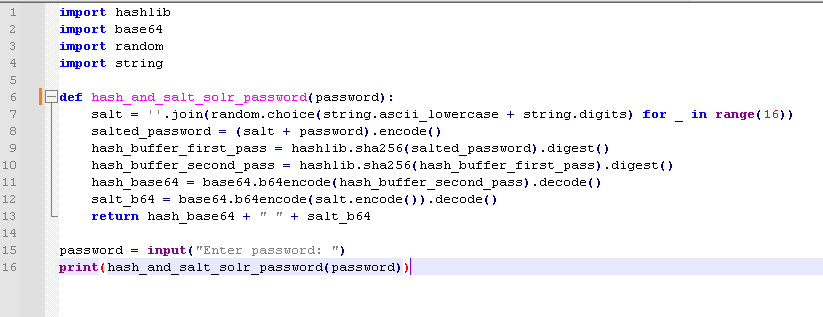
- Open command prompt as administrator and Navigate to the path where the solr_hash_pwd.py
file is saved.
For example: In below image solr_hash_pwd.py python file is saved in desktop. Open the command prompt in admin mode and navigate to desktop location and execute the next step.
Figure 3. Security.json Configuration Changes (Cont.)  Note:The image is provided for reference the hashed key varies for different password.
 - Now enter “python solr_hash_pwd.py” in the command prompt.
- On successful execution, “Enter password:” will pop.
- Enter the preferred password and press enter. Note:Keep note of the password for future references
- After entering the password, Hashed Password will be popped as output. Copy that hashed
password and paste in credentials field.
“credentials”: {“<username>”:”Generated Hashed key/password”}Figure 4. Security.json Configuration Changes (Cont.) 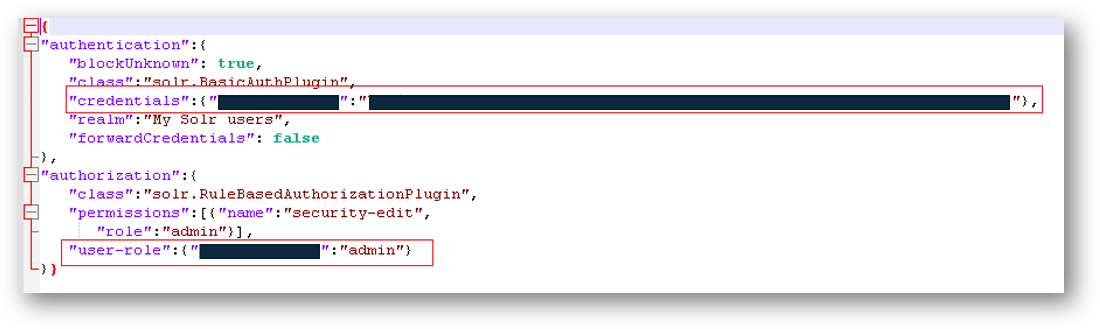
- Include the username in the user-role field, as shown in the highlighted section of the
figure:
"User-role": {"<username>": "admin"}. - After doing the required changes in the security.json file, Save the file and store it in
Solr path. mentioned below:
e.g., C:\9.5.0\security.json