Schedules
This section explains the steps required to manage an account for a login user.
- On the main bar, click Schedules.
- The drop-down appears with the following options:
- Manage My Schedules
Figure 1. My Account 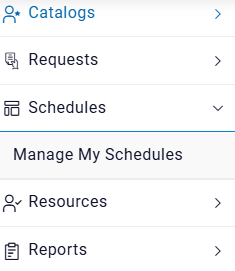
- Manage My Schedules
Manage My Schedules
Through this module, the user can schedule Action(s) on object(s) in an
organization. Pre-requisites of using My Schedules:
- Organization should have “Action Scheduling Enabled” in the Organization Module.
- At least one Action should be active for respective object.
- UI associated with Action should not have Approval associated with it.
- Controls used in UI should be Textbox and Hidden Controls Only.
It has the following options:
- View Schedules
- Create Schedules
-
Schedule History
Figure 2. My Schedules 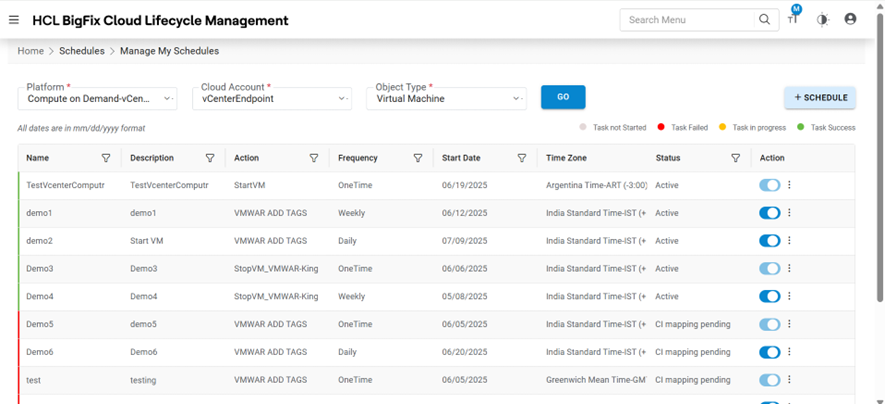
Create Schedules
To create a schedule of an Action in an organization, login user needs to follow the steps below:
- Click on My Schedules menu option and then click +Schedule.
Figure 3. Create Schedule 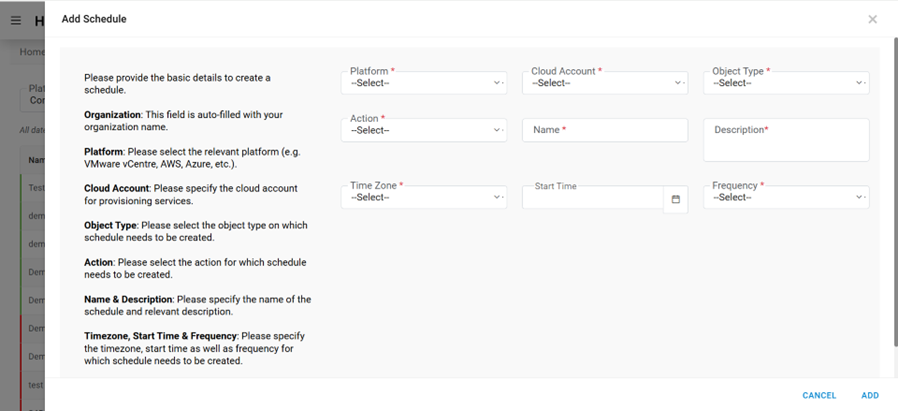
- Refer to the table below to understand the fields mentioned in the above figure.
Table 1. Create Schedule Fields Fields Description Organization Select the name of the organization (Business units/ divisions in organizations) Platform The field lists down the cloud service provider. Cloud Account Displays the name of the environment (cloud endpoint) Object Type Name of the infrastructure resource. Action Displays the list of Action(s) associated with Object. Name This is a unique name for Schedule Action. Description Description of Schedule Action. Time Zone This field represents the Time Zone of Start Time. Start Time The field represents when to start/schedule the Action. Frequency Interval at which the Action can be schedules Action Parameter(s) List of Parameters depends on selected Action - Select Platform and Cloud Account.
- Select Object Type.
- Select Action.
- Enter the Name and Description of Schedule.
- Select Time Zone and Start Time.
- Select Frequency .
- Now Map the Parameters of Action. Parameter Data Type supports two types:
- Static – User can provide the Static value of a control.
- SQL Function – SQL function is to find the dynamic value of a control.
- Click ADD.
Figure 4. Create Schedule (Cont.) 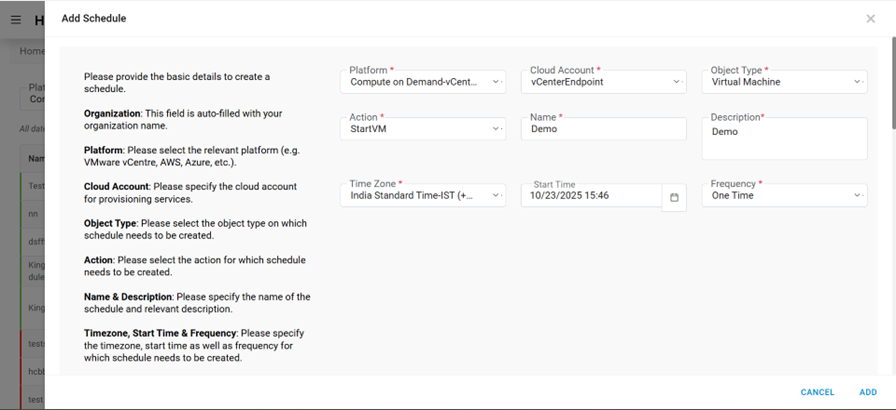 Note:All fields marked with an asterisk (*) are mandatory.
 - A success message box appears on the screen.
- Now click on (
 ). And then click on Map Object. A Popup will open containing the relevant
Object(s).
). And then click on Map Object. A Popup will open containing the relevant
Object(s).Figure 5. Create Schedules 
- You can select the appropriate Object(s), on which Action needs to be scheduled.
Figure 6. Create Schedule (Cont.) 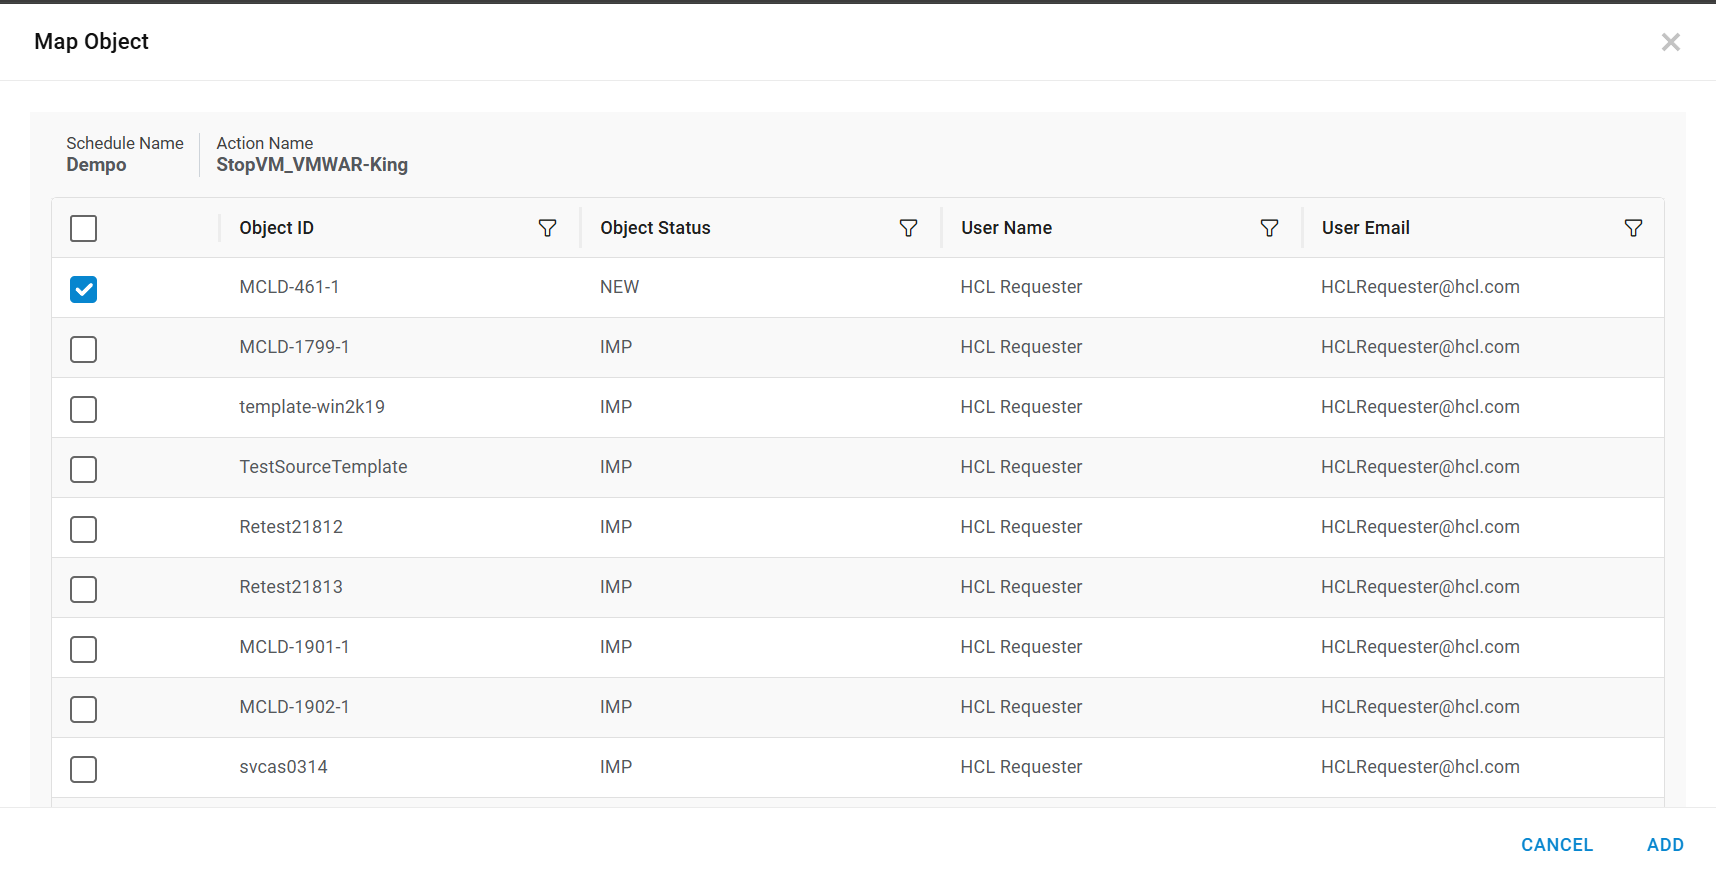
- Now click on the ADD button.
- A successful message appears on the screen.
- The Action Scheduled Successfully.
View Schedules
- This section lists all the Schedules that have been created by an organization
admin.
Figure 7. View Schedules 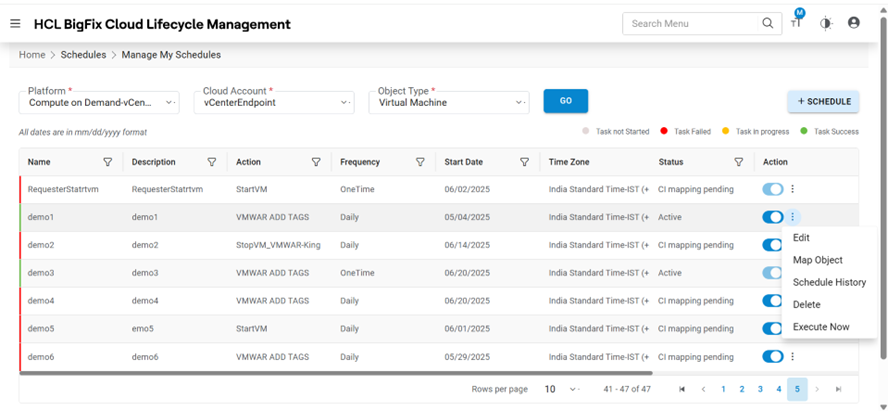
- Refer to the table below to understand the fields mentioned in the above figure.
Table 2. View Users field Fields Description Organization Select the name of the organization (Business units/ divisions in organizations) Platform The field lists down the cloud service provider. Cloud Account Displays the name of the environment (cloud endpoint) Object Type Name of the infrastructure resource. Action Displays the list of Action(s) associated with Object. Name This is a unique name for Schedule Action. Description Description of Schedule Action. Action Name Name of Action for which Schedule has been created Frequency Interval at which the Action can be schedules Start Date The field represents when to start/schedule the Action. Time Zone This field represents the Time Zone of Start Time. Start Date (UTC) The field represents when to start/schedule the Action in UTC time zone Next Run Date The field represents the next schedule time of the Action Status The status of the Schedule Action User to take actions like Edit, Change Status, Map Objects, history, Delete against the listed schedules - It also comprises the following actions:
- Edit: To modify the details of Schedule.
- Change Status (
 ): To change
the status of Schedule.
): To change
the status of Schedule. - Map Objects: To map objects to Schedule.
- History: To check the history of Schedule.
- Delete: To delete the Schedule.
- Execute Now: To execute the schedule immediately.
Schedule History
This section lists all the History of Schedules Actions.
To view the schedule history, follow the below-mentioned steps:
- Click on (
.png) )icon then click on
schedule history in the grid records on View
Schedule tab.
)icon then click on
schedule history in the grid records on View
Schedule tab. - On clicking this icon, the Schedule History tab will open.
Figure 8. Schedule History 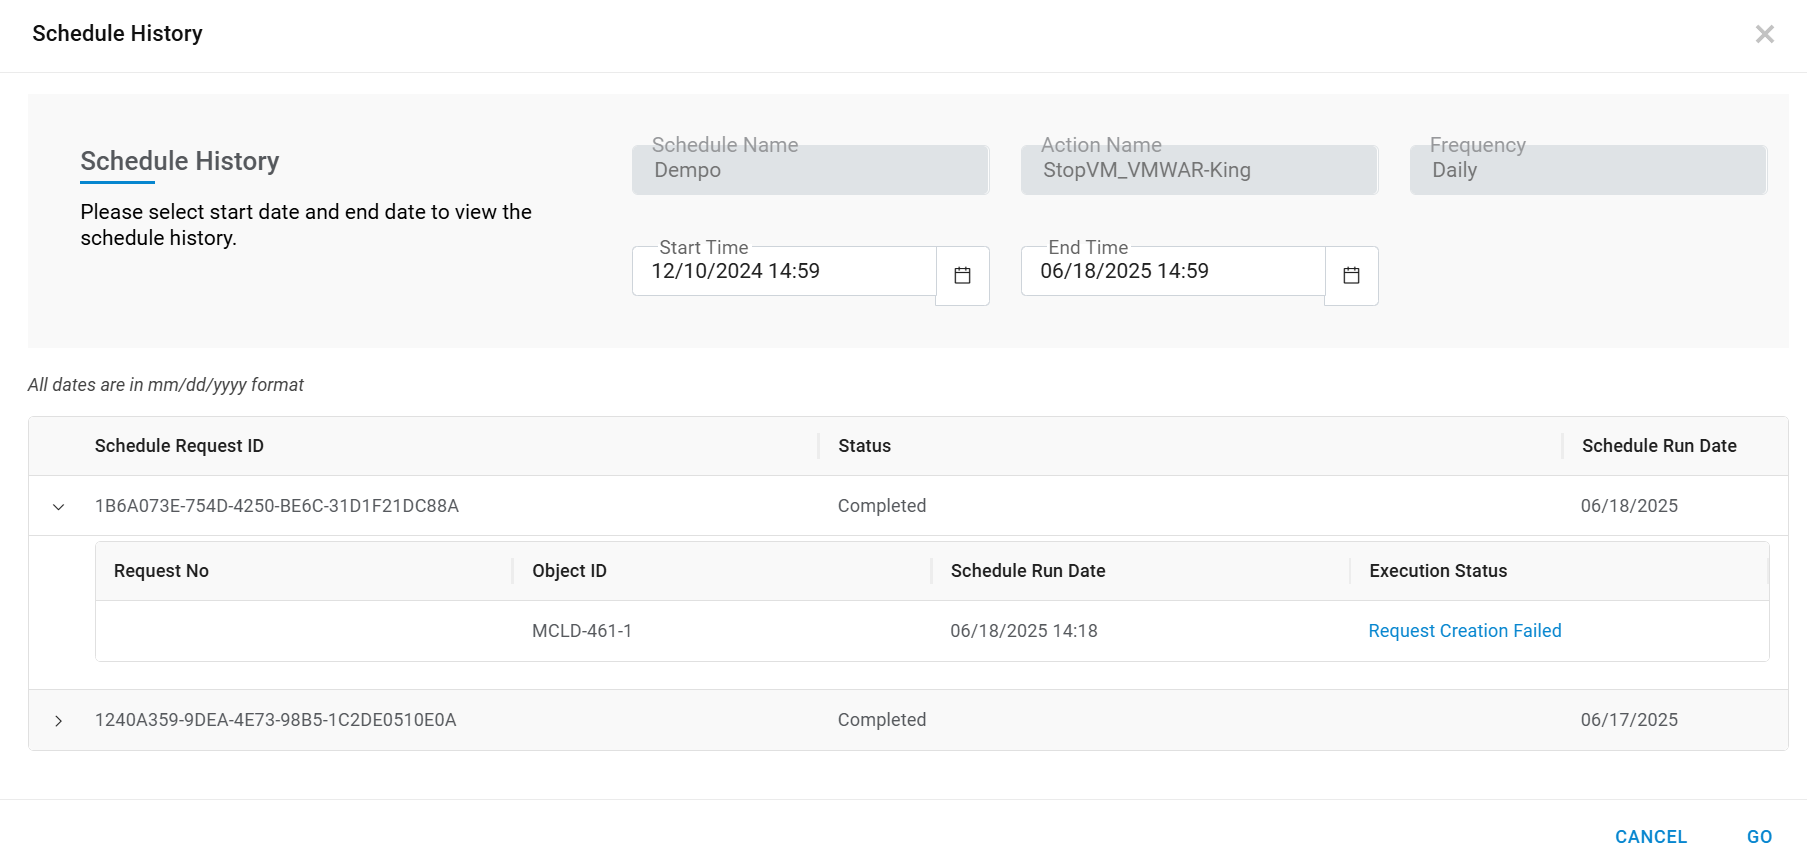
Refer to the table below to understand the fields mentioned in the above figure.
Table 3. Schedule History Field Fields Description Schedule Name This is a unique name for Schedule Action. Action Name Name of Action for which Schedule has been created Frequency Interval at which the Action can be schedules Start Date Start Time, to filter the history of Schedules from this time End Date End Time, to filter the history of Schedules till this time Status InProgress, Completed, Failed filter status Schedule Request Id Unique GUID for the schedule instance. Status Status of the scheduled instance Schedule Run Date Run date of the scheduled instance Request No Request Tracking Request Number created by Schedule Request Id. Object Id Object Id, Unique Id of the object on which Action is performed. Schedule Run Date Run date of the scheduled instance Execution Status Status of the Request Execution