RBAC (Role Based Access Control)
Role-Based Access Control (RBAC) is an essential component of HCL BigFix CLM. This module details the steps to manage the RBAC model within an environment to implement several critical securities such as the least privilege, separation of duties, and data abstraction.
This module includes two kinds of Role Management: Manage Group and Manage User. Different users of this platform or with service providers, get permission to access resources, and these permissions are given based on mapping of the users to system-based groups.
- On the main bar, click RBAC.
- The drop-down appears with the following options:
Figure 1. RBAC 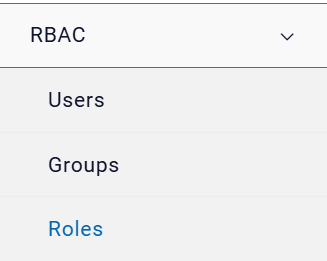
Provider gets access to both the Manage Users, Manage Groups and Manage Roles sections.
Manage Users
Through this module, the organization admin manages (Add, Edit and Delete) other users in an organization. It has the following options:
Add Users
To add an end user in an organization, organization admin needs to follow the steps below:
- Click on the User screen and then click + USER button.
Figure 2. Add User 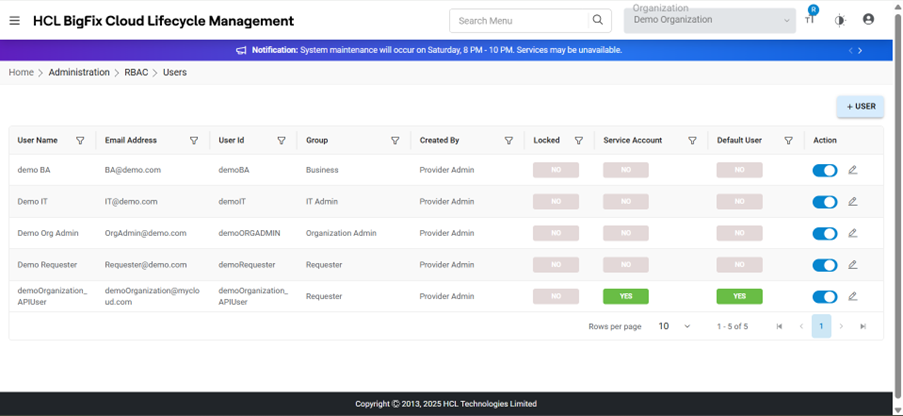
- The following “Add User” pop-up appears on the screen.
Figure 3. Add User Screen 
- Refer to the below table to understand the fields mentioned in the above figure.
Table 1. Add User Fields Fields Description Service Account User for API integration with HCL BigFix CLM Organization Select the name of the organization (Business units/ divisions in organizations) User Name This represents the full name of the user User Id This is the unique id to search user in domain directory Email Address This is the email address of the user Password This field gets populated with HCL BigFix CLM generated password Token Expiration Time (in seconds) This section is applicable for service account users. It is an integer value to define the access token timeout for this user, to override the default token expiration value configured by admin user. Generate password The option that helps to generate a password in HCL BigFix CLM Select Role This section is applicable for organizational users. Provider needs to provide a role to a user while adding it in HCL BigFix CLM Select widget This section is applicable for organizational users. HCL BigFix CLM dashboard widgets are listed. System defined widgets appear - Enter the User Name and then enter the User ID.
- Enter Email Address .
- Click Generate Password to generate a new password.
- Select Role.
- Once the role is selected, the widgets appear in the Widget box.
- Select Widget.
- Provider selects the widgets according to the roles which are to be assigned to an end user.
- Click ADD button.
Figure 4. Add User (Cont.) 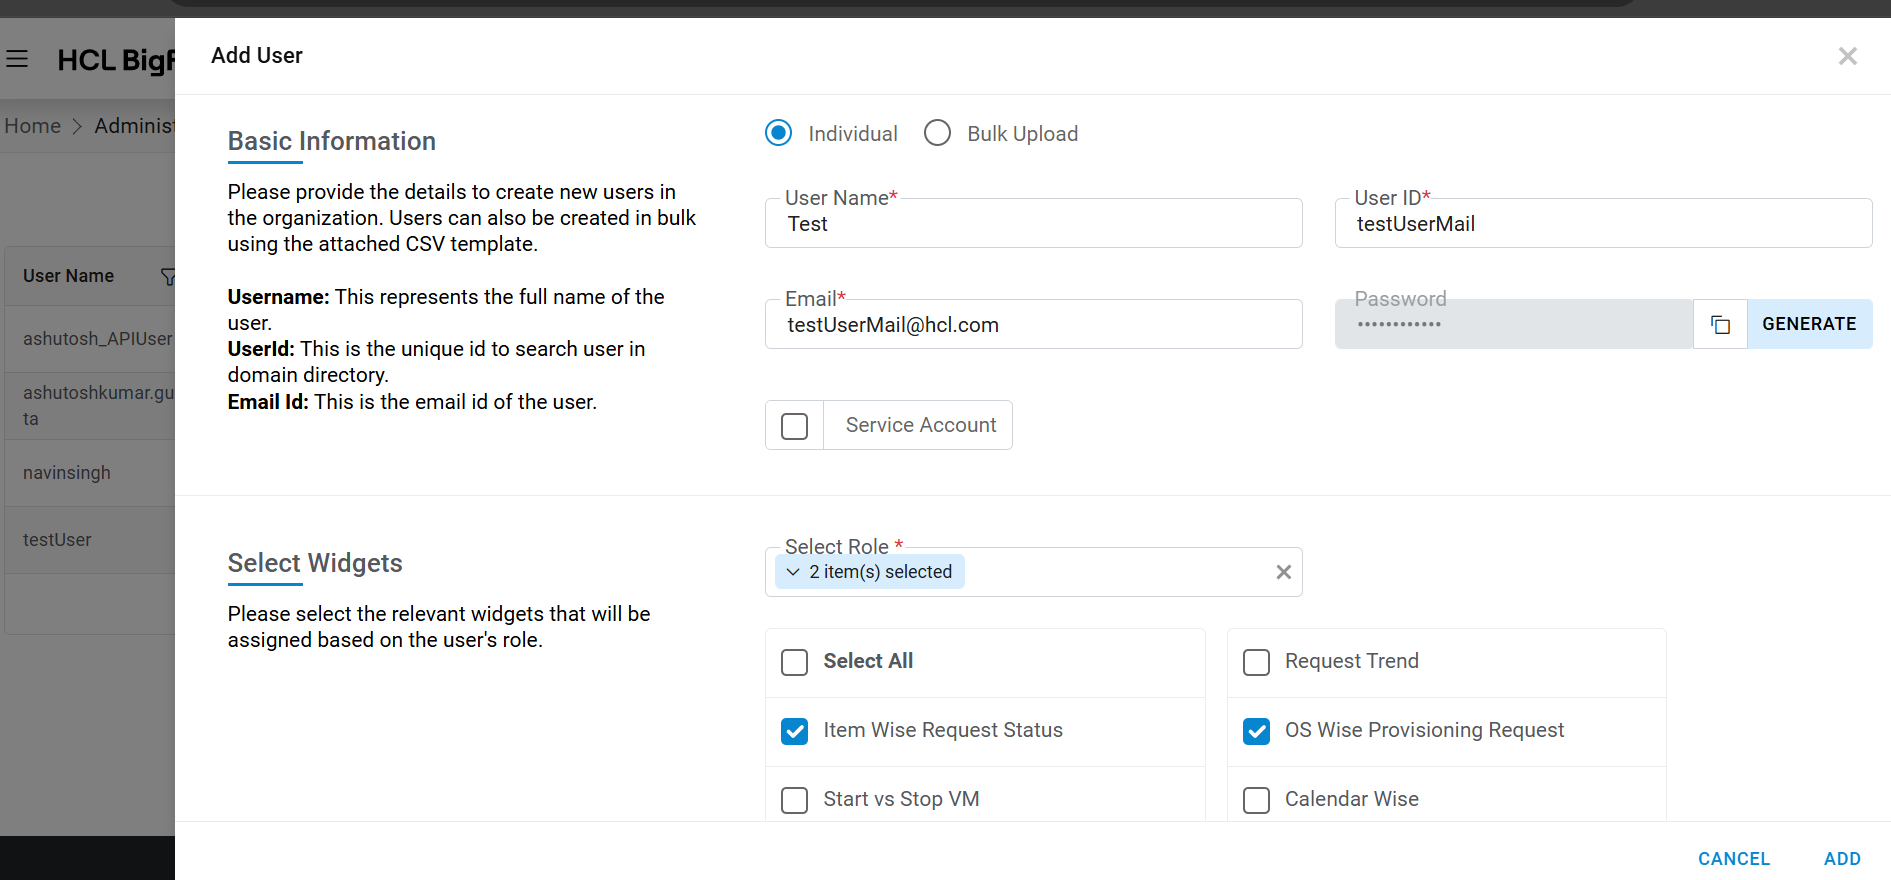 Note:All fields marked with an asterisk (*) are mandatory.
 - A success message box appears on the following screen.
Figure 5. Add User (Cont.) 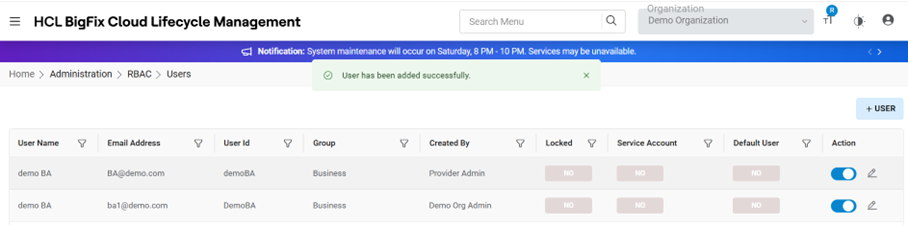
View Users
This section lists all the provider users that have been created by an organization admin.
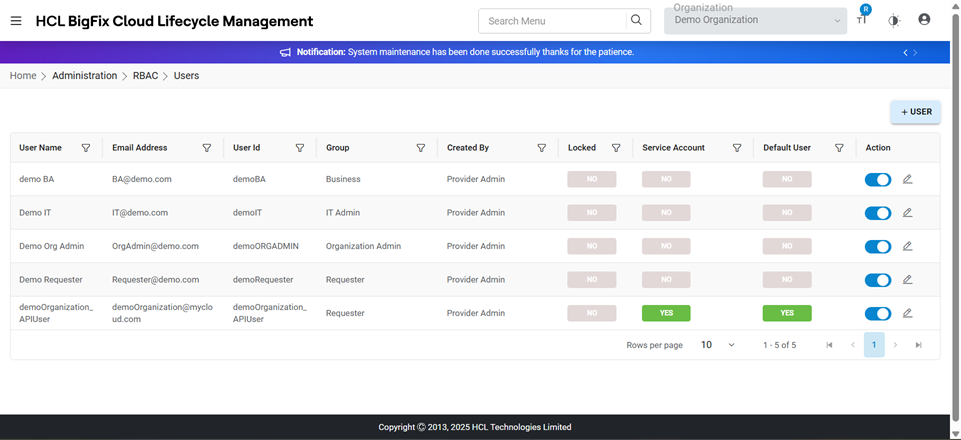
Refer to the table below to understand the fields mentioned in the above figure.
| Fields | Description |
|---|---|
| Organization | Select the name of the organization (Business units/ divisions in organizations) |
| Username/Email | Enter Username or Email to filter the Grid Data |
| User Name | Displays the username of the user that has been added |
| Email Address | Displays the email of the user that has been added |
| User Id | Displays the user id of the user that has been added |
| Group | Displays the group name the user belongs to |
| Created By | Displays the name of the user who has created the specific user. |
| Locked | Displays whether the user has been locked by HCL BigFix CLM, post multiple failed login attempts |
| Service Account | User for API integration with HCL BigFIx CLM. |
| Default User | When the organization admin user created then new default API user is created along with that for API integration with HCL BigFix CLM |
| Action | User to take actions like Edit against the listed users |
You can modify the details of existing providers by clicking on
the Edit icon  .
.
Edit Users
To edit/modify user details, organization admin needs to follow the steps below:
- On the User screen.
Figure 7. Edit Users 
- Available users appear in a tabular view.
- Click Edit (
 ) icon.
 - Modify the details as desired and click Update.
Figure 8. Edit User (Cont.) 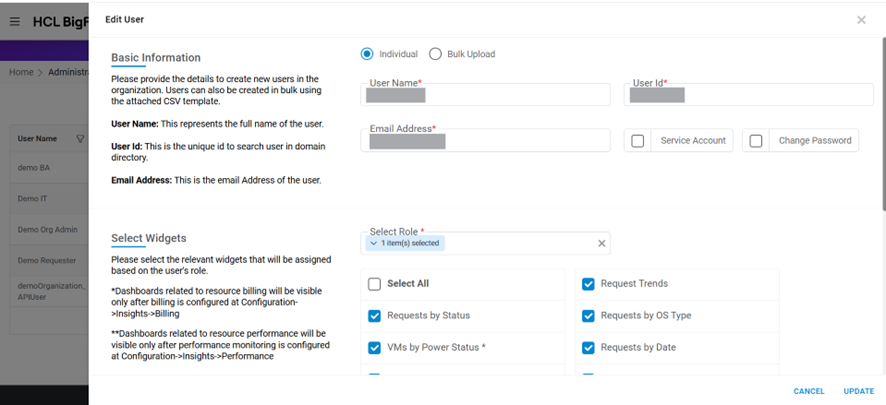
- A success message box appears.
Figure 9. User Updated Successfully 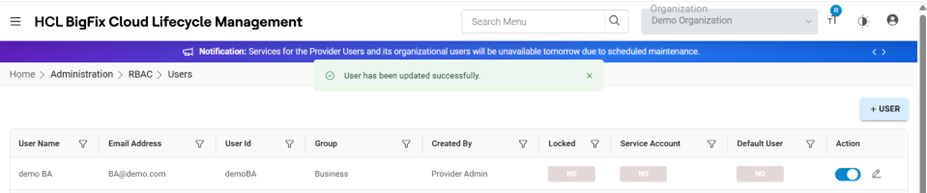
Upload Users
To upload end-users in an organization, organization admin needs to follow the steps below:
- Select Bulk Upload and Click Browse and upload data to select the csv file that has the user details.
- Click on Import.
Figure 10. Upload User 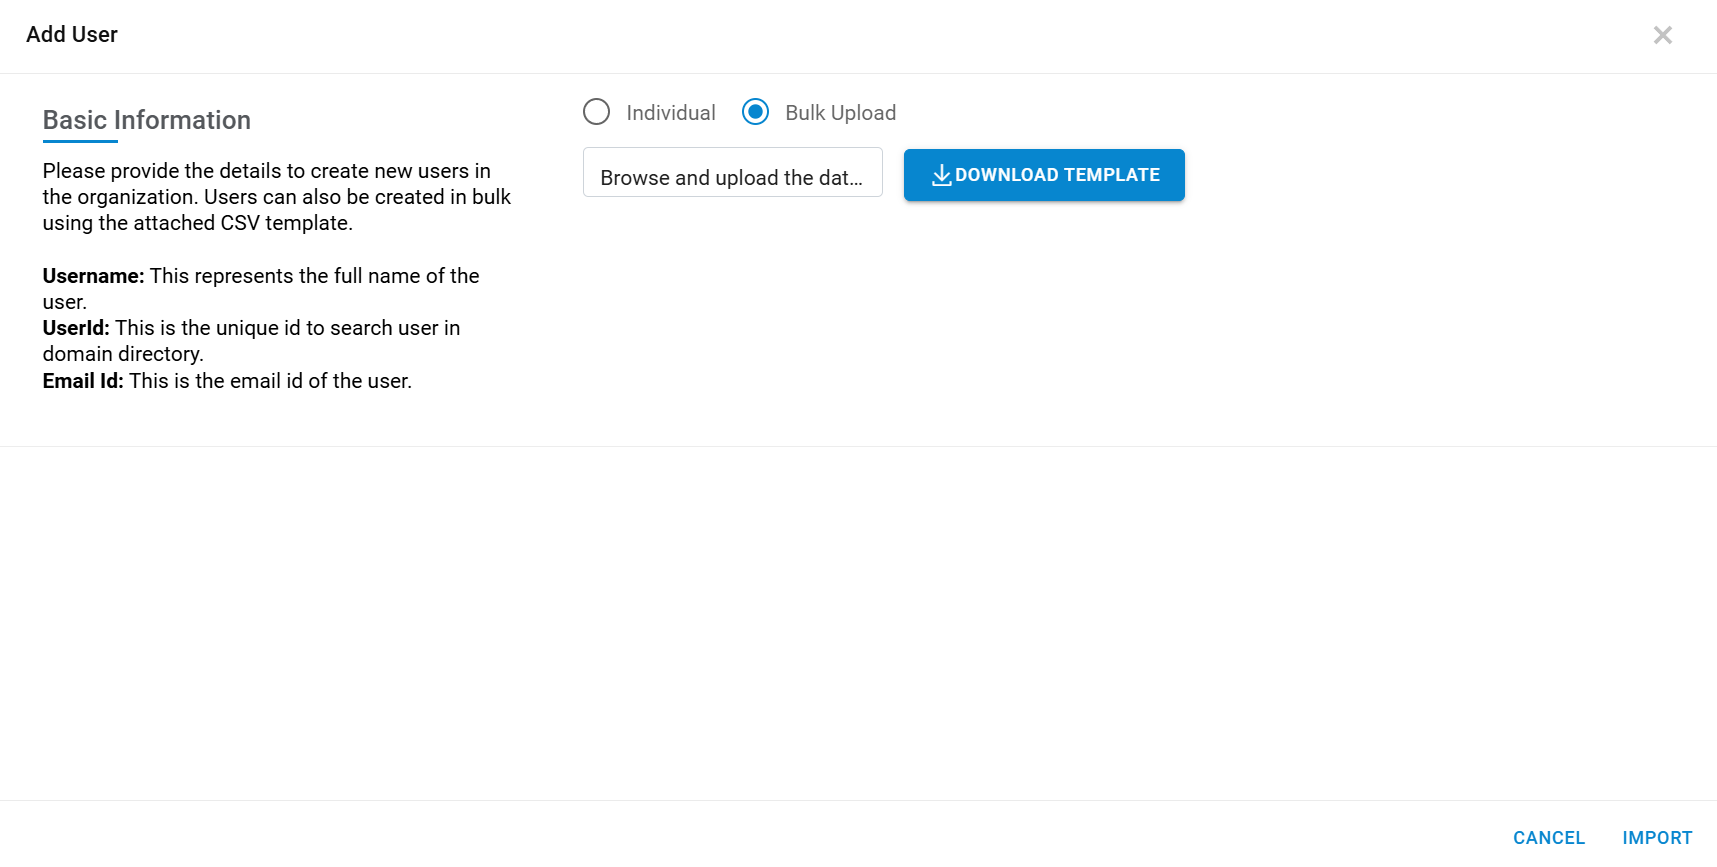
- A success message box appears on the following screen.
Manage Group
To create a system group in an organization and map users into it, Organization Admin needs to follow the below-mentioned steps:
- On the main menu bar, click RBAC, and then click Manage Group.
- The Manage Group screen appears, and it lists down the available groups
in a tabular view that helps to see available groups and map users/ assign group user and
assign actions to them.
Figure 11. Group Management 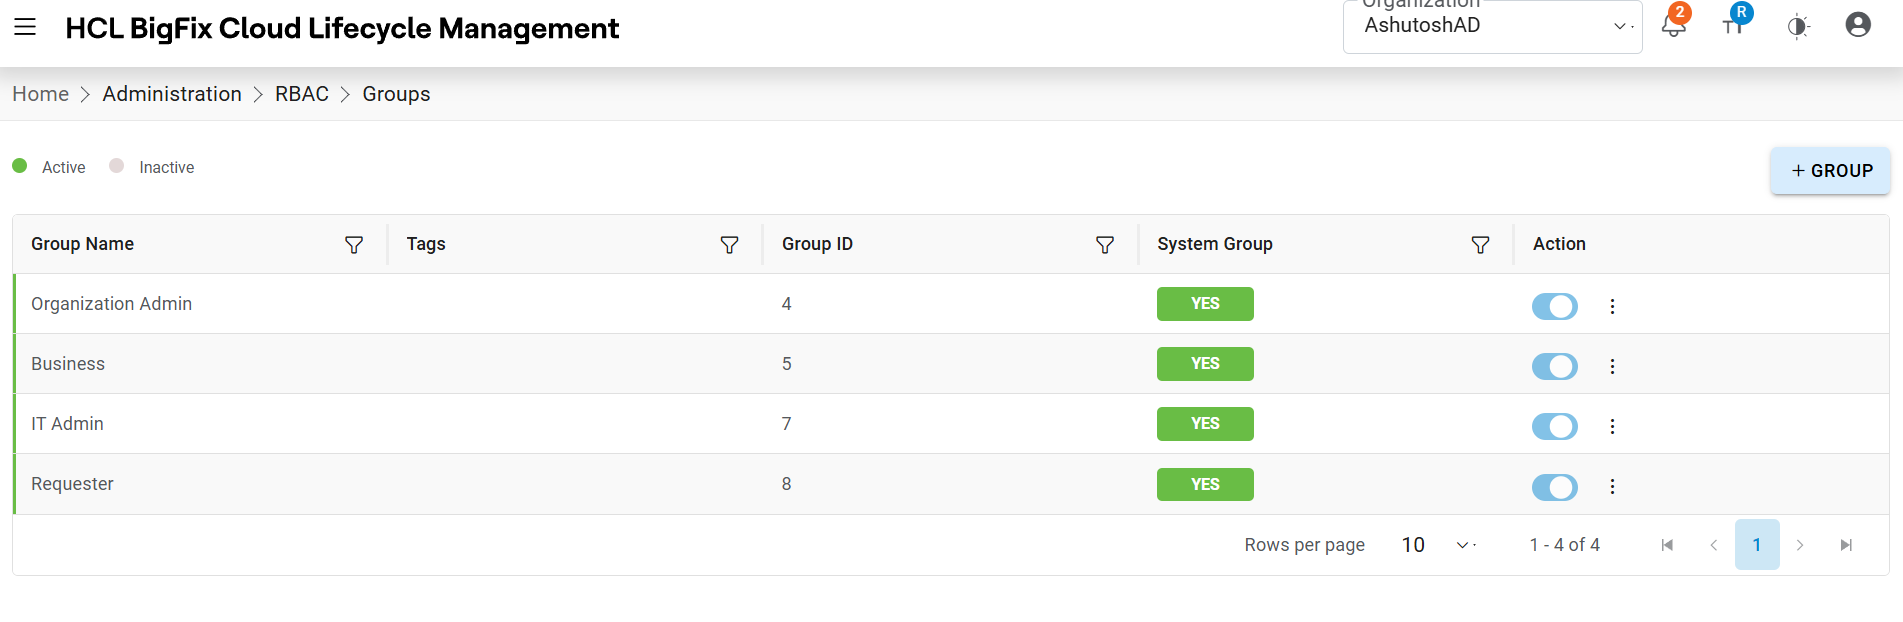
- Refer to the following table to understand the fields mentioned in the above
figure.
Table 3. Group Management Fields Fields Description Group ID The ID that has been generated by HCL BigFix CLM engine Group Name Displays the name of the group Organization Name Displays the name of the organization Map Group To Associated the Group with AD Groups or Add Users in the group System Group This field represents the group is System group or User created group Action User to take actions like Edit, Change Status (active or Inactive), Delete and Add tagging against the listed groups
Add Group
To add a group, organization admin needs to follow the below-mentioned steps:
- On the Manage Group screen, click +GROUP tab.
- The following Add Group page appears on the screen:
Figure 12. Add Group 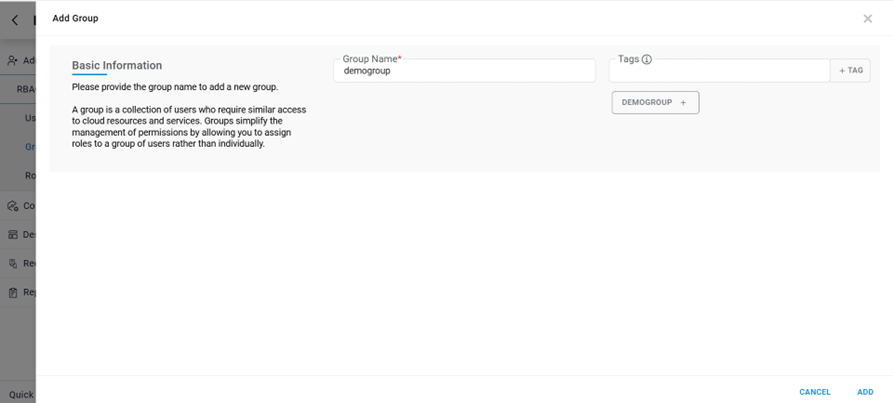
- Refer to the following table to understand the fields mentioned in the above
figure.
Table 4. Add Group Fields Fields Description Name Unique Name of the group. Organization Name Organization will be by default selected under which group needs to be created. Tags Tags to add any specific tag. - Click on Add Button.
- A success message box appears on the following.
Figure 13. Add Group (Cont.) 
A new group is added and listed in the table.
Note:Action like editing and deleting can only be performed when the Hil BigFix CLM System Group is NO.
RBAC/AD Group
To map a group, organization admin needs to follow the below-mentioned steps:
- On the Manage Group screen, click RBAC/AD Group link
corresponding to the group to be mapped.
Figure 14. View Groups 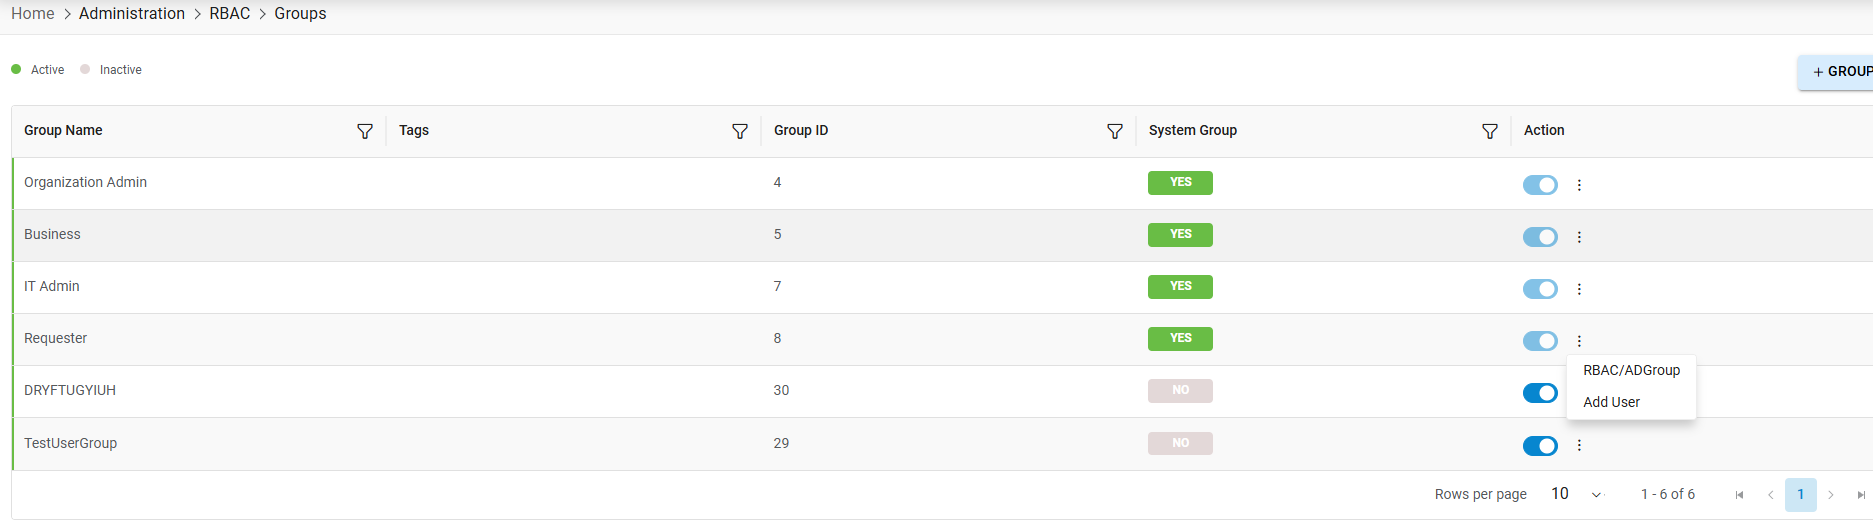
- A pop-up window prompts the AD group to the selected RBAC group.
- Enter AD Group Name or AD Group Email ID and then select the required Role i.e. Group to the RBAC group.
- Click Search and available AD groups appear in the Available Groups box.
- Select AD groups and then click (
 )on to move selected AD groups to Selected RBAC groups
box or vice versa, to unselect the AD groups from an RBAC group.
)on to move selected AD groups to Selected RBAC groups
box or vice versa, to unselect the AD groups from an RBAC group.Figure 15. Add Groups (Cont.) 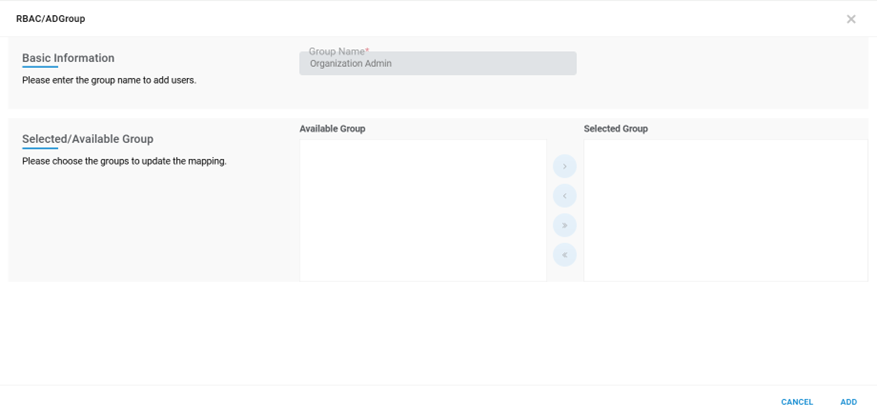 Note:All fields marked with an asterisk (*) are mandatory.
 - Click Save.
- A success message box appears on the screen.
Add User
To assign a user or multiple users to a group, organization admin needs to follow the steps below:
- On the Manage Group screen, click Add User against the selected
group.
Figure 16. Map User 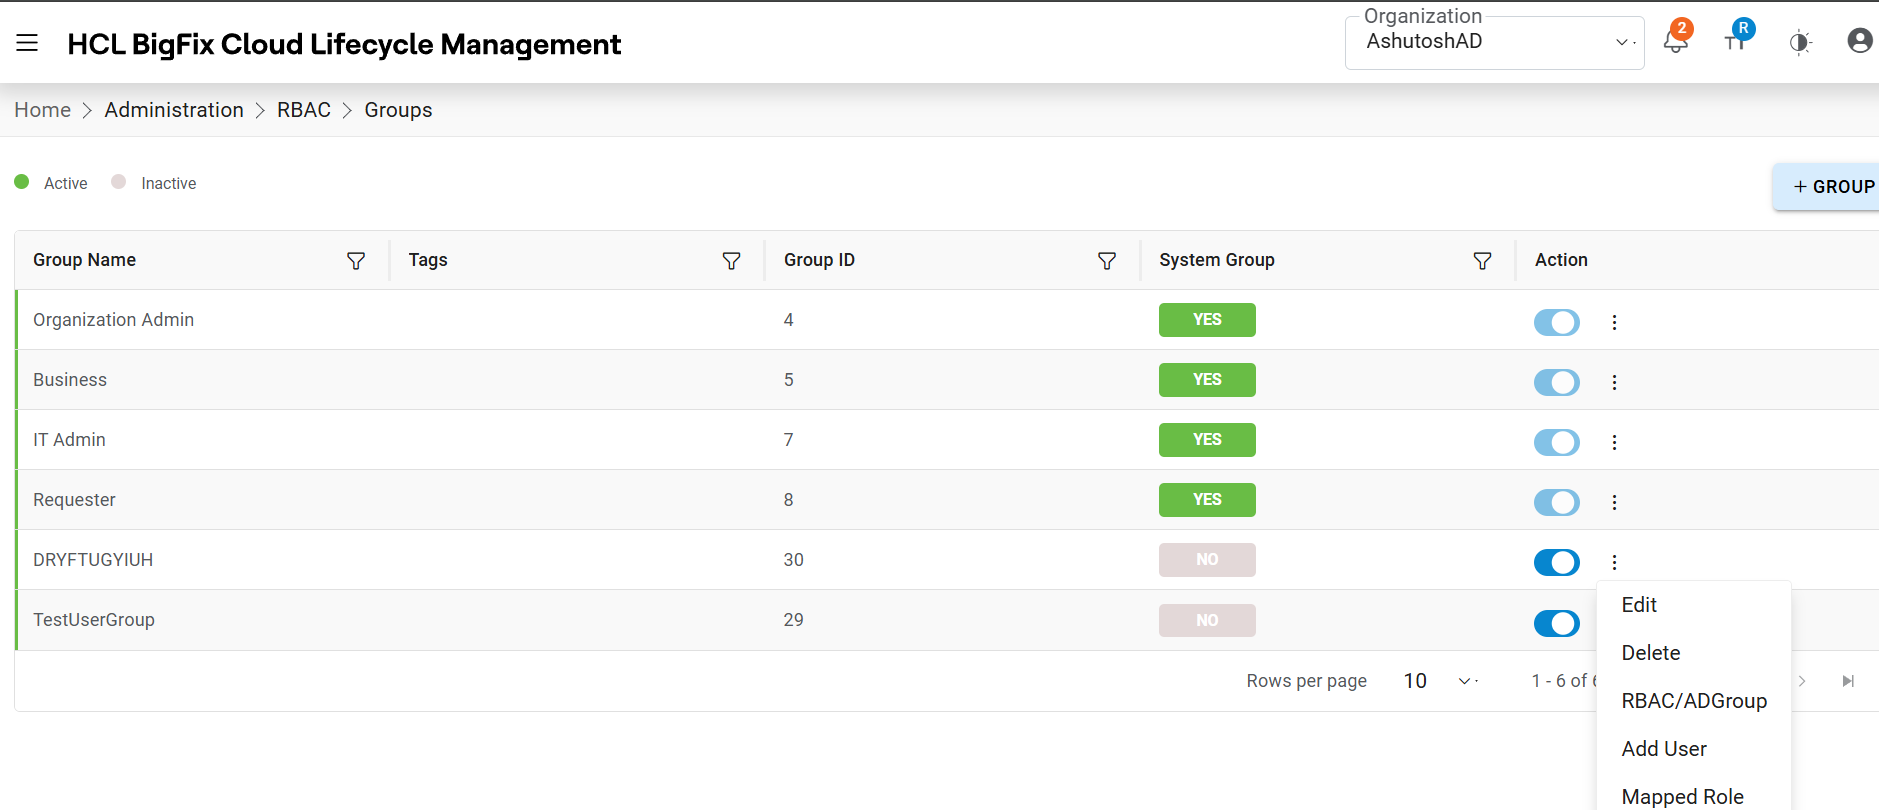
- A pop-up window prompts a user to map the selected group.
- Select Organization.
- Enter the Email/Group Name .
- Click Search and available users appear in the Available User box.
- Select Users and then click on
.png) to move selected users to Selected Users box or
vice-versa, to unselect the users from a group.
to move selected users to Selected Users box or
vice-versa, to unselect the users from a group. - Click ADD.
Figure 17. Map User (Cont.) 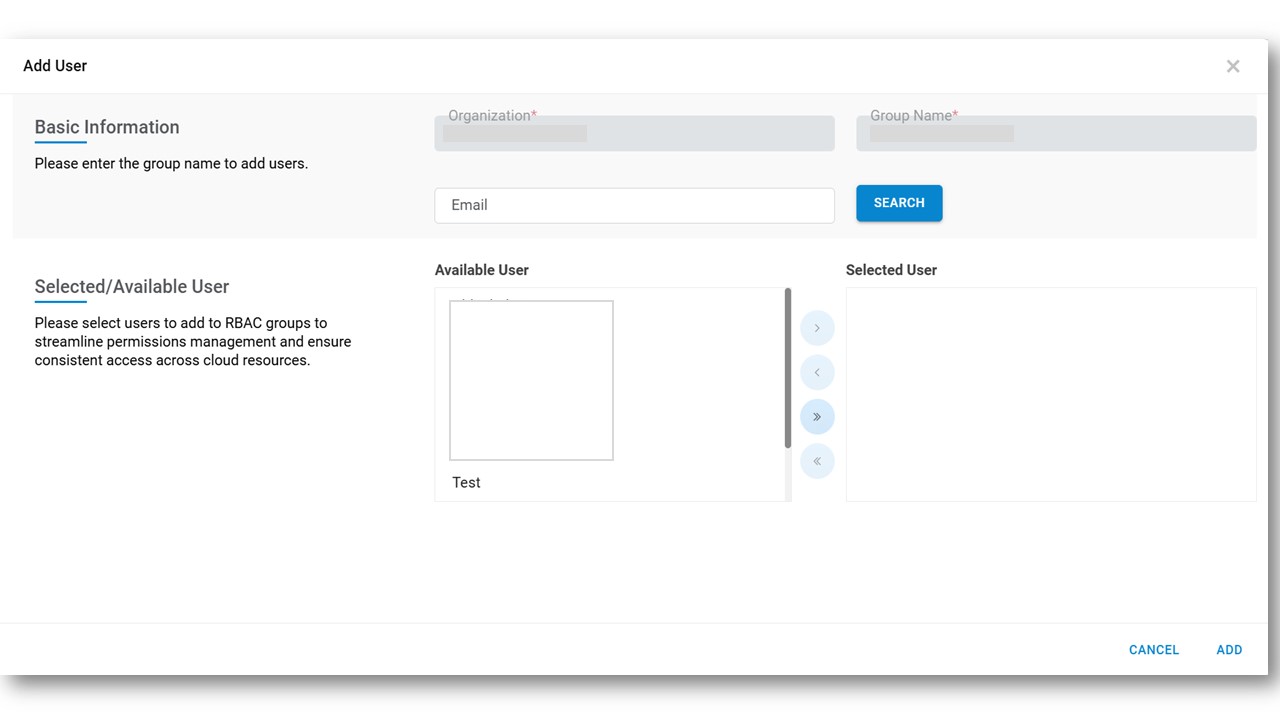
All fields marked with asterisk (*) are mandatory.
- A success message box appears on the following screen.
Add Role
To assign a role or multiple roles to a group, organization admin needs to follow the steps below:
- On the Manage Group screen, click Add Role link corresponding to
the System Group with the value ‘No’.
Figure 18. Map Role 

- A pop-up window prompts a user to map the selected group.
- Select Roles from Available Role and then click on
.png) to move selected roles to
Selected Role box or vice-versa, to unselect the users from a group.
to move selected roles to
Selected Role box or vice-versa, to unselect the users from a group. - Click Save.
Figure 19. Map Role (Cont.) 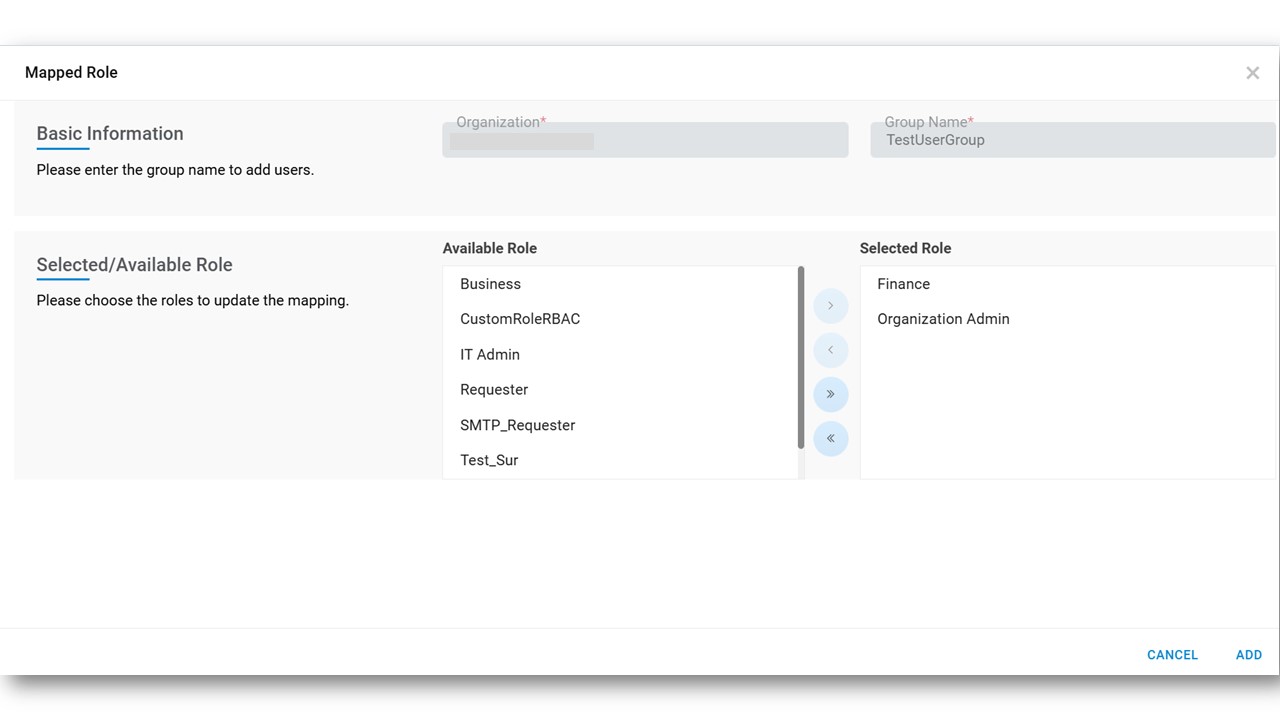 Note:All fields marked with asterisk (*) are mandatory.
 - Click ADD.
- A success message box appears on the screen.
Role Management
Through this module, Organization admin user can manage roles in an organization through below steps:
- On the Main Menu bar, click RBAC and then click Roles.
- The Role Management screen appears, and it lists down the available roles in a
tabular view that helps to see available roles and add new roles and assign actions to
them.
Figure 20. Role Management 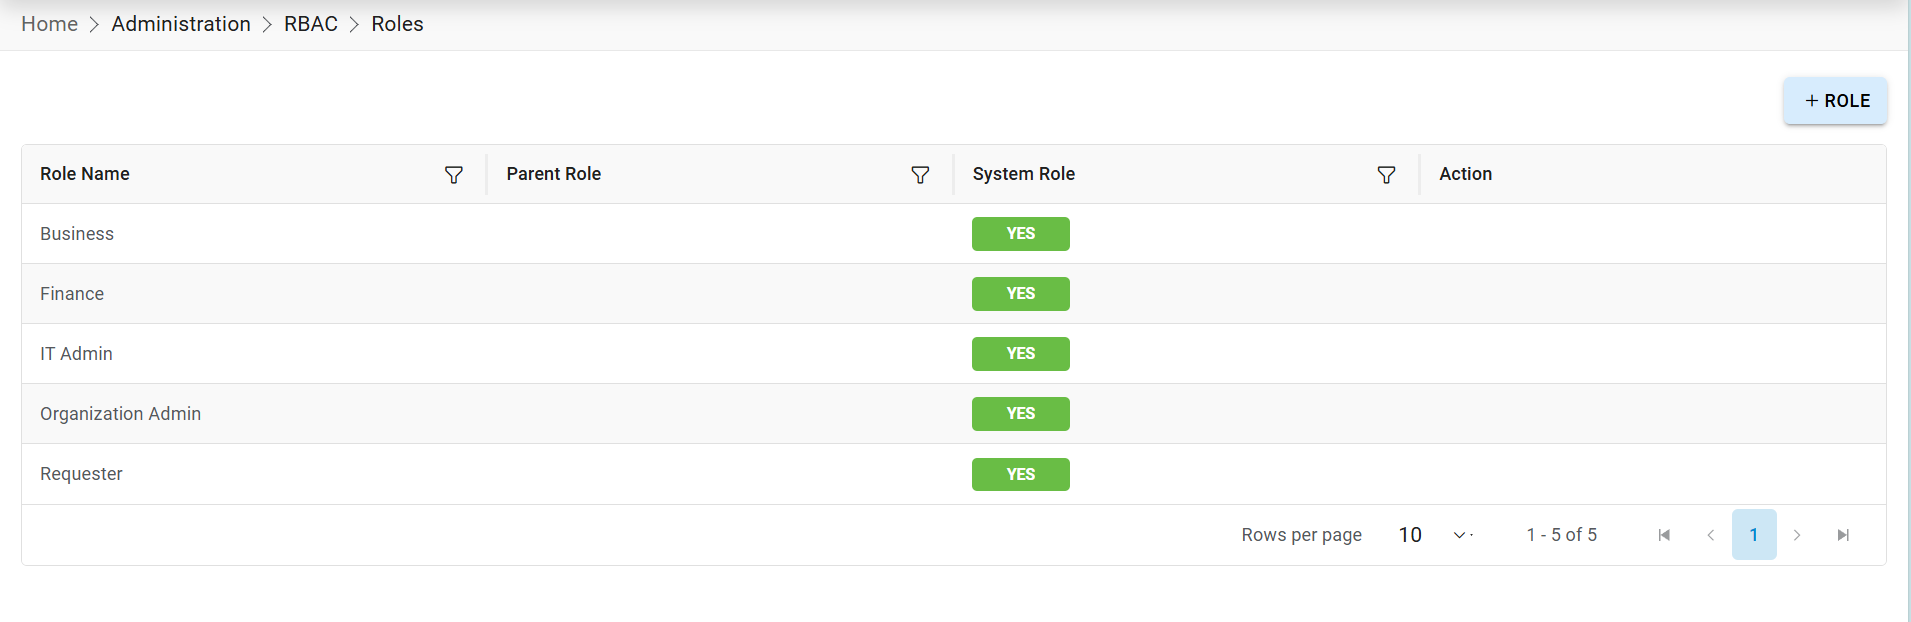
- Refer to the table below to understand the fields mentioned in the above figure.
Table 5. Role Management Fields Description Role Name This indicated the Name of the Role Power User This field indicates whether the Role is of Power users or not. Parent Role This field indicates the HCL BigFix System created Role that will act as a Parent Role for the Newly added User-Created role. HCL BigFix CLM System Role This field represents the role is HCL BigFix CLM System Role or User-Created role Action User to take actions like Edit, Delete, Configure Menu, Configure Widgets against the listed role. Note:Power User - Power users will be able to see requests and objects belonging to another user in the same role.It also consists of the following actions:
- Add Role: To add a role in organization.
- Edit Role: To update an existing role.
- Delete Role: To delete an existing role.
- Configure Widgets: To manage Dashboard widget assigned to role.
- Configure Menu: To manage Menu assigned to role.
Add Role
To add a role, an organization admin needs to follow the following steps:
- On the Role Management screen, click Add Role tab.
Figure 21. Add Role Screen 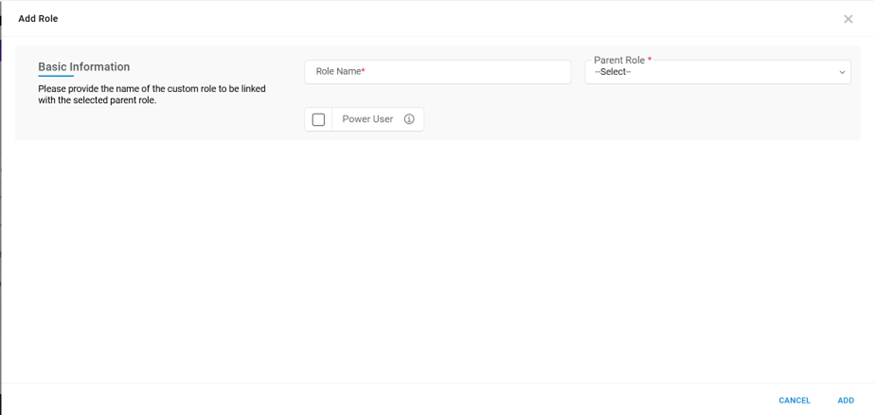
- Refer to the table below to understand the fields mentioned in the above figure:
Table 6. Add Role Fields Description Organization Select the name of the organization (Business units/ divisions in organizations) Role Name This field contains the Name of the new Role. Parent Role This field contains the HCL BigFix CLM System Role. Power User This field indicates whether the Role is of Power users or not. - Select Organization.
- Enter Role Name.
- Select Parent Role and Power User.
- Click on the ADD.
- A success message box appears on the screen.
- A new role is added and listed in the table.
Edit Role
To Edit/ Modify the information of an existing Role, Organization user needs to follow the below steps:
- On the Role Management screen, click +Role.
Figure 22. Edit Role 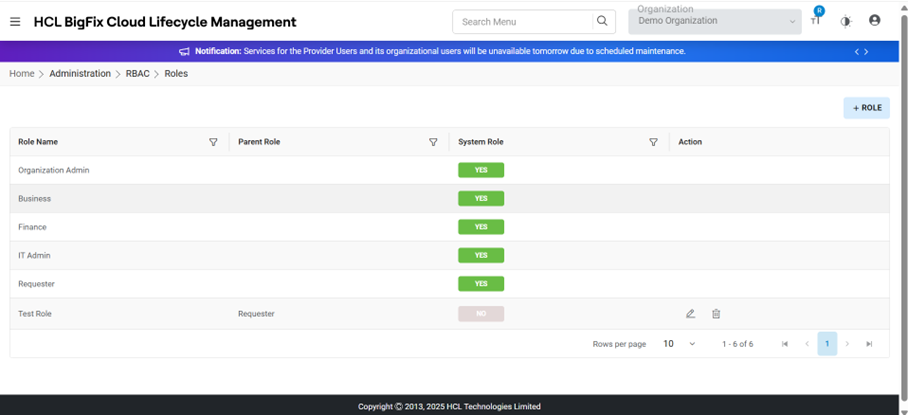
- Select Organization.
- Click Go.
- Available Role list is shown in a tabular view.
- Click Edit (
 )
corresponding to the Role to be edited.
)
corresponding to the Role to be edited. - Modify the details as required and click UPDATE.
Figure 23. Edit Role (Cont.) 
- A success message box appears on the screen.
Delete Role
To delete an existing Role, Organization users need to follow the below steps:
- On the Role Management screen, click +Role.
Figure 24. Delete Role 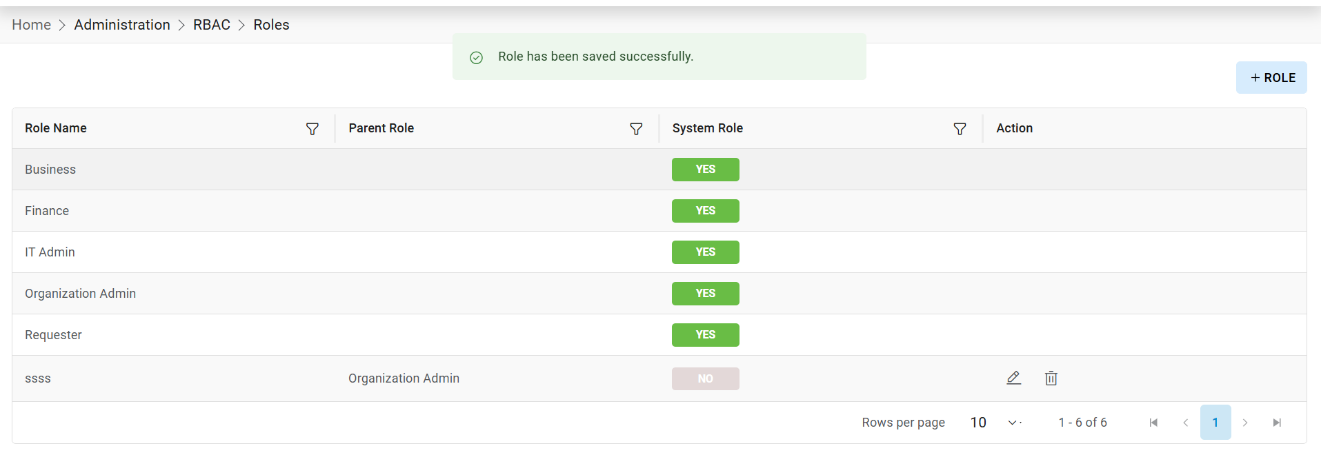
- Select Organization.
- Click Go.
- Available Role list will be shown in a tabular view.
- Click Delete (
 )
corresponding to the Role to be deleted.
)
corresponding to the Role to be deleted. - A confirmation message appears on the screen.
- Click OK to confirm. A successful message appears on the screen.
Configure Widgets
To configure the widgets in existing Role, Organization user needs to follow the below steps:
- On the Role Management screen, click +Role.
Figure 25. Configure Widget 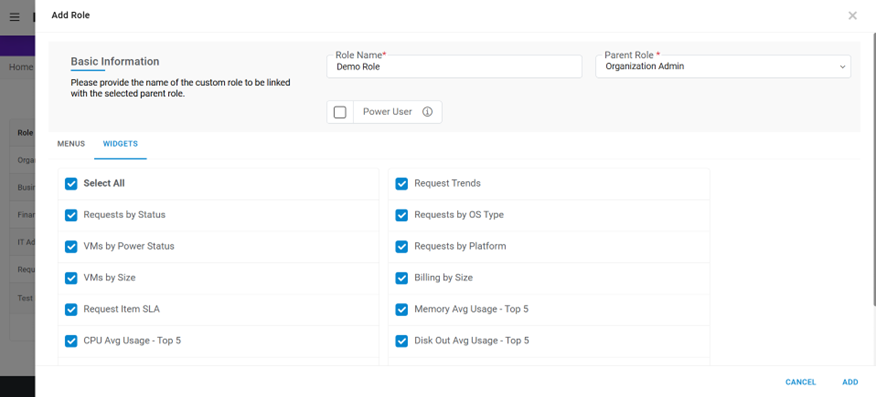
- Available Role list will be shown in a tabular view.
- Click Edit (
 )
corresponding to the Role to be edited.
)
corresponding to the Role to be edited. - A popup window will appear on the screen.
- If configuration of widgets has been done earlier, then all the widgets associated with
the Parent Role will be shown as checked.
Figure 26. Configure Widgets (Cont.) 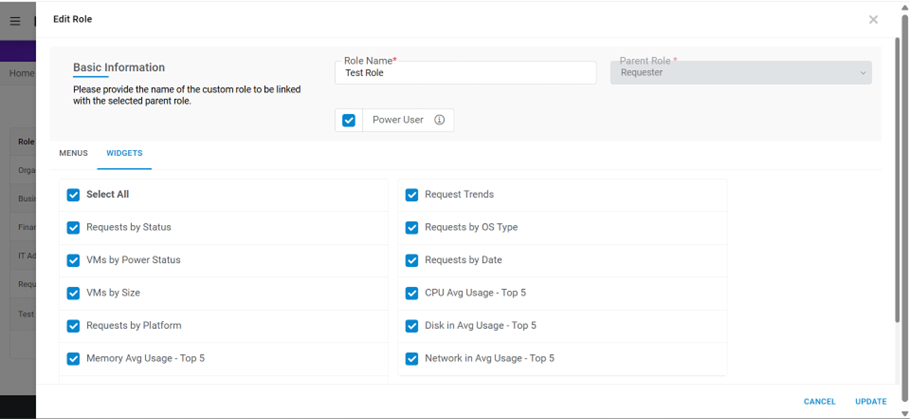
- Select/Unselected the Widgets as per widgets assignation.
- Click on UPDATE.
- A successful message appears on the screen.
Configure Menu
To configure the menus in existing Role, Organization user needs to follow the below steps:
- On the Role Management screen, click View Role.
Figure 27. Configure Menu 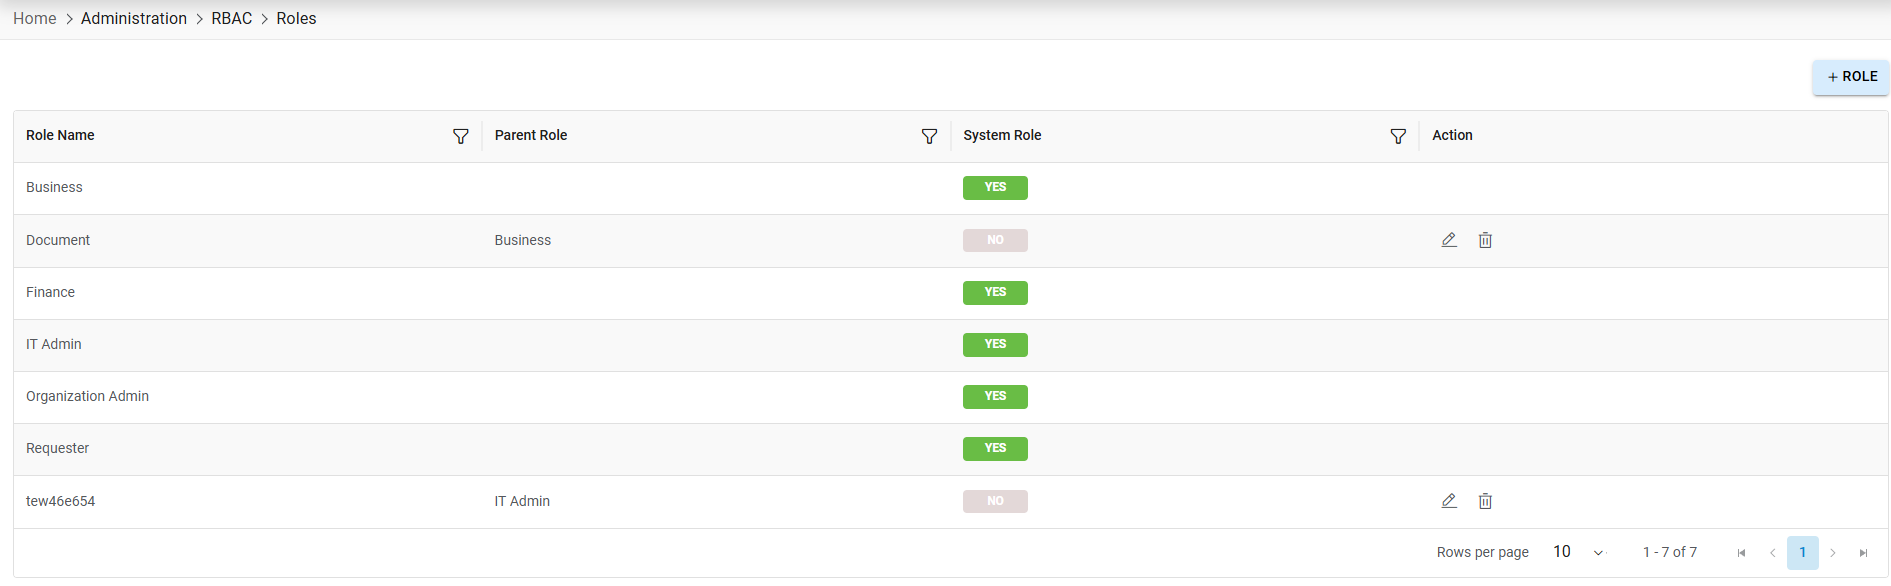
- Available Role list will be shown in a tabular view.
- Click EDIT (
 )
corresponding to the Role to be edited.
)
corresponding to the Role to be edited. - A popup window will appear.
- If configuration of menu has been done earlier, then all the menus associated with the
Parent Role will be shown as checked.
Figure 28. Configure Menu (Cont.) 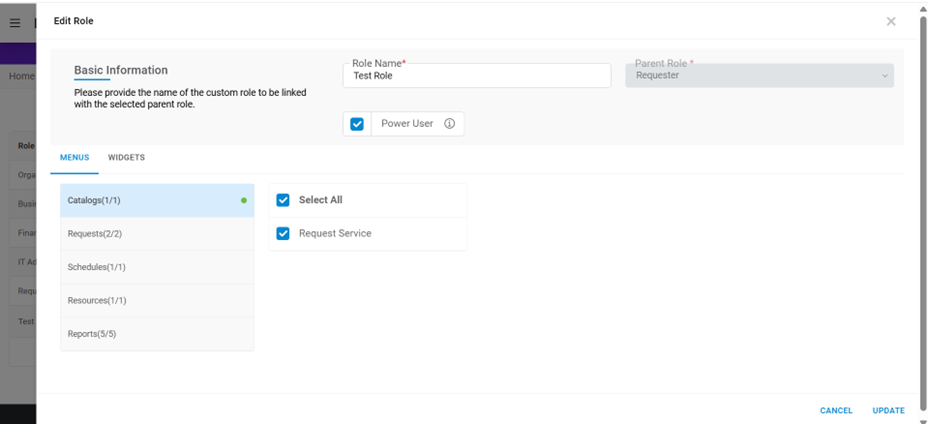
- Select/Unselected the Menu Item as per menu assignation.
- Click on UPDATE.
- A successful message appears on the screen.