Accessing BigFix CLM
Get the URL and user credentials for HCL BigFix CLM.
Reach out to the person who has configured HCL BigFix CLM or drop an email to: HCL BigFix CLM-Product-Supp@hcl.com
- Launch a web browser (Chrome, Mozilla, or Edge) and use the HCL BigFix CLM URL and user credentials to login to the system.
- Enter the Email ID .
- Click Next
Figure 1. HCL BigFix CLM Login Page 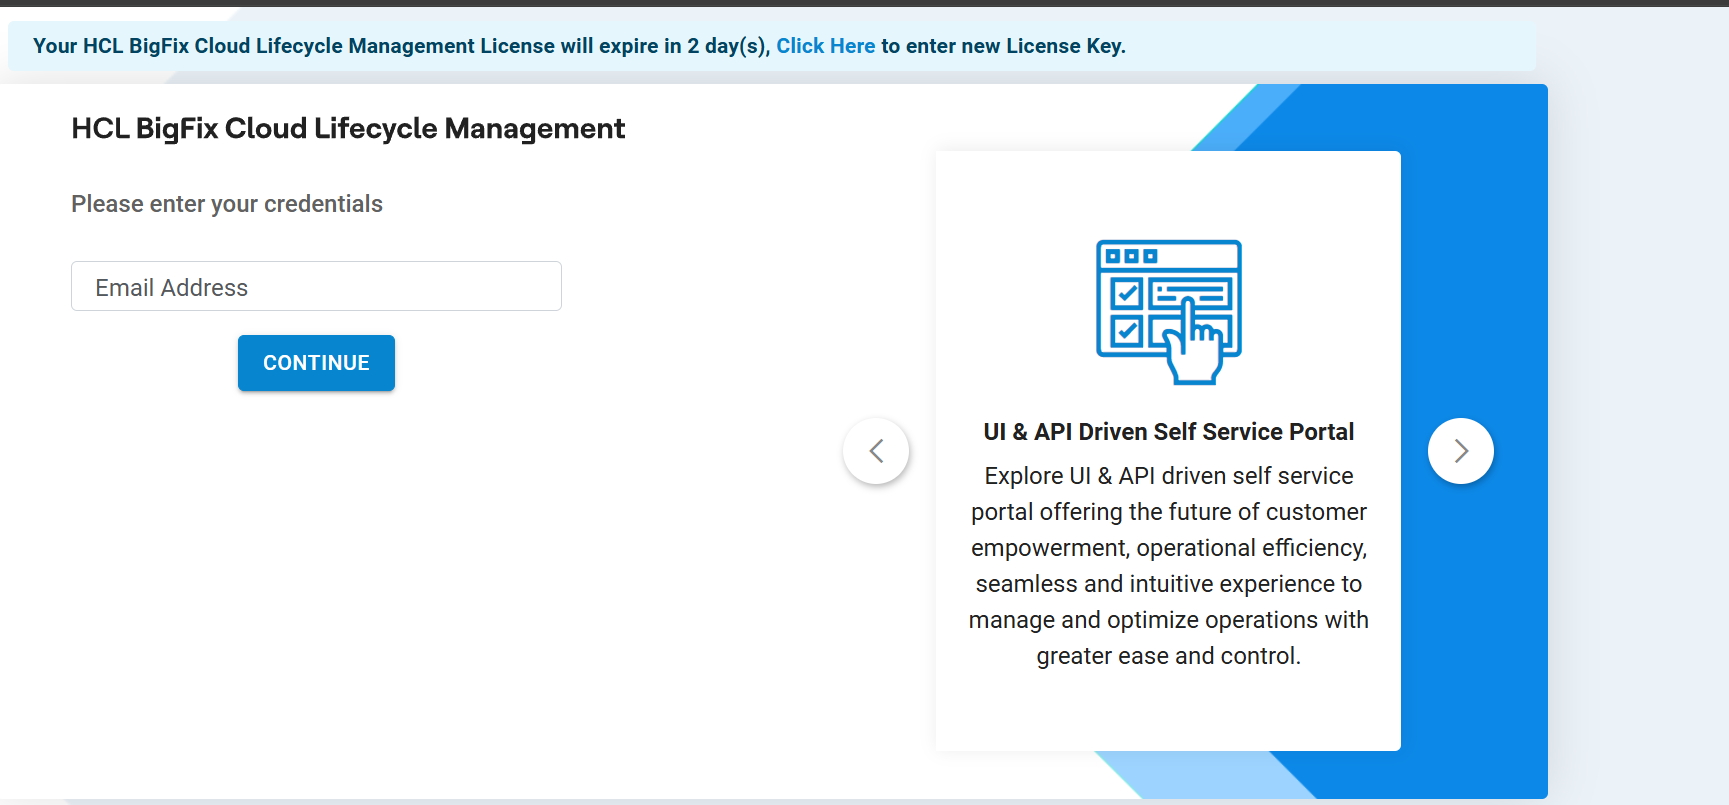
- Enter Password.Note:For security purposes, it is advised to change the password frequently, at least once a month, to keep the hackers out of the system and to log off when the application is not being used.
- Select the Authentication Type . The following authentication types are available
for login:
Table 1. Approver Module Authentication Type Authentication Type Description Form Based It provides a mechanism to authenticate the user through the credentials which are stored in the database LDAP It provides a mechanism to authenticate the user to login through Active Directory (AD) credentials SAML Based Authentication It provides a mechanism to authenticate users through the third -party Identity Access Management (IAM) which supports SAML based authentication Note:If there are no login credentials, then drop an email to bigfixclm-prodsupport-team@hcl-software.com.
If the login type is Form Based , no domain selection is required.
If the login type is LDAP, domain credentials need to be entered with domain selection.
If the login type is SAML, user gets re-directed to the authentication page.
Figure 2. HCL BigFix CLM Login Page .png)
- Click Login.
- On successful login, HCL BigFix CLM homepage for Business Approver appears, as shown below.
- The following are the options that are available for Business Approver:
- My Reports
- Service Catalog
- My Account
- Cloud Advisory
- Help
Figure 3. My Approval 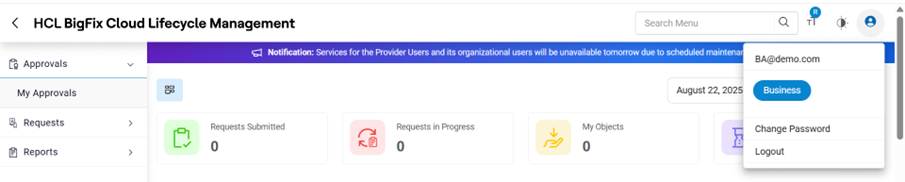
Approval
Approval screen appears with the following options:
- Pending Approvals
-
Approval History
Figure 4. Pending Approvals 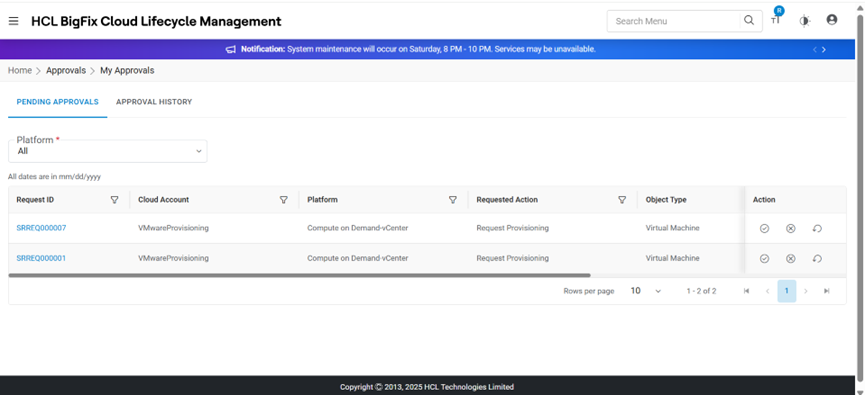
Figure 5. Approval History 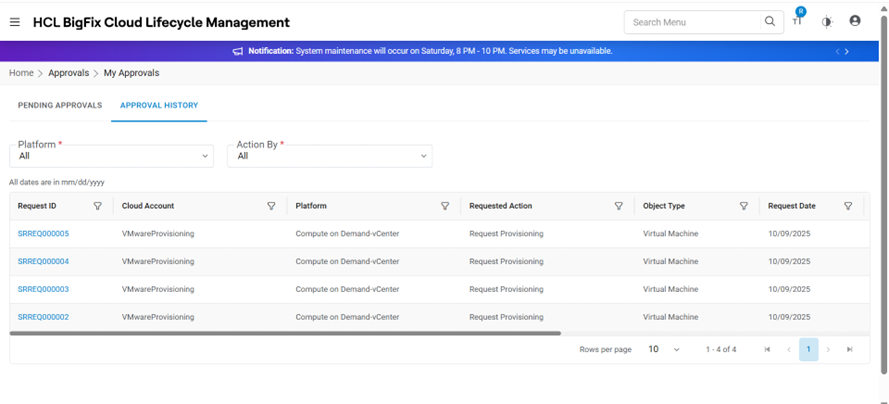
My Pending Approval
This section explains the steps to approve the pending requests or necessary actions that need to be taken by the business approvers.
- On the My Approval screen, click My Pending Approvals.
- Select the Platform or Request Number and click Go.
Figure 6. Pending Approval 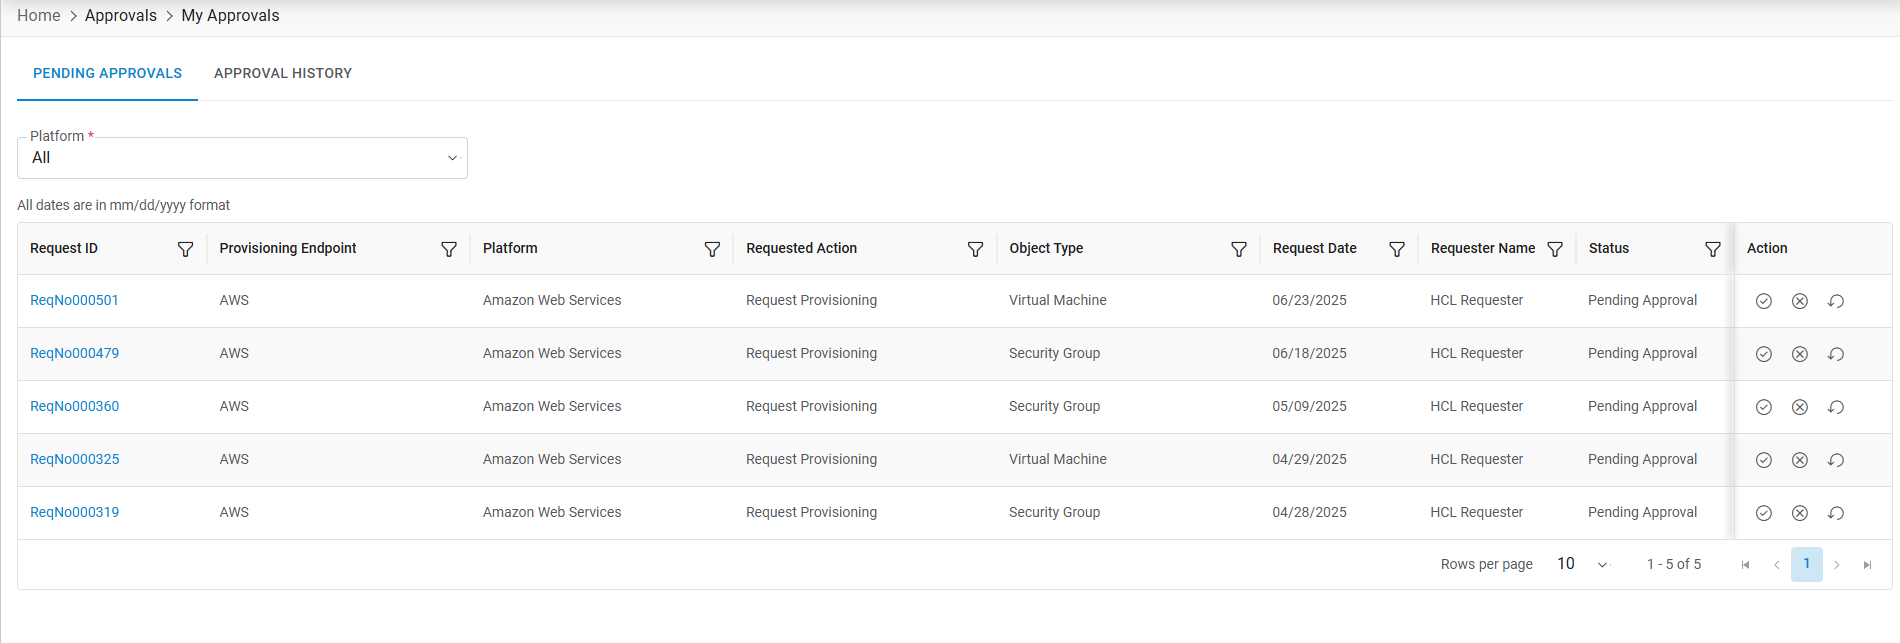
Refer to the following table to understand the fields mentioned in the above figure.
| Fields | Description |
|---|---|
| Request Number | ID of the Service request |
| Request ID | ID of the Service request |
| Cloud Account | Name of environment (cloud endpoint). |
| Platform | Name of Cloud service providers |
| Requested Action | Task to be performed |
| Object Type | Name of the object against which service request has been raised |
| Request Date | Date on which the request has been created |
| Requester Name | Name of the person who has created the request |
| Status | Status of the request |
| Action | It allows the Approver to take actions like Approve, reject or refer back the request |
A Business Approver performs the following actions regarding the pending request:
- Approve Requests: To approve a request, the user needs to follow the steps:
- Click Approve (
 )
against the request ID that needs to approve.
)
against the request ID that needs to approve. - A window pops-up with a summarized view.
- If required, enter Remarks in remarks box and click Approve.
Figure 7. My Pending Approval (Cont.) 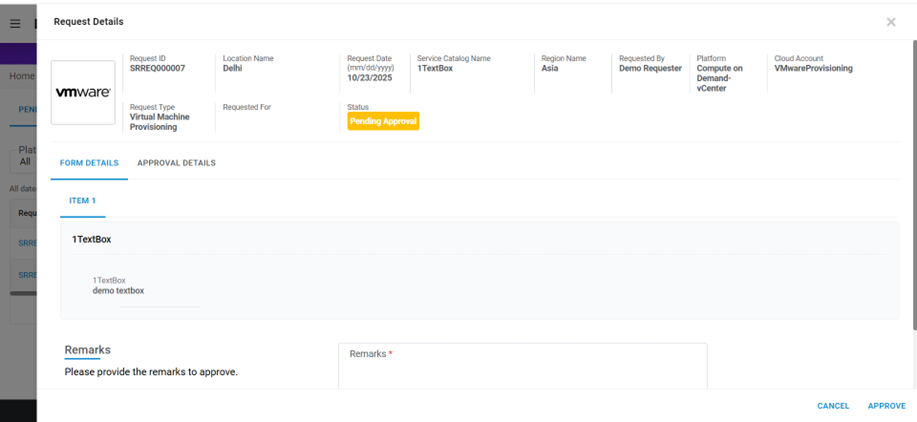
- Selected Request Id has been approved and moved from My Pending Approval to Approval History.
- A success message box appears on the following screen.
- Click Approve (
- Reject Requests: To reject a request, perform the below steps:
- Click Reject (
 )
against the request ID.
)
against the request ID. - A window pops-up with a summarized view.
- If required, enter Remarks in remarks box and click Reject.
- Selected Request ID gets rejected.
Figure 8. Pending Approval (Cont.) 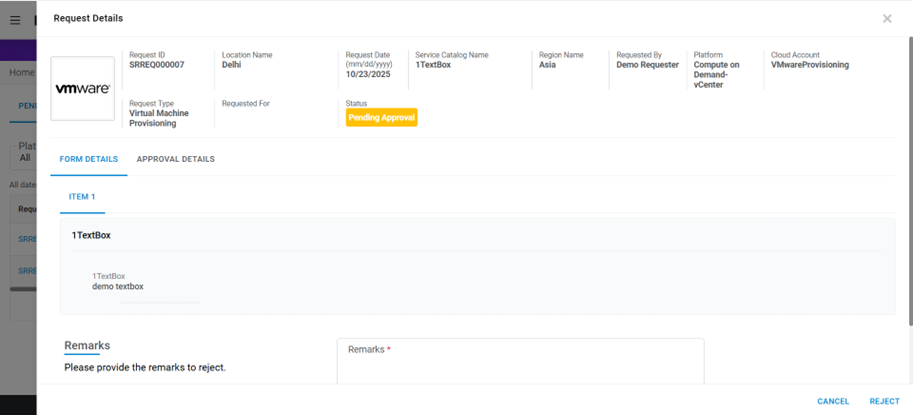
- A success message box appears on the screen.
- Click Reject (
- Refer Requests: To refer a request, perform the below steps:
- Click Refer back (
 )
against the request ID.
)
against the request ID. - A window pops-up with request details.
- If required, enter Remarks in remarks box and click Refer back.
Figure 9. Pending Approval (Cont.) 
- Selected request Id has been referred and the requester gets a notification with the remarks for further actions to be taken on it.
- A success message box appears on the screen.
Figure 10. Pending Approval (Cont.) 
- Click Refer back (
Approval History
This section details the steps to view the actions that have been taken by Business Approver against service requests.
- On the My Approval screen, click My Approval History.
- Select the Platform or Request Number and click Go.
- Click on Request ID.
Figure 11. Approval History 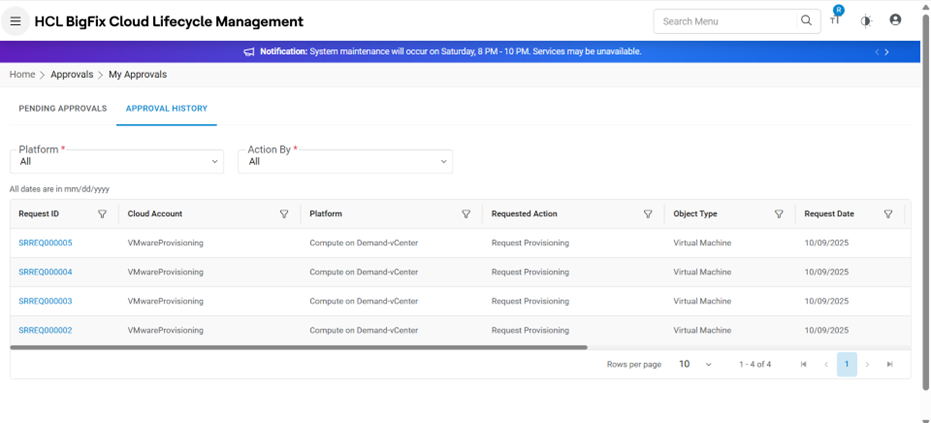
Refer to the following table to understand the fields mentioned in the above figure.
Table 3. Approval History Fields Description Request ID ID of the request created Cloud Account Name of environment (cloud endpoint). Platform Name of Cloud service providers Requested Action Task to be performed Object Type Name of the object against which service request has been raised Request Date Date on which the request has been created Requester Name Name of the person who has created the request Approval Stage Describe the name of the Approval Stage on which Approval is provided Approval Date Date on which Approval is provided Status Displays the status of the request The Order History window appears.
Figure 12. My Approval History (Cont.) 
Refer to the below table to understand the fields mentioned in the following table in the above figure.
Table 4. My Approval History Fields Description Request ID Unique request ID Date Approval date (post approval) Status Status of the request