Custom Control Properties
This section describes how a provider admin can edit custom controls and provide customized values to it.
To edit/modify the properties, the provider needs to follow the below steps:
- Click
 icon on the Custom
Control.
icon on the Custom
Control. - A section appears as shown below:
Figure 1. Custom Control Properties 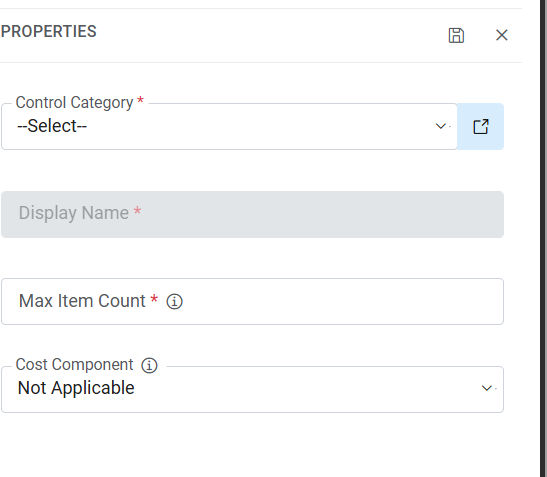
-
Refer to the below table to understand the fields mentioned in the above figure:
Custom Control Properties
Fields Description Control Category It has an option to select category of the control either “Disk” or “Network”. Based on the Control Category pre-defined controls will be populated and can be customized further. Display Name To display the name of the control on screen. Max Item Count This field is unique for “Custom control”. It sets the limit of the categories (disk/network), for no limit set “0”. e.g., if the value is five then user can add only five categories(disk/network). Cost Component Property defines whether control will be used for expected cost calculation.
Control will be used for expected cost calculation of additional disk. Value for Cost components field will be as follows:
Not Applicable (default)
Additional Disk
- Select Control Category.
- This will display the pre-configured control list based on platform. Controls are
displayed on screen as shown below.
Figure 2. Pre-configured Control 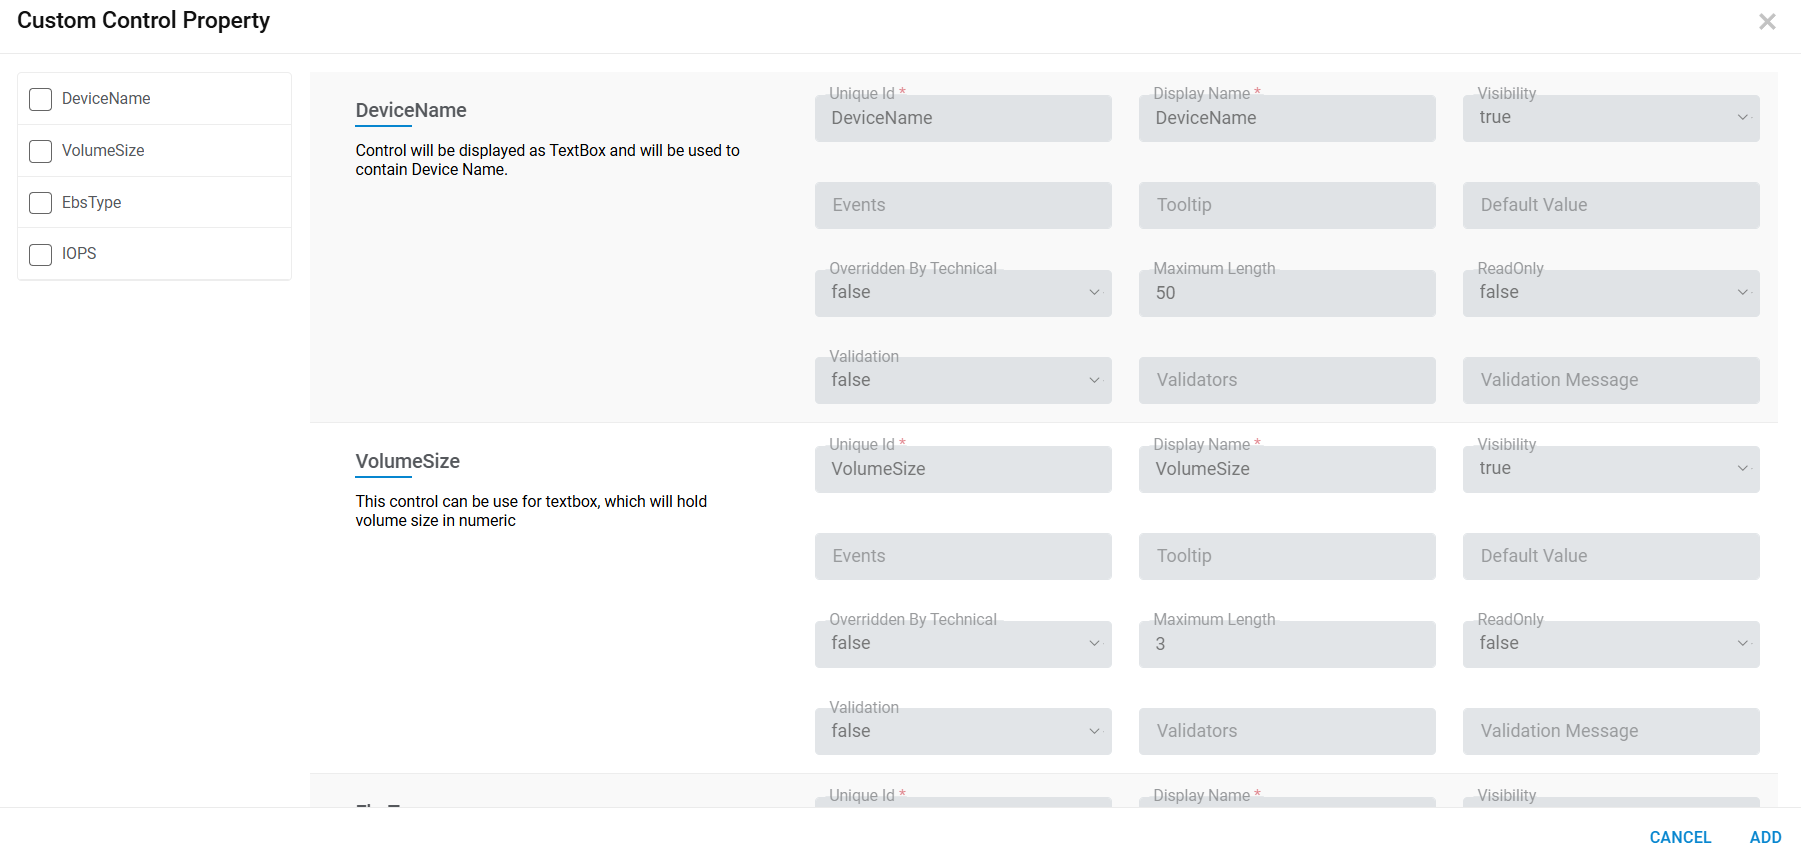
Figure 3. Pre-configured Control 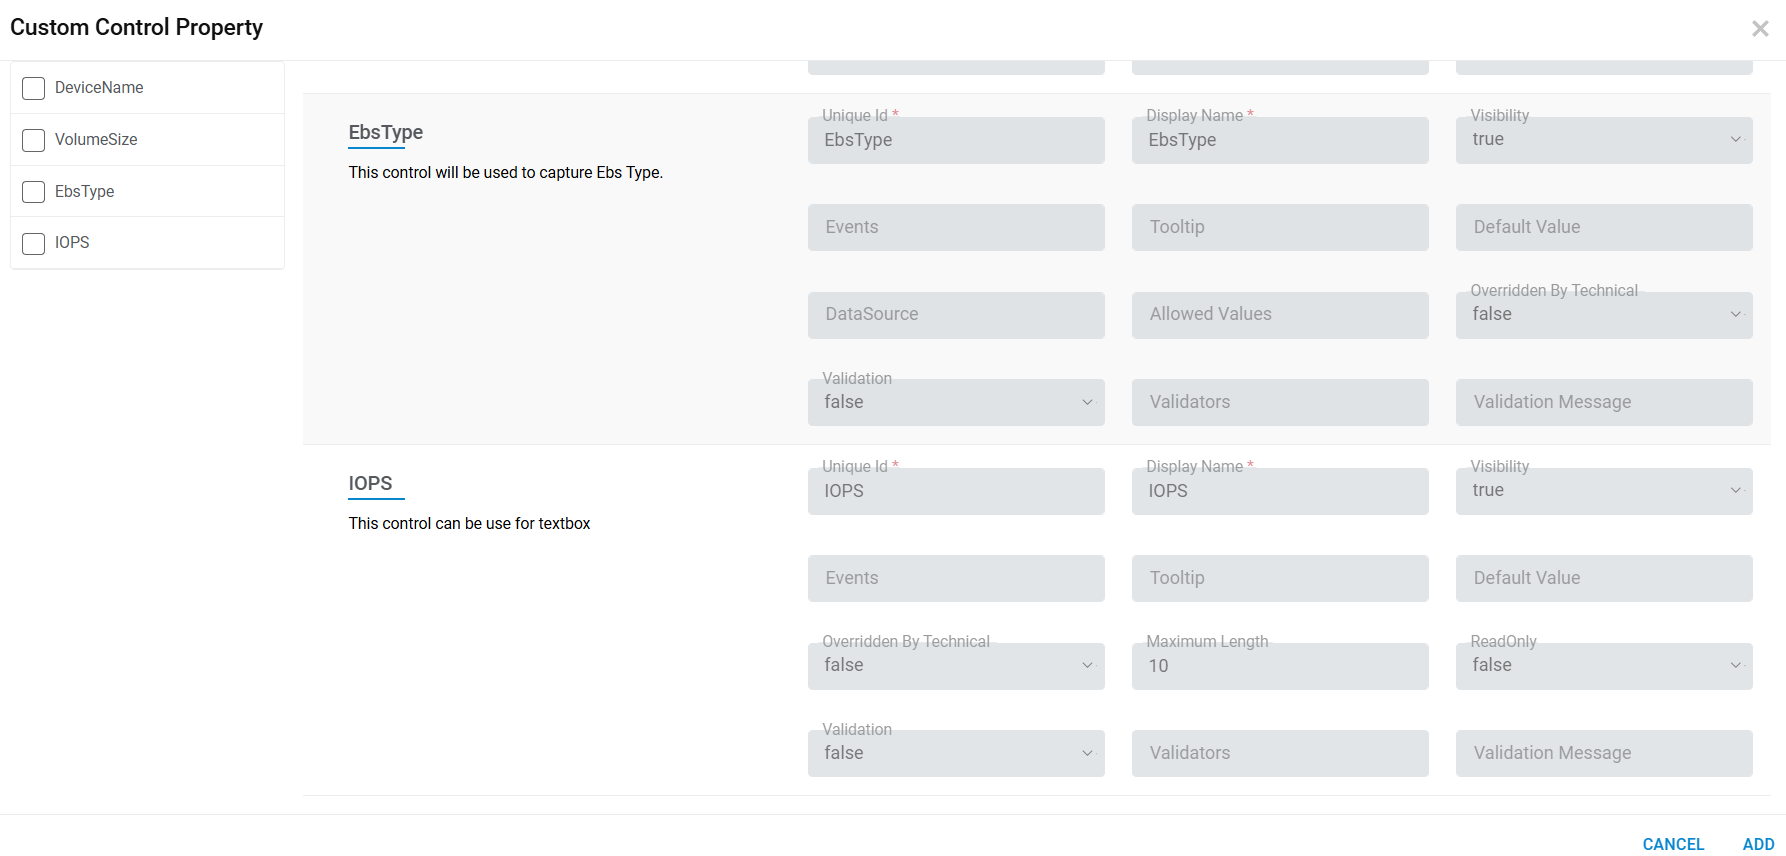
Figure 4. Pre-Configured Control 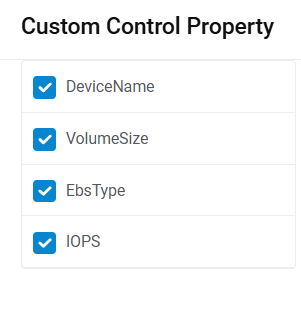
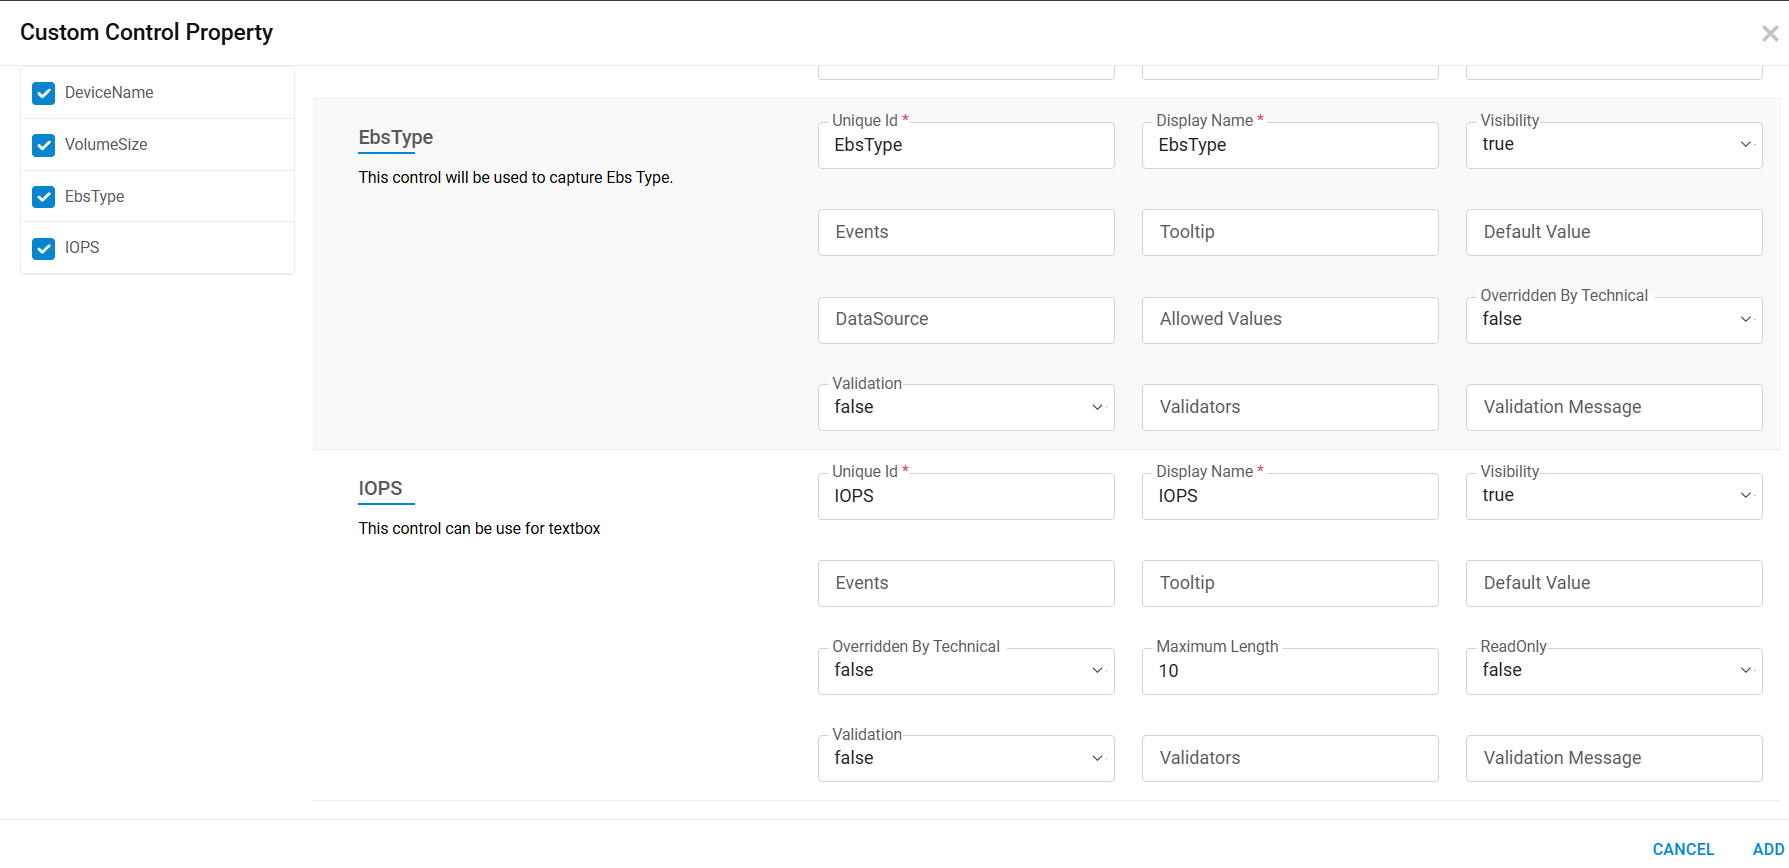
- Click on Check. This defines the control availability on the screen.
- Selecting the check boxes option displays the properties of the corresponding control as
shown below.
Figure 5. Pre-Configured Control Properties 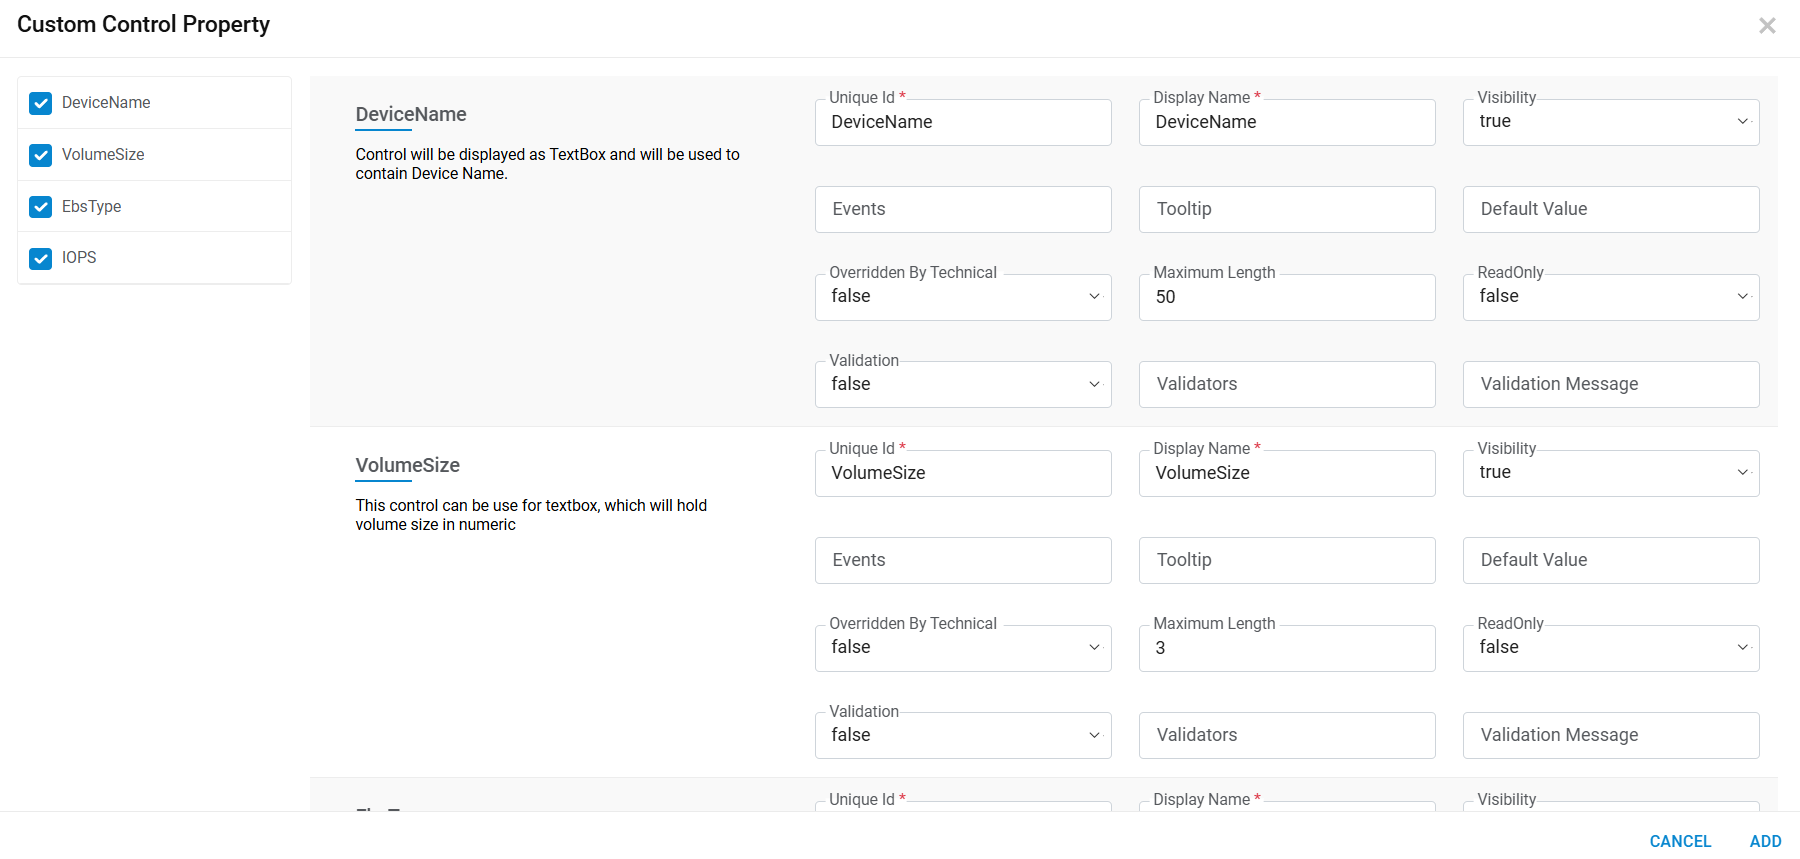
Figure 6. Pre-Configured Control Properties