Create UI Template
To create UI Templates, provider users need to follow the below steps:
- On the Forms screen, click on Create UI Template tab.
Figure 1. Create Manage UI Template 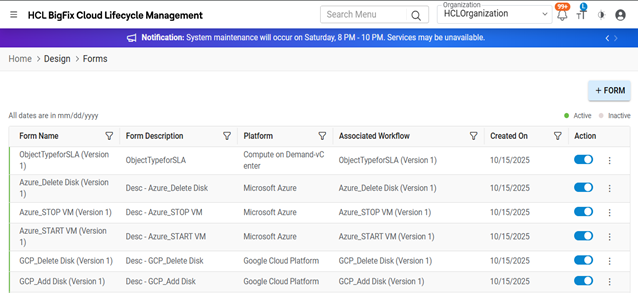
Figure 2. Create Template UI (Cont.) 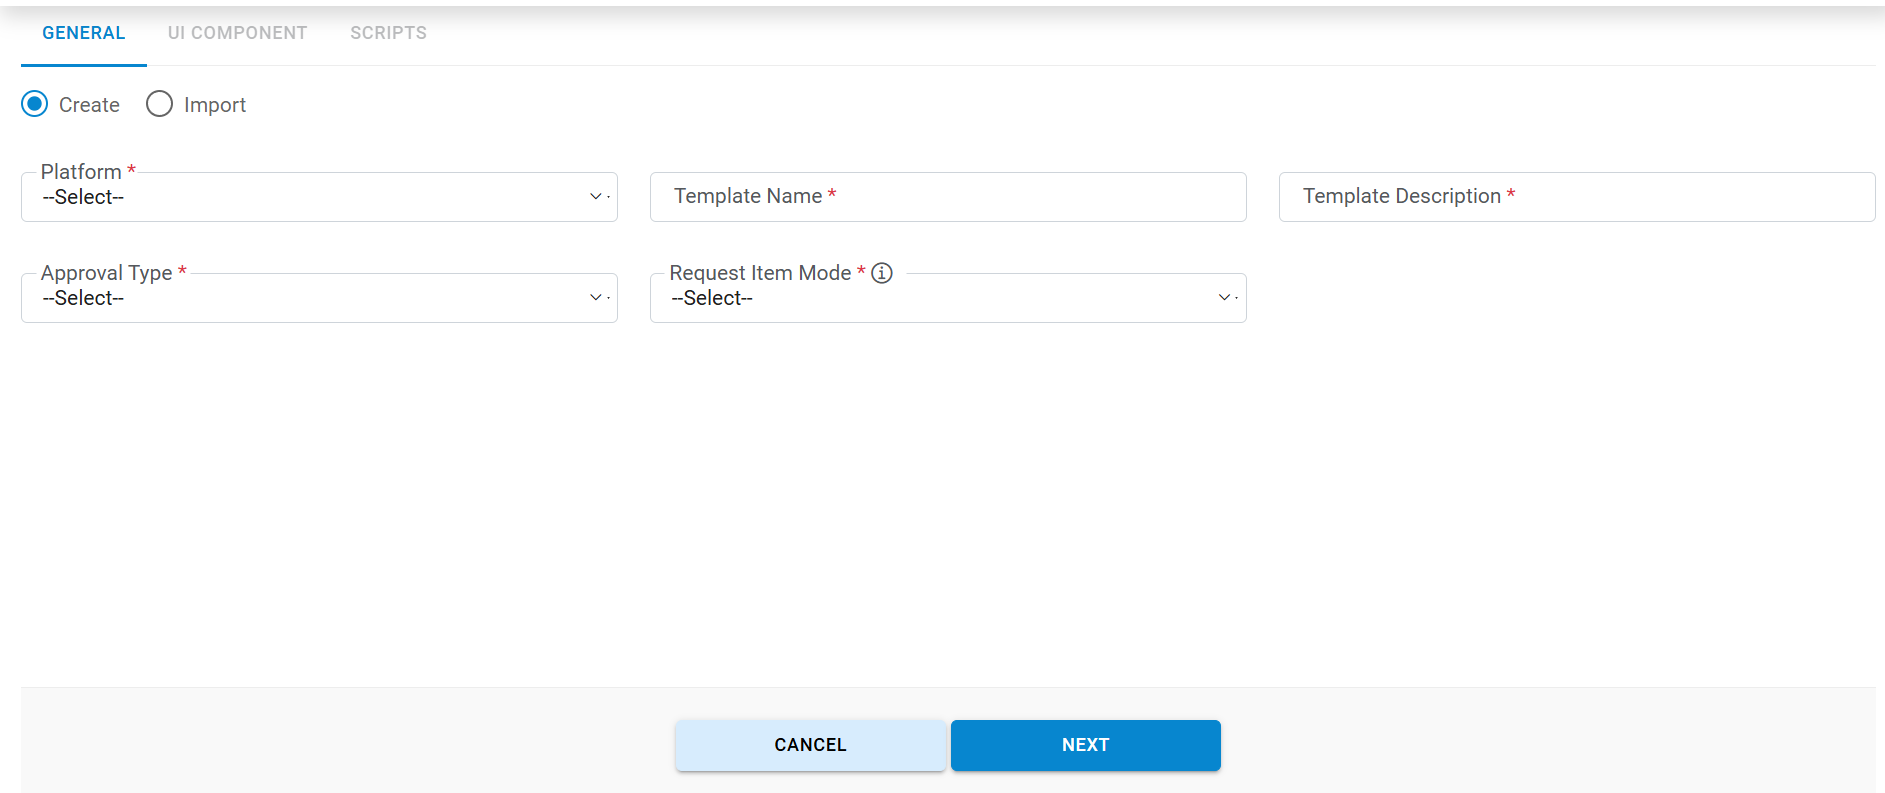
- It will show the 3 sections: General, UI Component, Scripts.
- Enter the details of the fields mentioned in the Field column of the table below. Refer to the Description column of the table to understand the fields:
Fields to Create UI Template
| Fields | Description |
| Organization | Lists of logged-in provider’s organization |
| Platform | Lists of cloud service provider(s) |
| Template Name | Input box to provide a unique name for the template. This name will be used as a unique identifier across the application |
| Template description | Provide a description of the template |
| Number of Tabs | Provide the count of tab required for the customized screen. User has an option of adding up to 5 tabs. This field is mandatory but can be edited later. |
| Approval Types |
A user can add an approval in the designed screen. Once any approval type is selected, then Orchestration will be executed followed by the approval process, which is defined in the approval workflow template. If no approval templates are being added, then Orchestration will directly execute the service. There are three types of Approvals. No Approval: In this no approval will be attached. Static Approval: Predefined approval Template will be used for Approval. Dynamic Approval Rule: On Run time, Approval Template will be decided. |
| Request Item Mode |
There are two types of mode: Single Mode: In this option, controls get rendered for a single time on the customized screen irrespective of the number of instances that have been selected. Multiple Item Mode: In this option, controls get rendered on the customized screen based on several instances that have been selected. User needs to fill the details on the customized screen that get used in request fulfilment and provisioning of instances. |