Lesson 7: Add verification points to test steps by using Smartshots
In this lesson, you will learn how to add verification points to the test steps by using the Smartshots to validate UI elements, values, and messages during a test run.
Before you begin
Ensure that you have completed the previous lessons in this tutorial.
About this task
In this task, you add a verification point to check whether the Create Login Details field is enabled. Verification points are evaluated when the test runs.
As each test step is performed, the following associated validations are verified:
-
If the validation condition is met, the test proceeds to the next step.
-
If the validation condition is not met, the step is marked as failed, and the failure is recorded in the test results.
Quick rules to remember
| Element type | Verification point |
|---|---|
| Label text | content |
| Input field value | value |
| Field presence | exist |
| Enabled or disabled state | enabled |
Procedure
-
Locate the recorded step Create Login Details, and then click it.
The step opens in the Smartshot view tab.
-
Click the Expand view icon
 to expand the Smartshot view for better visibility.
-
Select the Create Login Details toggle field.
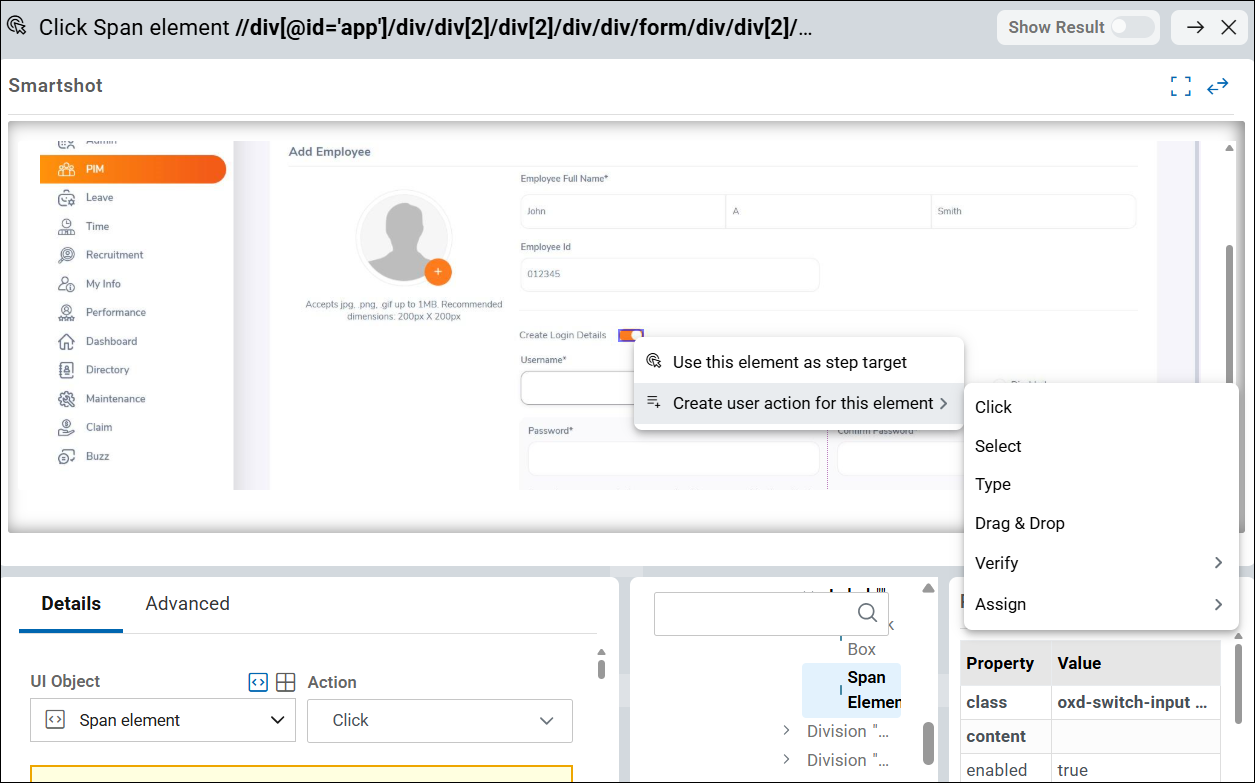
- Right-click and select . This allows you to add a verification that checks a specific property of the selected UI element. In this scenario, this step creates a verification point to check whether the Create Login Details UI element is enabled.
-
Select enabled:true option from the displayed
Verification points list.
You can view the created verification point in the Details tab.
-
Select any UI element in Smartshot.
Notice that once the UI element is selected, the same element is automatically highlighted in both the Elements panel and the Properties panel.
-
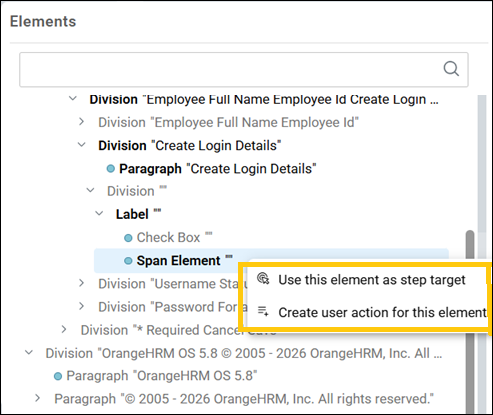
The Elements panel shows the UI elements captured in the recorded test.
-
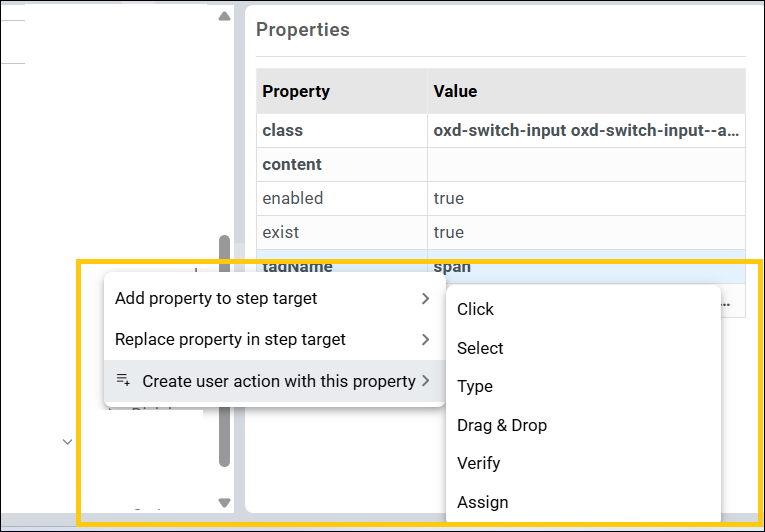
The Properties panel displays the properties of the currently selected UI element.
Additionally, you can use either panel to add the same Verify step.
-
From the Elements panel, right-click the highlighted UI element and select . For example, Span Element in the Elements panel.
You are creating a verification based on a specific property of the UI element, rather than the entire element.
-
From the Properties panel, right-click the tagName property and select . For example, span.
You are creating a verification based on a specific property of the UI element, rather than the entire element.
-
-
Click Close to close the
Smartshot.
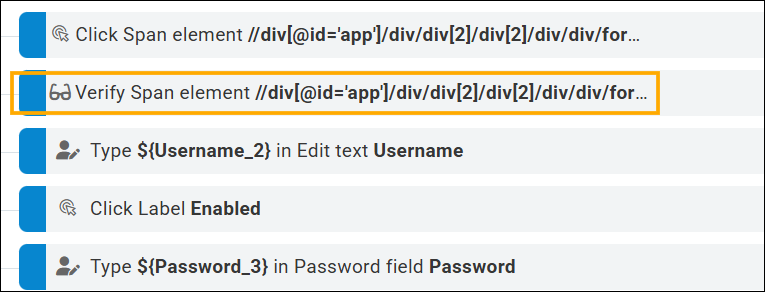
The Verify step is added to the recorded steps.
- Click Save to save the modified test.
Results
You have added verification points to the recorded Create Login Details step.
You have completed Lesson 7.