Modifying the store to display the profit margin only in Store Preview
In this lesson, you customize the Aurora starter store to display the profit margin for recommended products in Store Preview only. You must configure the profit margin field to map the fields into your UserData within the CatalogNavigationViewType noun. This noun is used for search results. With the mapping complete, the fields can be extracted for display in the Aurora starter store.
Since the profit margin is related to price, update your store product recommendation site-level widget to display the profit margin after the offer price. By updating the site-level widget, the change takes place for all stores.
Procedure
- In the Enterprise Explorer view, expand
- Open the CatalogEntryRecommendation_Data.jspf file for editing.
-
Locate the following code:
<wcf:rest var="catalogNavigationView1" url="${searchHostNamePath}${searchContextPath}/store/${WCParam.storeId}/productview/byIds" > <c:forEach var="id" items="${catentryIdQueryList}"> <wcf:param name="id" value="${id}"/> </c:forEach> <wcf:param name="langId" value="${langId}" /> <wcf:param name="currency" value="${env_currencyCode}" /> <wcf:param name="responseFormat" value="json" /> <wcf:param name="catalogId" value="${WCParam.catalogId}" /> <wcf:param name="profileName" value="IBM_findProductByIds_Summary" /> <c:forEach var="contractId" items="${env_activeContractIds}"> <wcf:param name="contractId" value="${contractId}"/> </c:forEach> </wcf:rest> -
Change the value
profileNameto be your new search profile.For example,X_findCatalogEntryProfitMargin.<wcf:rest var="catalogNavigationView1" url="${searchHostNamePath}${searchContextPath}/store/${WCParam.storeId}/productview/byIds" > <c:forEach var="id" items="${catentryIdQueryList}"> <wcf:param name="id" value="${id}"/> </c:forEach> <wcf:param name="langId" value="${langId}" /> <wcf:param name="currency" value="${env_currencyCode}" /> <wcf:param name="responseFormat" value="json" /> <wcf:param name="catalogId" value="${WCParam.catalogId}" /> <wcf:param name="profileName" value="X_findCatalogEntryProfitMargin" /> <c:forEach var="contractId" items="${env_activeContractIds}"> <wcf:param name="contractId" value="${contractId}"/> </c:forEach> </wcf:rest> - Expand
- Open the PriceDisplay_Data.jspf file for editing.
-
Define the new profit margin variable for the price display widget by adding the
following code to the end of the file.
<c:set var="profitMargin" value="" /> <c:if test="${env_inPreview && !env_storePreviewLink}"> <c:forEach var="userData" items="${catalogEntryDetails.UserData}" > <c:if test="${!empty userData.ProfitMargin}"> <c:set var="profitMargin" value="${userData.ProfitMargin}" /> </c:if> </c:forEach> </c:if> - Open the PriceDisplay_UI.jspf file for editing.
-
Define the display of the profit margin within store preview only for the price display
widget by adding the following code to the end of the file:
<c:if test="${env_inPreview && !env_storePreviewLink}">
  <c:if test="${!empty profitMargin}">
    <div> Profit Margin: ${profitMargin}% </div>
  </c:if>
</c:if>
Note: The profit margin displays only in Store Preview and only if the value exists and is not empty. Also,profitMarginis the example index field name that is used in this tutorial. Ensure that you use the same index field name, which you defined when you updated your search x-schema.xml. -
Save and close all files.
Note: If you are directly modifying the .jspf files in the Docker container; edit the server.xml file and recompileJspOnRestart=
”true”to jspEngine as shown below:<jspEngine disableResourceInjection="true" recompileJspOnRestart="true"></jspEngine> <basicRegistry></basicRegistry> <enterpriseApplication id="crs" location="crs.ear" name="crs"> <classloader apiTypeVisibility="spec,ibm-api,third-party" /> </enterpriseApplication>Restart the Store service.
-
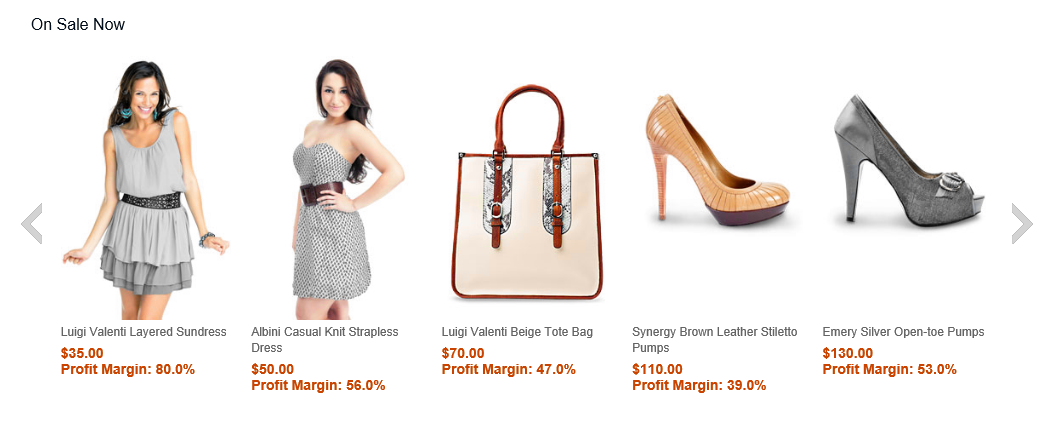
Open your storefront in Store Preview and browse to any secondary category page and
verify that the profit margin displays after the offer price.
For example, if you browse to the Women category page, your product recommendation widget can resemble the following screen capture.