
Management Center Dashboard
The Management Center user interface helps you quickly access business tools and provides a usable, intuitive, and efficient way to complete your business tasks. The Management Center dashboard has all the tools with descriptions displayed on the screen. The dashboard view will contain the tools the user has access to.
If user has no role assigned, the error page is displayed with following message - You do not have access to the tools in the Management Center. To change your access, contact your Site Administrator.
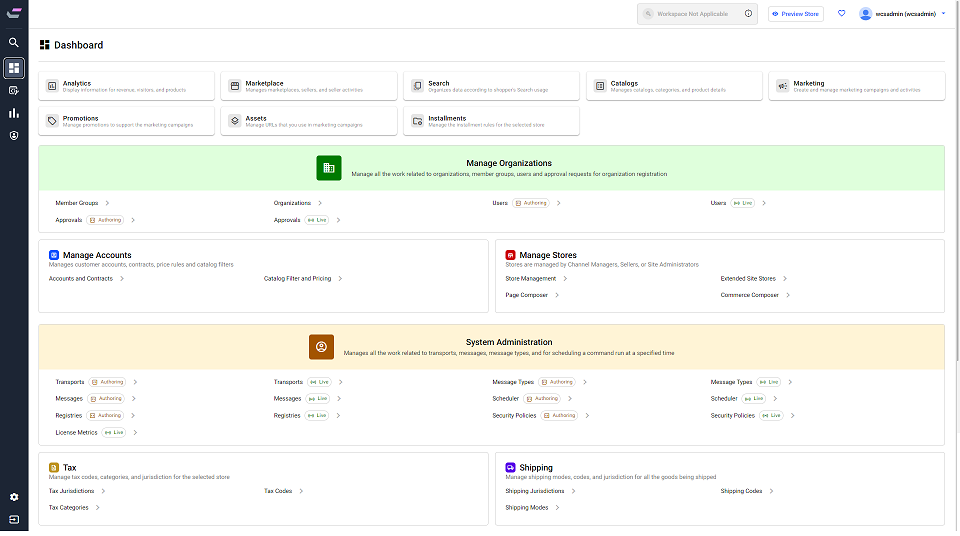
- Management Center Tool menu
- After logging in to the Management Center, the dashboard page is
displayed on the screen. You can access the Management Center
dashboard from the side navigation menu. The list of tools accessible to the
user role is displayed on the dashboard. Along with the tool name, the
AuthandLiveenvironment badge is added to identify the tool environment. The following table lists all the tools that can be accessed from the Management Center and the environments used to access the tools:Table 1. Management Center Tools and Environment Tools Auth Live Can be accessed from Auth and Live, both environments Catalogs Yes Search Yes Marketing Yes Marketplace Yes Promotions Yes Content Yes Catalog Filter and Pricing Yes Customer Management Yes Store Management Yes Extended Site Stores Yes Workspace Yes Analytics Yes License Metrics Yes Page Composer Yes Commerce Composer Yes Shipping Yes Tax Yes Installments Yes Account Contracts Yes Member groups Yes Organizations Yes Attachments Yes Marketing Content Yes Users Yes Approvals Yes Transports Yes Messages Yes Message Types Yes Security Policies Yes Registries Yes Scheduler Yes - Searching tools from the hamburger menu
- The Search Tools option at the top of the hamburger menu allows you to search tools throughout the Management Center by entering the tool name.
- Preview Store
- The user's current preferred store is the default store. The preview will
then open in a new tab with the selected settings. Only one tab launches for
the store preview. If you launch the preview multiple times, the tab
refreshes with the latest preview context. You can preview stores by
clicking the Preview Store button on the dashboard's
top-right menu.
- Preview Settings window pops up on the screen.
- Choose Store for preview, and the Store URL is auto-filled for the selected store.
- Enable the toggle button for Advance
Settings.
- Provide the Preview date.
- Provide the Preview time.
- You can enable the button to view the Time elapse when the preview mode is on.
- Select the product recommendation as required.
- After providing the advanced settings, click the Launch Store Preview button to preview the store.
Note: The Preview Store button is available only for theAuthenvironment.
See Preview Store for more information.
- Favorites
- Management Center has a provision for marking the
last level of menu items as favorites. When you access the tool from the
side navigation menu, click on the tool name to view the sub-menu. From the
sub-menu, hover over the tool name, favourites and info; both icons appear
on the screen. Click the
 icon beside the tool name to add the tool as a
favorite. Upon selection, the heart color changes to red. All the tools
marked as favorites get added to the favorites list. You can access the
favorites list from the dashboard by clicking on the
icon beside the tool name to add the tool as a
favorite. Upon selection, the heart color changes to red. All the tools
marked as favorites get added to the favorites list. You can access the
favorites list from the dashboard by clicking on the  icon in the
dashboard header. Click on the tool name from the favorite list to access
the tool directly.Note: You can remove the tool as a favorite by following one of the methods given below:
icon in the
dashboard header. Click on the tool name from the favorite list to access
the tool directly.Note: You can remove the tool as a favorite by following one of the methods given below:- Click the icon in the dashboard header and
your favorite list is shown.
- Click on the red icon to remove the tool
from the favorite list.
- The tool is removed from the favorites list, and a success message is displayed on the screen.
- Click on the red
- Go to the tool you want to remove as a favorite from the side
navigation menu. Hover over the tool name, favourites and info
both icons appears on the screen.
- Click on the red icon to remove the
selection. The tool is removed from the favorites
list.
- Click on the red
- Click the
- Info
- Management Center has a provision for viewing the
information for the last level of menu items. When you access the tool from
the side navigation menu, click on the tool name to view the submenu. From
the submenu, hover over the tool name; favorites and info icons appear on
the screen. Hover over the
 icon, and the short description for the tool is
shown.
icon, and the short description for the tool is
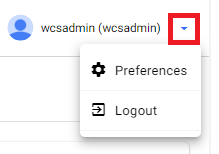
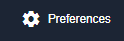
shown. - Preferences
- You can change the store selection and language of the dashboard.
- Go to the drop-down arrow at the top-right menu of the dashboard and
click Preferences.
- OR click the
 icon from the bottom of the
side navigation menu to set the preferences.
icon from the bottom of the
side navigation menu to set the preferences.
- OR click the
- A Preferences window pops up on the screen.
- Select the Store Name from the available list of stores.
- Select the language from the Languages drop-down menu. All the information displayed on the screen is updated to be displayed in the selected language.
- Click Save to save the changes. The information on the screen changes depending on the store and language selected.
- Click Logout to log out of the Management Center.
- OR click the
 icon to log out of the Management Center.
- OR click the
- Go to the drop-down arrow at the top-right menu of the dashboard and
click Preferences.
- Accessing tools
- Users can access the Management Center tools directly from the
dashboard. In the dashboard view, all the tools belonging to the environment
that you have logged in to are displayed on the screen. If the user is
present in
Authandliveboth environments, tools supporting both the environments are displayed along with the environment name on the screen.Note: After accessing the tool, click the Back arrow or Dashboard from the hamburger menu to revisit the dashboard. - Working on the approved content
- The workspace or a task selection dialog appears when you open a tool that
is workspace enabled. Select a task or work on the approved content before
continuing. The selection will be preserved. The widget will not appear in
the header if the user has never navigated to a workspace-enabled tool.
However, once shown, the workspace widget will stay visible until the window
is closed or the user logs off.
The saved selection is used if the user opens a new window and opens a workspace-enabled tool, it loads from the save preferences. The popup will be displayed if the current saved task is no longer active. If the current task is active, it is automatically selected, and the popup will not be displayed. If you change the current task or choose to work on approved content, the setting will be saved, but it will not immediately affect any other active windows. See Managing roles in workspaces, task groups, and tasks for more information.
- Workspace selection
- In the Select Workspace popup, users can choose to
Work on approved content or Work on an active task. Users can complete
active tasks without displaying them in the dialog. Users can filter active
tasks by workspace. If you navigate away from a workspace tool using the
left navigation menu (for example, move from Page Composer to
Organizations), the workspace selection widget will change to indicate that
Workspaces do not apply, and after clicking on
it, a more detailed explanation is displayed. Note: If the user selects a task to work on, the workspace and task being worked on are reflected in the user interface header.