Run the Data Load utility inside the development environment when testing customizations
or when debugging issues with the utility. This configuration to run the utility is less
time-consuming than first deploying to a runtime environment, then running the utility for test
purposes.
Procedure
-
Open WebSphere Commerce Developer.
-
Click .
The Run Configurations dialog displays.
-
Create a Java Application configuration.
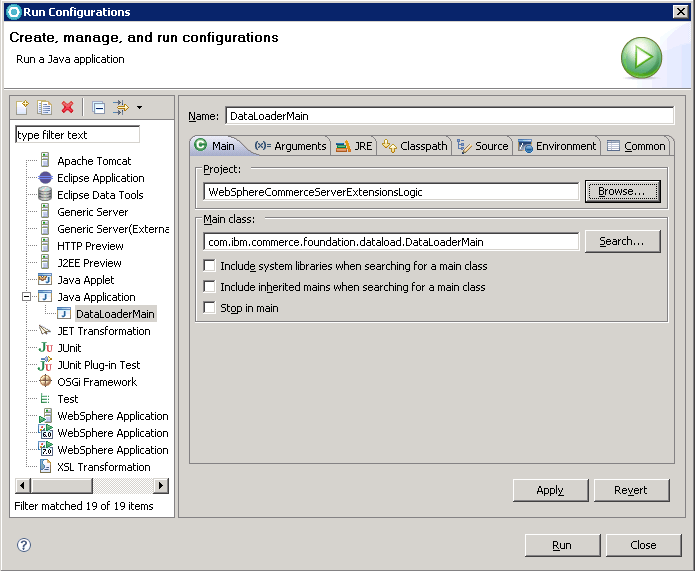
Double-click the Java Application on the left panel. On the
Main tab, enter the following information:
-
In the Name field, type a name for your configuration.
-
In the Project field, enter the project
WebSphereCommerceServerExtensionsLogic.
-
In the Main class field, enter the class name
com.ibm.commerce.foundation.dataload.DataLoaderMain.
-
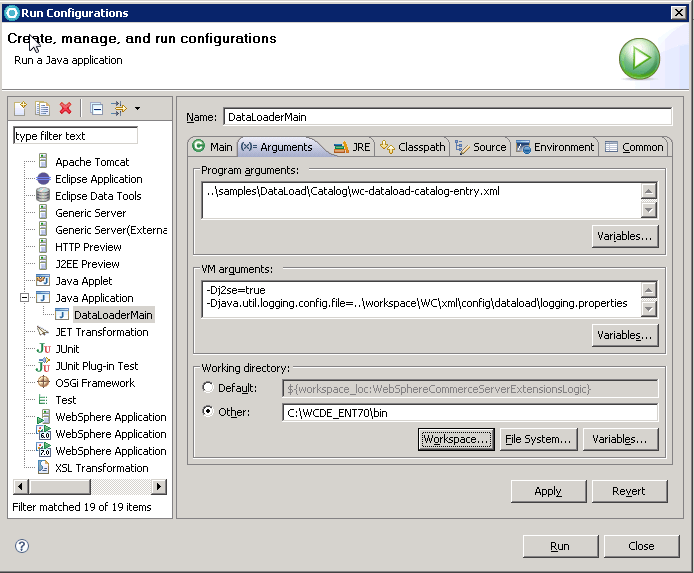
Click the Arguments tab. Enter the following information:
-
In the Program arguments field, type the path to the load order
configuration file.
-
In the VM arguments field, set the following parameter:
-Dj2se=true- Sets the Java platform type to J2SE. Set the value to true.
-Djava.util.logging.config.file=..\workspace\WC\xml\config\dataload\logging.properties- Enables the logging for the Data Load utility. The logging information is included in the
logging.properties file in the
workspace_dir\WC\xml\config\dataload directory.
-
In the Working directory field, enter the
WCDE_installdir/bin directory.
-
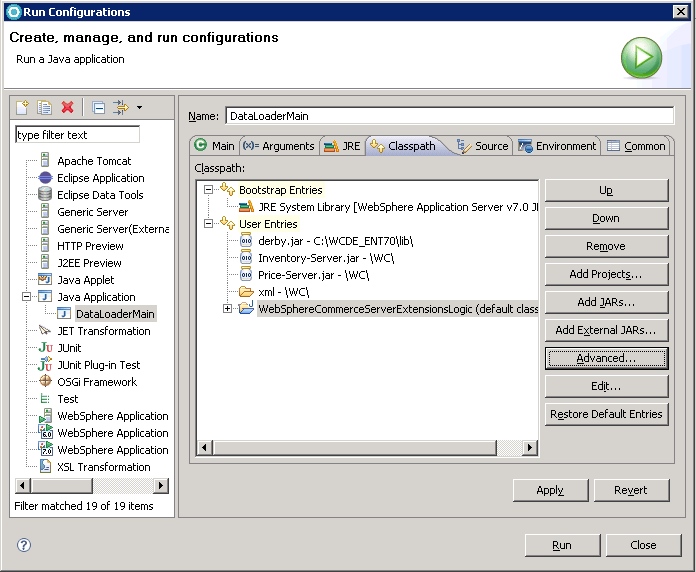
Click the Classpath tab; click User Entries, then
add the following class path information:


 Click Add External JARs, then browse
to the location of the JDBC driver JAR file for the specific database you are using. Click
Open.
 WCDE_installdir\lib\derby.jar
 db2_installdir\java\db2jcc4.jar
 oracle_installdir\jdbc\lib\ojdbc6.jar
-
Click Add JARs, then browse to the location of the
Inventory-Server.jar and Price-Server.jar files in the
WCDE_installdir/WC directory.
-
Click , then click OK. Go to , then click OK.
-
Click Run.
-
Verify the results of the load.


