To use the web feed utility, you can integrate with any Content Management System that
generates web feeds.
If you are using
IBM Web Content Manager, packaged
with WebSphere Portal, follow this procedure to configure
IBM Web Content Manager, to generate web feeds. Creating feeds
from
IBM Web Content Manager is a two-step process:
- Create a template for the feeds by creating and configuring a Menu
Component.
- Create sample data for feeds to output.
In this procedure, you use an example intranet site that is preinstalled with WebSphere Portal.
The feed is managed by an Atom Feed Menu Component that creates an Atom feed
for the existing site area. The feed is linked in the List presentation template. The Atom Feed
Menu Component requires two 'CDATA' Text Components control rich text in the
feed. To display your content on different pages, use a page URL mapping that refers to the page
where the content is shown. Typically, design elements are stored in design library, but in this
procedure you use the standard library 'Intranet 6.1.0' provided with the
WebSphere Portal.
You can adapt this procedure to add feeds to other IBM Web Content Manager managed sites.
Procedure
-
Add an Atom feed to your existing website.
-
Using Mozilla Firefox, open http://portal.ibm.com:10040/wps/portal/intranet.
This intranet home page that contains the latest news, announcement, and events. You add an Atom
feed to Announcements section. People can subscribe to this list and use their favorite feed reader
to receive updates on any new announcements.
The page name is Intranet. Notice in the URL
(http://portal.ibm.com:10040/wps/portal/intranet) that a Virtual Portal mapping
of intranet exists for the page.
-
Log in first as an IBM Web Content Manager
designer
-
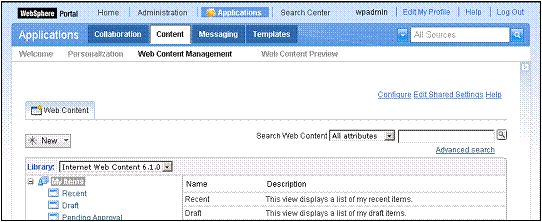
Expand .
For example:
-
Change the library from default
Internet Web Content 6.1.0 to Intranet
Web Content 6.1.0. Go to the Content to verify that you have an
Intranet site with a Home – Announcements site area.
Notice the Announcement List that controls the list view, and two
announcement entries Employee Achievements and Company
Milestones.
For example:

-
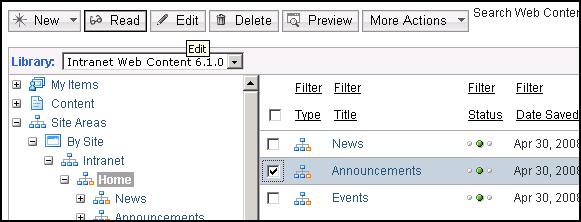
Go to the Home level; select ; then, click Edit.
-
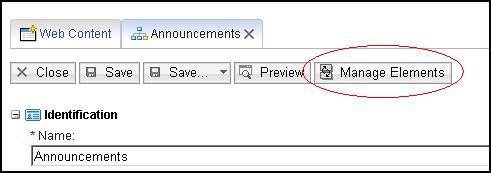
On the Announcements tab, Manage Elements
-
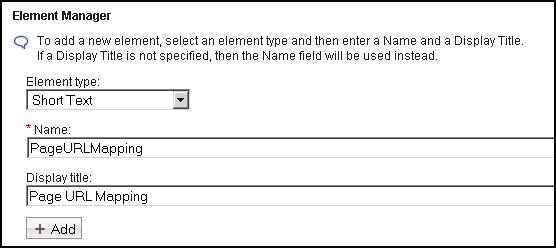
In the Element type list, select Short Text. In
the Name field, type
PageURLMapping. In the
Display title field, type Page URL Mapping. Click
Add; then, click OK.
-
In the Page URL Mapping field, type
intranet. This
portal page is where the announcements are shown. Click Save and Close. You
can repeat this step for other site areas, News, and
Events.

-
To add rich text to your feeds, put text into CDATA tags,
<![Data[, and
]]>. Add the text in text components; then add the text components to the menu
component.
-
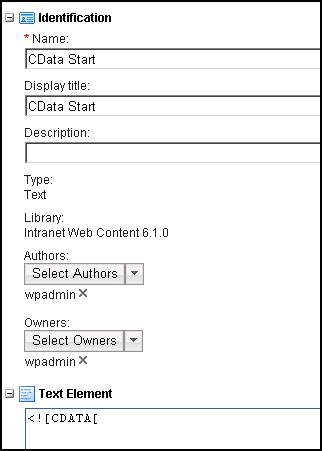
Create a text component, click .
-
Complete the fields:
- Name
- Type
CData Start.
- Display title
- Type
CData Start.
- Text Element
- Type
<
-
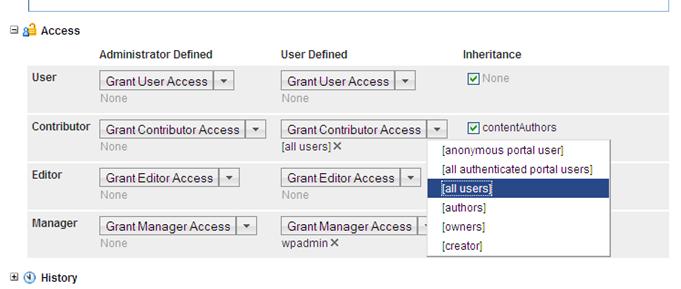
Add access to all users (including anonymous). Expand the Access section.
In the Contributor User Defined list, select [all
users].
-
Click Save to save the text component.
-
Click Save as to create another text component that is based on the one
you created.
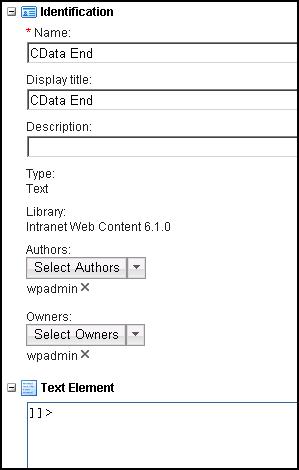
Name this component
CData End. In the
Text Element
field, type
]]>. For example:
-
Click Save and Close.
-
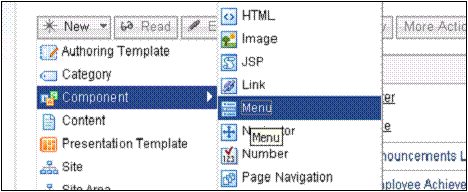
Create a menu component.
-
Click
-
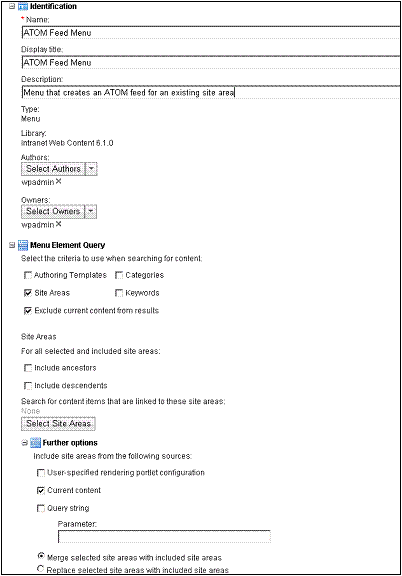
In the Identification page, set the following options:
- Identification section
-
- Name
- Atom Feed Menu
- Display title
- Atom Feed Menu
- Description
- Menu that creates an Atom feed for an existing site area
- Menu element query
- Select:
- Site Areas
- Exclude current content from results
- Further options
- Select:
- Current content
- Merge selected site areas with included site areas
For example:
-
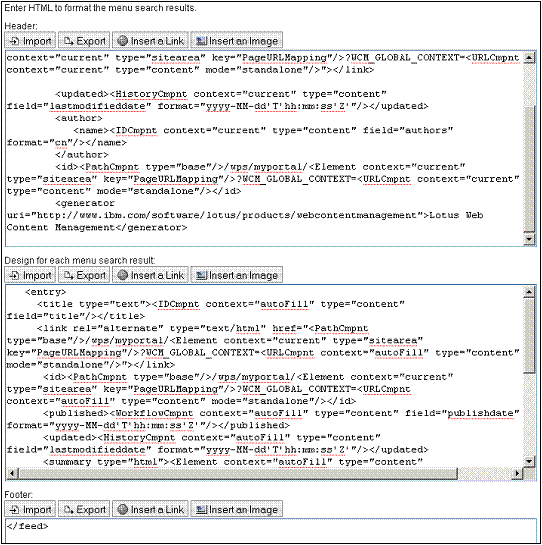
Add the following code in the header.
<?xml version="1.0" encoding="utf-8" standalone="yes"?>
<feed xmlns="http://www.w3.org/2005/Atom" >
<title><IDCmpnt context="current" type="content" field="title"/></title>
<link href="<PathCmpnt type="base"/>
  <URLCmpnt context="current" type="content" mode="standalone"/>">
</link>
<updated><HistoryCmpnt context="current" type="content" field="lastmodifieddate" format="yyyy-dd-MM'T'hh:mm:ss'Z'"/></updated>
<author>
  <name><IDCmpnt context="current" type="content" field="authors" format="cn"/></name>
</author>
<id>
  <PathCmpnt type="base"/><URLCmpnt context="current" type="content" mode="standalone"/>
</id>
<generator uri="your_Web_Content_Management_site">Web Content Management</generator>
Where your_Web_Content_Management_site is the URI value for
your IBM Web Content Manager site.
Based on the current context, the default content for a site area, it creates this example
code:
<?xml version="1.0" encoding="utf-8" standalone="yes"?>
<feed xmlns="http://www.w3.org/2005/Atom">
<title>Announcements List</title>
<link rel="self"
 href="http://portal.ibm.com:10040/wps/myportal/intranet?WCM_GLOBAL_CONTEXT=
 /wps/wcm/myconnect/Intranet+Web+Content+6.1.0/IntranetSite/Home/Announcements/AnnouncementsList">
</link>
<updated>2008-06-24T12:24:57Z</updated>
<author>
  <name>uid=xyzadmin,o=defaultWIMFileBasedRealm</name>
</author>
<id>http://portal.ibm.com:10040/wps/myportal/intranet?WCM_GLOBAL_CONTEXT=
  /wps/wcm/connect/Intranet+Web+Content+6.1.0/IntranetSite/Home/Announcements/AnnouncementsList
</id>
<generator uri="your_Web_Content_Management_site">Web Content Management</generator>
Note: This
code is separated across multiple lines for readability.
Where your_Web_Content_Management_site is the URI value for
your IBM Web Content Manager site.
-
Enter the following code in Design for each menu search result:
<entry>
  <title type="text"><IDCmpnt context="autoFill" type="content" field="title"/></title>
  <link rel="alternate" type="text/html"
   href="<PathCmpnt type="base"/><URLCmpnt context="autoFill" type="content" mode="standalone"/>">
  </link>
  <id><IDCmpnt context="autoFill" type="content" field="id" format="id"/></id>
  <published><WorkflowCmpnt context="autoFill" type="content" field="publishdate"
   format="yyyy-dd-MM'T'hh:mm:ss'Z'"/></published>
  <updated><HistoryCmpnt context="autoFill" type="content" field="lastmodifieddate"
   format="yyyy-dd-MM'T'hh:mm:ss'Z'"/></updated>
  <summary><Element context="autoFill" type="content" key="Summary"/></summary>
  <content type="image/jpeg"  src='<PathCmpnt type="base"/><Element context="autoFill"
   type="content" key="Image" format="url" htmlencode="true"/>'></content>
  <category term="<ProfileCmpnt context="autoFill" type="content" field="categories"/>" ></category>
  <author>
    <name>
      <IDCmpnt context="current" type="content" field="authors" format="cn"/>
    </name>
  </author>
</entry>
-
Enter the footer in the code to end the feed:
</feed>
For example:
-
Click Save. Notice that an ID is added to the component tags.
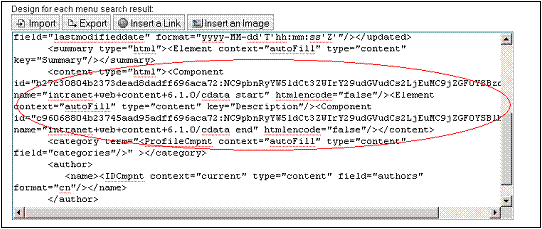
If this ID is not added, verify that the correct names were used for the components.
-
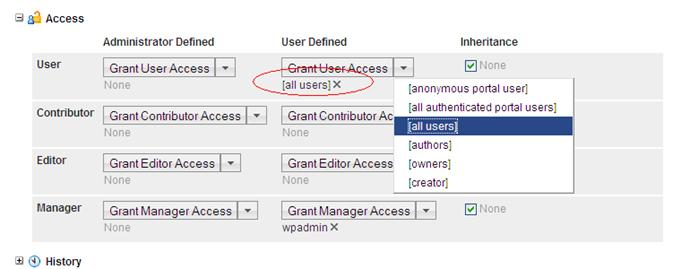
Allow this menu to be read by all users (including anonymous users). Expand the Access section
and add [all users] to User-Defined users.
-
Test your Atom Feed Menu.
-
Click Preview.

-
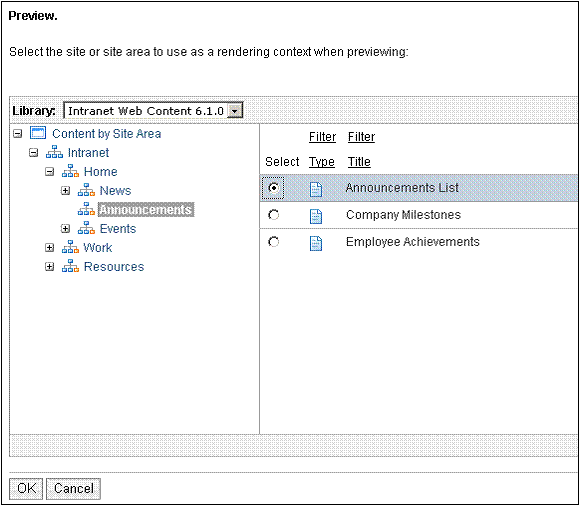
Select the Intranet Web Content 6.1.0 library. Expand, ; then, select the Announcements List.
-
Creating sample data for feeds to output.
-
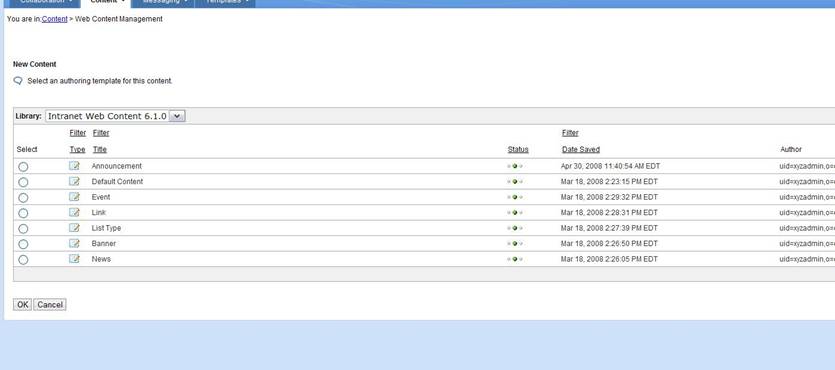
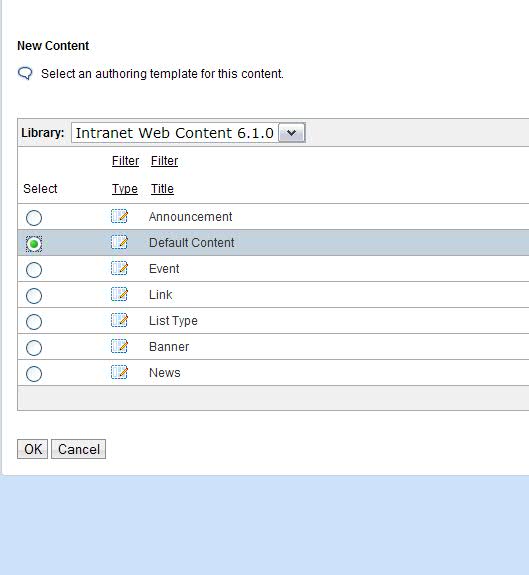
Select an authoring template.
-
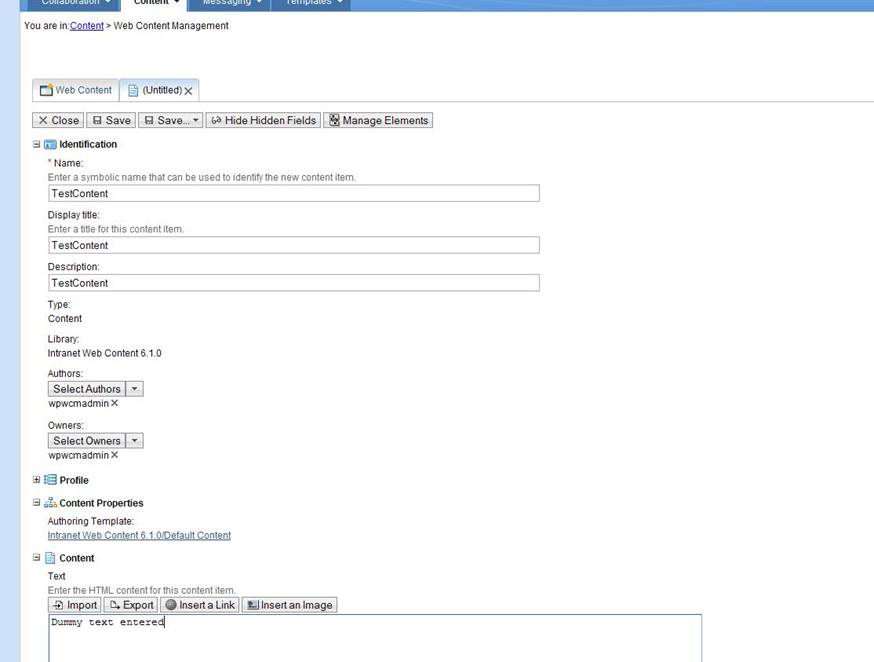
Choose the option to create new content.
-
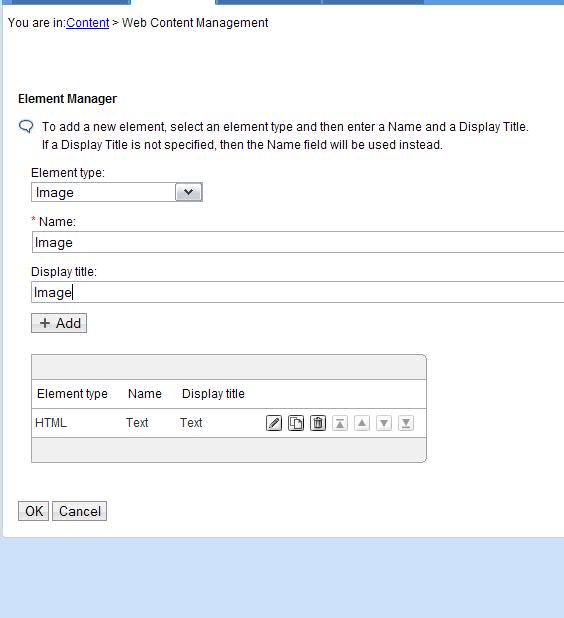
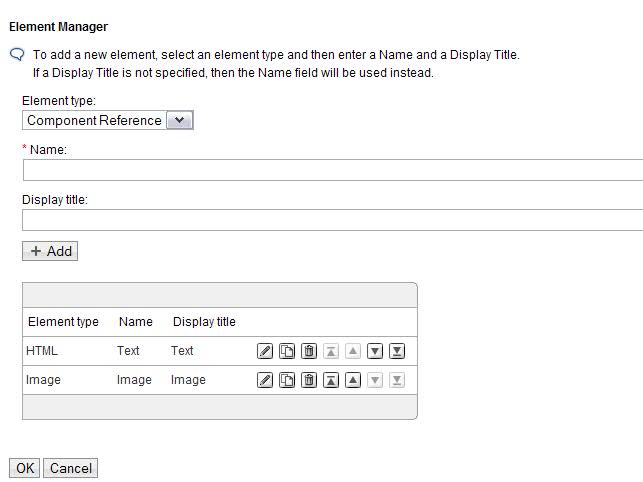
Click Manage Elements and add the attribute type.
-
Click OK.
-
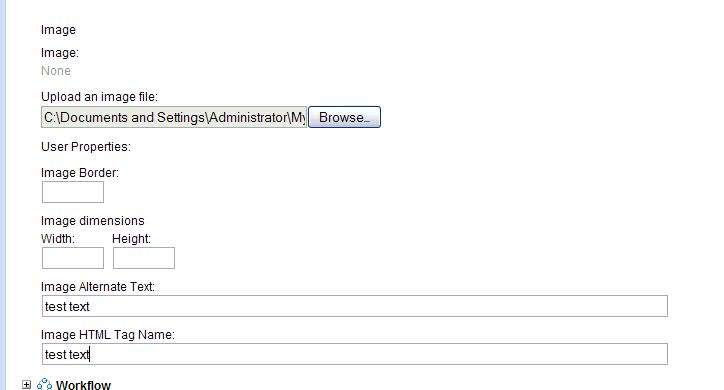
Select a URL for the image.
-
Click Save.
-
When prompted to pick a category, browse to one and pick a site.
For example, maybe, announcements.


