Install BigFix MDM Service for ChromeOS
Learn how to install BigFix MDM Service for ChromeOS to provide MDM service on ChromeOS through WebUI.
Before you begin
- Prepared Google Admin Console for ChromeOS
- You must have the necessary certificates and keys. See, Managing certificates and keys for MDM server installation.
- You must have the BigFix Agent running on the MDM Server target.
- You must be a Master Operator to perform this task through WebUI.
- You must have valid Google Enterprise Credentials
About this task
To install BigFix MDM Service for ChromeOS:
- From the WebUI main page, select .
- On the Modern Client Management page, click Admin.
- On the Admin page, from the left navigation, under MDM
Servers, select Install.
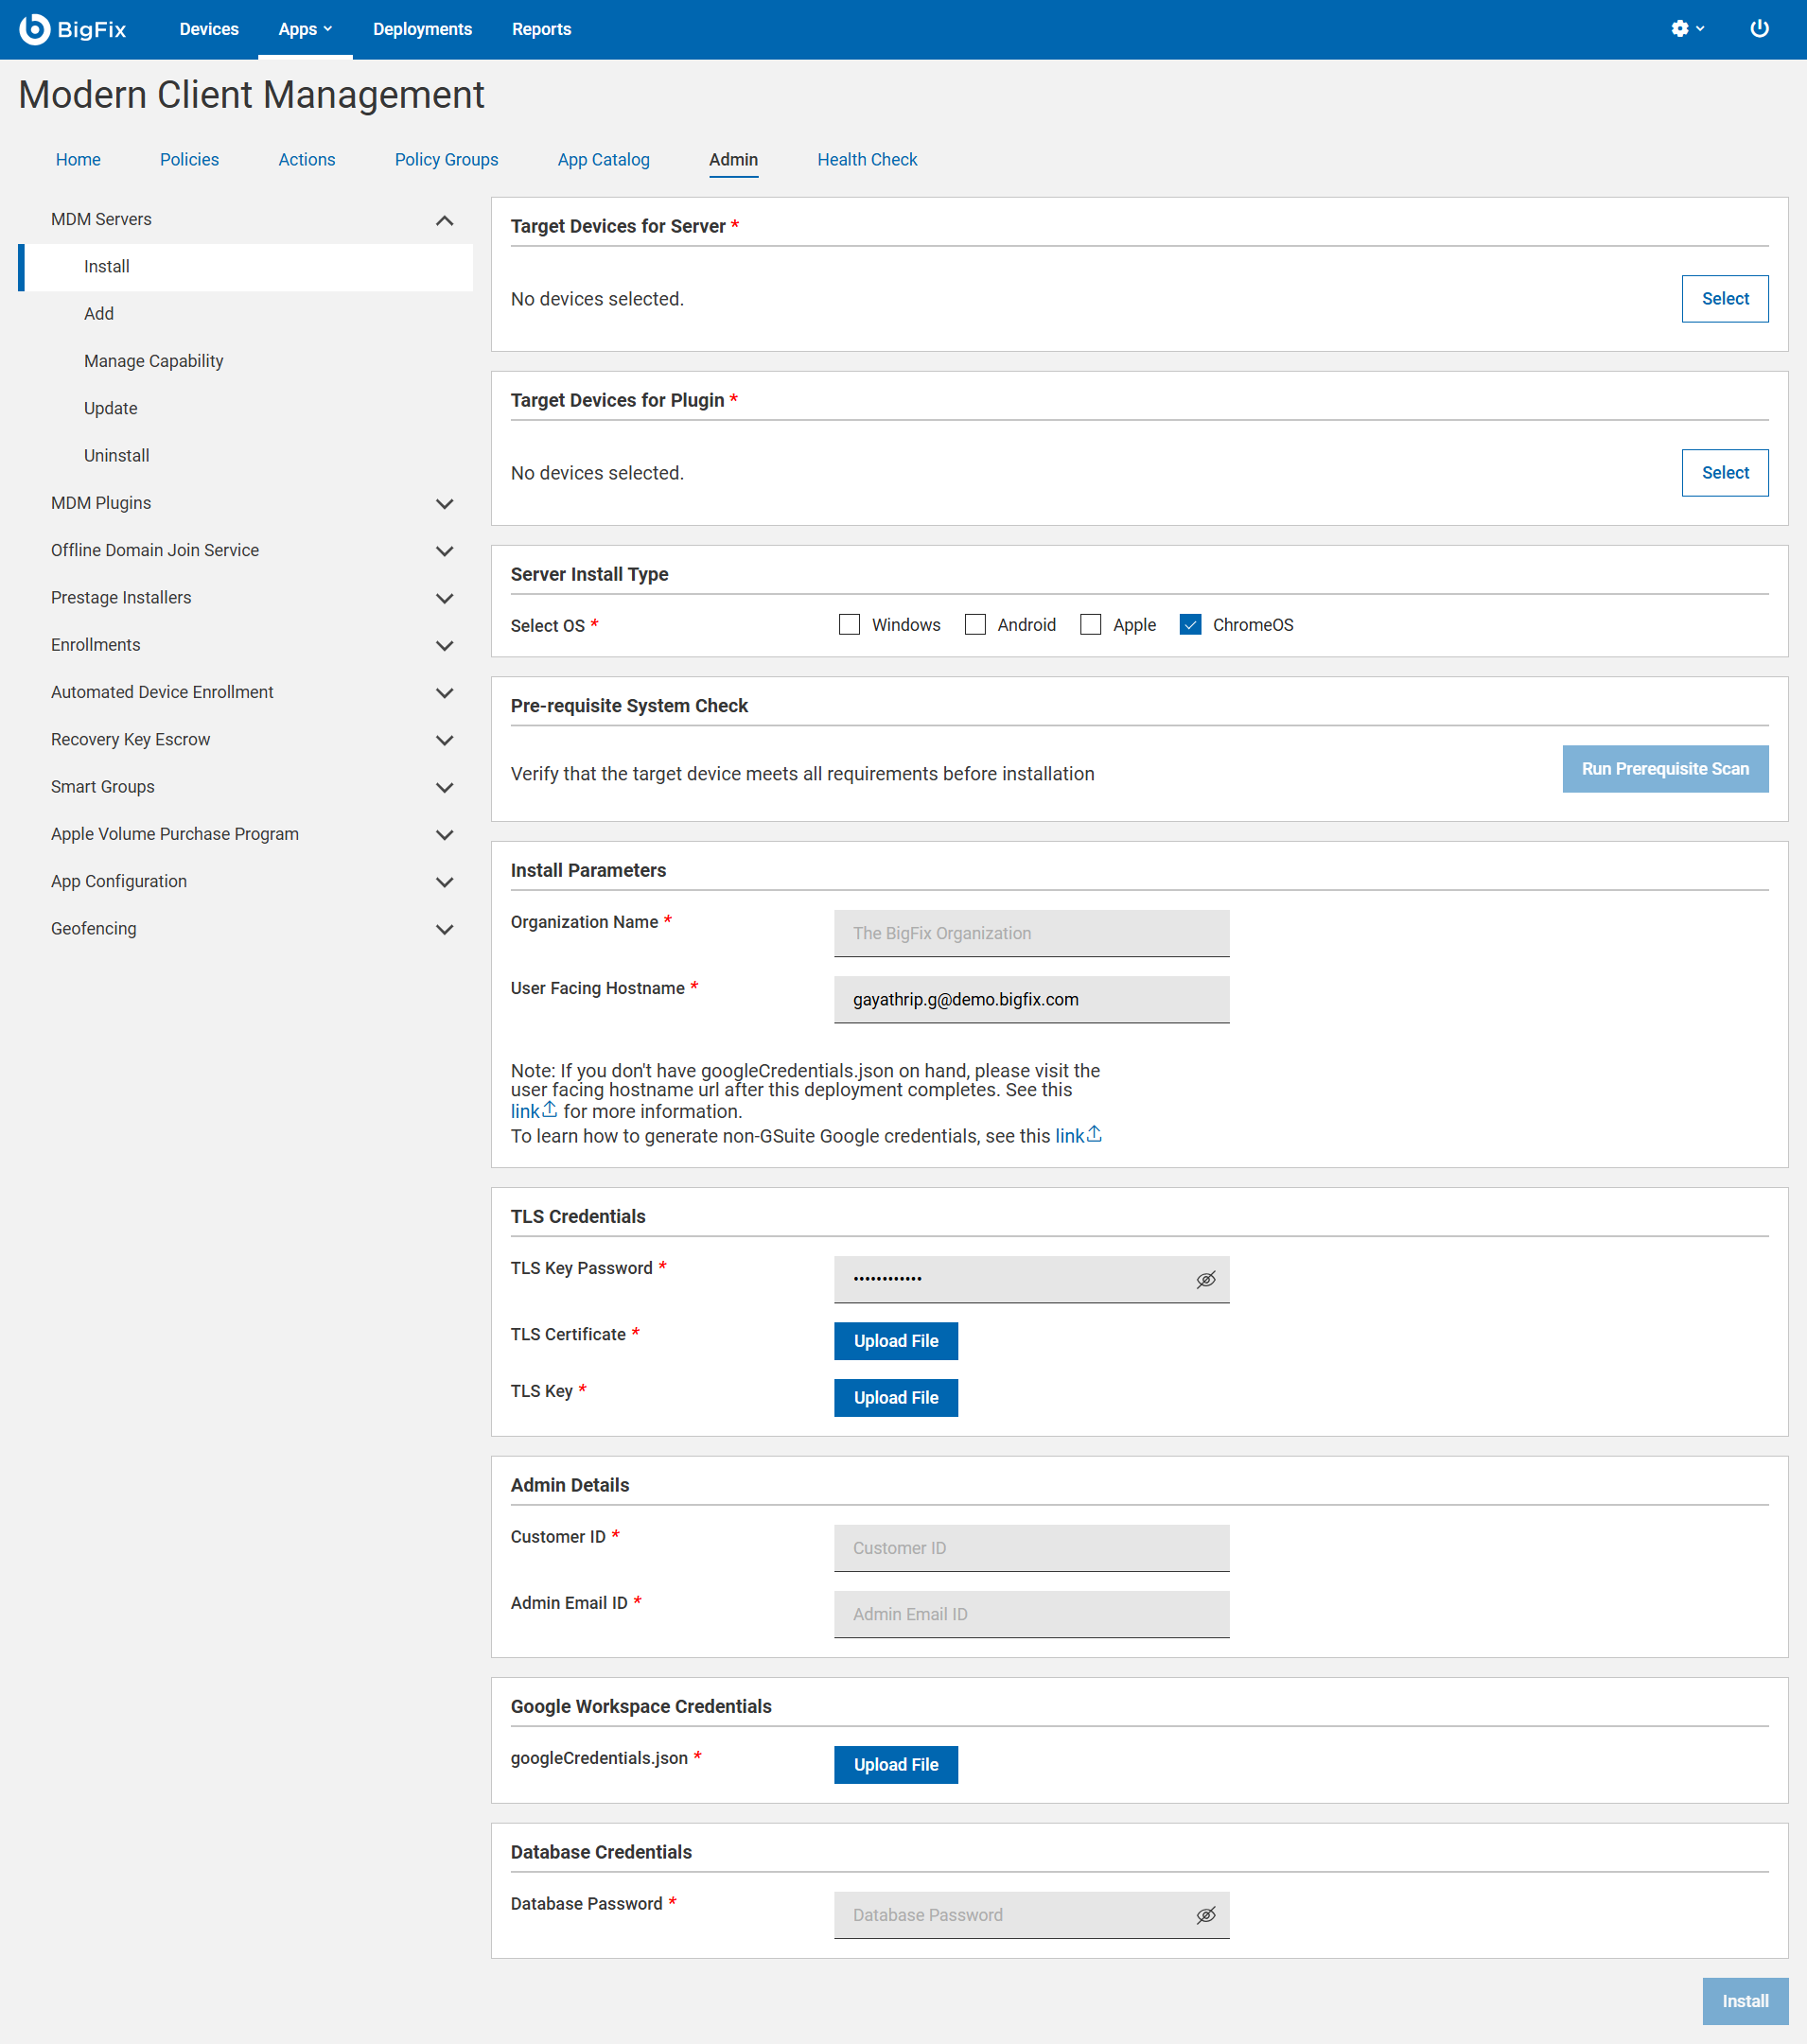
- Select Target Device for server. Click Select and select an appropriate target on which you want to install the MDM server.
- Select Target Device for Plugin. Click Select and
select an appropriate target on which you want to install the MDM
Plugin.Note:
- You need MDM Plugin to set up a connection between the MDM Servers and the BigFix Plugin Portal. MDM Plugin communicate with the MDM Server through REST APIs and the AMQP protocol using client certificates.
- Ensure that the server host is running the Plugin Portal and that the BigFix agent is running locally. For details about installing the BigFix Client, see Installing the BigFix components.
- Server Install Type: For Select OS, select ChromeOS to manage ChromeOS devices.
- Pre-requisite System Check: Click Run Prerequisite
Scanto scan the MDM target device and verify that all
prerequisites are installed or configured. Review the scan results and
ensure success before proceeding with the install parameters.Note: If the scan detects any issues, refer to Prerequisite & Connectivity Scan for more information to resolve the issues.
- Install Parameters:
- Organization Name: Enter a string. While enrolling a device, the organization name entered here displayed to the users along with the rest of the profile information.
- User Facing Hostname: For over the air enrolls, this is the hostname
of the server where users can visit to enroll in MDM. For over the
air enrolls, this is the hostname of the server where users can
visit to enroll in MDM. The value must be a valid FQDN that is
accessible from the Internet. For example,
mdmserver.deploy.bigfix.com.Note: https:// should not be included here.This is also where some Android Admin configuration takes place. See Enroll to Managed Google Play Accounts enterprise.
- TLS Credentials: Enter the details of the MDM Server TLS
certificate and key contents.
- TLS Key Password: Enter a string to set the password to encrypt the TLS key.
- TLS Certificate: Click Upload File and browse through the location to select the TLS .crt or .pem file.
- TLS Key: Click Upload File and browse through the location to select the unencrypted TLS .key file that was previously saved. Refer to BigFix MDM Server TLS Certificate Content.
- ChromeOS
Server Admin details:
- Customer ID: Enter the appropriate customer ID.
- Admin Email ID: Enter the email ID associated with the admin.
- Google Workspace Credentials: Click Upload file and browse through the file location to select the googlecredentials.json file.
- Database Credentials: Enter the Postgres Database Credentials.
- Click Install.
Results: This action completes these activities:
- Downloads a set of Podman images from software.bigfix.com which is needed for the MDM installation.
- Installs the services and certificates including the Plugin certificates and the TLS certificate on which the server runs.
- Applies all required configurations.
- After successful installation, you can find the MDM plugin files at this
location:
- Windows — C:\Program File (x86)\BigFix Enterprise\BES Plugin Portal\Plugins
- Linux
- Binaries — /opt/BESPluginPortal/Plugins
- Data files — /var/opt/BESPluginPortal