Deploying an IAST agent for microservices on Kubernetes
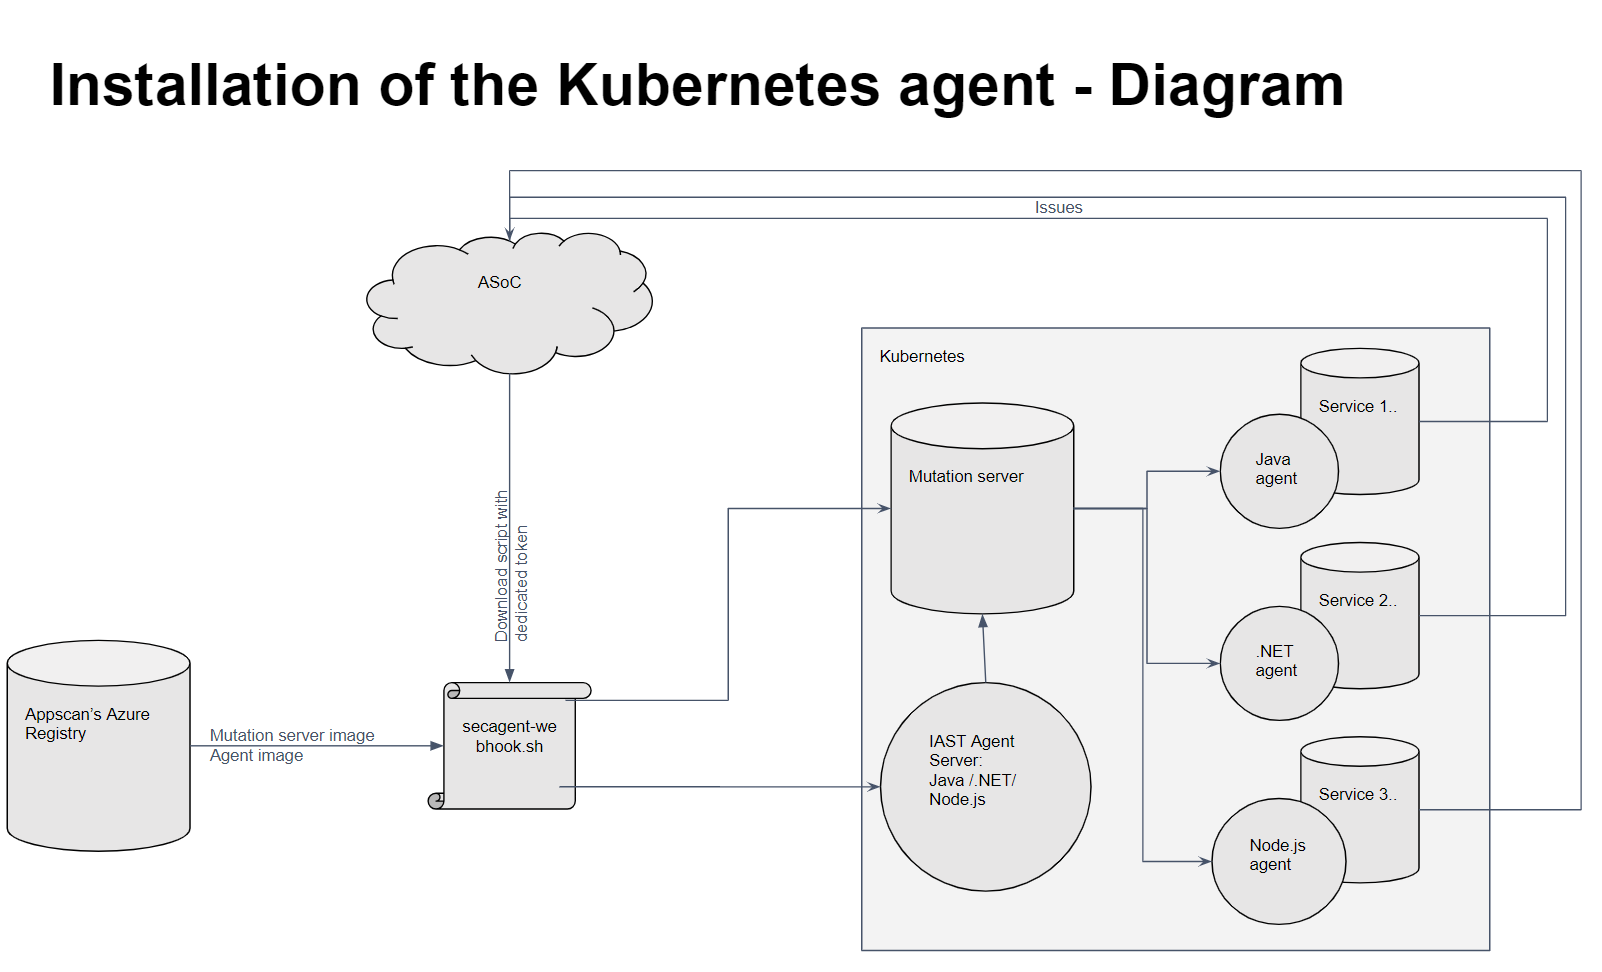
AppScan supports automatic installation of the IAST agent on a Kubernetes cluster. Using a MutatingAdmissionWebhook, the IAST agent is automatically installed in any starting pod. You can install or remove the agent using Helm or Webhook scripts.
About this task
General instructions
Procedure
-
Download the agent:
Download the ASoC Kubernetes IAST agent, as described here, and extract the contents of the ZIP file.
-
Install the IAST agent in the cluster:
The agent can be installed in one or more namespaces. A
MutatingAdmissionWebhookis deployed, which automatically injects the IAST agent into every new pod created in the selected namespaces. If no namespace is specified, the default namespace is used.Install the agent using one of the following methods:
-
Restart existing pods:
After installation, restart any running pods in the target namespaces to ensure the IAST agent is injected.
-
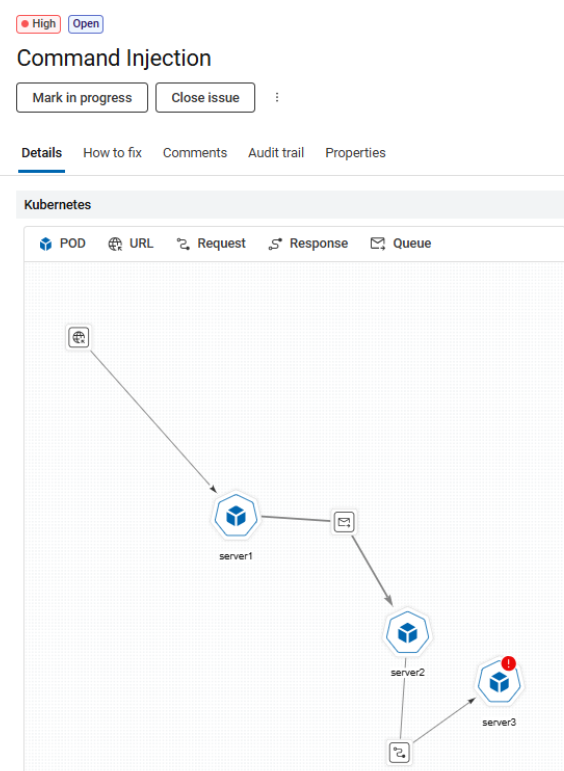
Viewing pod names in issues:
Pod names for reported issues are available under Additional Info in the Issue Details tab.
- Optional:
The following optional features are available:
-
IAST Analyzer: Provides a complete service graph view and helps reduce
false positives. Currently supported for Node.js and .NET only.
-
IAST Analyzer: Provides a complete service graph view and helps reduce
false positives. Currently supported for Node.js and .NET only.
Helm-based installation
About this task
Procedure
-
Install the IAST agent:
-
Uninstall the IAST agent: Run this command:
helm uninstall secagentThis removes the Helm release named secagent. Then restart all running pods to complete the removal.
For advanced configuration and full documentation, see helm-secagent/README.md.
Script-based installation
About this task
Procedure
-
Install the IAST agent:
-
Uninstall the IAST agent: Run this command:
./uninstall-secagent-webhook.shAfter script execution is complete, restart all running pods to complete the removal.
Excluding a pod from IAST installation
Procedure
-
Exclude a specific pod in an included namespace.
Add the label
skip-iast-webhook="true"to the pod’s YAML configuration.Any new pod created with this label is ignored by the IAST mutating webhook. - To include the pod again, remove the label or set it to false, then restart the pod.
-
Pod exclusion via user configuration:
If the Kubernetes YAML file is not accessible for editing, you can exclude pods from IAST instrumentation using a user configuration file.A sample user-config.json file is available in the examples folder of the downloaded package.Example
{
"name": "demo-app-frontend",
"namespace": "default",
"ignore": true,
"agents": ["java"]
}
Field description- name (required): The name of the pod.
- namespace (required): The namespace where the pod is running.
- ignore (optional): When set to true, IAST will skip instrumentation for this pod.
- agents (optional): Specifies which agent(s) IAST should attempt to install. If not provided, IAST will try all supported agent types. Values are: [java, net-core, nodejs]
Using a private registry
About this task
Procedure
-
Pull the images from the public IAST registry:
docker pull iastappscan.azurecr.io/webhook-certificate:latest docker pull iastappscan.azurecr.io/webhook-server:latest docker pull iastappscan.azurecr.io/secagent-sidecar:latest -
Push the images to your private registry.
Example: docker tag iastappscan.azurecr.io/secagent-sidecar:latest my.registry.com/secagent-sidecar:latest Docker push my.registry.com/secagent-sidecar:latest -
Run the script with the following parameter:
./install-secagent-webhook.sh -n my-namespace --registry=my.registry.comAlternatively, install using the Helm chart:helm install secagent helm-secagent --wait \ --set config.namespaceConfig.namespaces={test-ns1,test-ns2,test-ns3} \ --set registry=my.registry.com -
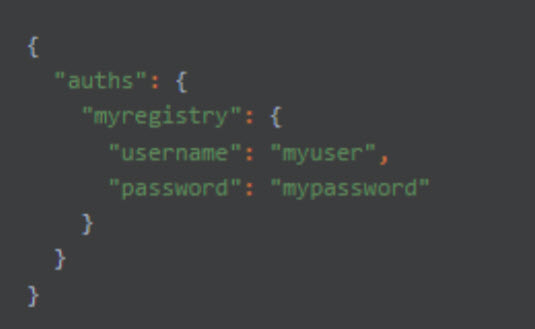
If the private registry requires authentication, follow these steps:
-
Create a JSON secret file:
-
Create a JSON secret file:
Installing in restricted environments
About this task
secagent
namespace where the MutatingAdmissionWebhook is deployed. - Managed Kubernetes platforms, such as enterprise or cloud-managed clusters, where only administrators can create namespaces.
- Environments with strict RBAC policies that prevent service accounts or scripts from creating namespaces.
- Clusters with pre-provisioned namespaces that must be used as is.
Procedure
- Manually create and configure the namespace in advance.
-
Install the agent in the required namespaces by using the previous steps. If a
namespace named
secagentalready exists, the installation script detects it and uses it without attempting to recreate it. -
To uninstall, note that the uninstall script deletes the
secagentnamespace and all associated resources by default. To uninstall the webhook without deleting the namespace and related RBAC configuration, use:./uninstall-secagent-webhook.sh --keep-namespace