Configuring the Framework
Before using Volt MX Foundry APIs for iOS, you must configure Volt MX iOS SDK into your IDEs, such as Xcode. Configuring the Volt MX iOS SDK involves the following steps:
Configuring HCLVoltFoundrySDK to Project
To configure KonySDK Framework to project, follow these steps:
- Extract the downloaded
HCLVoltFoundry-ios-sdk.zipfile. -
Drag
KonySDK.frameworkto your Framework group in Xcode project.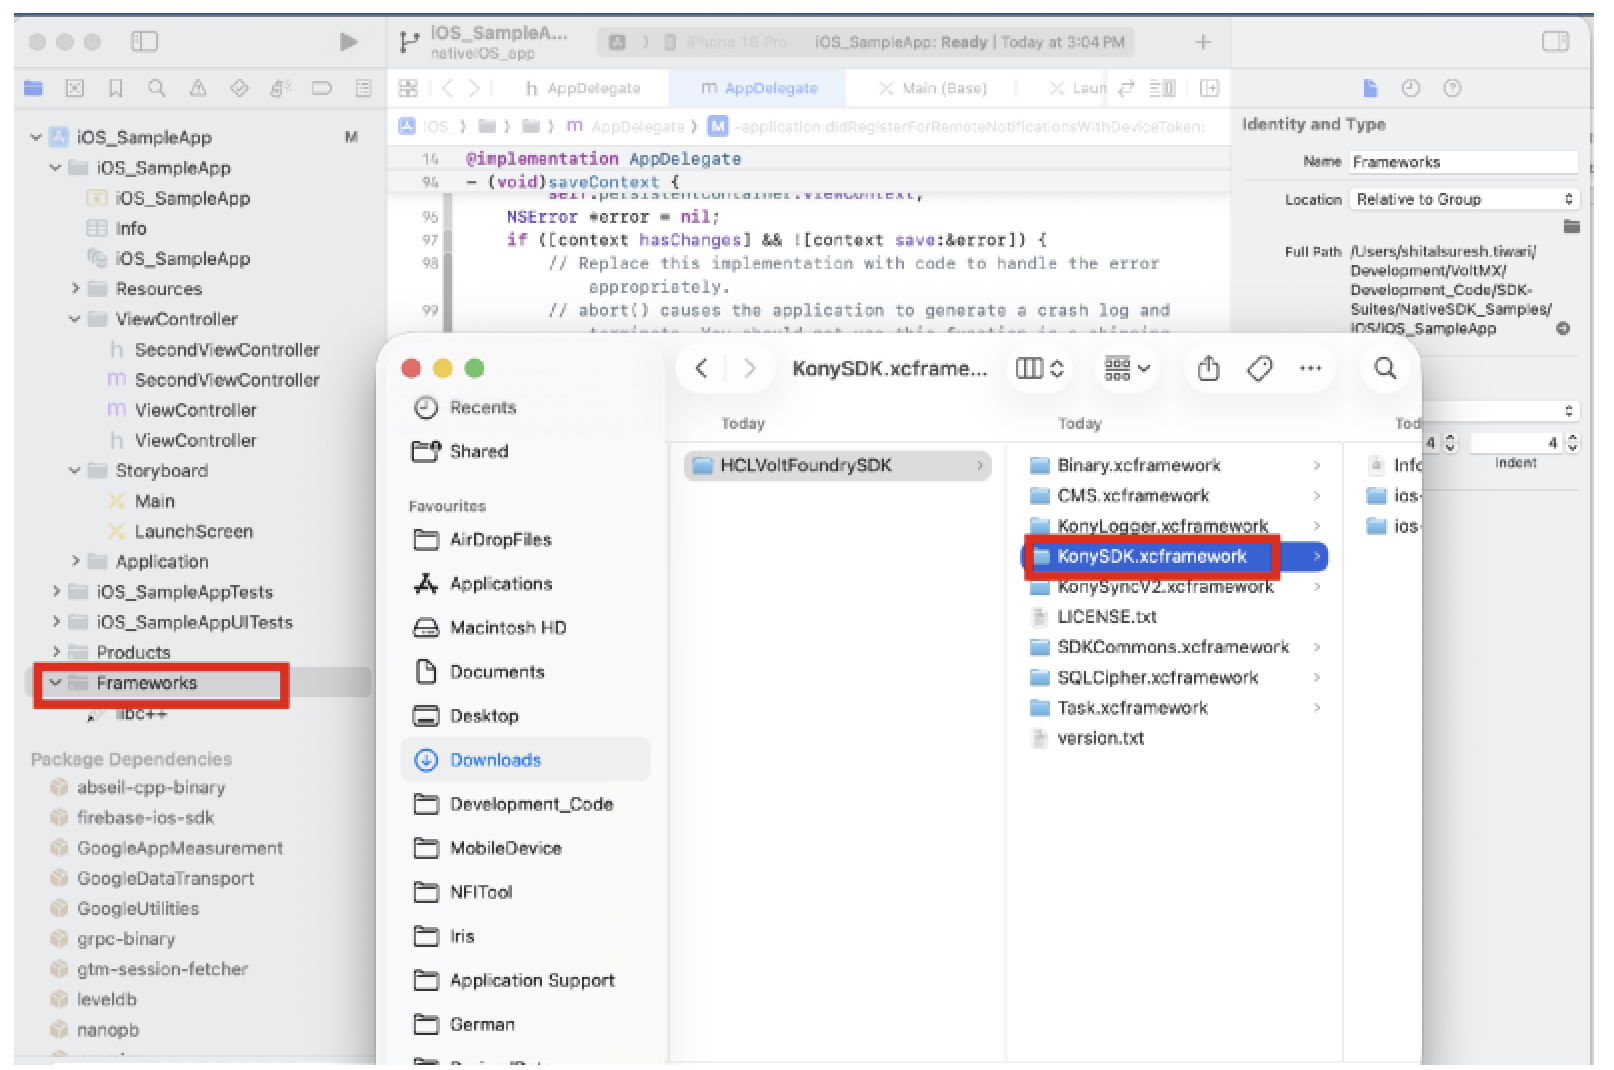
-
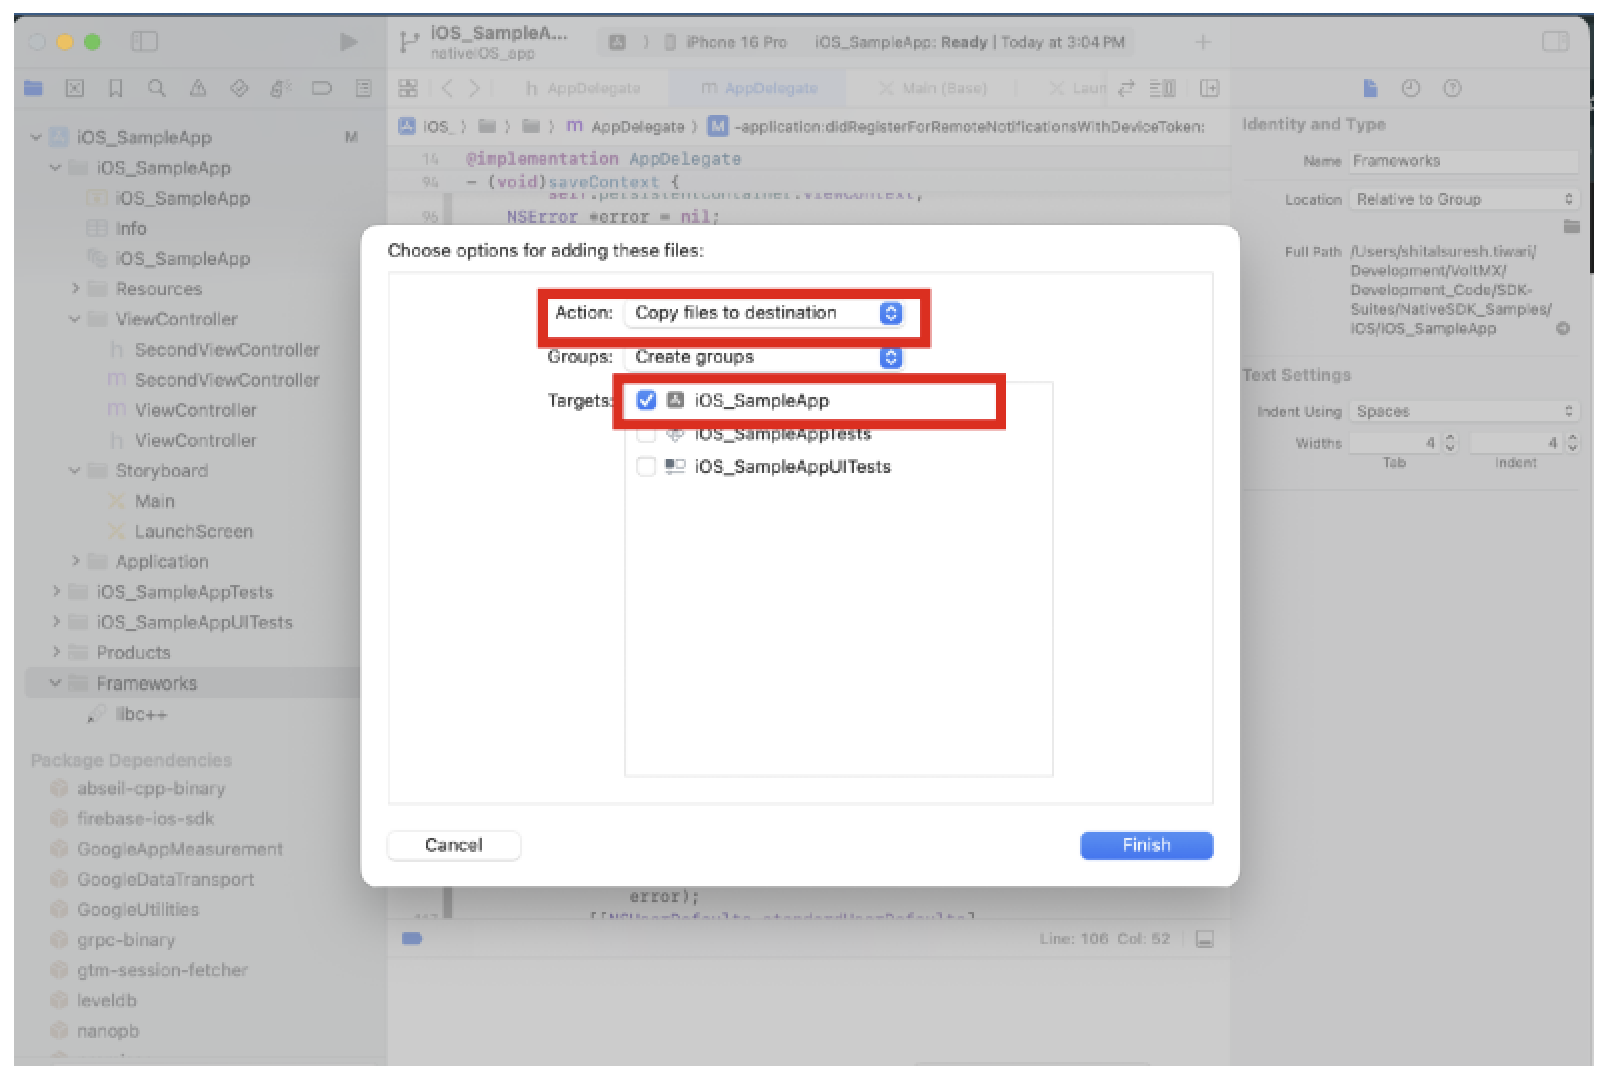
Select the Copy items into destination group's folder check box. Make sure it adds these libraries to your main target.
-
Click Finish.
Adding Framework Dependencies
-
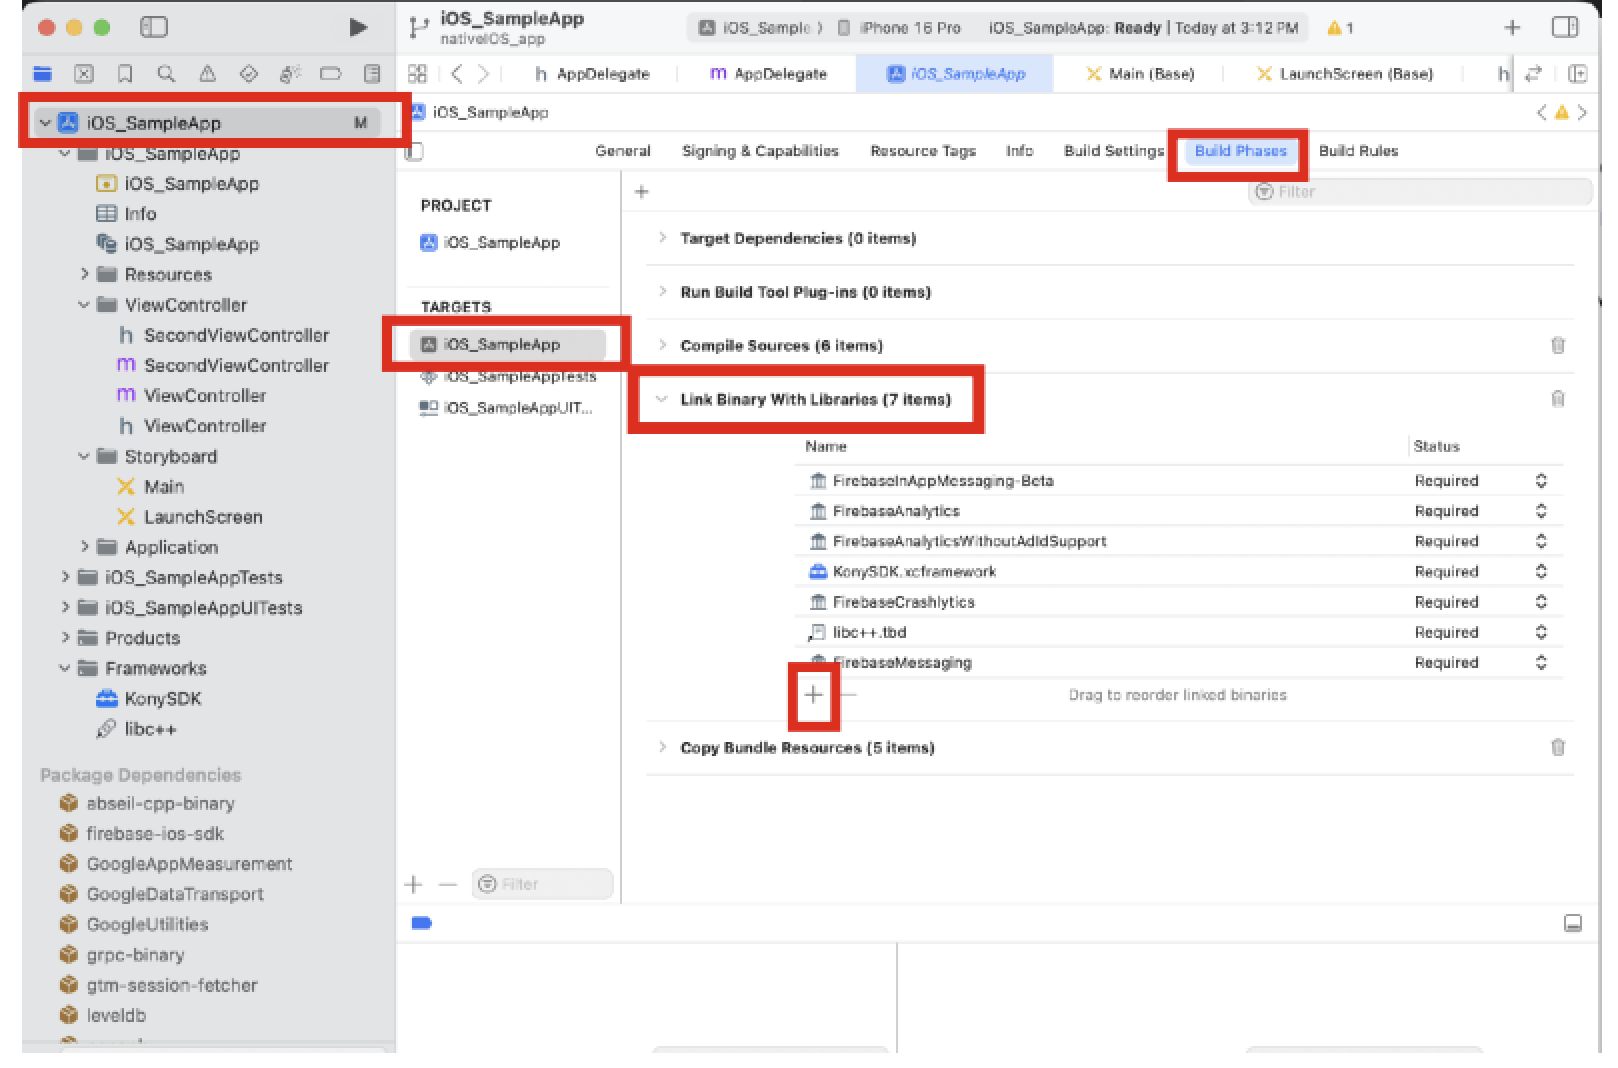
In the Project Navigator, select your project.
-
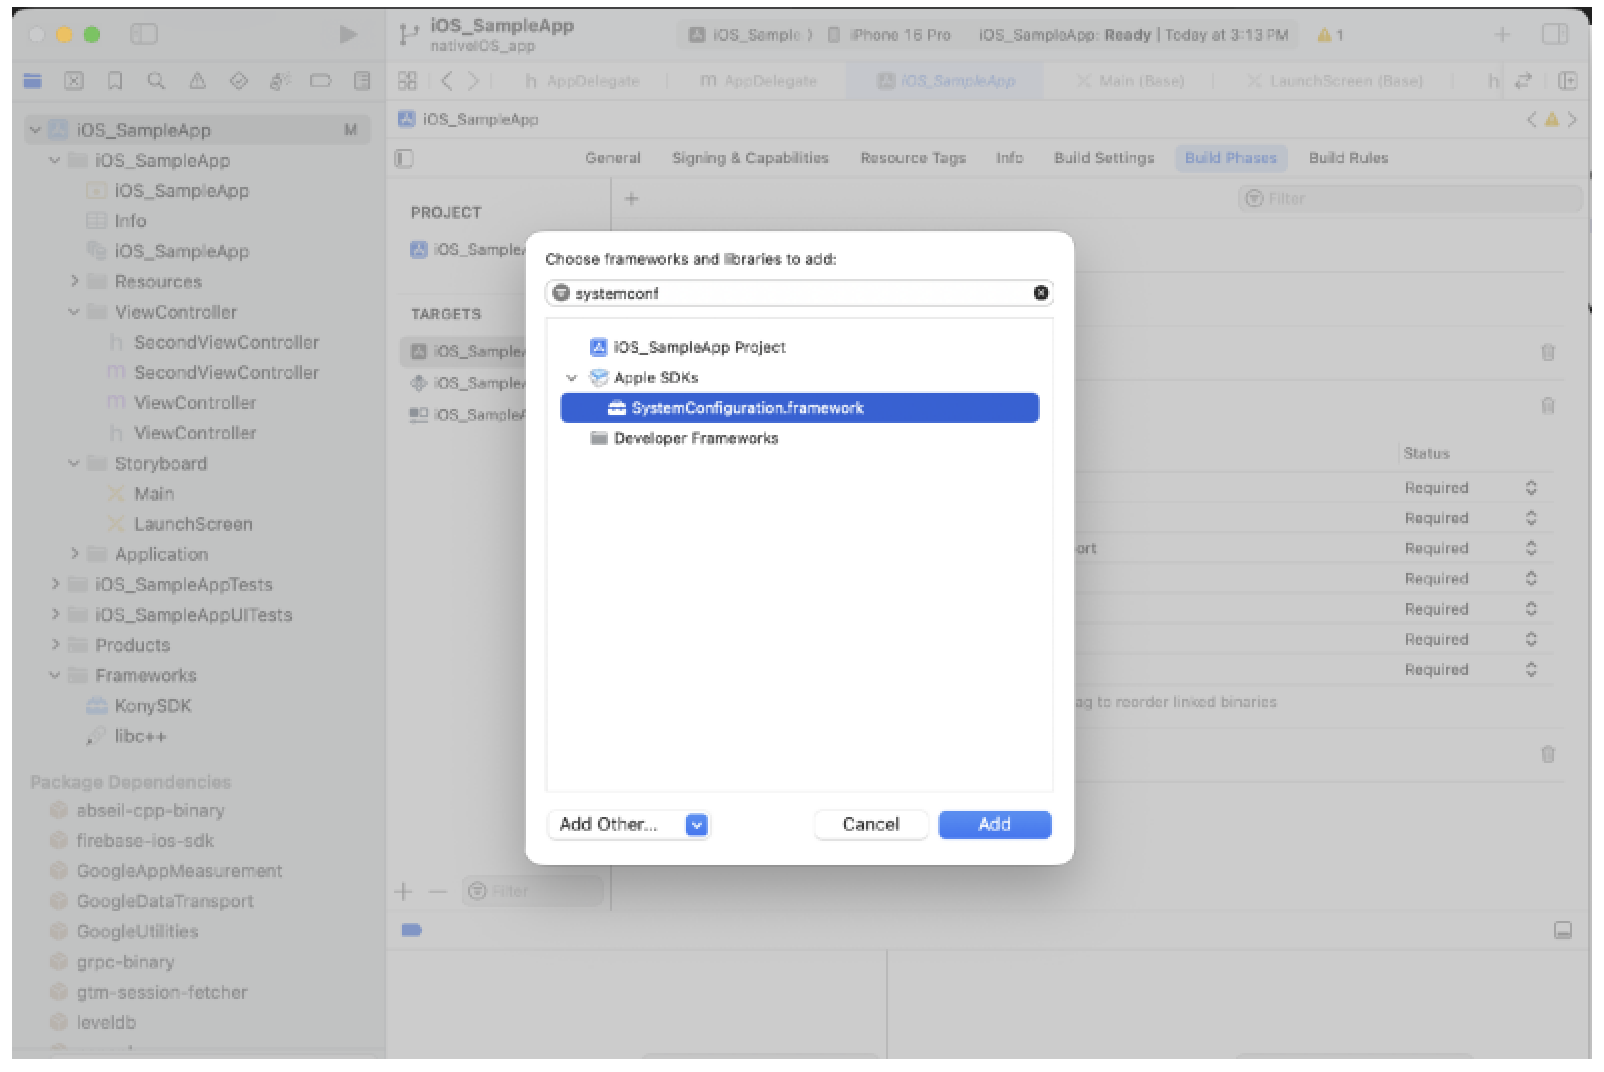
In the Editor, select your app target, navigate to Build Phases > Link Binary With Libraries and then click the Add (+) button.
-
In the Choose frameworks and libraries to add dialog, type systemconf.
- Select the
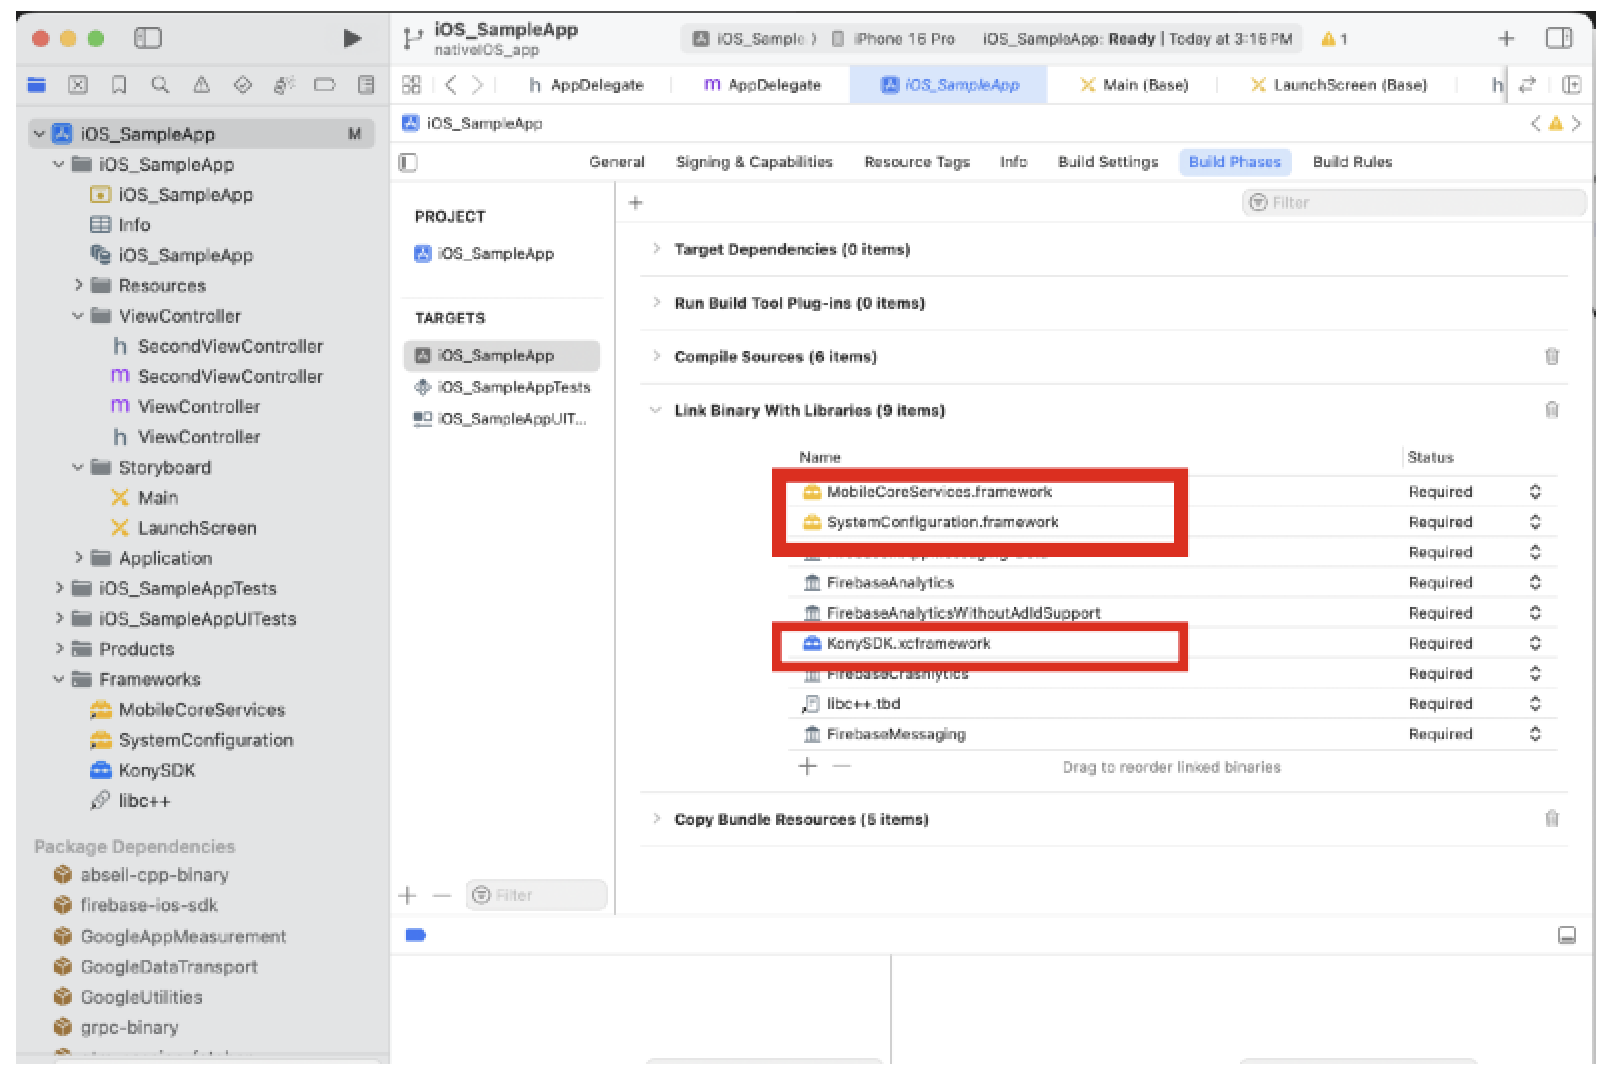
SystemConfiguration.framework, and then click Add. The system adds the selected frameworks to the project under the Link Binary With Libraries section. -
Add the
MobileCoreServices.frameworkby following Step 3 through Step 4.The system adds the selected frameworks to the project under the Link Binary With Libraries section.
-
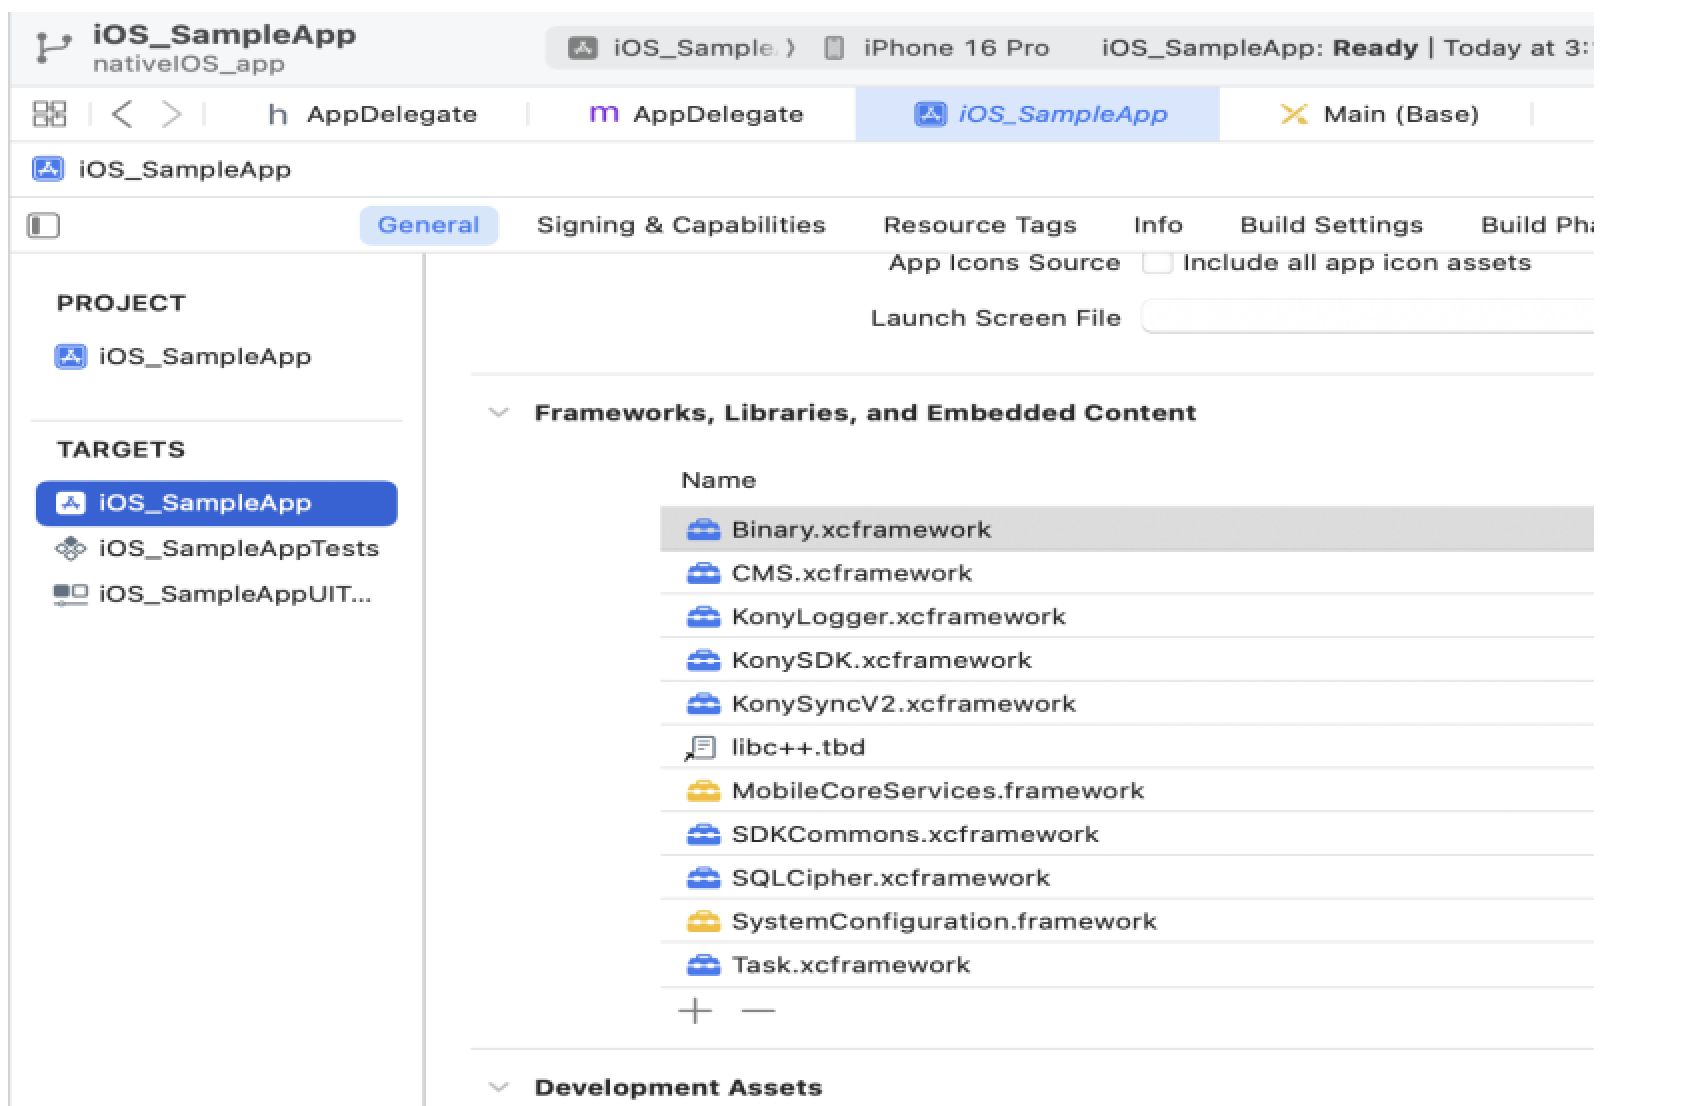
Now, add the remaining frameworks (shown in the following image) under the Embedded Binaries section in the General tab.
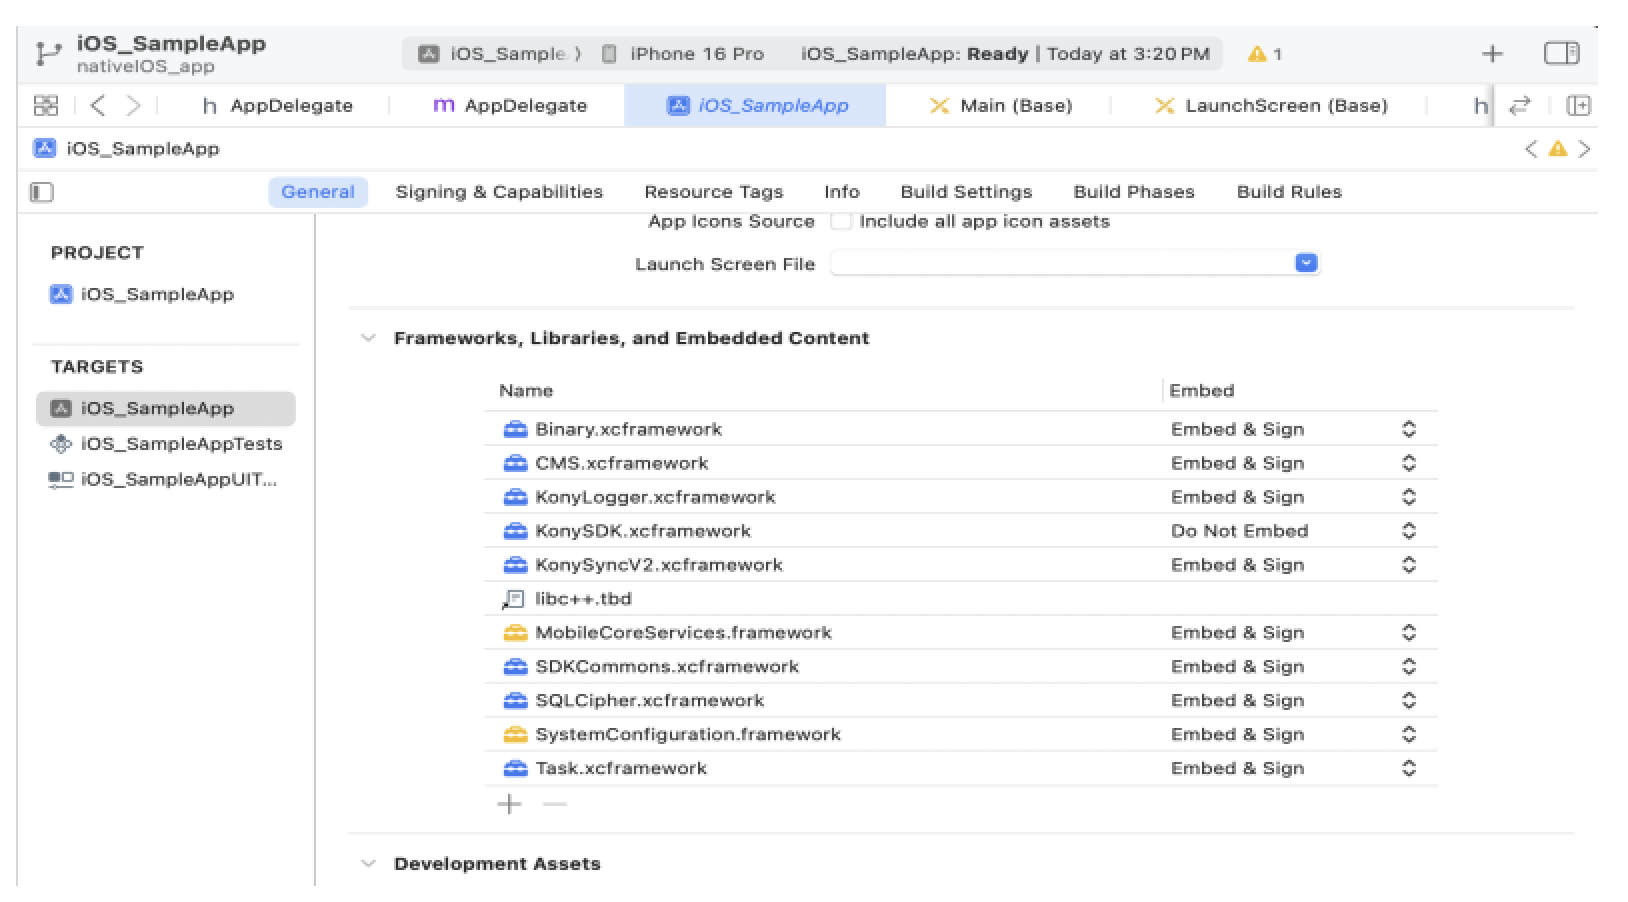
By doing so, these files will be listed in Link Binary With Libraries and Embedded Frameworks sections in the Build Phases tab.
-
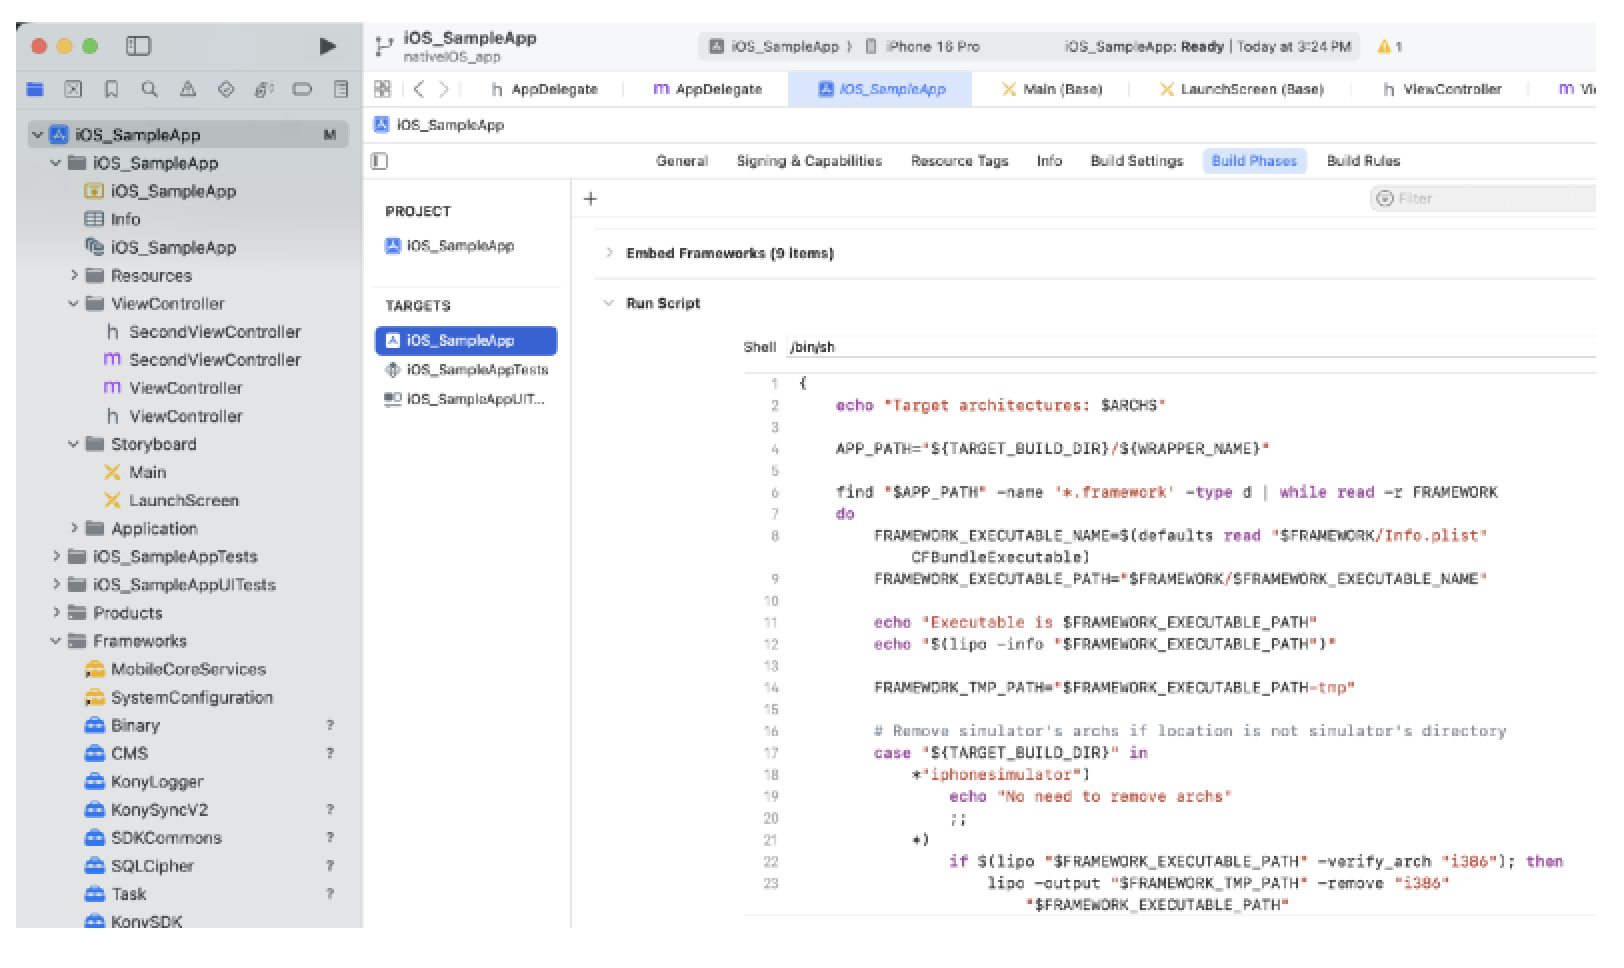
For example, if you want to release an app to the AppStore and not include i386 and x86_64 architectures, you must add a script before building your project. To do so, follow these steps.
- Under the Build Phases tab, click the Add (+) button and select New Run Script Phase from the list. The Run Script section appears.
- Type the following script in the text box.
    {
        echo "Target architectures: $ARCHS"

        APP_PATH="${TARGET_BUILD_DIR}/${WRAPPER_NAME}"

        find "$APP_PATH" -name '*.framework' -type d | while read -r FRAMEWORK do

            FRAMEWORK_EXECUTABLE_NAME=$(defaults read "$FRAMEWORK/Info.plist" CFBundleExecutable)

            FRAMEWORK_EXECUTABLE_PATH="$FRAMEWORK/$FRAMEWORK_EXECUTABLE_NAME"

            echo "Executable is $FRAMEWORK_EXECUTABLE_PATH"
            echo "$(lipo -info "$FRAMEWORK_EXECUTABLE_PATH")"

            FRAMEWORK_TMP_PATH="$FRAMEWORK_EXECUTABLE_PATH-tmp"

            # Remove simulator's archs if location is not simulator's directory
            case "${TARGET_BUILD_DIR}" in
                *"iphonesimulator")
                    echo "No need to remove archs"
                    ;;
                *)
                    if $(lipo "$FRAMEWORK_EXECUTABLE_PATH" -verify_arch "i386"); then
                        lipo -output "$FRAMEWORK_TMP_PATH" -remove "i386"
                "$FRAMEWORK_EXECUTABLE_PATH"
                        echo "i386 architecture removed"
                        rm "$FRAMEWORK_EXECUTABLE_PATH"
                        mv "$FRAMEWORK_TMP_PATH" "$FRAMEWORK_EXECUTABLE_PATH"
                    fi

                    if $(lipo "$FRAMEWORK_EXECUTABLE_PATH" -verify_arch "x86_64");

                then
                        lipo -output "$FRAMEWORK_TMP_PATH" -remove "x86_64"
                        "$FRAMEWORK_EXECUTABLE_PATH"
                        echo "x86_64 architecture removed"
                        rm "$FRAMEWORK_EXECUTABLE_PATH"
                        mv "$FRAMEWORK_TMP_PATH" "$FRAMEWORK_EXECUTABLE_PATH"
                    fi
                    ;;
            esac

            echo "Completed for executable $FRAMEWORK_EXECUTABLE_PATH"
            echo "$(lipo -info "$FRAMEWORK_EXECUTABLE_PATH")"
        done

        cp Resources/*
        "$TARGET_BUILD_DIR/$UNLOCALIZED_RESOURCES_FOLDER_PATH" > /dev/null
        2> /dev/null

        exit 0
    }
Note:
This step should be the final step under the Build Phase.
-
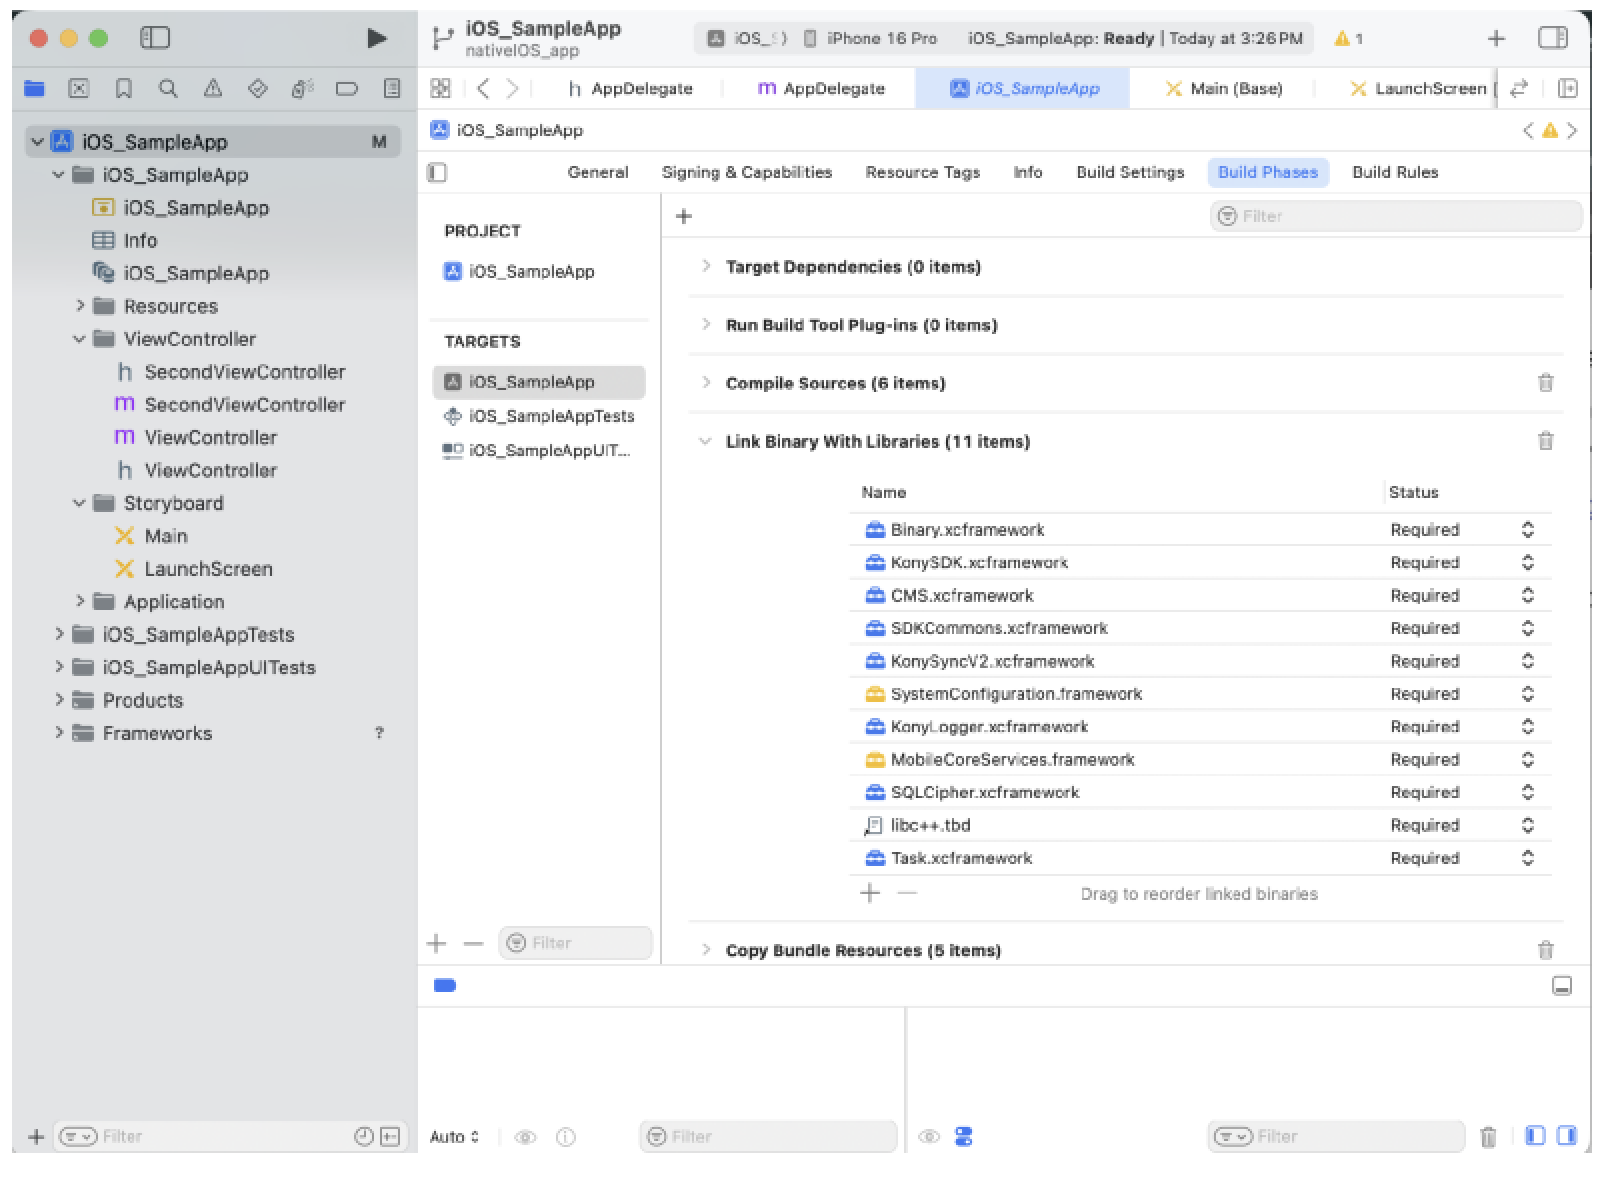
Add dependent libraries to your project, shown below:
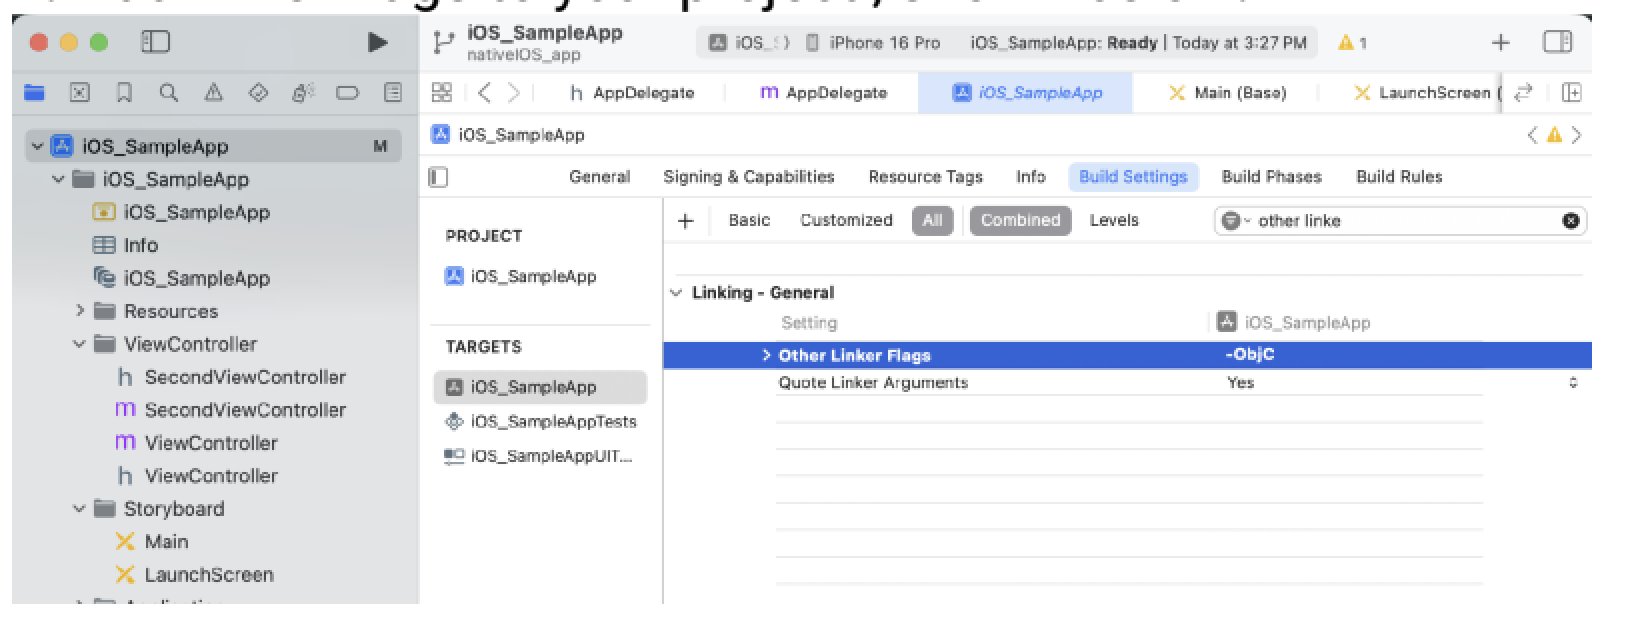
-
Add linker flags to your project, shown below: