Command Engine
This feature allows users to execute cumulative or selective commands on target devices.
This will help with quick diagnostics scenarios wherein groups of commands specific to identifying the status on target devices could be retrieved and showcased on the console.
Command Master
This screen allows users to create commands that will be executed on target devices.
On this screen, user with proper roles can approve and reject commands.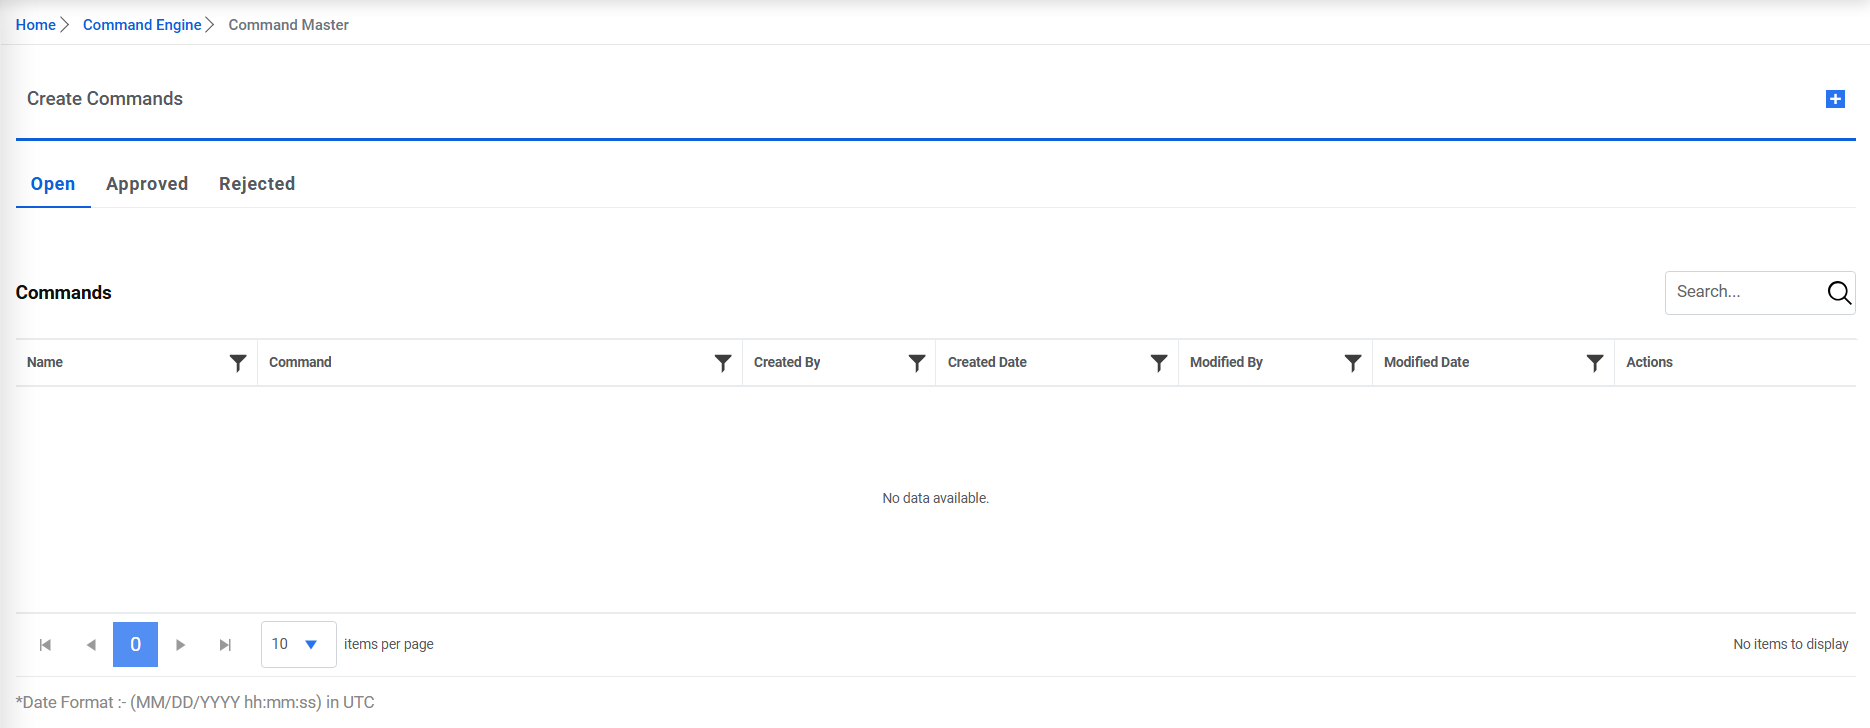
- To create a command, click on
 icon.
icon.Figure 1. Create Command 
- Provide the command name.
- Provide the Category for the command.
- Provide the Subcategory for the command.
- Provide the Device Type for the command.
- Provide the Model Id for the command.
- Provide the Manufacturer for the command.
- Provide the command.
Figure 2. Create Command (Cont.) 
- Click on save. Below alert appears:
Figure 3. Create Command (Cont.) 
- The added command appears in the grid:
Figure 4. Create Command (Cont.) 
- To view the command, click on
 icon
and the command details appear in the read only mode.
icon
and the command details appear in the read only mode.Figure 5. Create Command (Cont.) 
- To edit any command, click on
 icon. The fields get prefilled with the
existing data. Make the required changes and update it.
icon. The fields get prefilled with the
existing data. Make the required changes and update it.Figure 6. Create Command (Cont.) 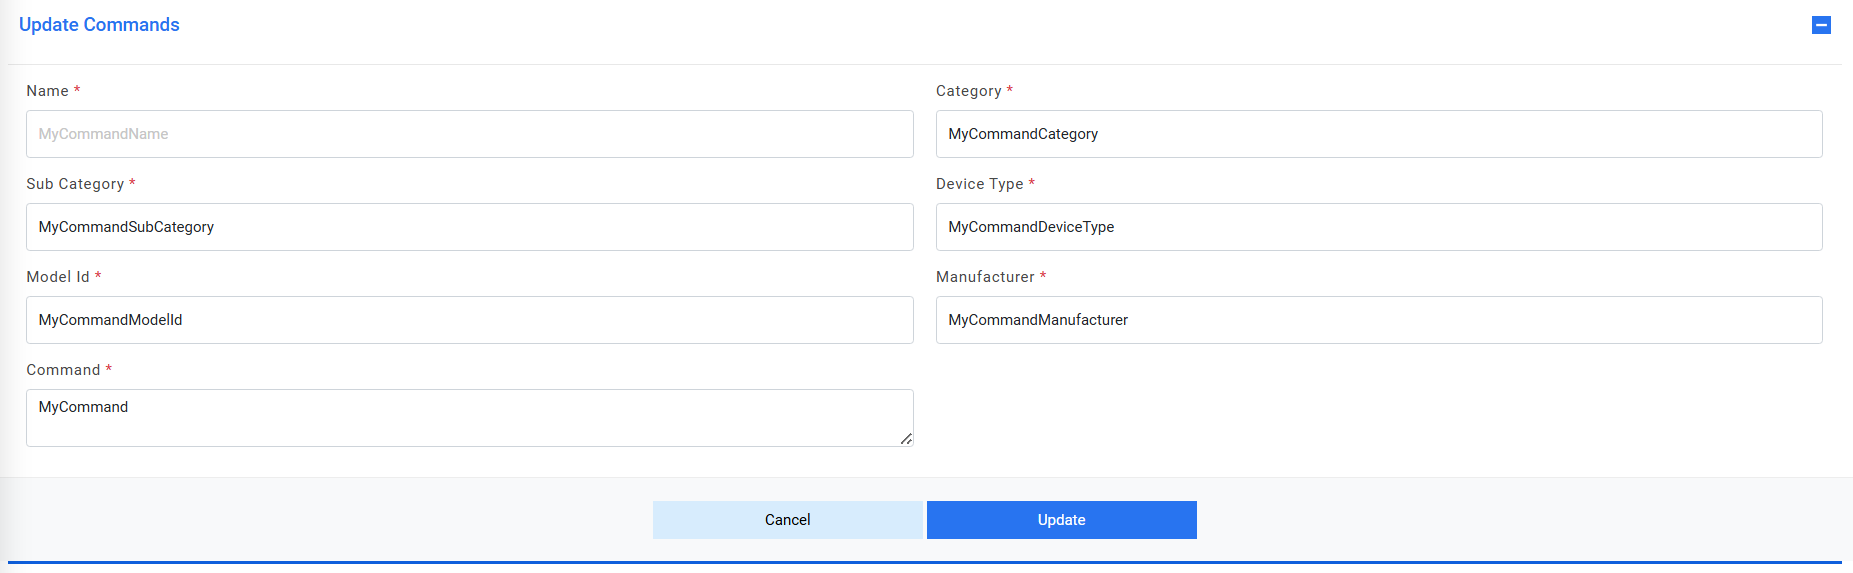
- To delete a command, click on
 icon. A confirmation box appears:
Figure 7. Create Command (Cont.) 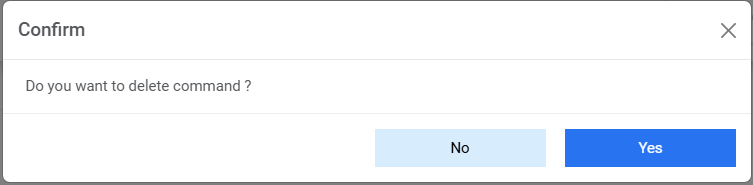
- Click on Yes. The below alert appears, and command gets deleted:
Figure 8. Create Command (Cont.) 
- To approve the command, user must have the role ‘Command Approver’. Login
with such user, and on Command Master page, user can view all the commands
in open state in Open State. All the approved commands can be viewed under
Approved Tab and all rejected commands under Rejected Tab.
Figure 9. Command Approver Login 
- To approver a command in open tab, click on
 icon. The
popup appears:
icon. The
popup appears:Figure 10. Command Approver’ Login (Cont.) 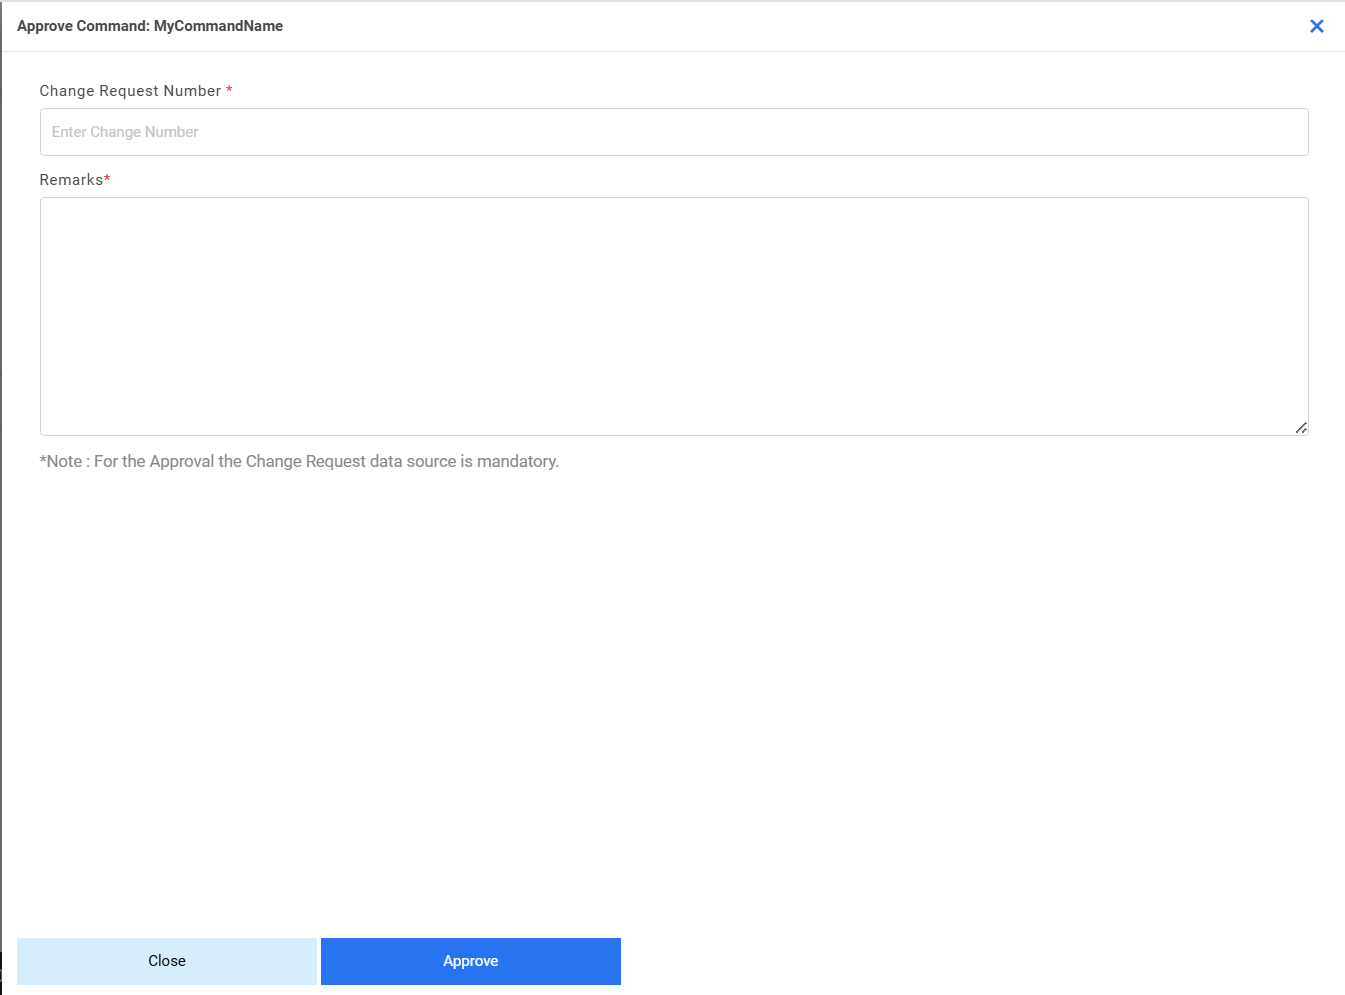
- Provide a valid Change Request Number to be associated with the command to
be approved and provide the approval remarks then click Approve.Note:The data source for Change Request is mandatory because based on its configuration, the existence of Change Request Number is checked.
Disclaimer: In the product, we’re just validating the Change Request Number existence on ITSM tool. We’re not the owner of the change request and are responsible for any modifications and updates made on the ticket.
- Below alert appears:
Figure 11. Command Approver’ Login (Cont.) 
- The command then moves from Open tab to Approved Tab.
Figure 12. Command Approver’ Login (Cont.) 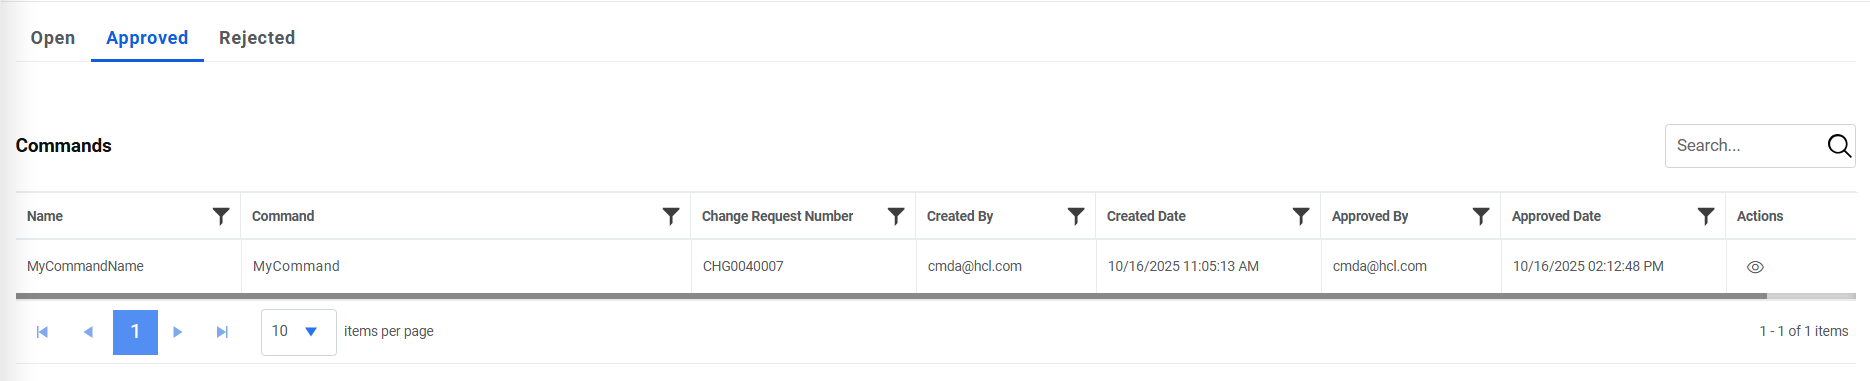
- To approve the command, user must have the role ‘Command Approver’. Login with such user, and on Command Master page, user can view all the commands in open state in Open State.
- All the approved commands can be viewed under Approved Tab and all rejected
commands under Rejected Tab.
Figure 13. Reject Command
- To approver a command in open tab, click on icon. The
popup appears:
Figure 14. Reject Command (Cont.)
- Provide a valid Change Request Number to be associated with the command to
be approved and provide the approval remarks then click Approve.Note:The data source for Change Request is mandatory because based on its configuration, the existence of Change Request Number is checked.
Disclaimer: In the product, we’re just validating the Change Request Number existence on ITSM tool. We’re not the owner of the change request and are responsible for any modifications and updates made on the ticket.
- Below alert appears:
Figure 15. Reject Command (Cont.)
- The command then moves from Open tab to Approved Tab.
Figure 16. Reject Command (Cont.)
To reject the command, user must have the role ‘Command Approver’. Login with such user, and on Command Master page, user can view all the commands in open state in Open State.
All the approved commands can be viewed under Approved Tab and all rejected commands under Rejected Tab
- To reject a command in open tab, click on
 icon. The
popup appears:
icon. The
popup appears:Figure 17. Reject Command 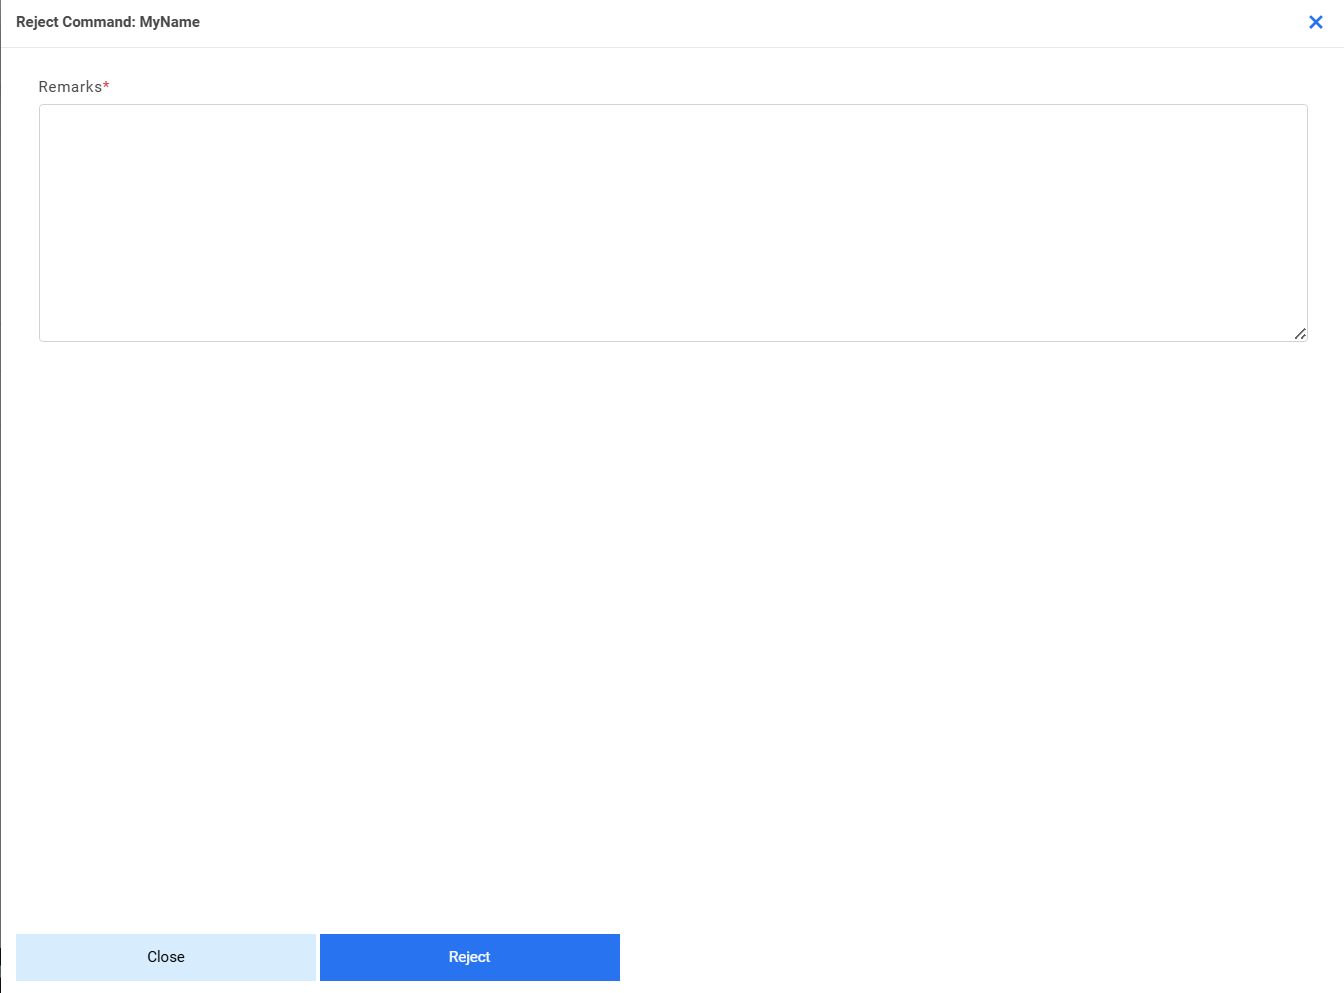
- Provide valid remarks for rejection and click on Reject.
- Below alert appears:
Figure 18. Reject Command (Cont.) 
- The rejected command now appears in Rejected tab.
Figure 19. Reject Command (Cont.) 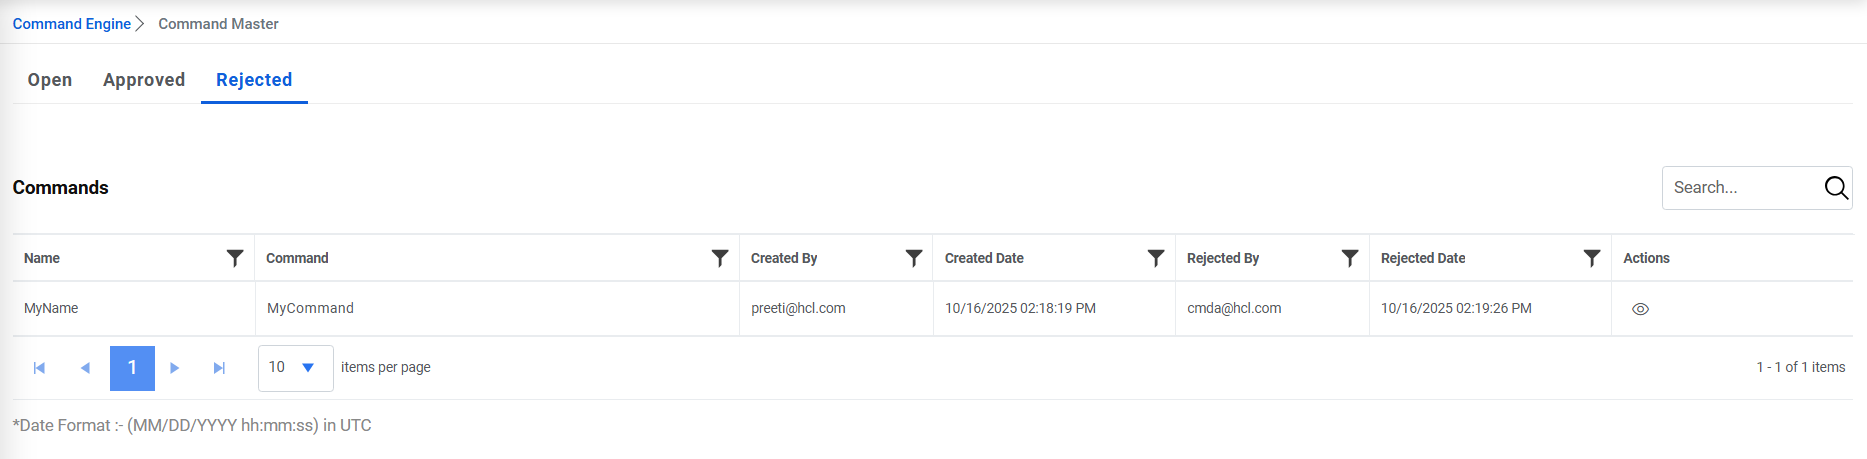
Command Scheduler
This screen allows user to schedule the commands created earlier to be executed on a target device.
To schedule the command, go to Command Engine then Command scheduler page.
Disclaimer: We’re not responsible for any sort of validation on the commands being executed nor are we responsible for the execution on target device as Ansible is responsible for this.
- Click on
 icon, below slider opens:
Figure 20. Command Scheduler 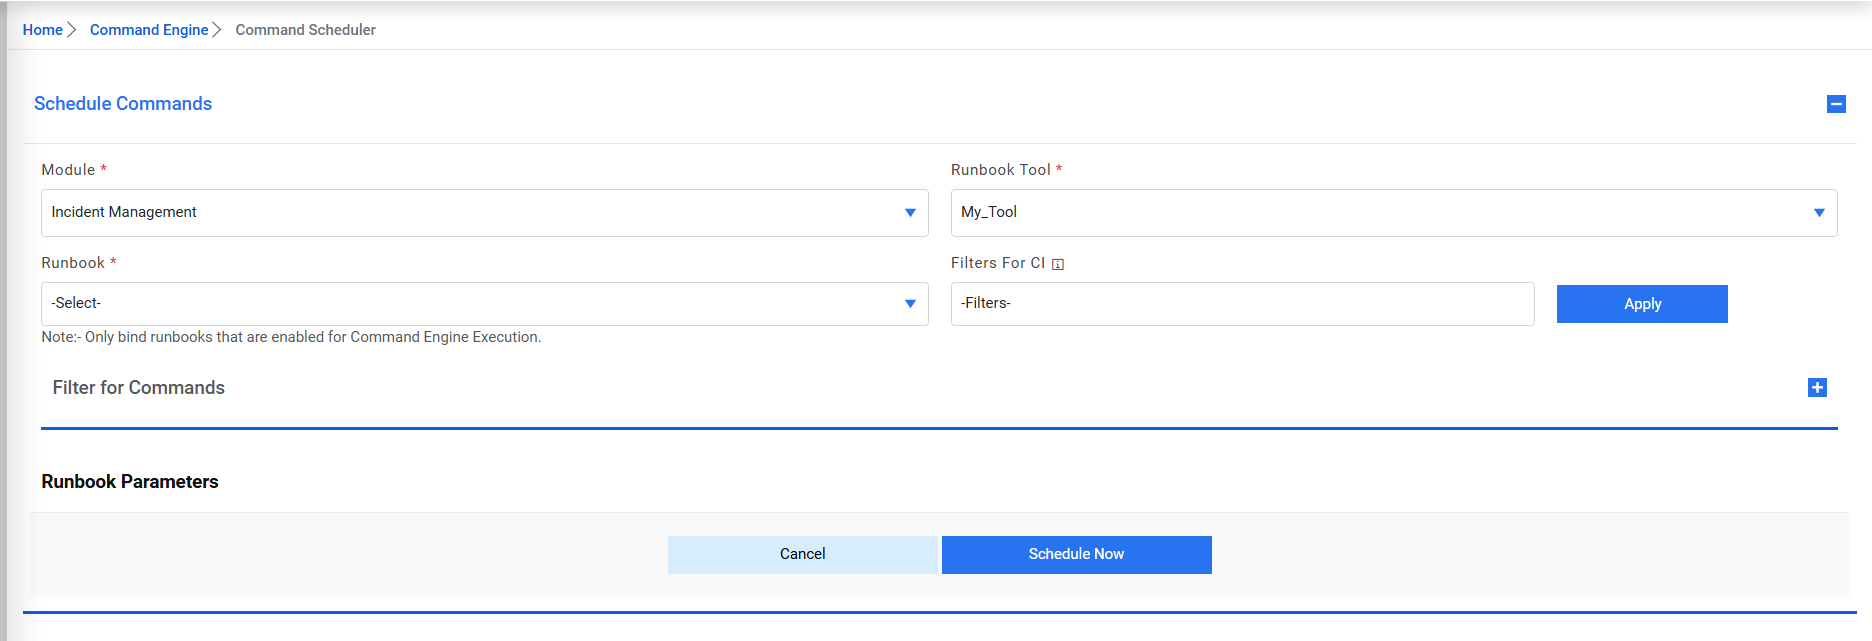 Note:User can schedule only those commands that have been enabled for Command Engine Execution on Manage Runbooks page.
Figure 21. Command Scheduler (Cont.) 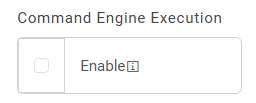
- Select Runbook Tool, Runbook to be scheduled, and Filters for CI
Figure 22. Command Scheduler (Cont.) 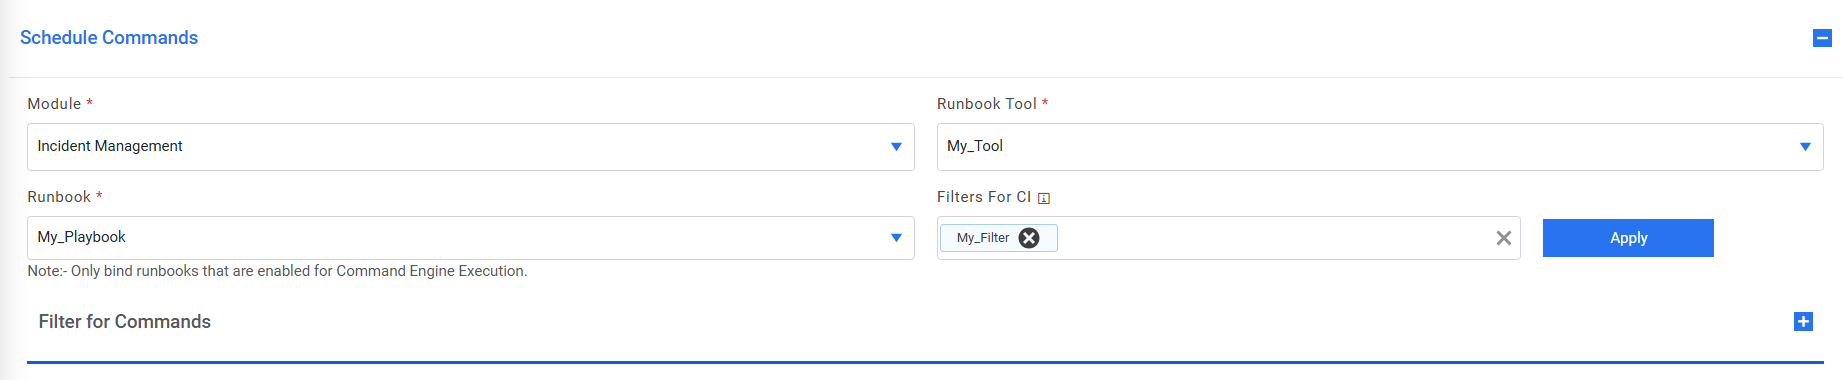
- Select applicable filters for the command. Only commands that are satisfied
by these filters will be applicable for execution.
Figure 23. Command Scheduler (Cont.) 
- Select the appropriate type and field in runbook parameters.
- Text: User can provide the textual value for the parameter
- SecureText: User can provide the value from any vault
- Command: User can select the commands that have been created based on the filters selected for commands.
- CI: User can select the CIs based in the filters selected for
CI.
Figure 24. Runbook parameters 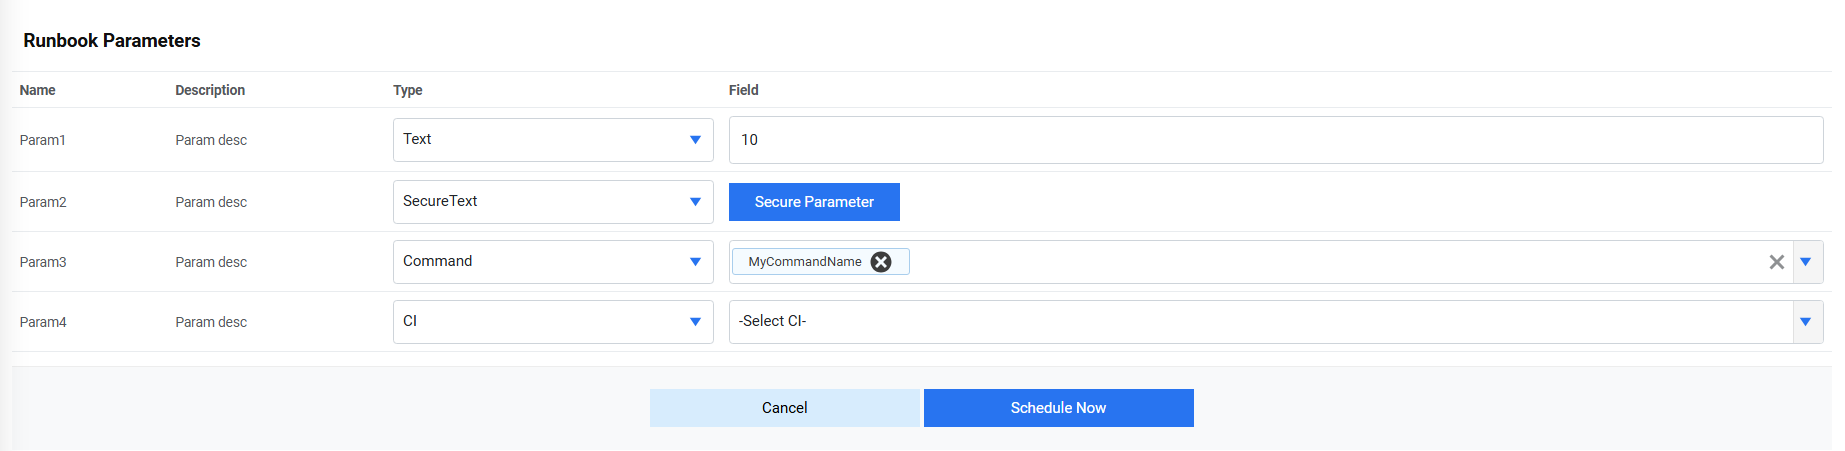
- Click on Schedule Now.
- A ticket has been created with prefix CMD that can be viewed on Tickets console. User can track its execution and status.