
MCP Generator
Overview
The MCP Generator is a self-service tool that creates a downloadable MCP server from an API definition you upload. Instead of hand-writing configuration, you import a supported JSON-based specification and receive a ready-to-use MCP
This guide covers three tasks:
- Generate an MCP server from an API collection.
- Run the generated server locally.
- Test the running server with the MCP Test Tool before connecting it to an agent.
server boilerplate. The generated server exposes your API requests as MCP tools, so AI agents can call your APIs.
Before You Begin
- Access to the Gateway Client and the required key to log in.
- An API definition or Postman Collection file in one of the supported formats listed below.
| Format | Supported version |
| Postman Collection | v2.0 / v2.1 |
| Swagger | 2.0 |
| OpenAPI | 3.x |
| OpenAPI file type | JSON / YAML |
Generate an MCP Server
- Open the MCP Generator
- Log in to the Gateway Client with the required key.
- Open the Tools grid (the nine-dot icon in the top bar) and select MCP Generator.
- The following Tools grid in the Gateway Client lists API Test Tool, MCP
Generator, MCP Test Tool and MCP Health Monitor appears on the
screen.
Figure 1. The Tools grid in the Gateway Client list MCP Generator 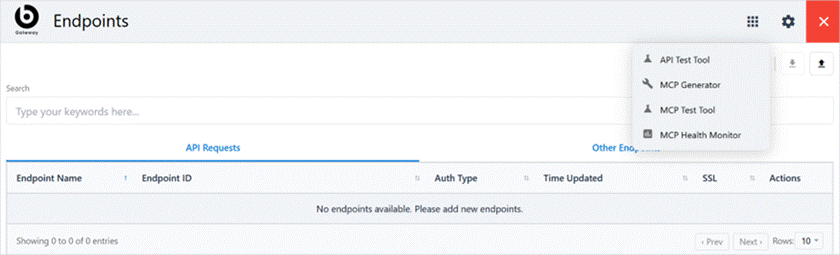
- Import your API collection:
- On the Generate a MCP Server page, locate the Import APIs Collection panel.
- Click Browse file and select the API definition or Postman Collection file you want to import. Make sure it uses a supported format.
- The Generate a MCP Server page. The Import APIs Collection panel is
required and accepts Postman v2.0/v2.1, Swagger 2.0 and OpenAPI 3.x
(JSON or YAML).
Figure 2. The Generate a MCP Server page 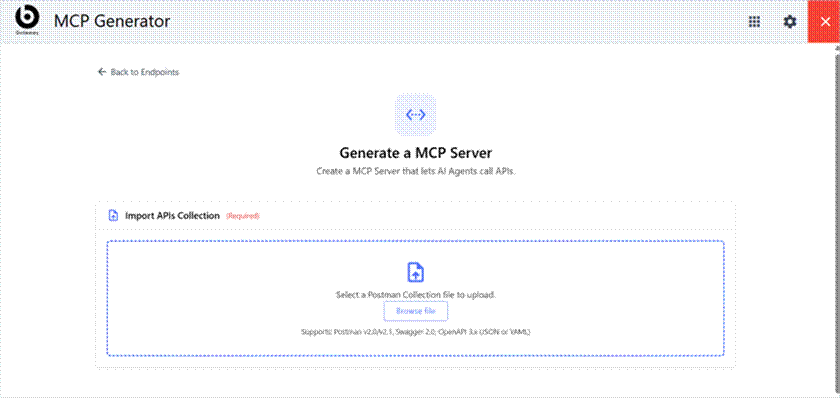 Note:The Import APIs Collection field is required. You must upload a supported API collection or specification before you can proceed.
Supported files are Postman Collection v2.1 and v2.0 JSON, OpenAPI 3.x JSON, and Swagger 2.0 JSON. The same OpenAPI and Swagger documents can be YAML (.yaml or .yml).
A sample API collection:
{
"info": {
"name": "MCP Generator Sample",
"schema": "https://schema.getpostman.com/json/collection/v2.1.0/collection.json"
},
"item": [
{
"name": "List pets",
"request": {
"method": "GET",
"header": [],
"url": "https://httpbin.org/get?limit=10"
}
},
{
"name": "Create pet",
"request": {
"method": "POST",
"header": [
{ "key": "Content-Type", "value": "application/json" }
],
"body": {
"mode": "raw",
"raw": "{ \"name\": \"Ada\", \"status\": \"available\" }"
},
"url": "https://httpbin.org/post"
}
}
]
}
- Select the requests to include:
- After the file is uploaded, the collection is listed below the import panel. Click it to open the request selection dialog.
- Under Root Requests, Select the requests you want to expose as MCP tools.
- Use Deselect All or clear to reset your selection. The footer shows how many requests are selected.
- The request selection dialog for the imported collection. Each root request shows its HTTP method, name and URL; the footer shows the selection count and the Save Changes button.
- Click Save Changes.
Figure 3. The request selection dialog for the imported collection 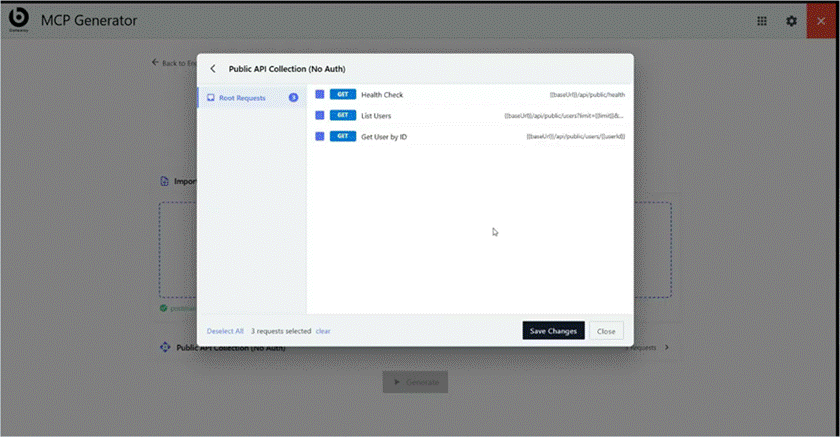
- Generate the server:
- Confirm the import panel shows a green check with your file name and detected format, and that your selected requests appear under the collection.
- Click Generate.
- The collection imported successfully, with three requests selected
(Health Check, List Users, Get User by ID) and the Generate button
ready.
Figure 4. Generate MCP Server 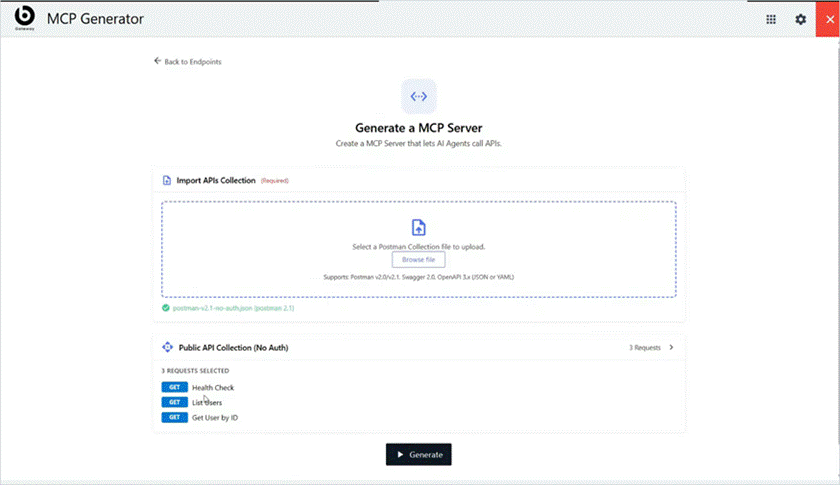
- When generation completes, the tool confirms success and downloads the server as a ZIP file.
- The “MCP server generated successfully” confirmation, showing the
downloaded ZIP location (example path) and the Run locally
checklist.
Figure 5. Success Message 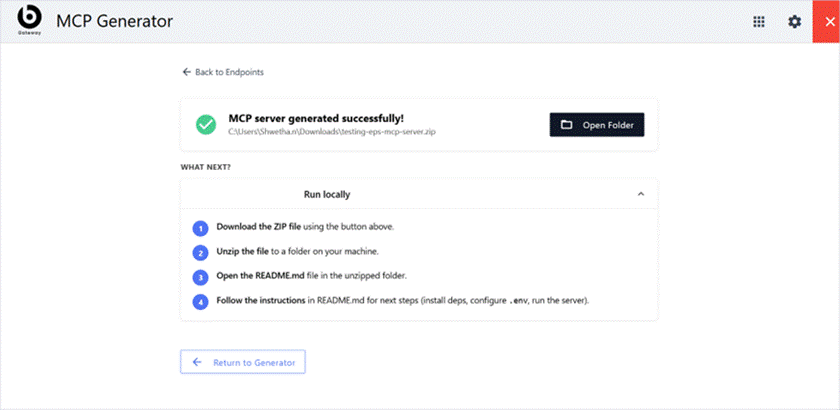
Run the Generated Server Locally
- Download the ZIP file using the button on the confirmation page (or use Open Folder to locate it).
- Unzip the file to a folder on your machine.
- Open the README.md file in the unzipped folder.
- Follow the instructions in README.md for the next steps: install
dependencies, configure the .env file, and start the server.Tip:Click Return to Generator on the confirmation page to generate another server. The exact commands, environment variables and port are specific to your generated project, so always follow its README.md.
Test the Server with the MCP Test Tool
Use the MCP Test Tool to verify connectivity and functionality before using the server with an agent. You can connect to the server, view the tools it exposes, supply parameters, run a tool, and review the response or any error. Follow the below-mentioned steps:
- Open the MCP Test Tool:
- Open the Tools grid and select MCP Test Tool.
Figure 6. Selecting MCP Test Tool from the Tools grid 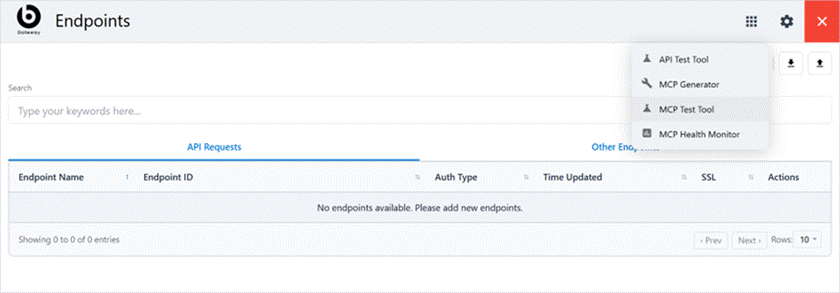
- Open the Tools grid and select MCP Test Tool.
- Enter the connection details:
- Confirm the Transport Type (for example, Streamable HTTP).
- Enter the Server URL where your generated server is running, for example http://localhost:3001/mcp.
- Set Authentication as required by your server (the default is None).
- Optional: use Enable SSL Verification toggle (disable it for expired or self-signed certificates) and expand Custom Headers if your server needs them.
- Click Connect.
Figure 7. The Connection panel before connecting 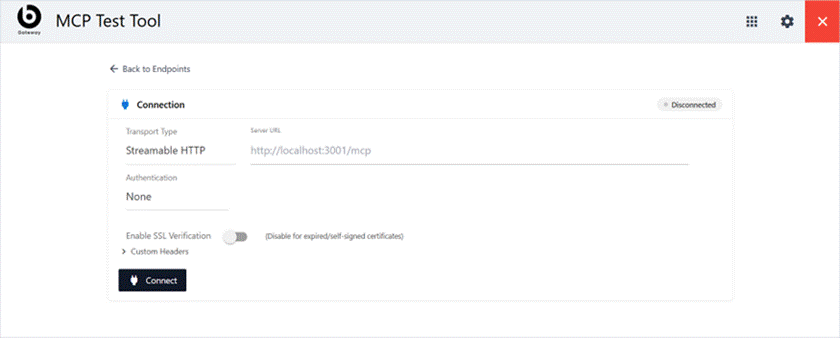
- Review the discovered tools:
- When the connection succeeds, a “Connected successfully” message appears and the status changes to Connected.
- The Discovered Tools panel lists the three tools (health_check, list_users and get_user_by_id.) returned by the server’s list-tools call.
- Use Refresh to reload the list.
Figure 8. A successful connection 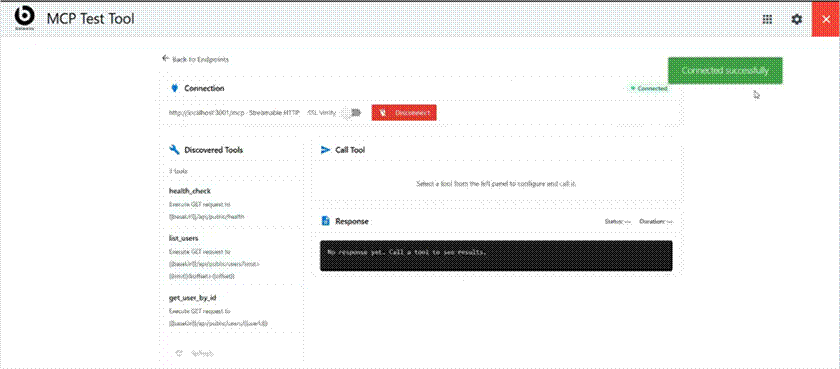
- Call a tool:
- Select a tool in the Discovered Tools panel.
- Click Call Tool.
- Review the Response panel, which shows the status, the duration and the returned content or error.
- The Response panel shows Status: Success, the call duration and the JSON
returned by the server.
Figure 9. Calling Health Check 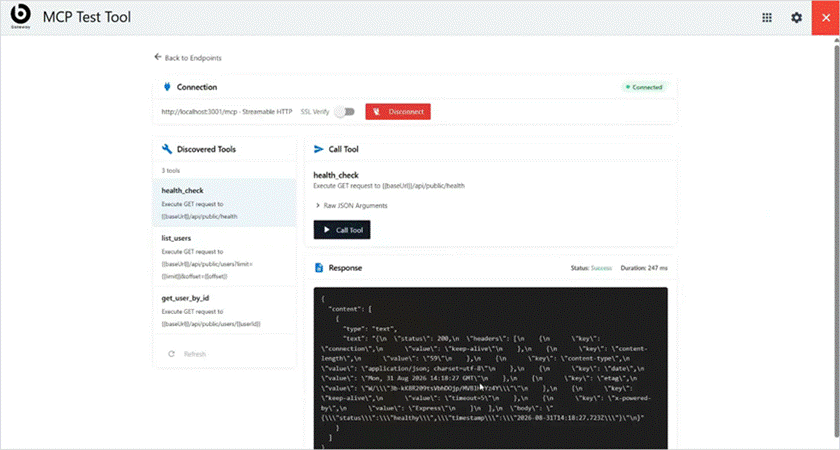
- Disconnect:When you finish testing, click Disconnect. The status returns to Disconnected and a confirmation message appears on the screen.
Figure 10. Disconnected Status 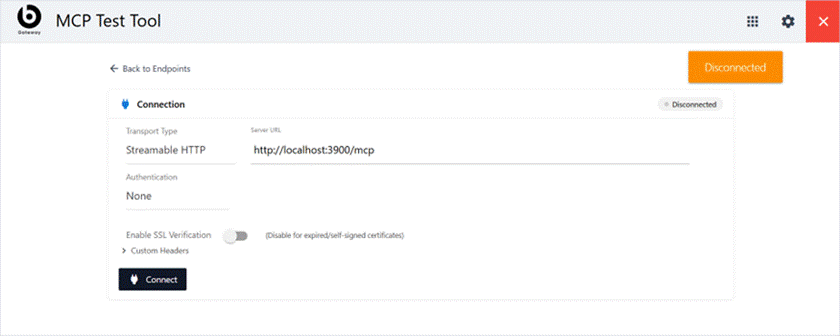
- Quick Reference:
Element What it does Tools grid Opens the MCP Generator, MCP Test Tool, API Test Tool and MCP Health Monitor. Import APIs Collection Required. Upload a Postman, Swagger or OpenAPI file. Root Requests dialog Choose which requests become MCP tools; confirm with Save Changes. Generate Build the MCP server and download it as a ZIP file. Server URL Address of your running MCP server in the MCP Test Tool. Discovered Tools Tools returned by the server’s list-tools call. Call Tool / Response Runs the selected tool and shows status, duration and output. Disconnect Ends the test session with the MCP server.