
External Agent Console
Overview
The A2A (Agent-to-Agent) Hub provides a standardized and extensible protocol for connecting external AI agents published by l third-party using their A2A Server. It enables agents to securely exchange messages, trigger actions, and collaborate with external systems in a consistent manner.
Traditionally, external systems and AI agents interact with the platform through high-level API calls, which can limit interoperability and two-way communication. The A2A protocol extends this capability by allowing partner systems, third-party AI models, and external automation agents to connect directly with the agent framework.
The A2A Hub provides a centralized interface to discover, add, connect, manage, and monitor external agents, enabling seamless collaboration between internal and external AI agents.
Accessing External Agents
- Log in to the tenant.
- From the left navigation panel, select External Agents, or log in directly using
the following URL: <https://tenant-url/admin#/genai/external_agents>
Figure 1. External Agents page, accessed from the left navigation panel. 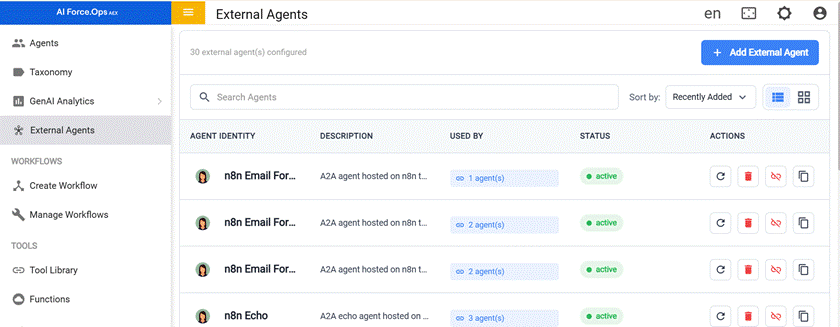 The External Agents page displays the following options:
- List View and Grid View
- Add External Agent button
- External and Published agent sections
- Search bar
- Filters
- Sort By options
- Agent cards with actions such as Refresh, Delete, Connect, Disconnect, Deactivate, and Reactivate
Switch Between List and Grid Views
This feature allows you to view external agents in either list or grid format.
- Select the List View or Grid View option.
Figure 2. External agents shown in List View. 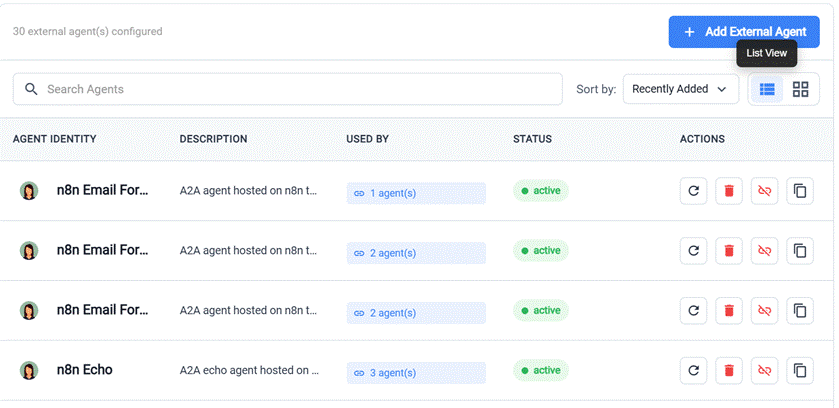
Figure 3. External agents shown in Grid View. 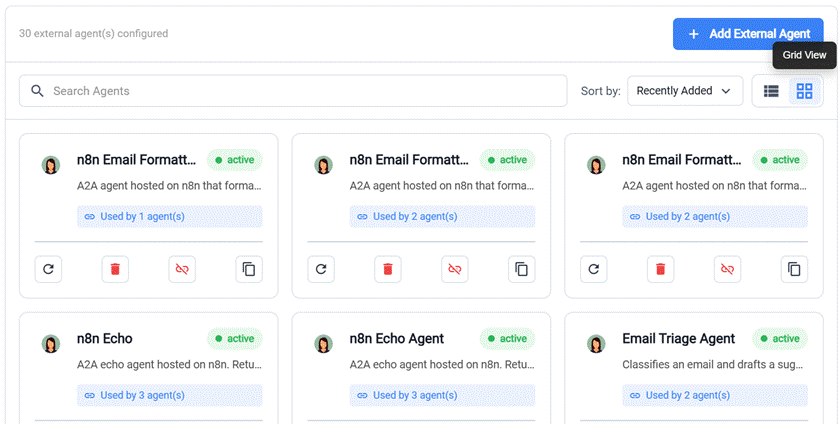 Note:The selected view displays all available external agents with their relevant information. Switching between views does not affect or remove agent data.
Sort External Agents
- Recently Added
- Name
- Status
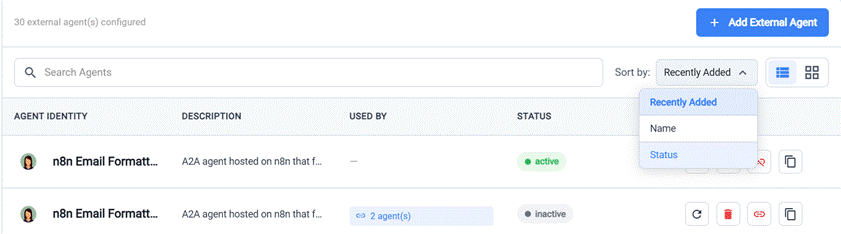
To sort agents:
- From the Sort By drop-down list, select the required option.
- Switch between List View and Grid View to view the sorting order.
- The external agents are displayed according to the selected sorting criterion in both views.
Add an External Agent
To add an external agent:
- Click Add External Agent.
Figure 5. Add External Agent button on the External Agents page. 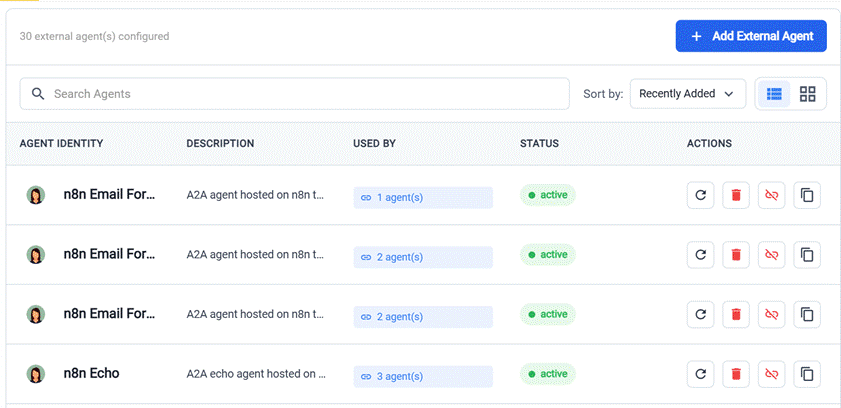
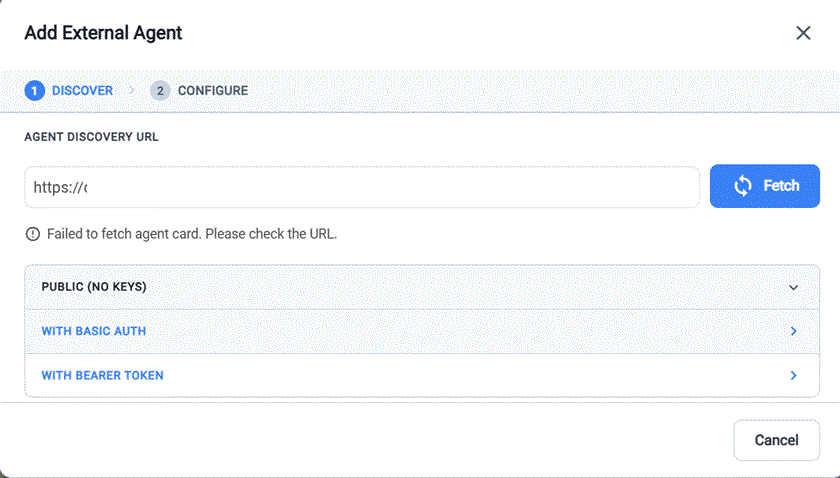
- Enter the Agent Discovery URL and click Fetch.
Figure 6. Step of the Add External Agent dialog, with the Agent Discovery URL field and Fetch button. 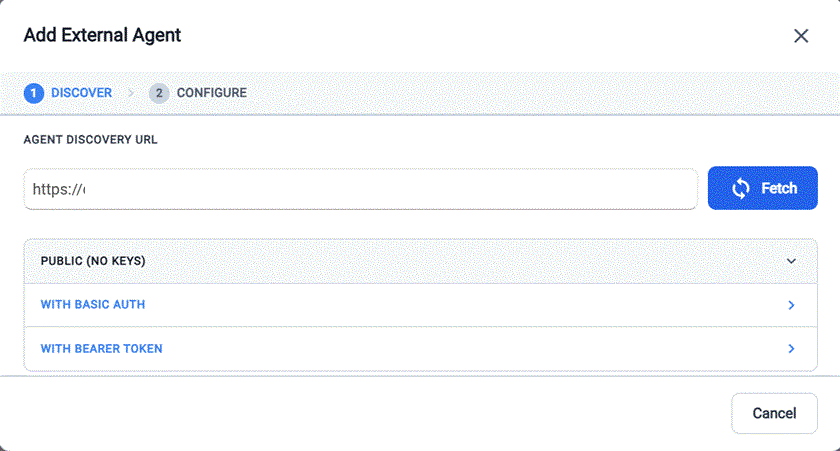
- Click Add Agent. The external agent is added successfully and is displayed in
both Grid View and List View.
Figure 7. Configure step showing the agent preview and security setup before clicking Add Agent. 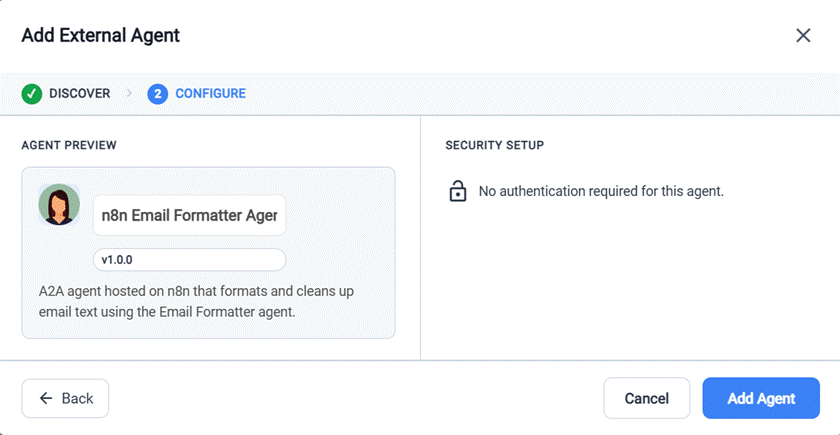
- If an agent with the specified name already exists, a message is displayed
indicating that the agent’s name is already in use, and the Add Agent
button is disabled.
Figure 8. Configure step showing the duplicate-name validation message and the disabled Add Agent button. 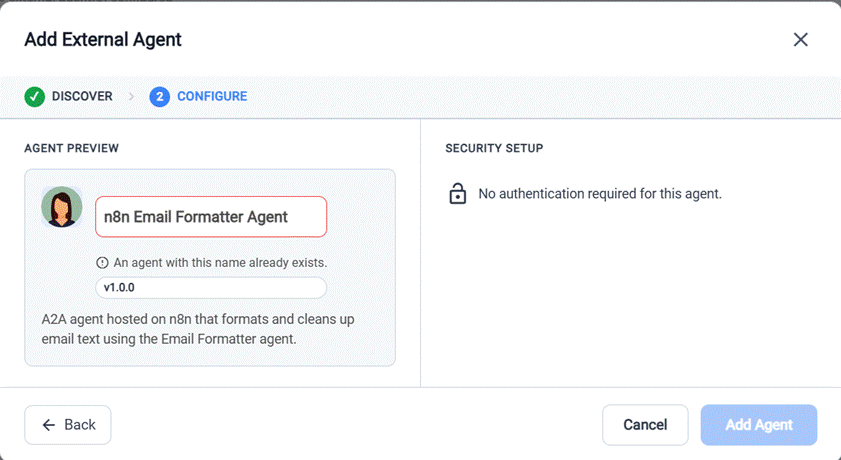
- Click Add External Agent.
- Enter the invalid Agent Discovery URL.
- Click Fetch.
- The agent details cannot be retrieved, and an error message such as "Failed to fetch agent card. Please check the URL" is displayed.
Delete an External Agent
To permanently remove an external agent:
- Locate the required external agent.
- Click the Delete icon.
Figure 10. Delete icon in the Actions column of the External Agents list. 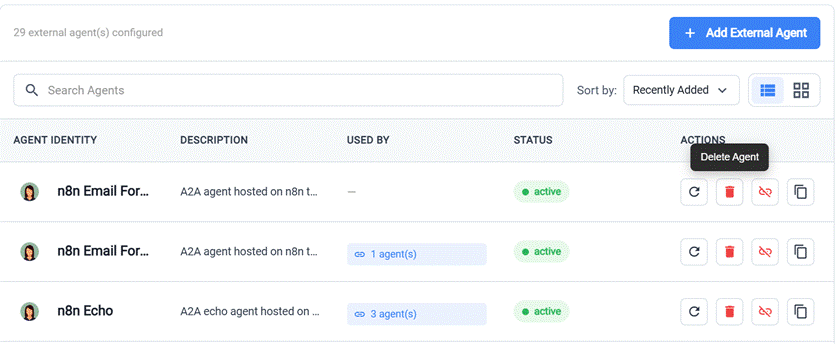
- Confirm the deletion by clicking OK.
- The selected external agent is removed from the A2A Hub.
- An external agent cannot be deleted while it is associated with other agents.
- For deleting associated agents, first go to each agent using the given link,
remove them and once removed from all the agents, press the Re-check button and
delete option will appear on successful removal, and delete the agent.
Figure 11. “Cannot Delete” message shown when an agent is still in use by other agents. 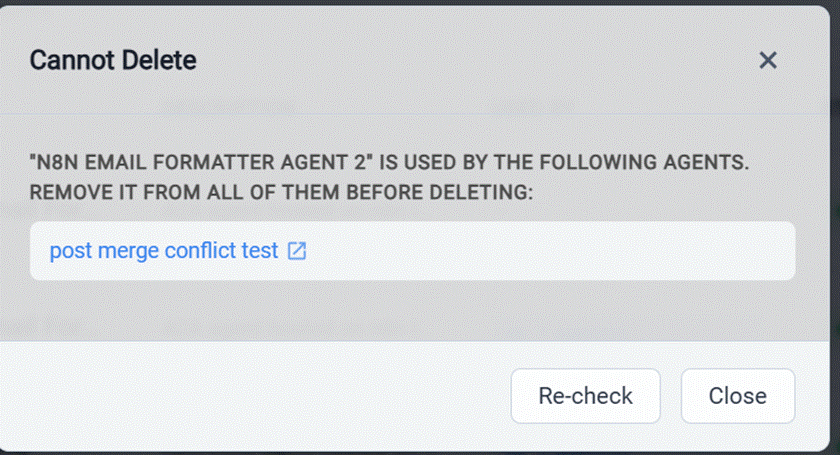
Deactivate an External Agent
Deactivate an external agent when you do not want it to remain active. Once deactivated LLM will not redirect any request to this external agent.
- Locate the required external agent.
- Click the Deactivate option.
Figure 12. Deactivate action available on an active external agent. 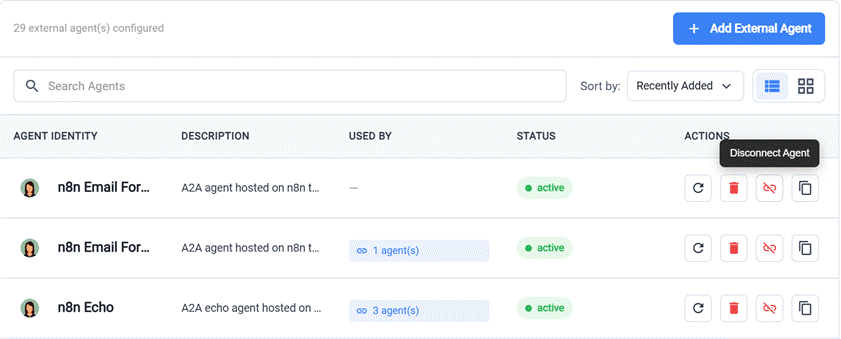
- Click OK to confirm.
- The external agent is successfully deactivated, and its status is updated accordingly.
Reactivate an External Agent
Reactivate a previously deactivated external agent.
- Locate the deactivated external agent.
- Click the Connect Agent option.
Figure 13. Connect Agent action is available on an inactive external agent. 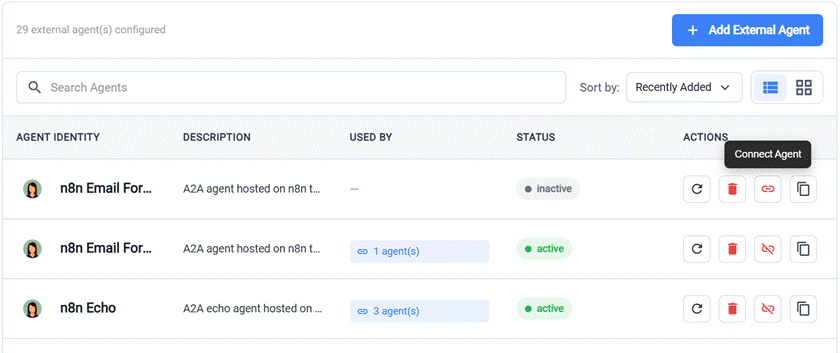
- Click OK to confirm.
- The external agent is successfully reactivated and its status is updated.
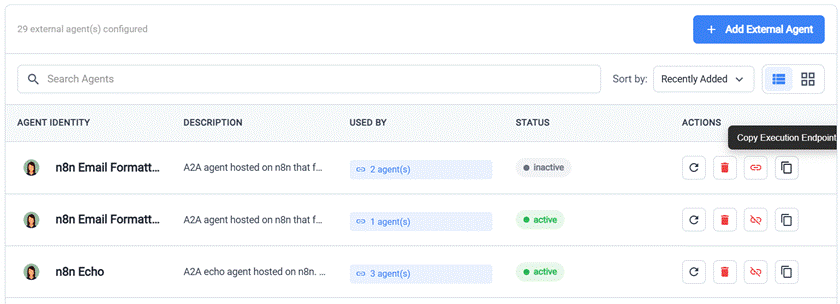
Copy Execution Endpoint
Search for an External Agent
The Search option allows you to quickly locate an existing external agent.
- Enter the agent’s name or relevant search text in the Search bar.
- View the search results.
- If the agent exists, the matching agent is displayed. If no matching agent is
found, the search results are displayed as empty.
Figure 15. Search bar filtering external agents by name. 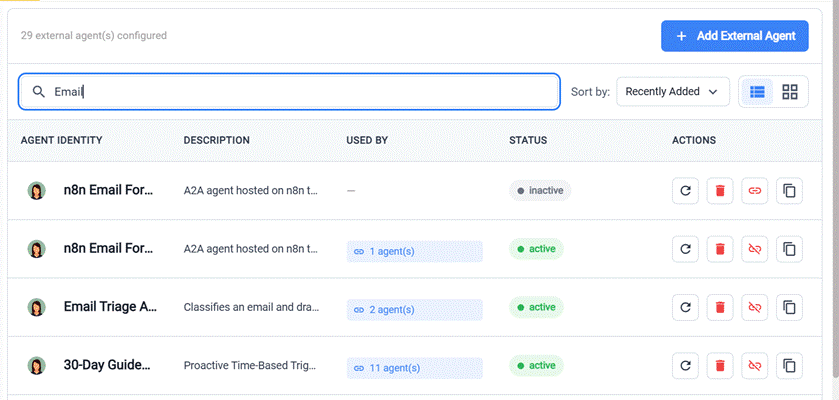
Test Connection for an External Agent
The Test Connection action allows you to check if the information associated with an external agent is still valid or not. It verifies whether the configured external agent is reachable and available for communication.
If authentication creds have changed external agents will not be reachable and in this case, we need to delete the exiting one and onboard again so that we can save latest creds details.
- Locate the required agent card.
- Click Test Connection to check the connectivity of the external agent.
Figure 16. Test Connection action is used to verify agent connectivity. 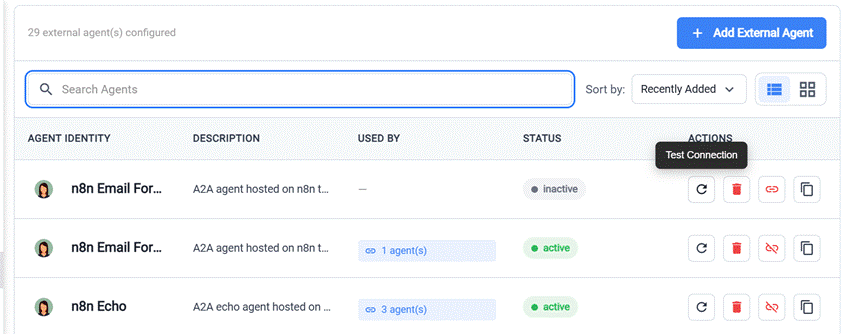
Connect or Disconnect an External Agent
Use the Connect and Disconnect actions to manage the connection status of an external agent.
- Click Connect Agent to establish a connection with the external agent.
Figure 17. Connect Agent action for an external agent. 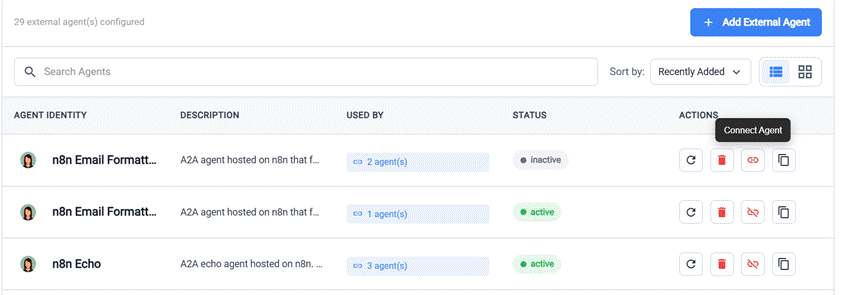
- Click Disconnect Agent to terminate the connection with the external agent.
- The agent status is updated based on the selected action.
Figure 18. Disconnect Agent action for an external agent. 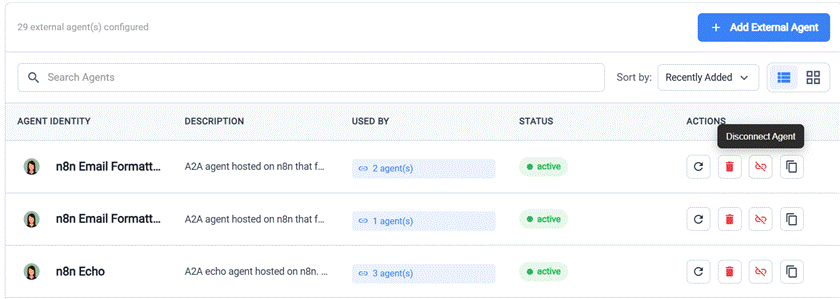 Note:
External agents created in the External Agent Console are available on the Agent Configuration page under the External Agents module.