Adding Tenants
To add a tenant,
- On the Tenants screen, click
.png) .
.It redirects you to the Create Tenant screen.
Figure 1. Adding Tenants 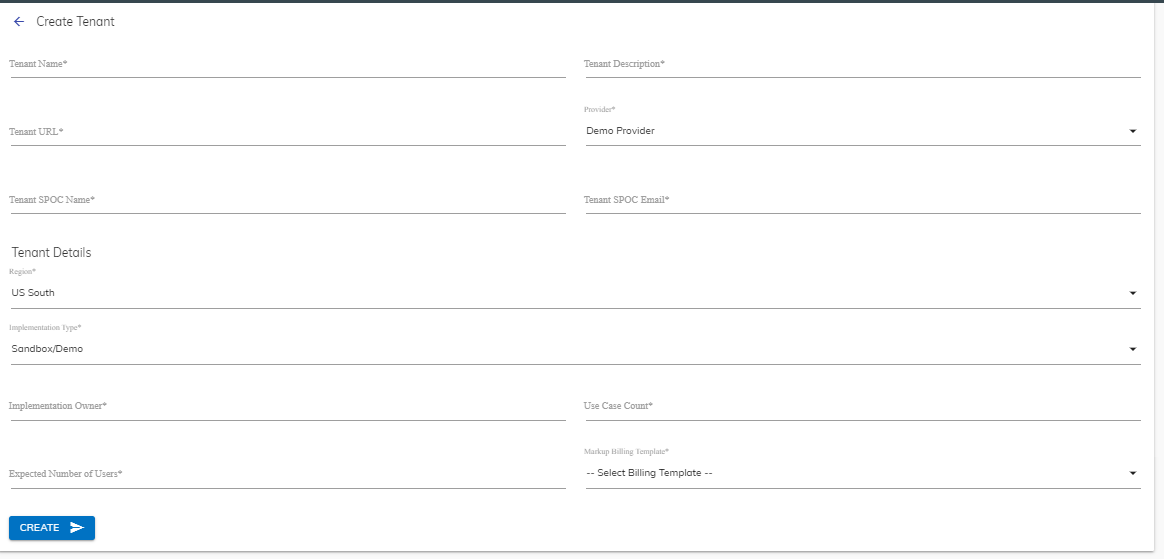
- In the Create Tenant form, specify the following information:
Table 1. Create Tenant Fields Fields Sub-Fields Description Create Tenants Tenant Name Name of the instance you want to create Tenant Description Brief detail of the instance you want to create Tenant URL URL to access the tenant instance Tenant SPOC Name Name of the contact person for the tenant. Tenant SPOC Email Email ID of the contact person for the tenant. Tenant Details Region Region where the instance will be deployed.
US South is the primary region for the instance deployment
Implementation Type Sandbox or Standard Implementation Owner Name of the user who manages the access of the end-users to the instance Use case Count Number of use cases that can be added to the instance Expected Numbers of Users Number of users allowed to use the instance Markup Billing Template The markup value to be added on top of the face value. The templates listed here are generated in the Creating Markup Billing for Tenants section. - Click Submit and it provisions the following services for an instance:
- Environment
- Cognitive Engine
- Database
The new tenant is listed in the list of tenants shown in Managing Tenants