Keycloak integration with CDP
This page describes on how to integrate Keycloak as an identity provider for the application using User Federation.
To enable Single Sign-On (SSO) for CDP users via Keycloak, the application must be integrated with an instance of Keycloak using the User Federation feature. This setup allows centralized identity management, enhances security, and simplifies user provisioning across environments.
This integration involves:
- Deploying a Keycloak instance using Helm
- Modifying database tables for SSO compatibility
- Configuring realms and uploading custom Keycloak themes
- Updating deployment templates for seamless integration
Deploy Keycloak Using Helm
To deploy Keycloak using Helm chart, follow the steps below:
- Deploy the open-source Keycloak Helm chart in your Kubernetes environment. For more information, refer Deploy Keycloak.
- Ensure proper ingress, database, and storage configurations are set according to your infrastructure needs.
Backup and Modify Database Tables
Before applying schema changes, take a full backup of the following tables to avoid data loss:
OAuthTokenOAuthUserDMPCampaign
Then execute the following SQL commands to support SSO functionality:
ALTER TABLE OAuthToken DROP COLUMN Token;
ALTER TABLE OAuthToken ADD COLUMN Token TEXT;
ALTER TABLE OAuthUser ADD COLUMN IsSSO TINYINT(1) DEFAULT 0;UPDATE DMPCampaign
SET Config = JSON_SET(Config, '$.featureEnablingConfig.isSSO', true)
WHERE CampaignId = <required_campaign_id>;<required_campaign_id> with the actual campaign
identifier.Configure Realm (Tenant) in Keycloak
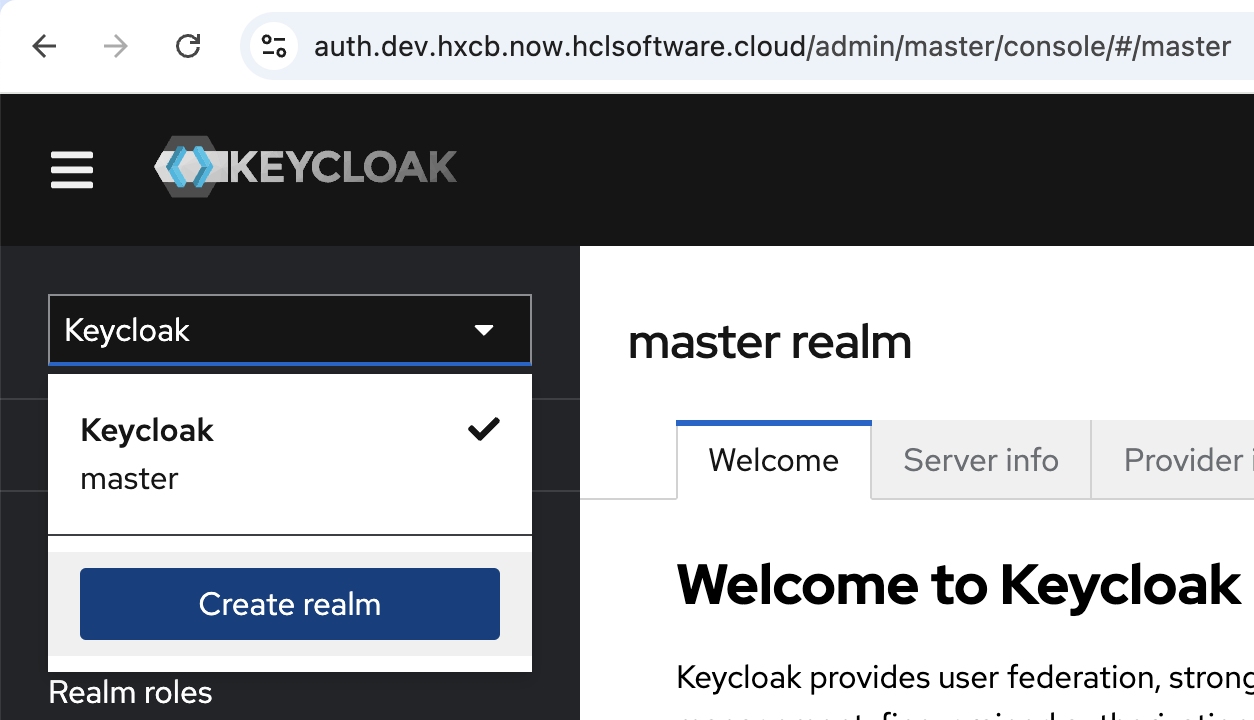
To configure the Realm in Keycloak, follow the steps below:
- Login to the KeyCloak admin console with user and password, and click Create
realm.
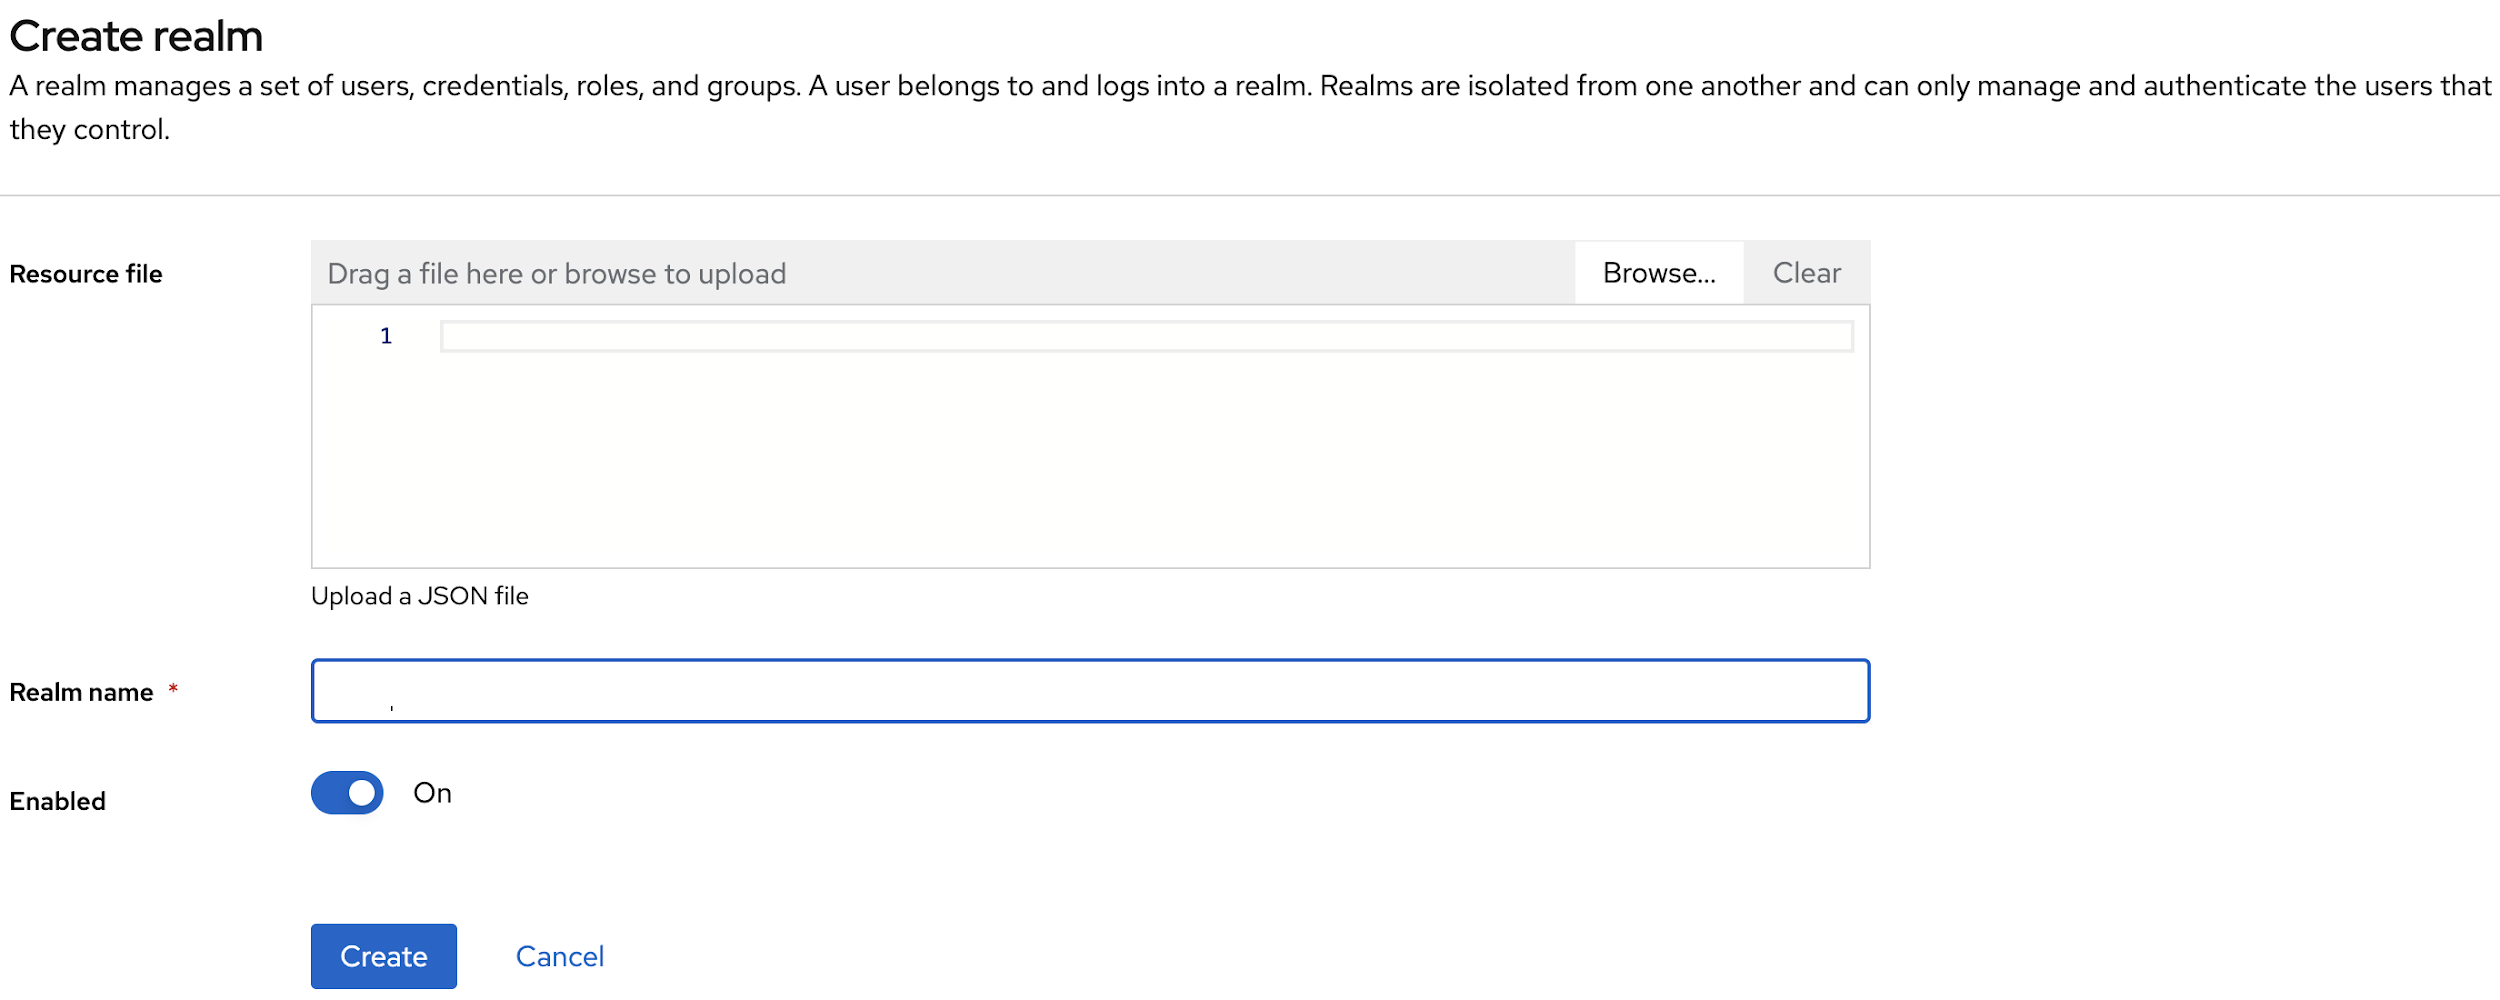
- In the Create realm page, enter realm name and click
Create.
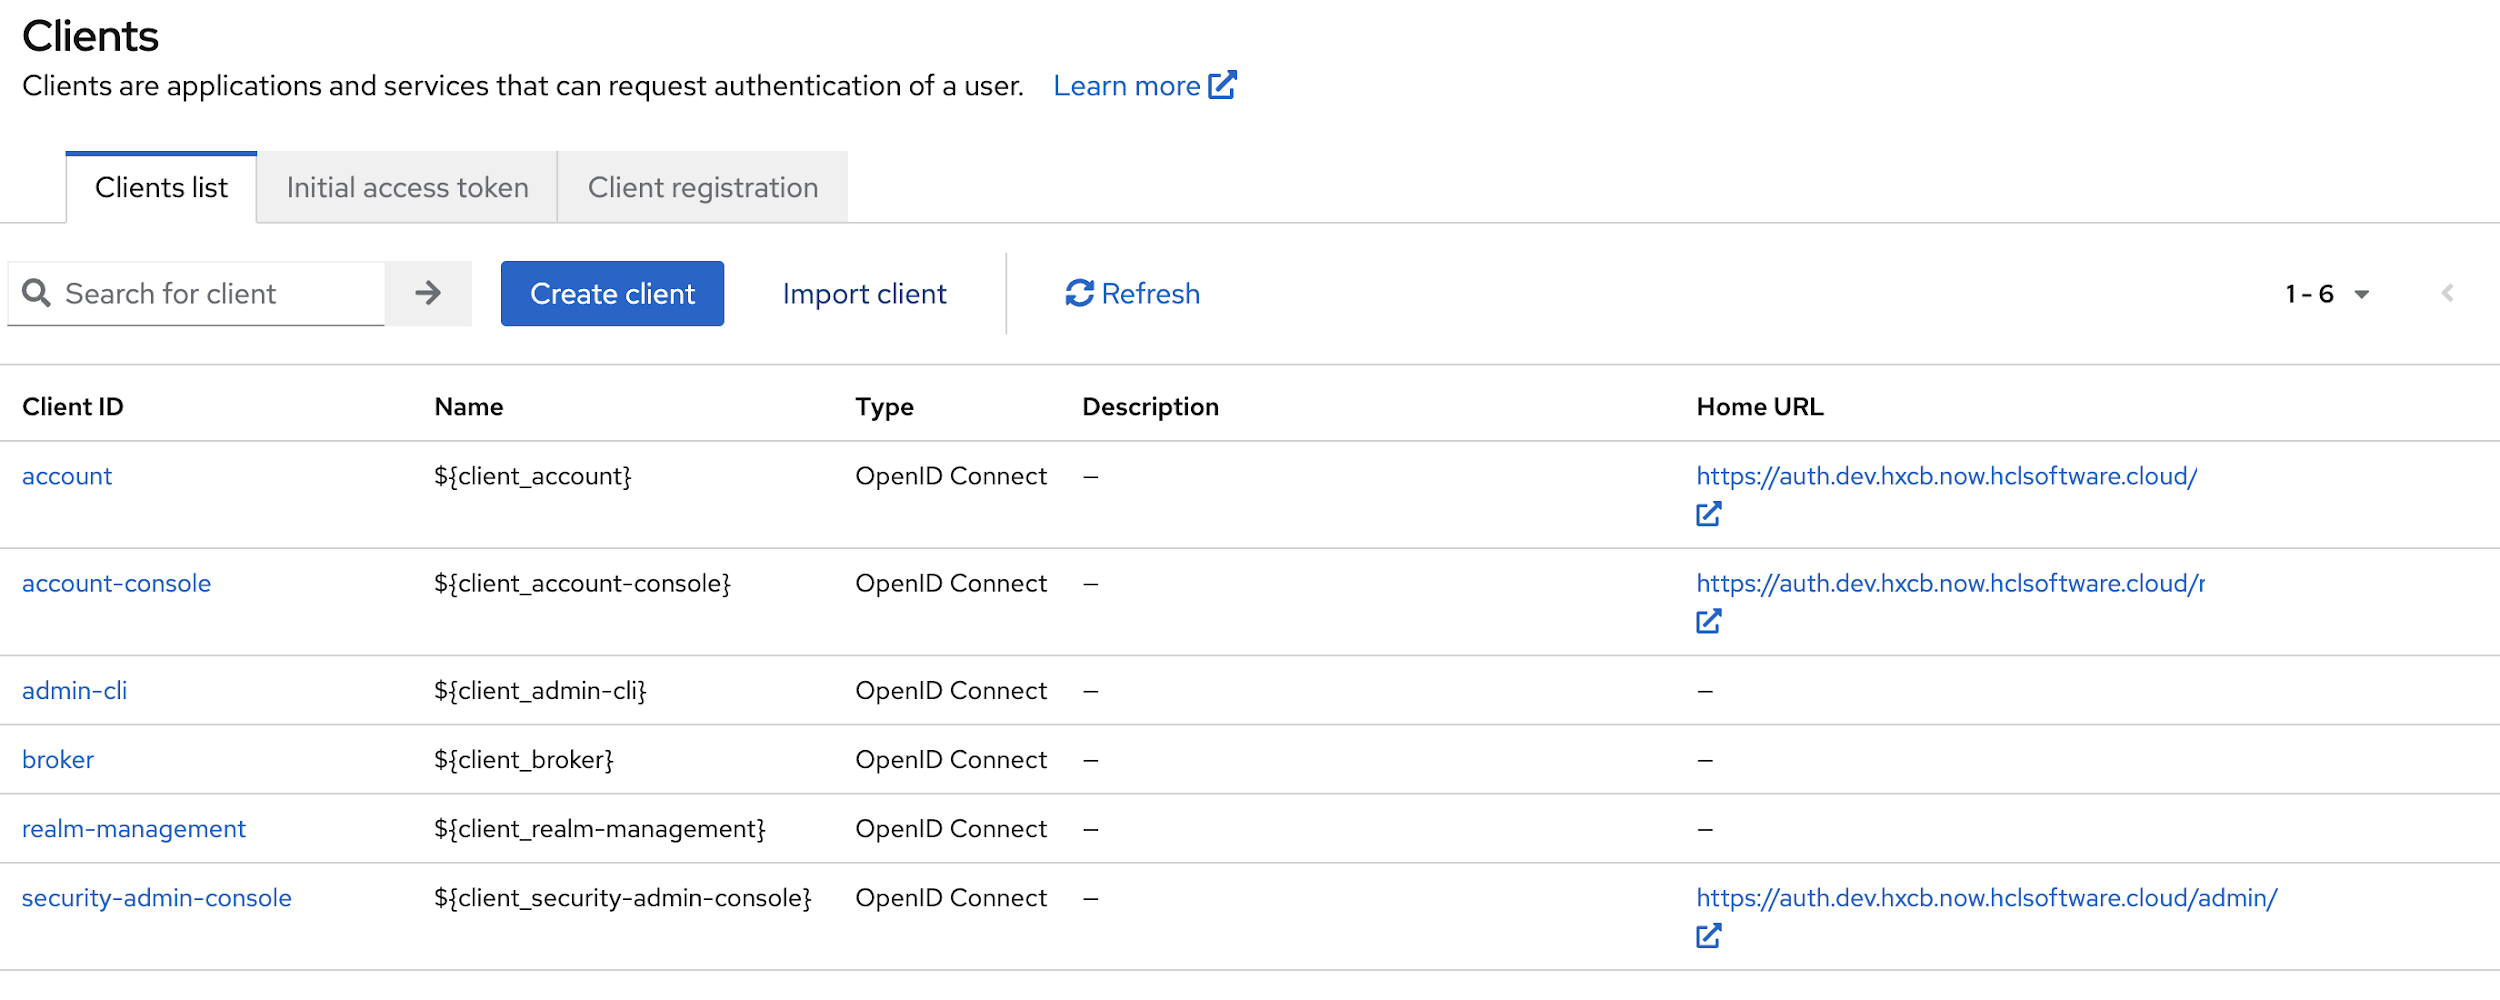
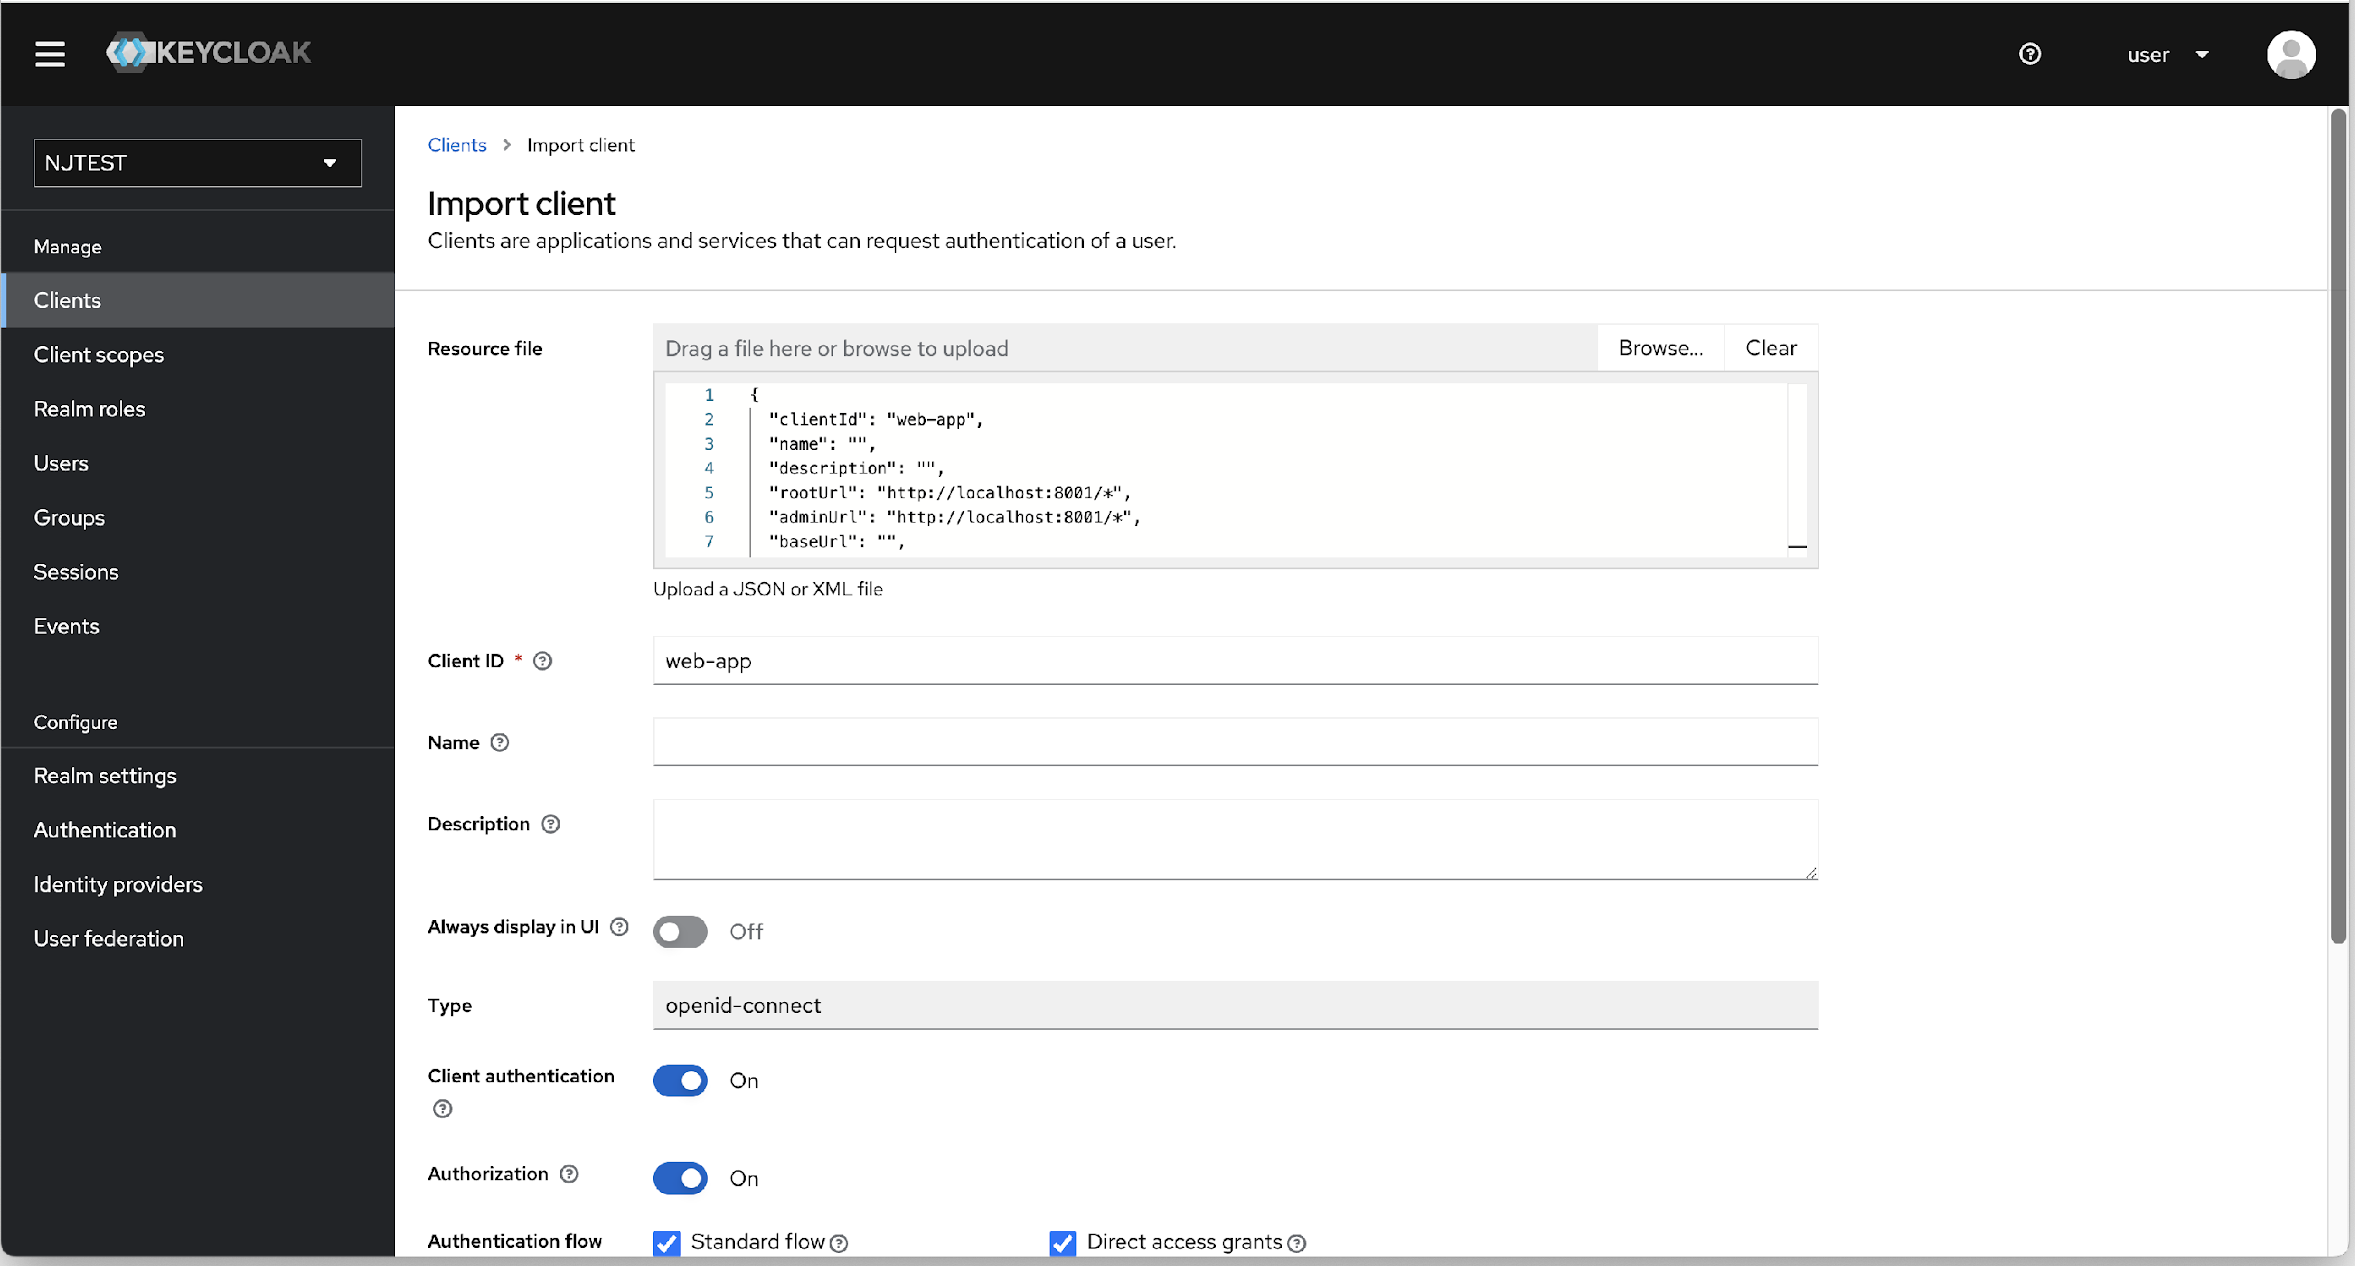
- Now, navigate to Clients page, and click Import client to import the json
file to create a web-app client.
- After uploading the resource file, and enter mandatory fields, click Save
to import.
- After import, open the web-app client and verify the Access
settings page for url details. Replace below the URLs with cdp web-app
application URL like "https://cdp.dev.hxcb.now.hclsoftware.cloud/*" as
shown in the image below.

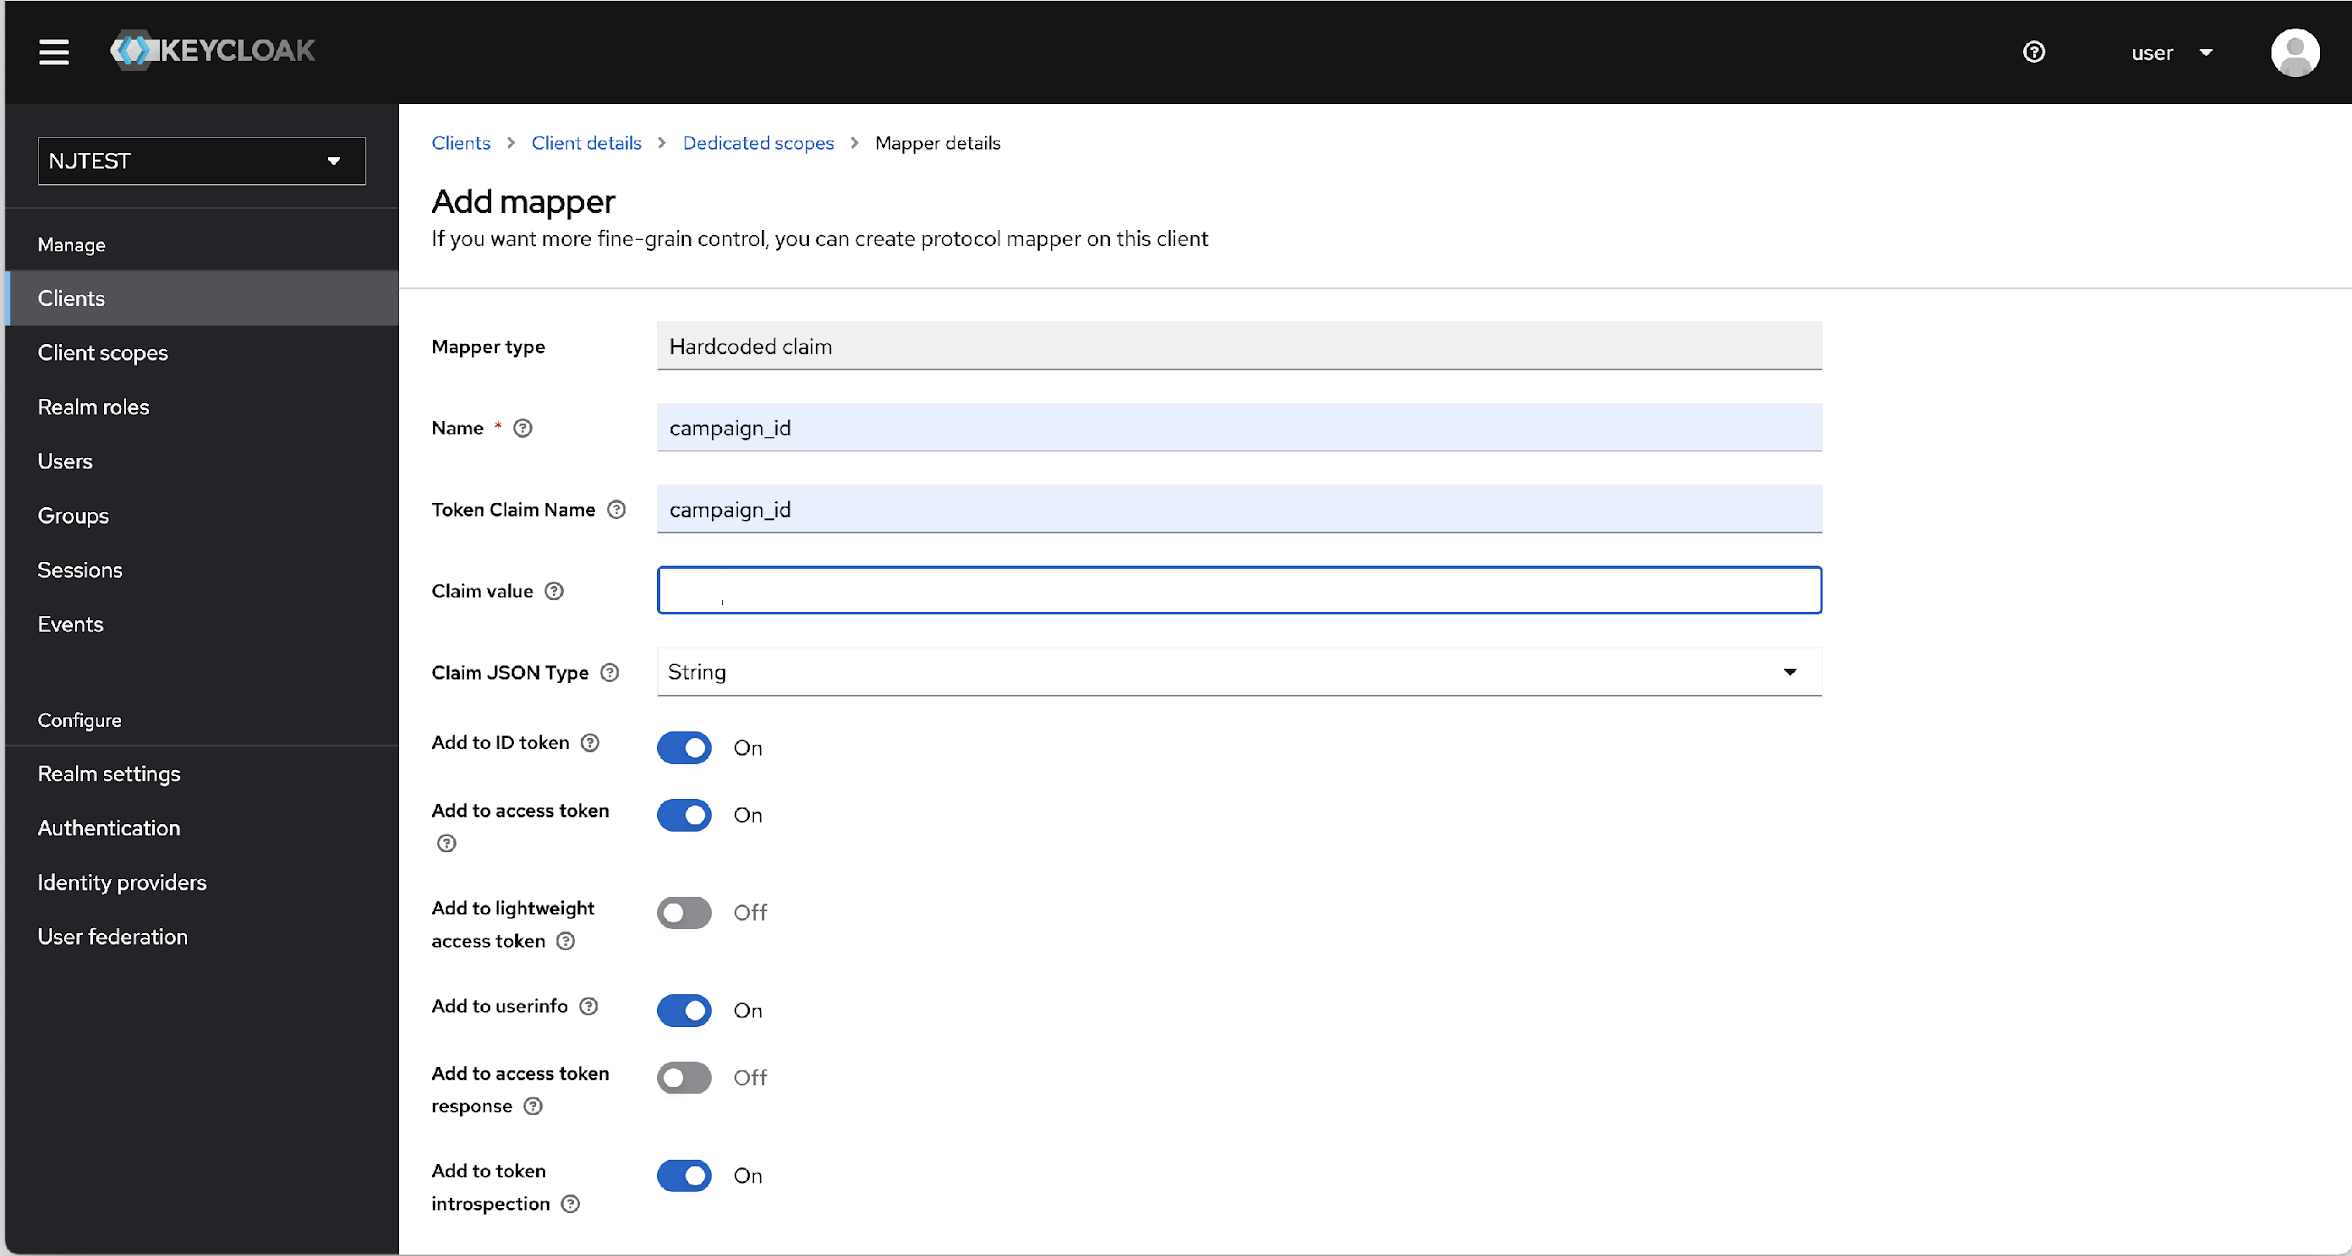
- Navigate to Clients > web-app > Client scopes tab, and
click web-app-dedicate scope.
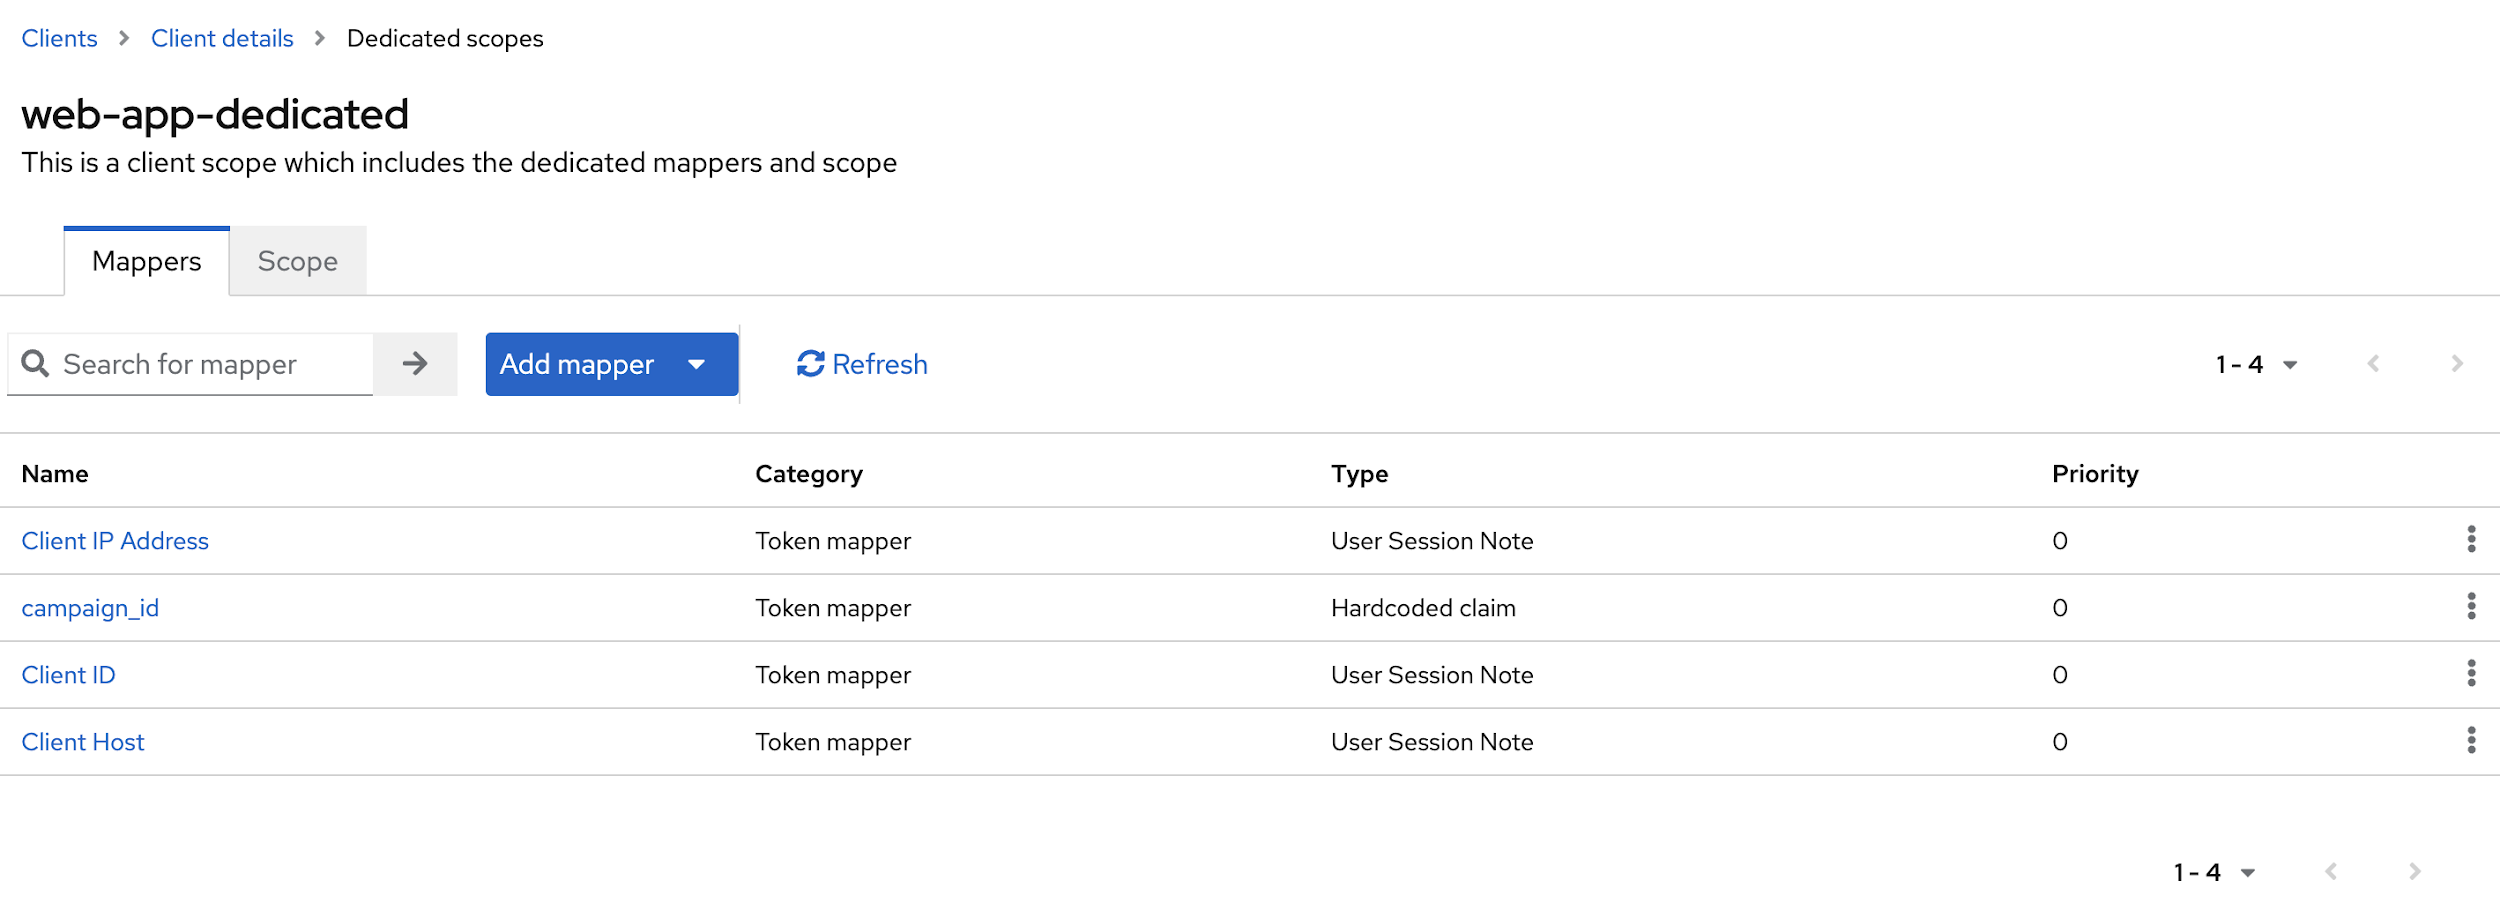
- In the Mappers tab, click campaign_id, and update the "Claim value" with
the tenant id created in VRM db.
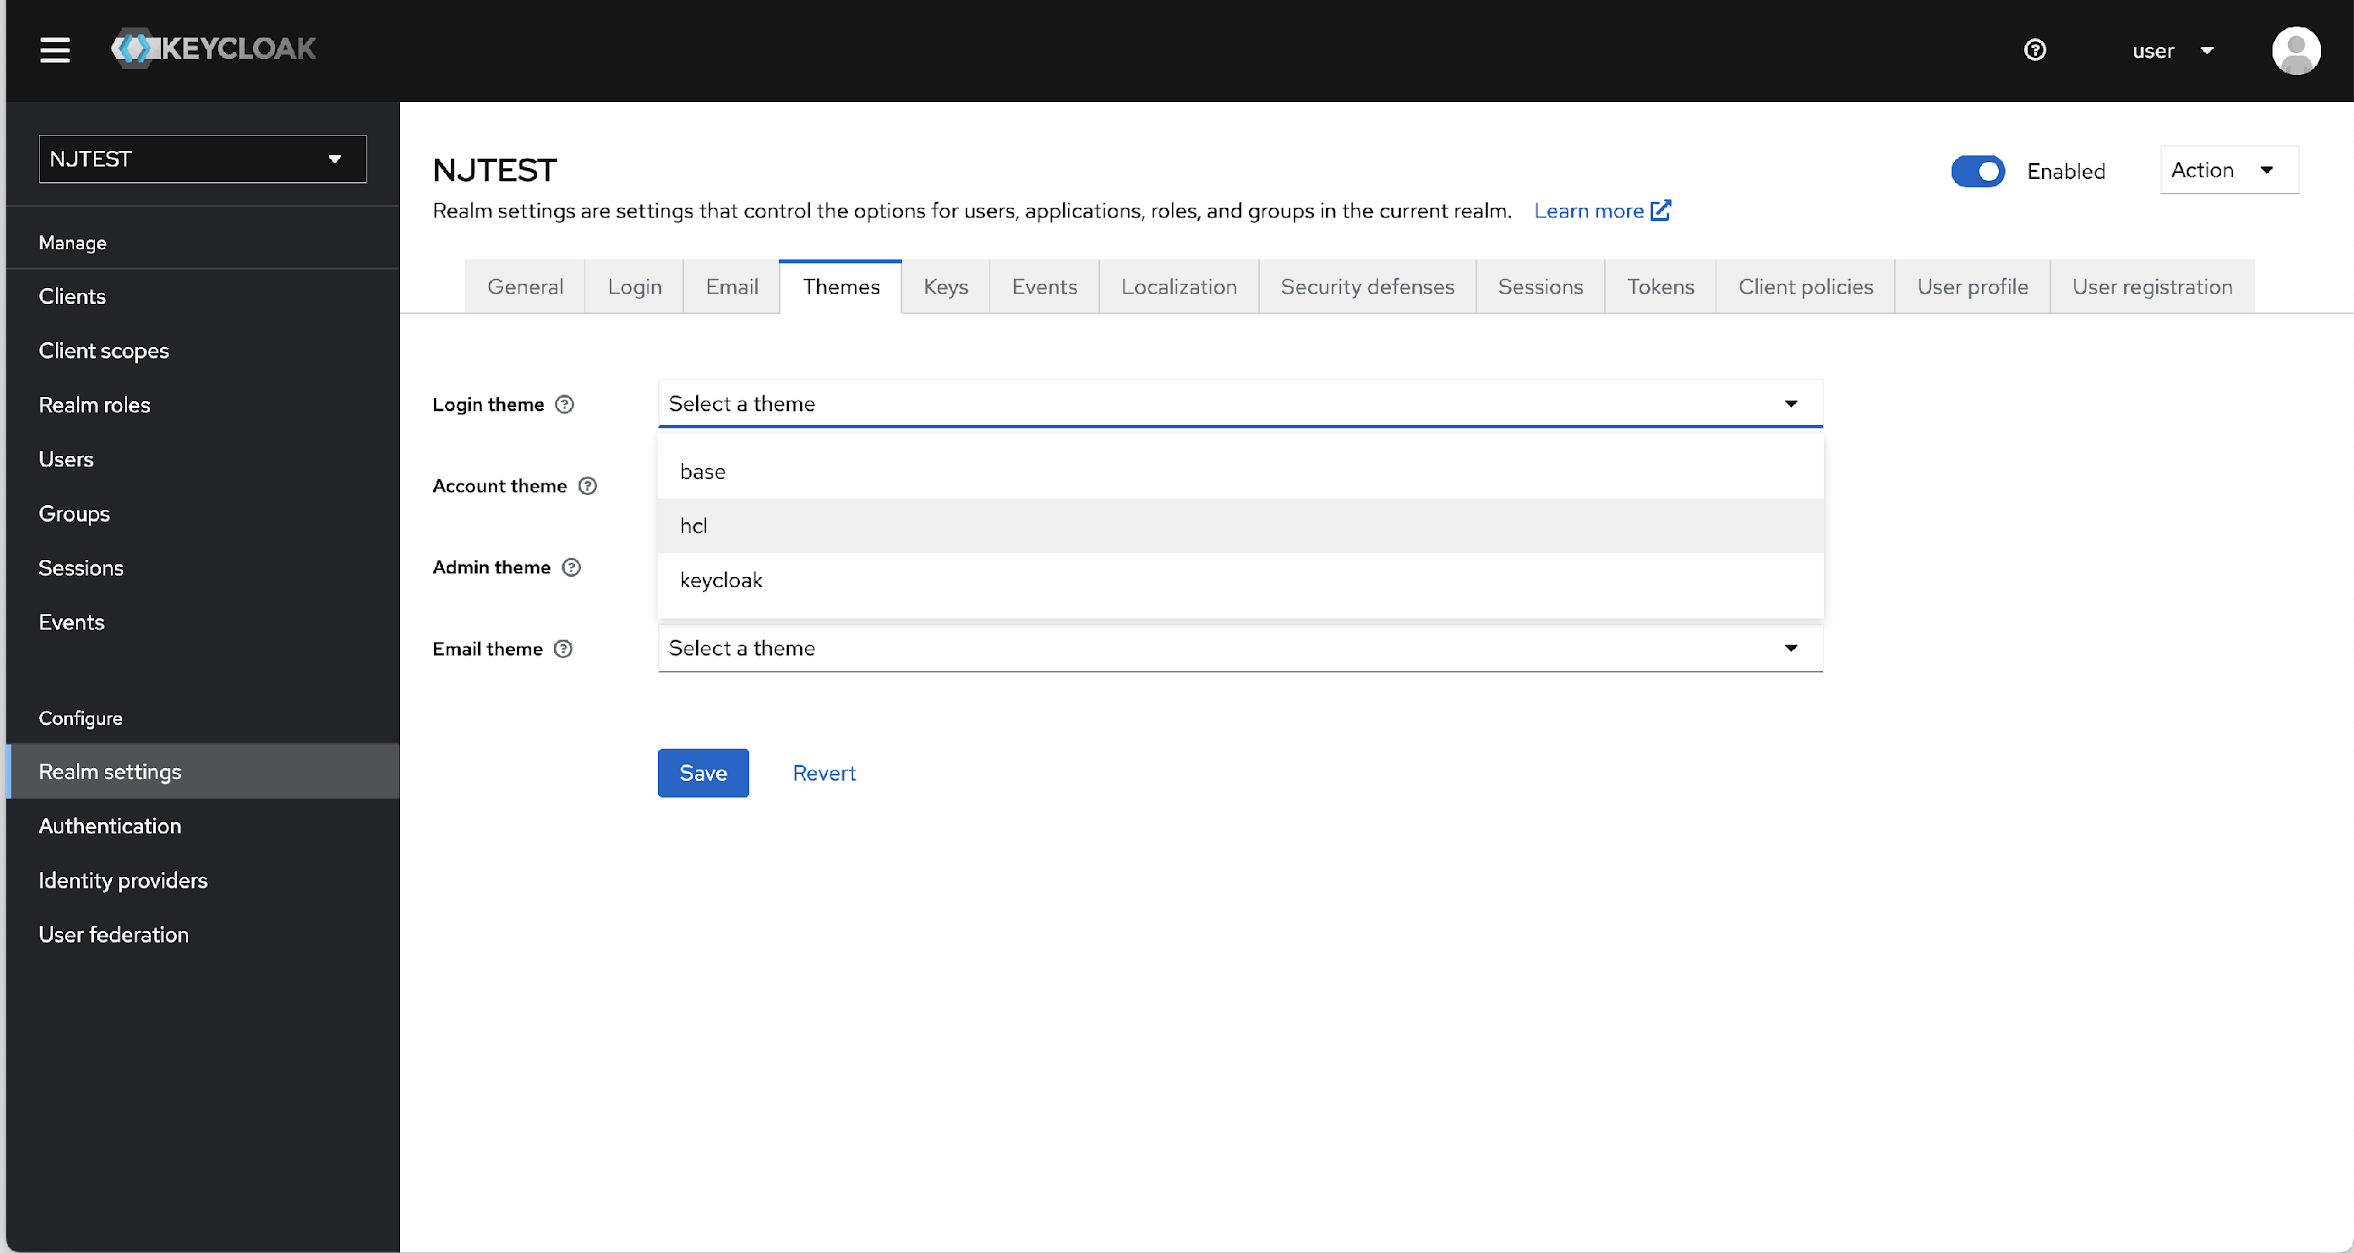
- Now, click the Realm settings> Themes, and in the Login
theme drop-down list, select the hcl option.
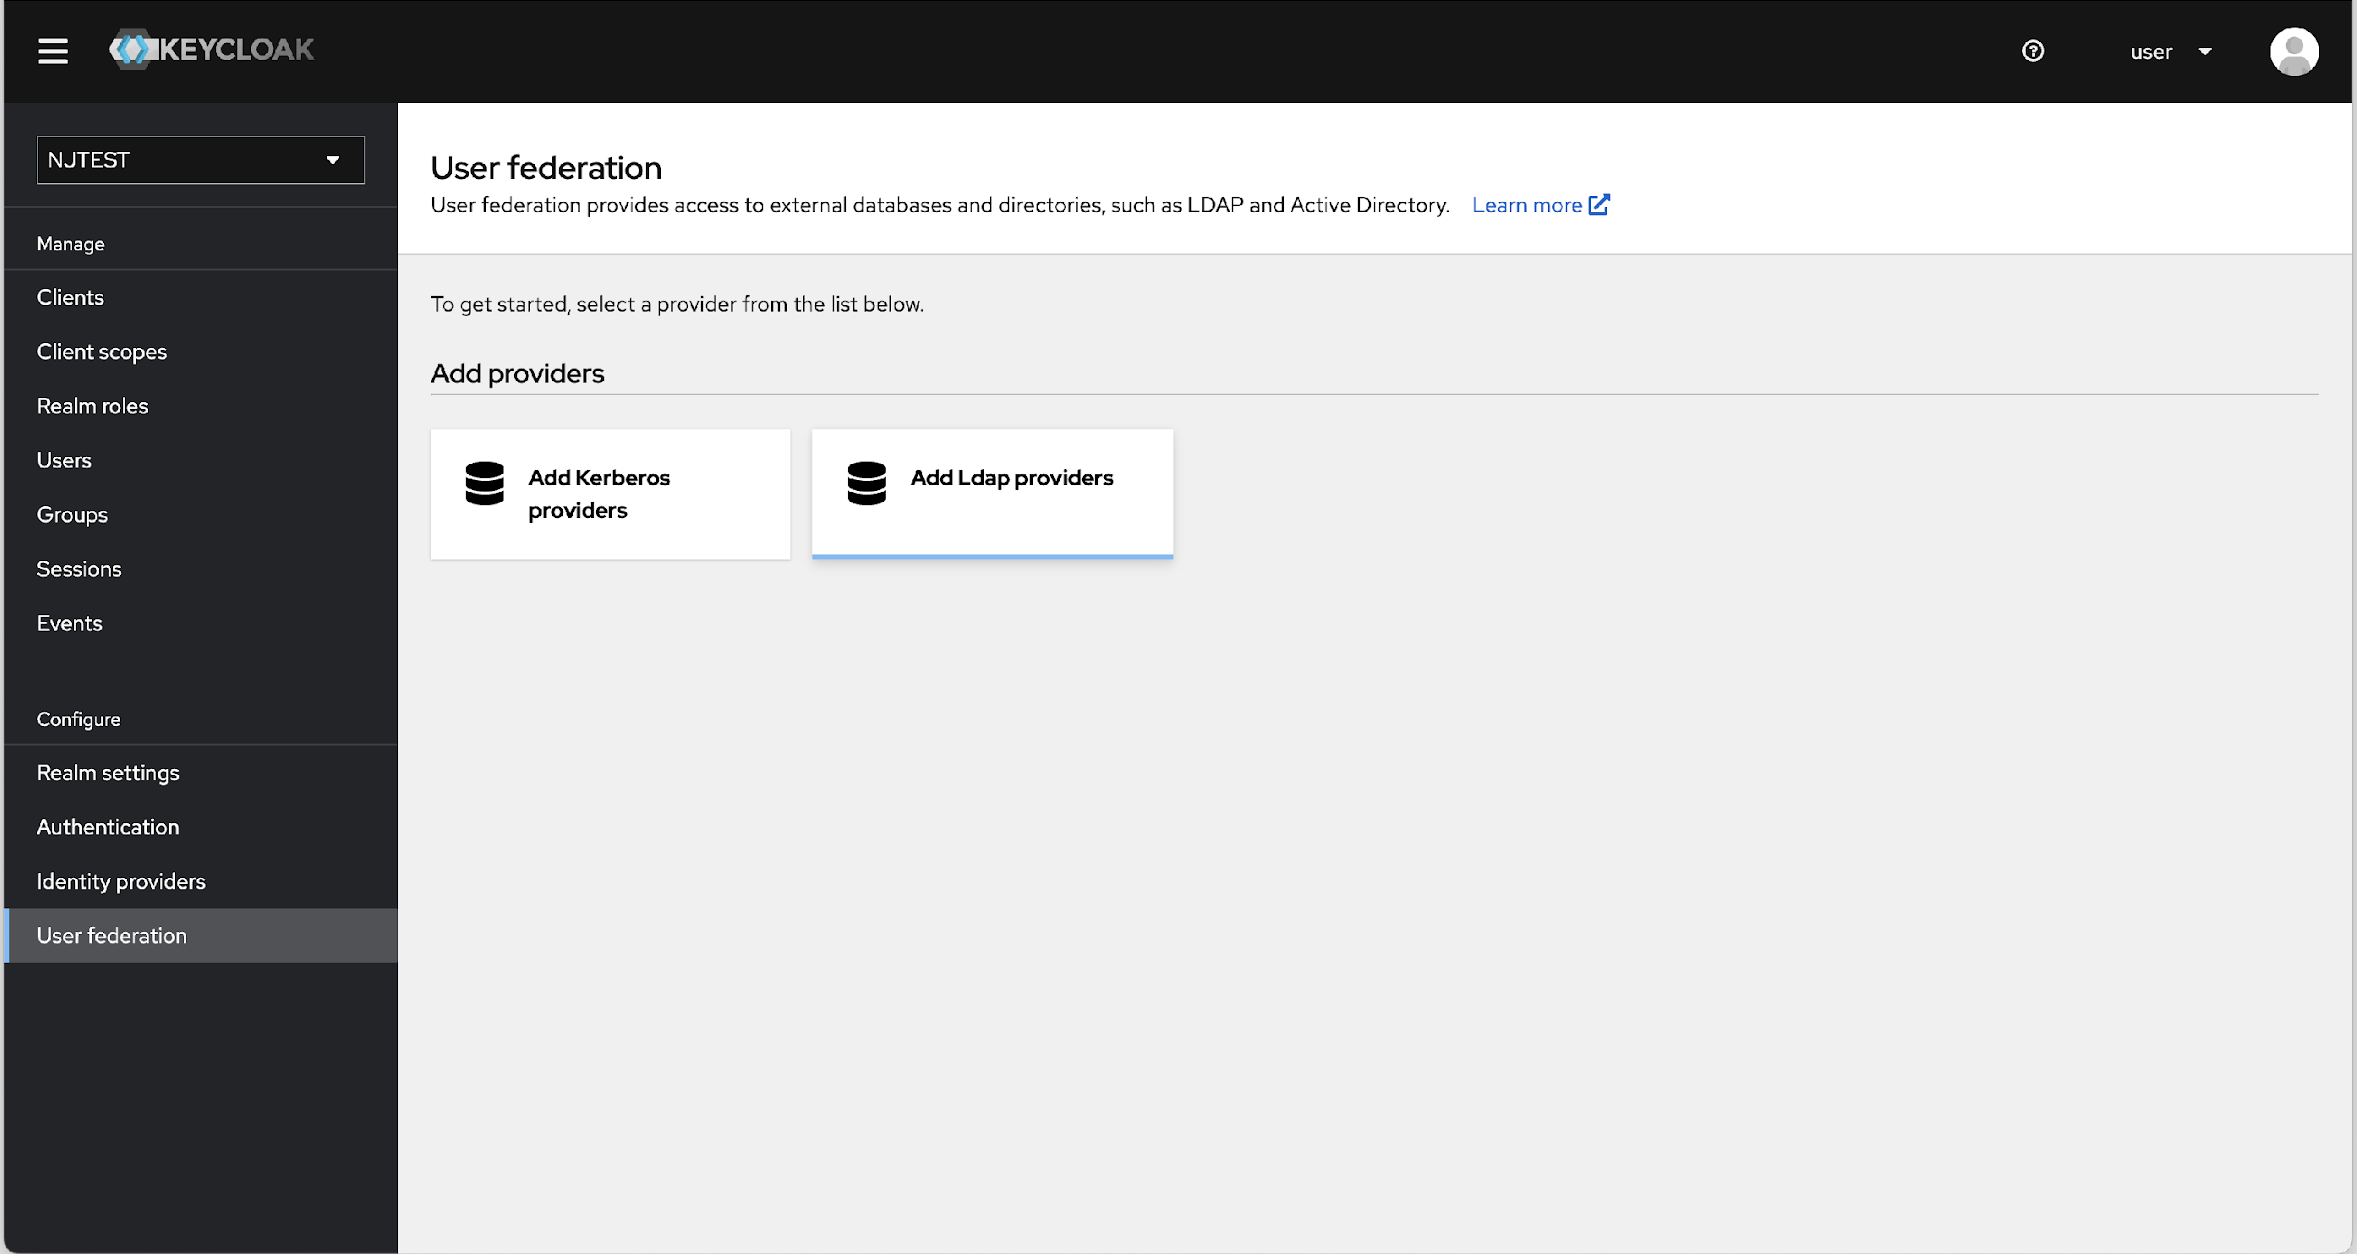
Now to integrate client's AD with Keycloak, navigate to "User federation" and add LDAP providers.
Pre-requisites:
- Get host and port details from customer
- Whitelist AWS kubernetes cluster public IP from customer's firewall side to accept requests from our KeyCloak.Whitelist IPs
- Port opening must be performed with respect to the customer network
To add LDAP providers and integrate AD client, follow the steps below:
- From the left menu bar, click User federation. In the User
federation page, click Add LDAP providers.
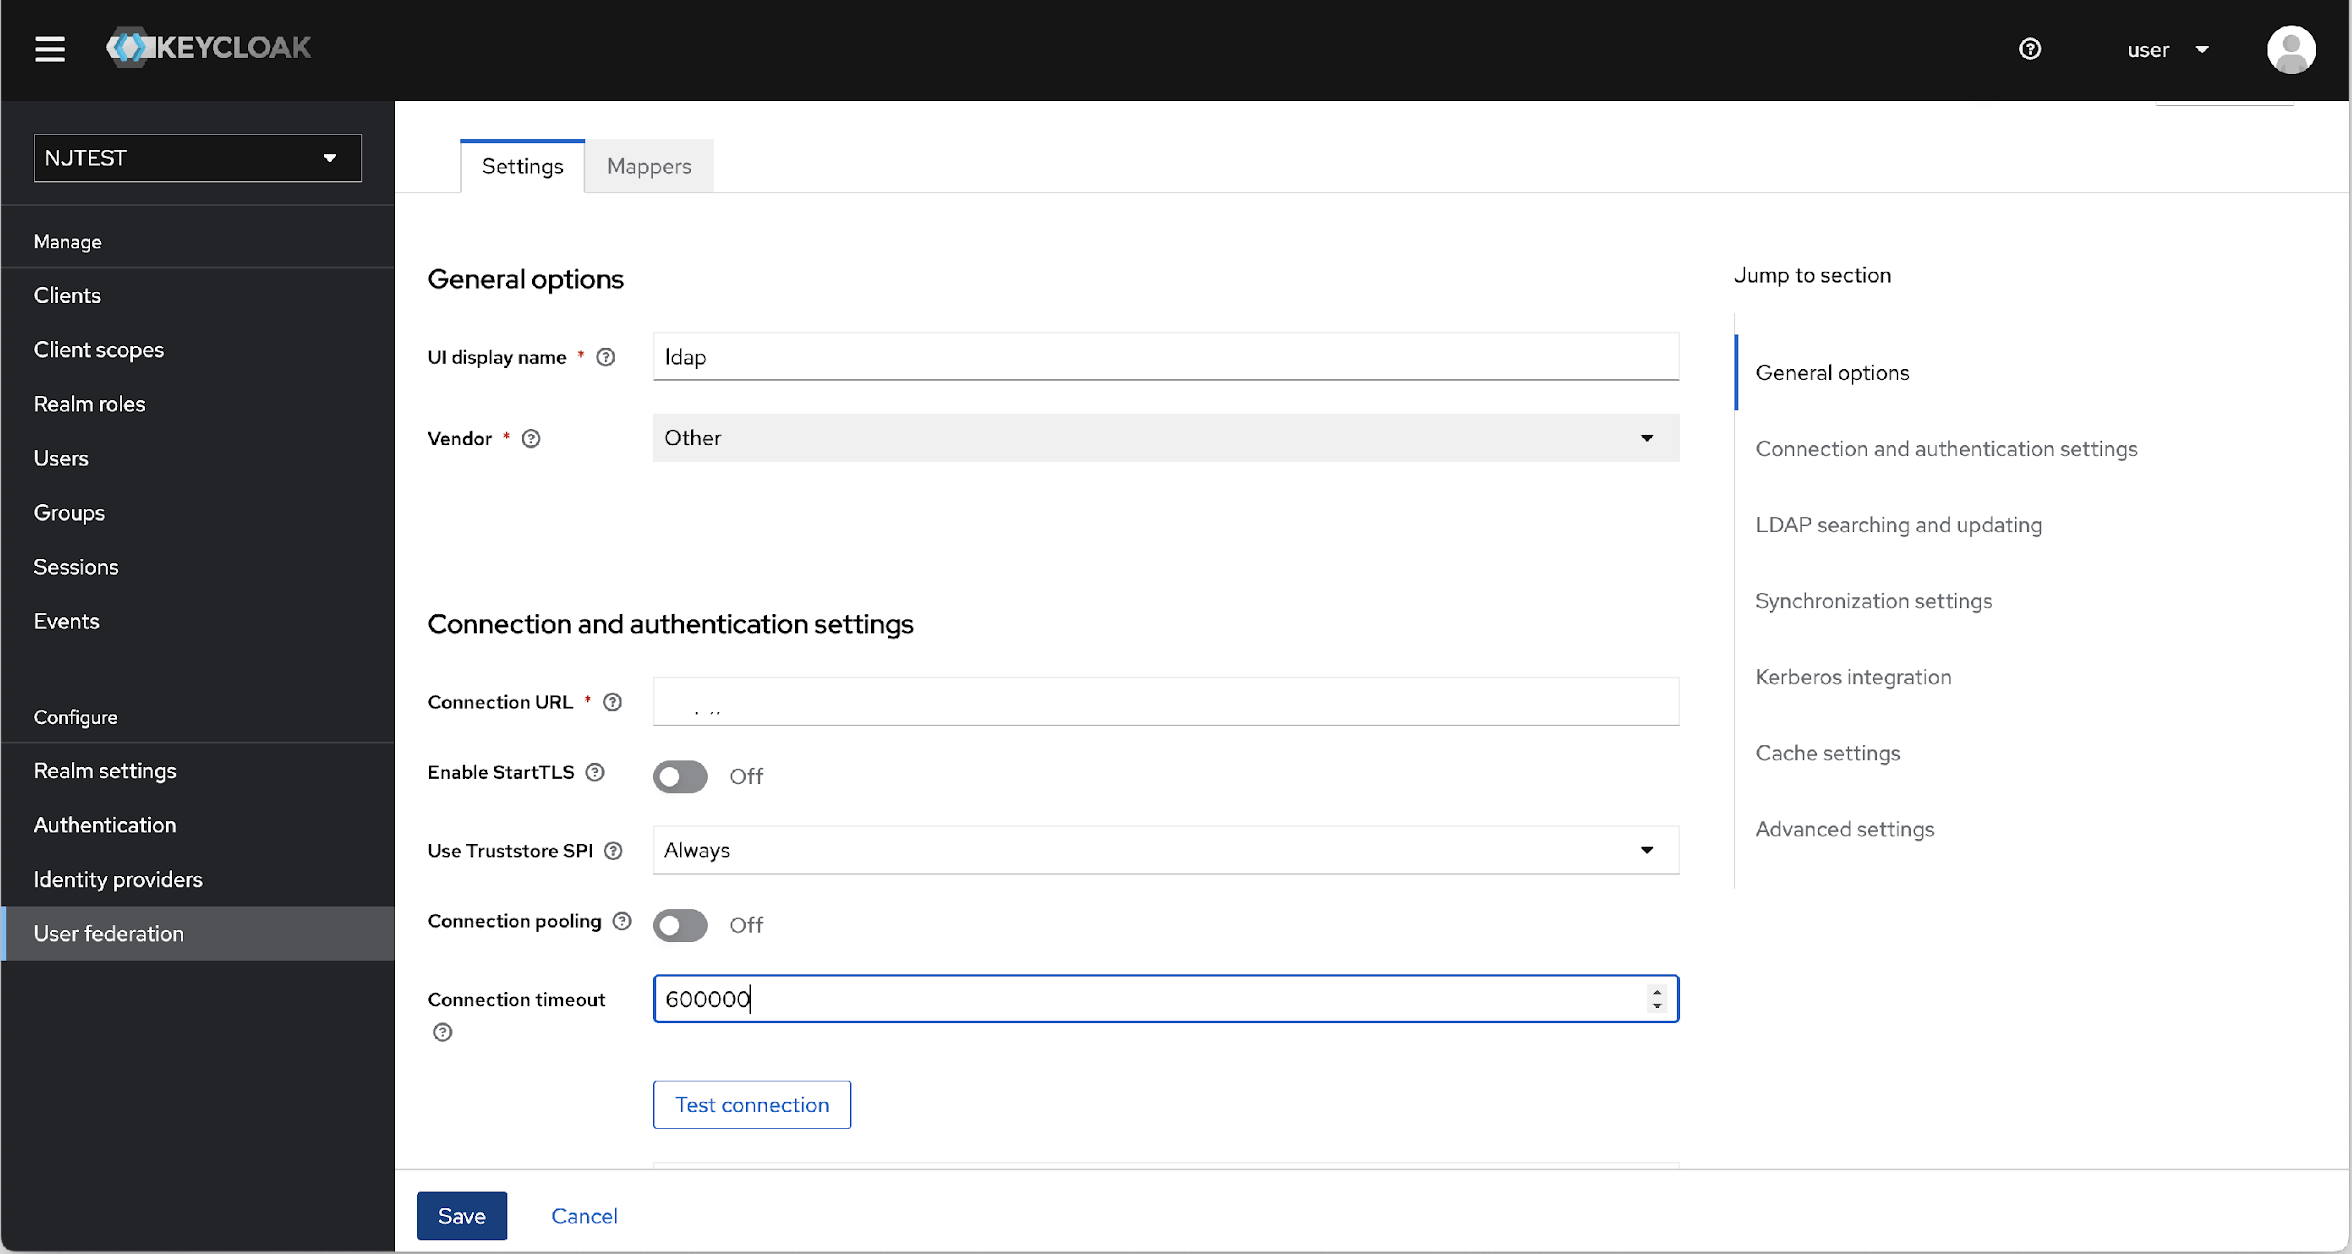
- In the Settings page, update the following details:
- UI display name: Logical name displayed in Keycloak Admin Console
(e.g.,
ldap). - Vendor: Set to
Otherwhen using a generic LDAP server or custom AD. - Connection URL: LDAP server address in the format:
ldap://<host>:<port>(e.g.,ldap://100.10.1.2:389). - Connection timeout: Maximum connection wait time in milliseconds
(e.g.,
600000ms or 10 minutes).
- UI display name: Logical name displayed in Keycloak Admin Console
(e.g.,
- After updating the details in the Settings page, click Save, and
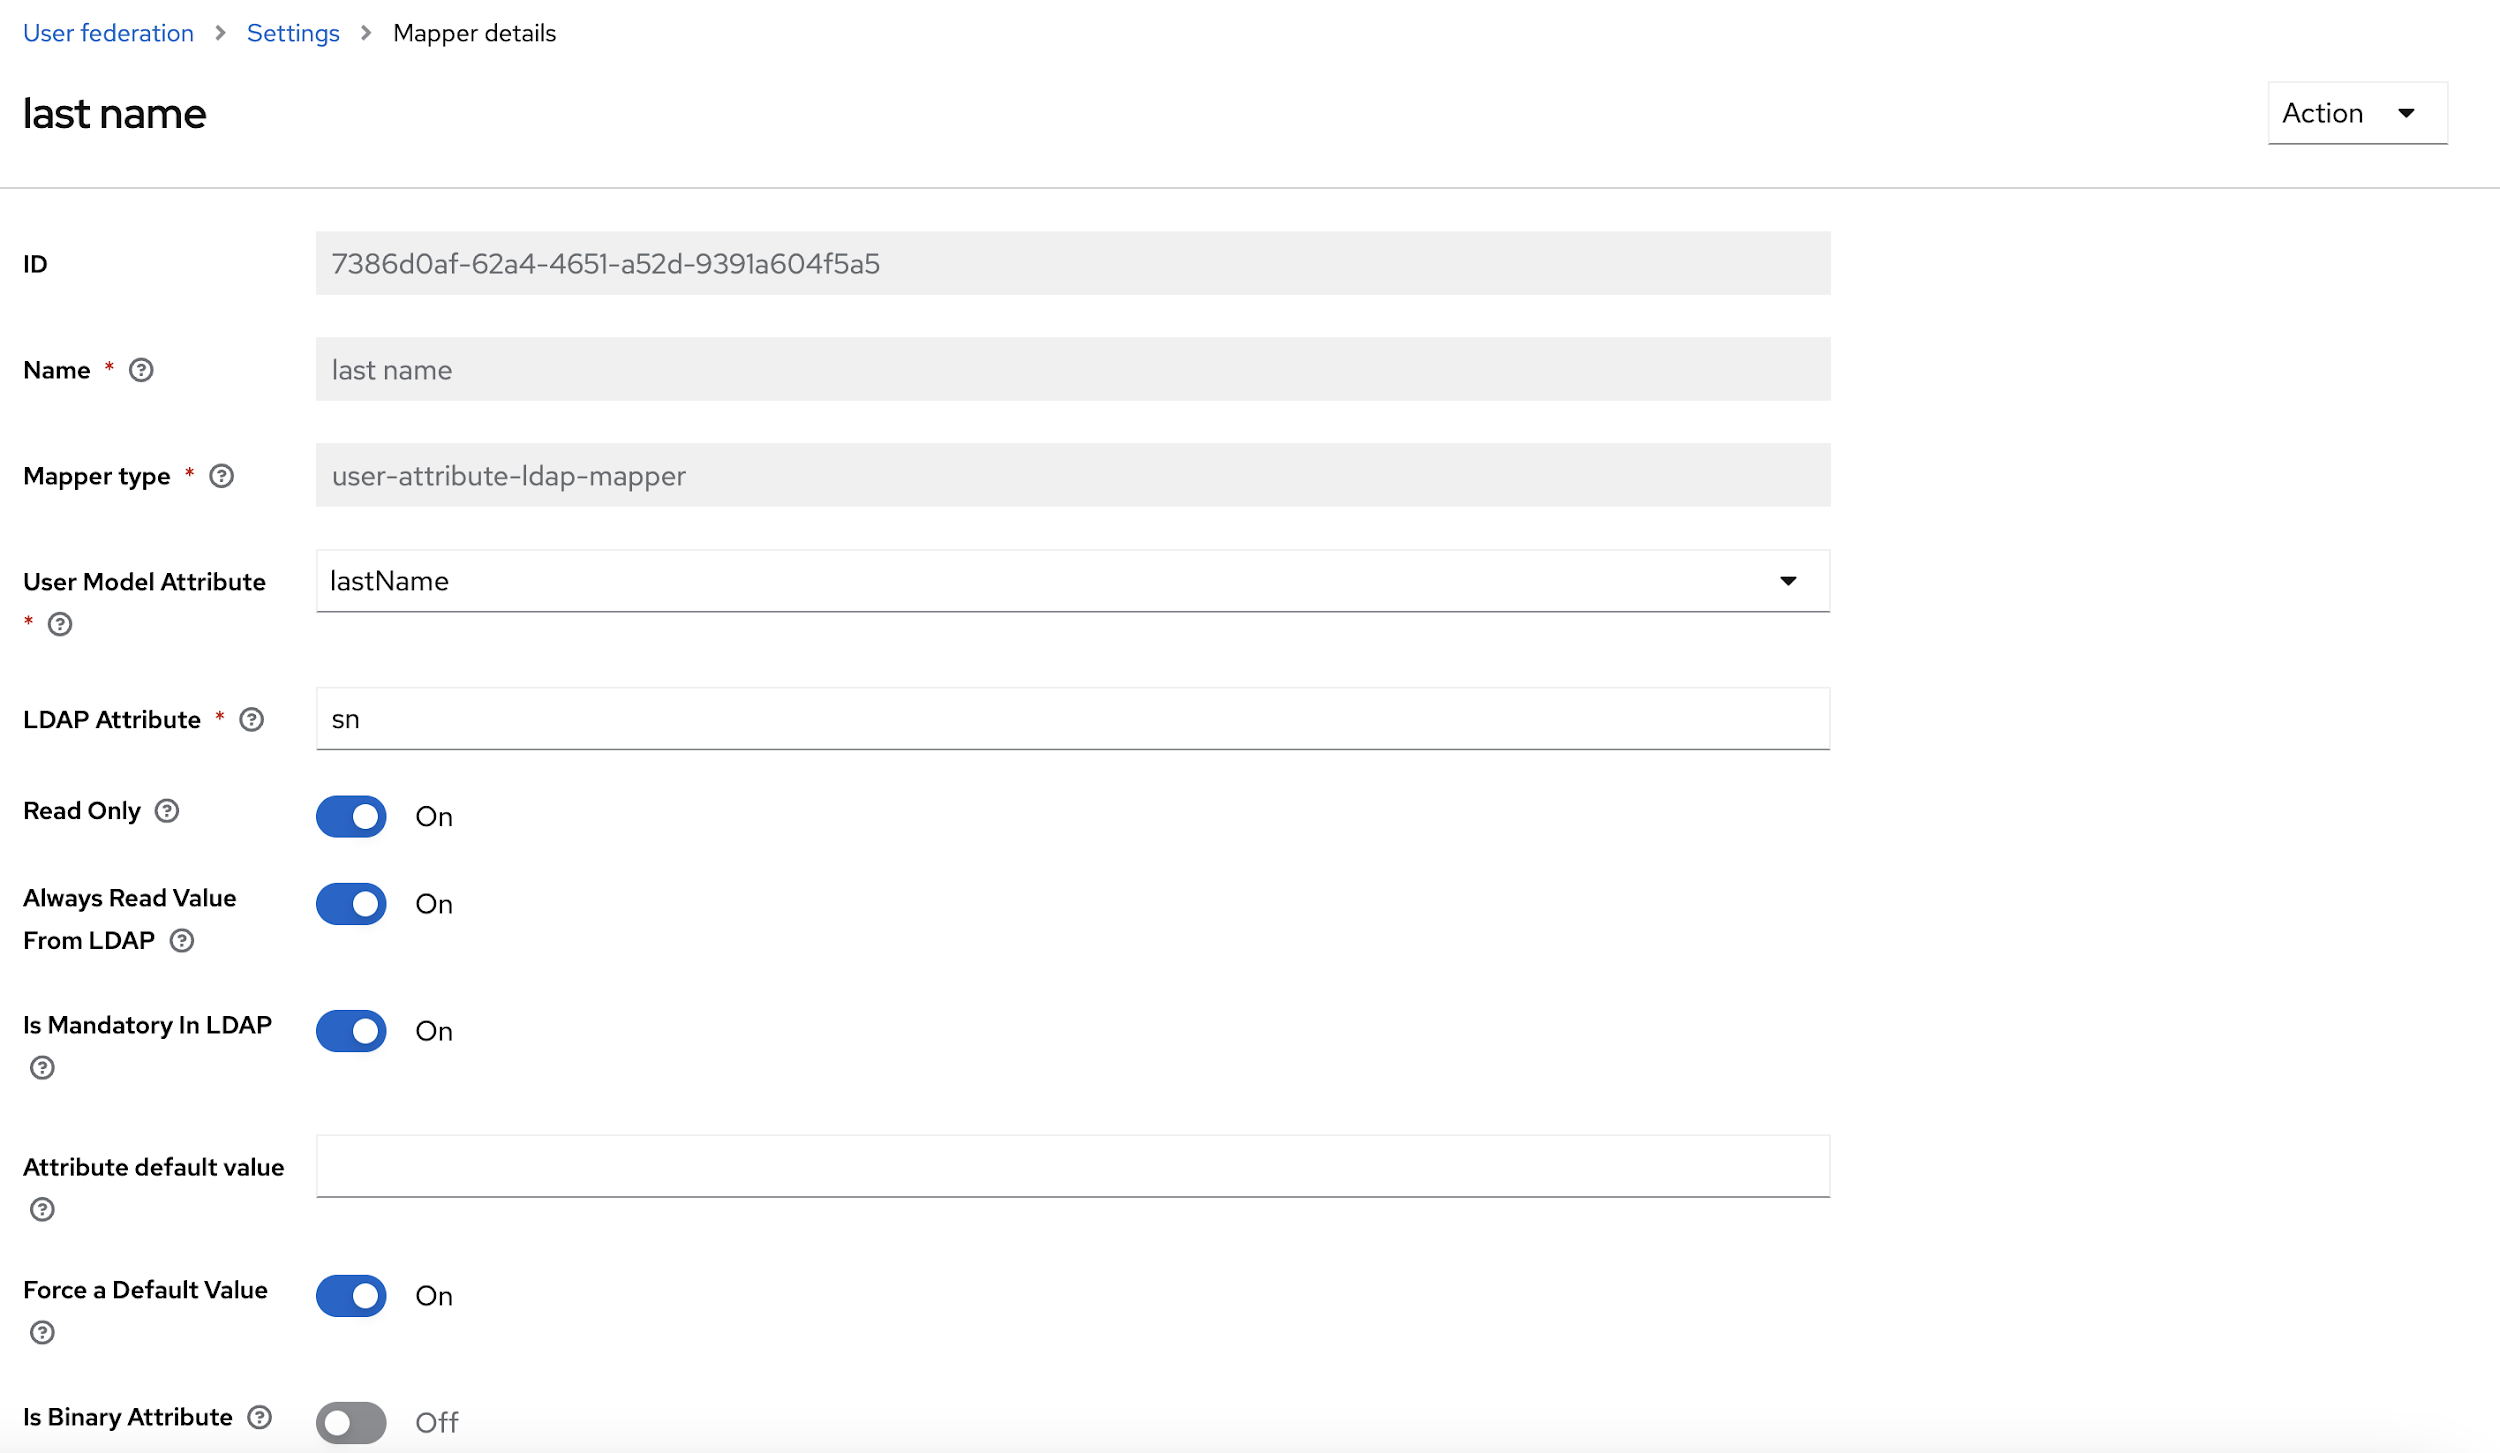
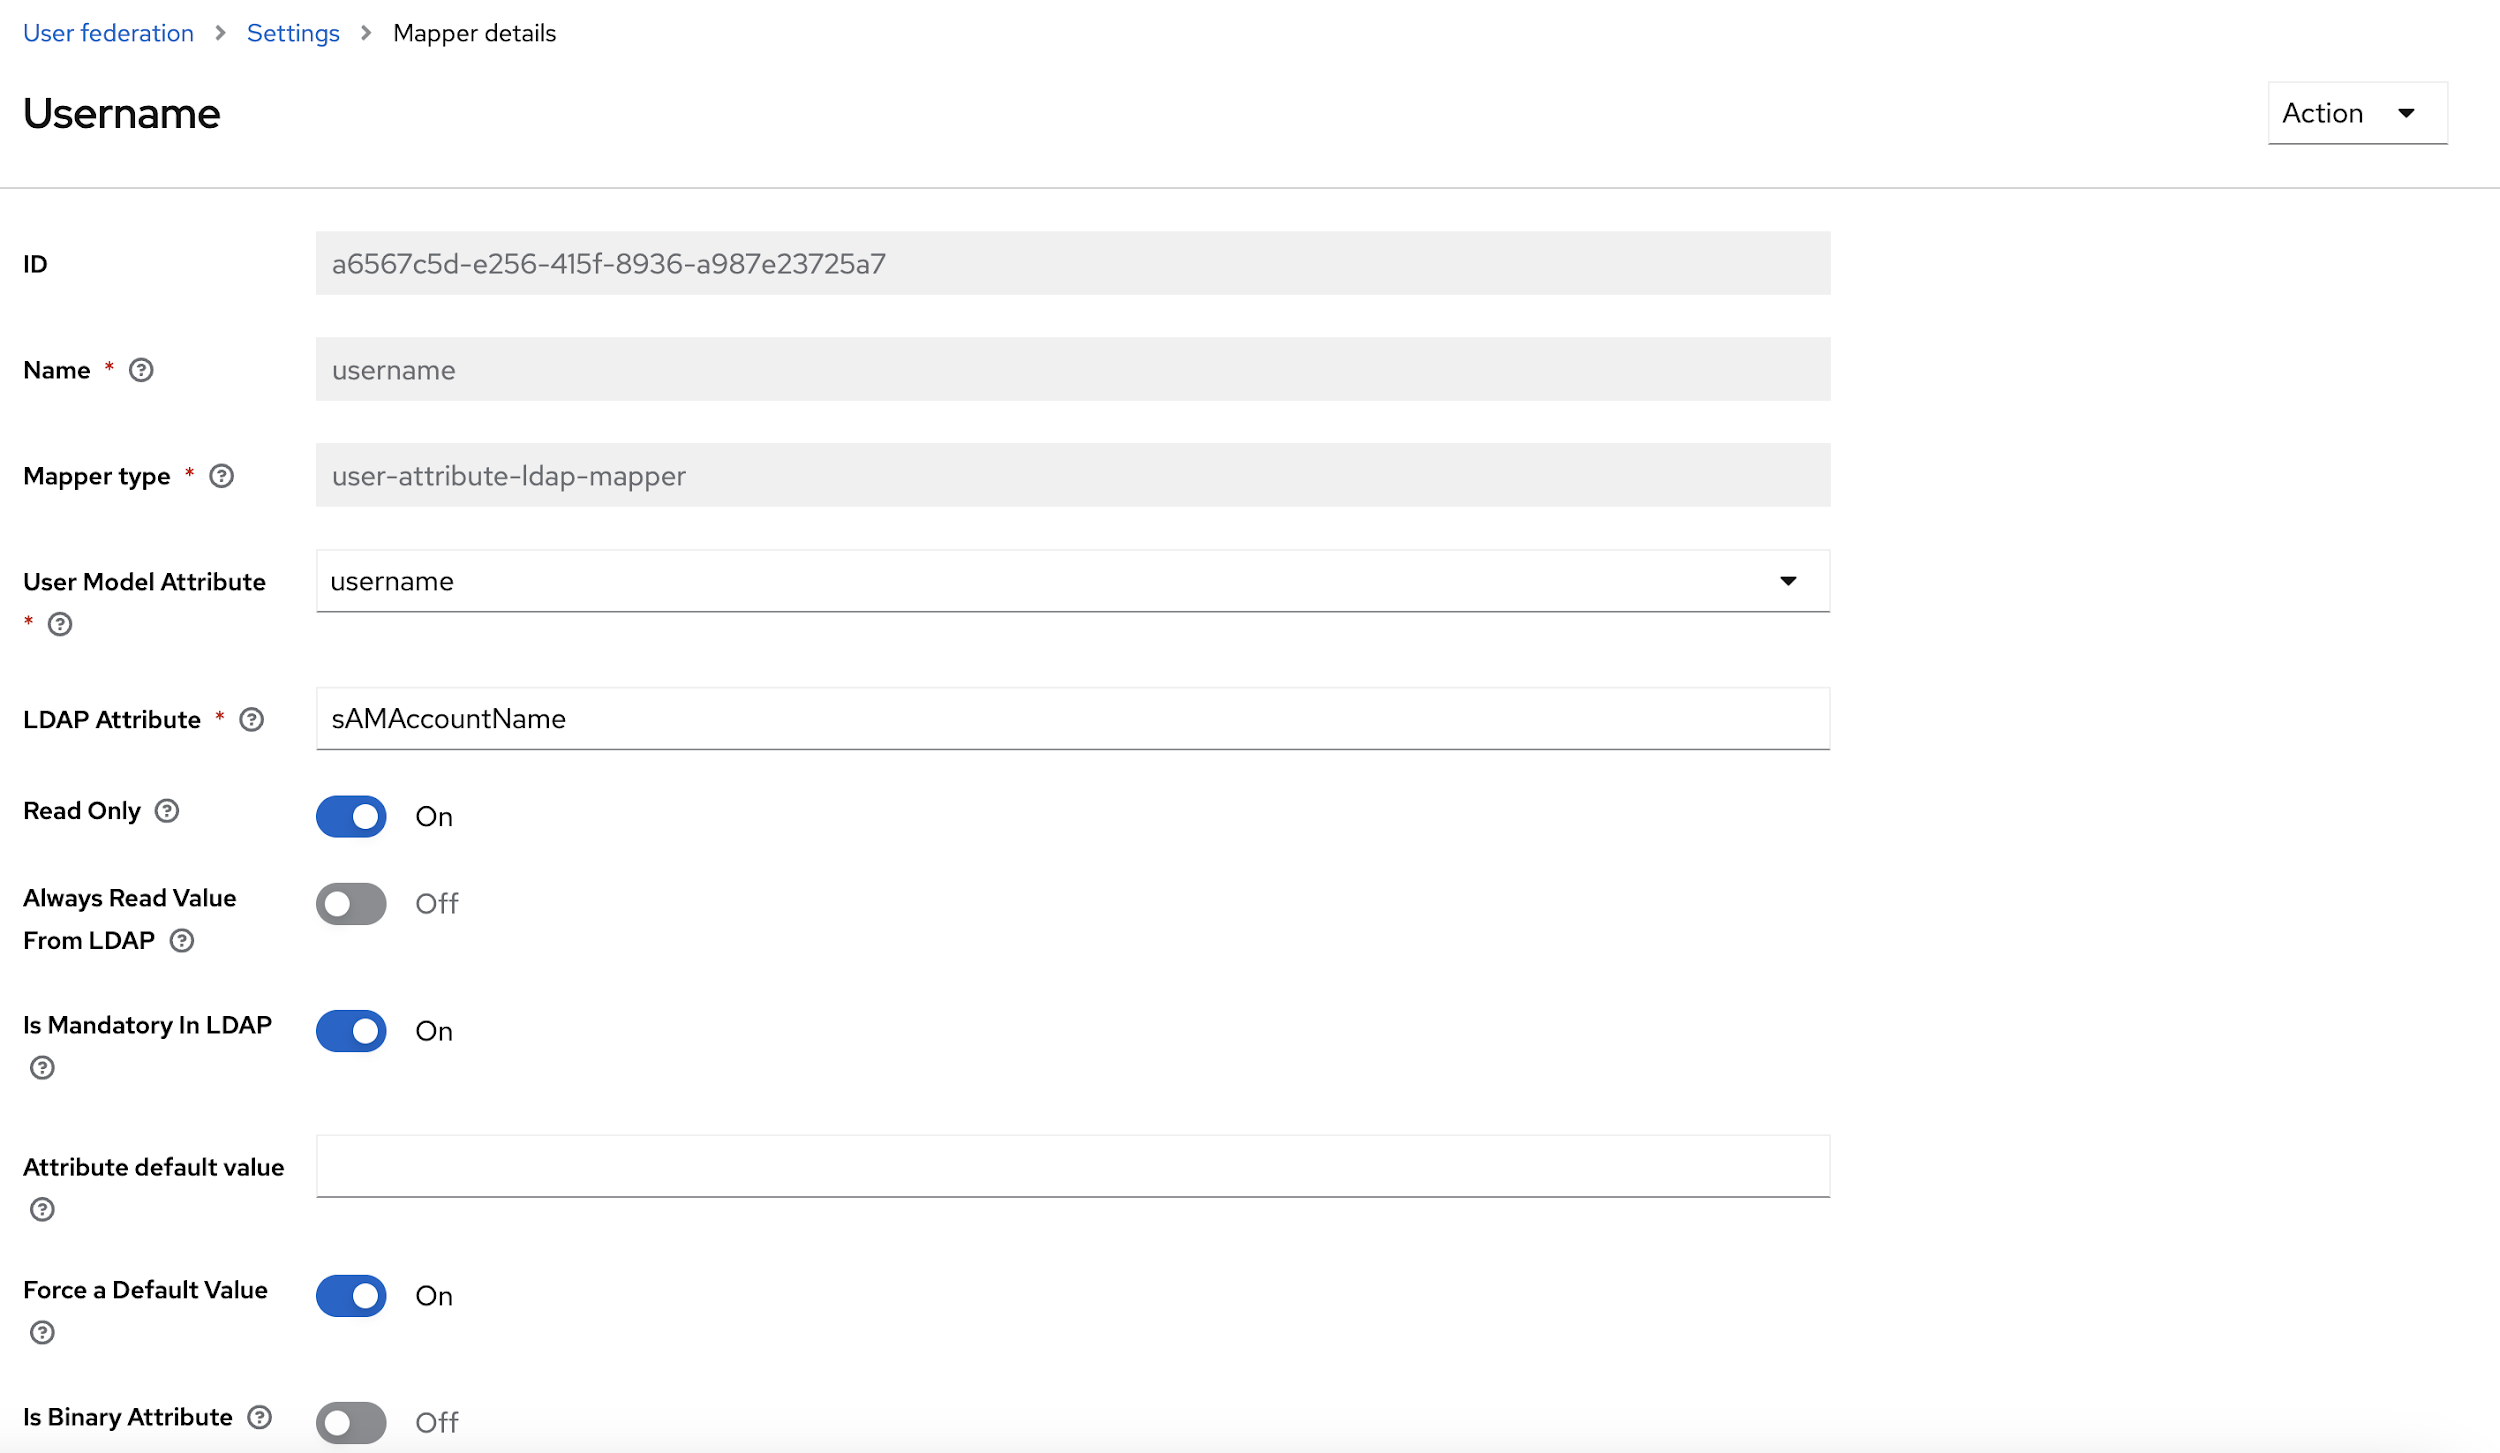
navigate to Mappers page.
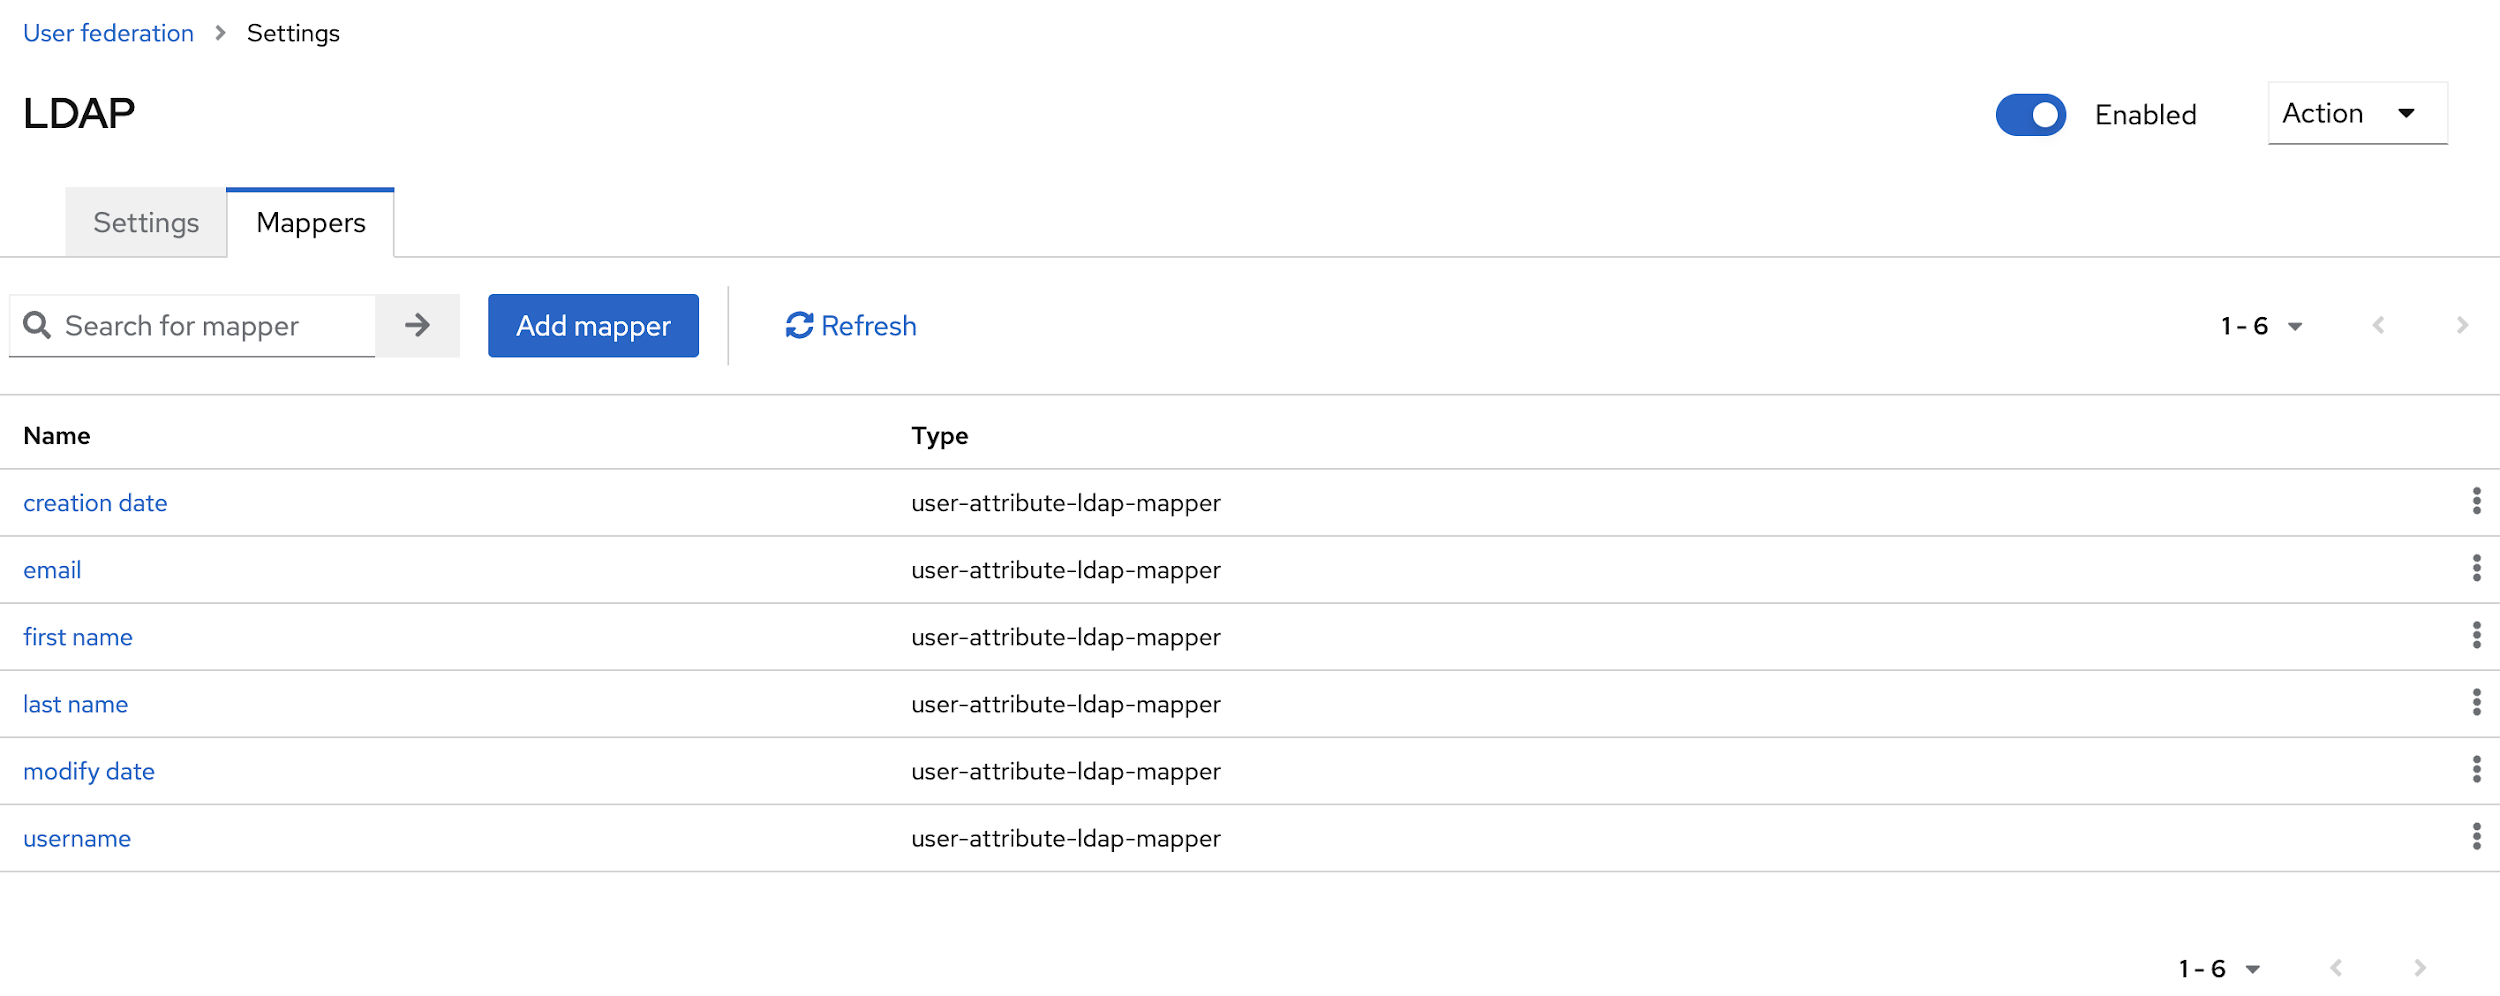
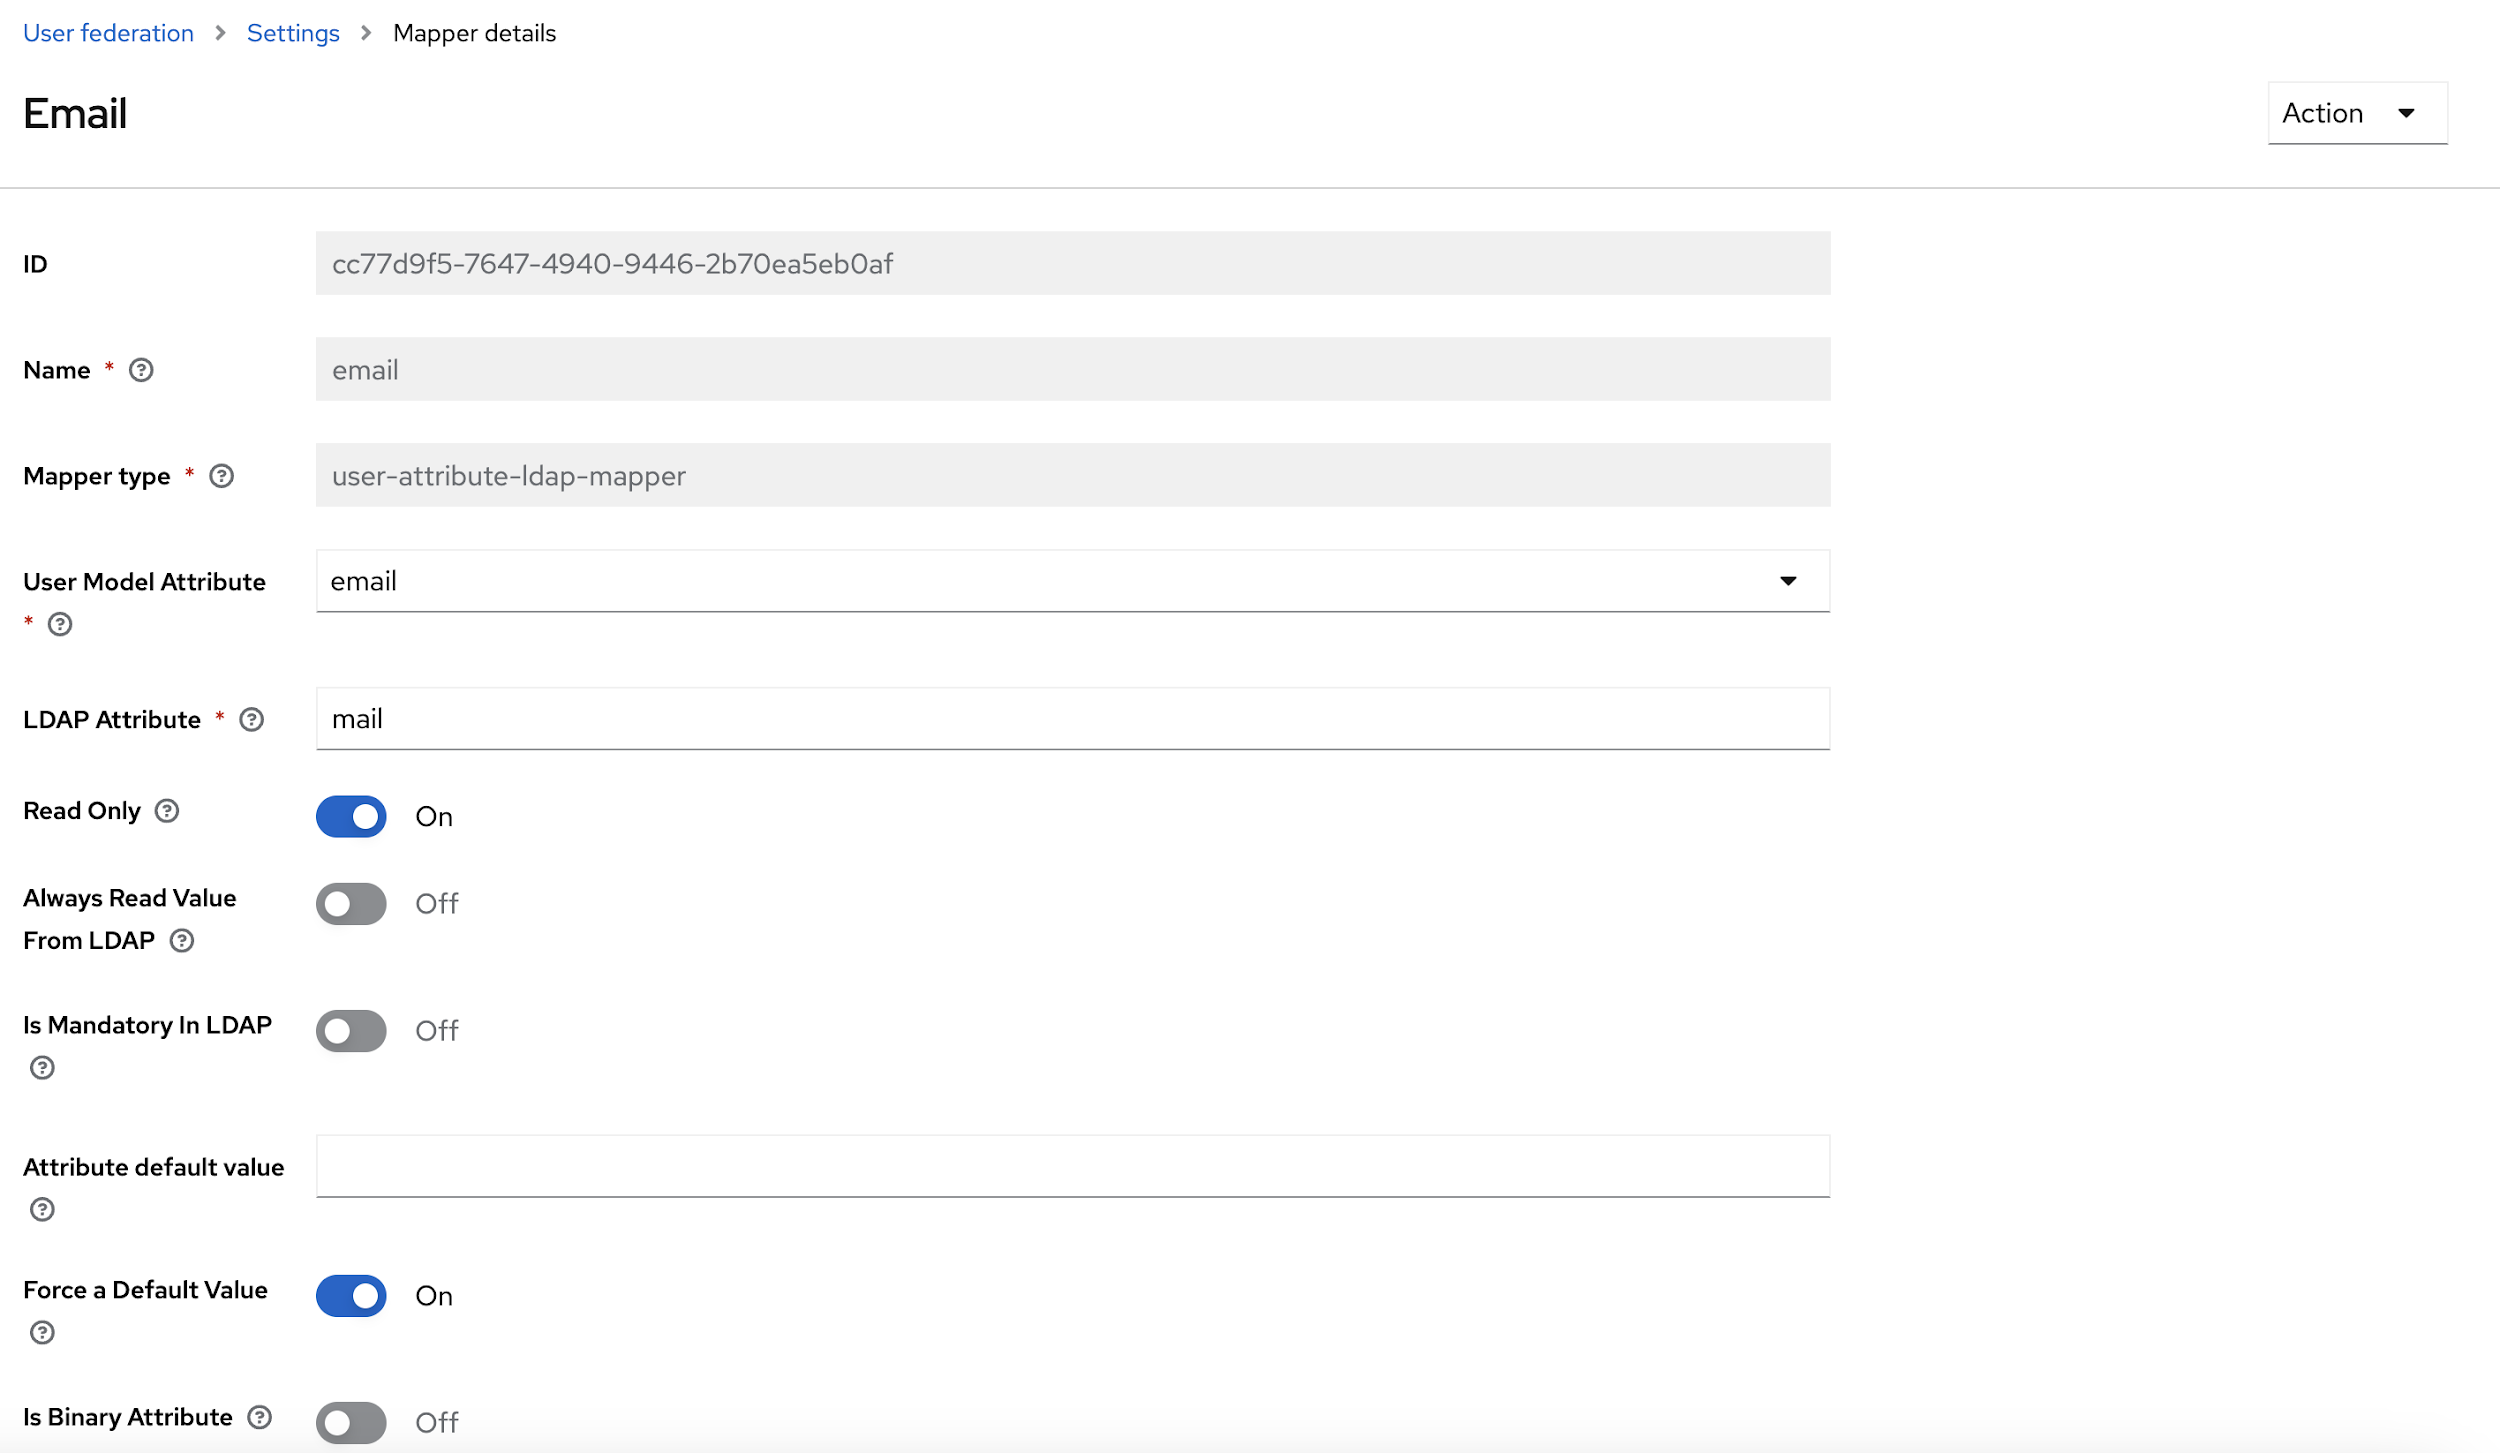
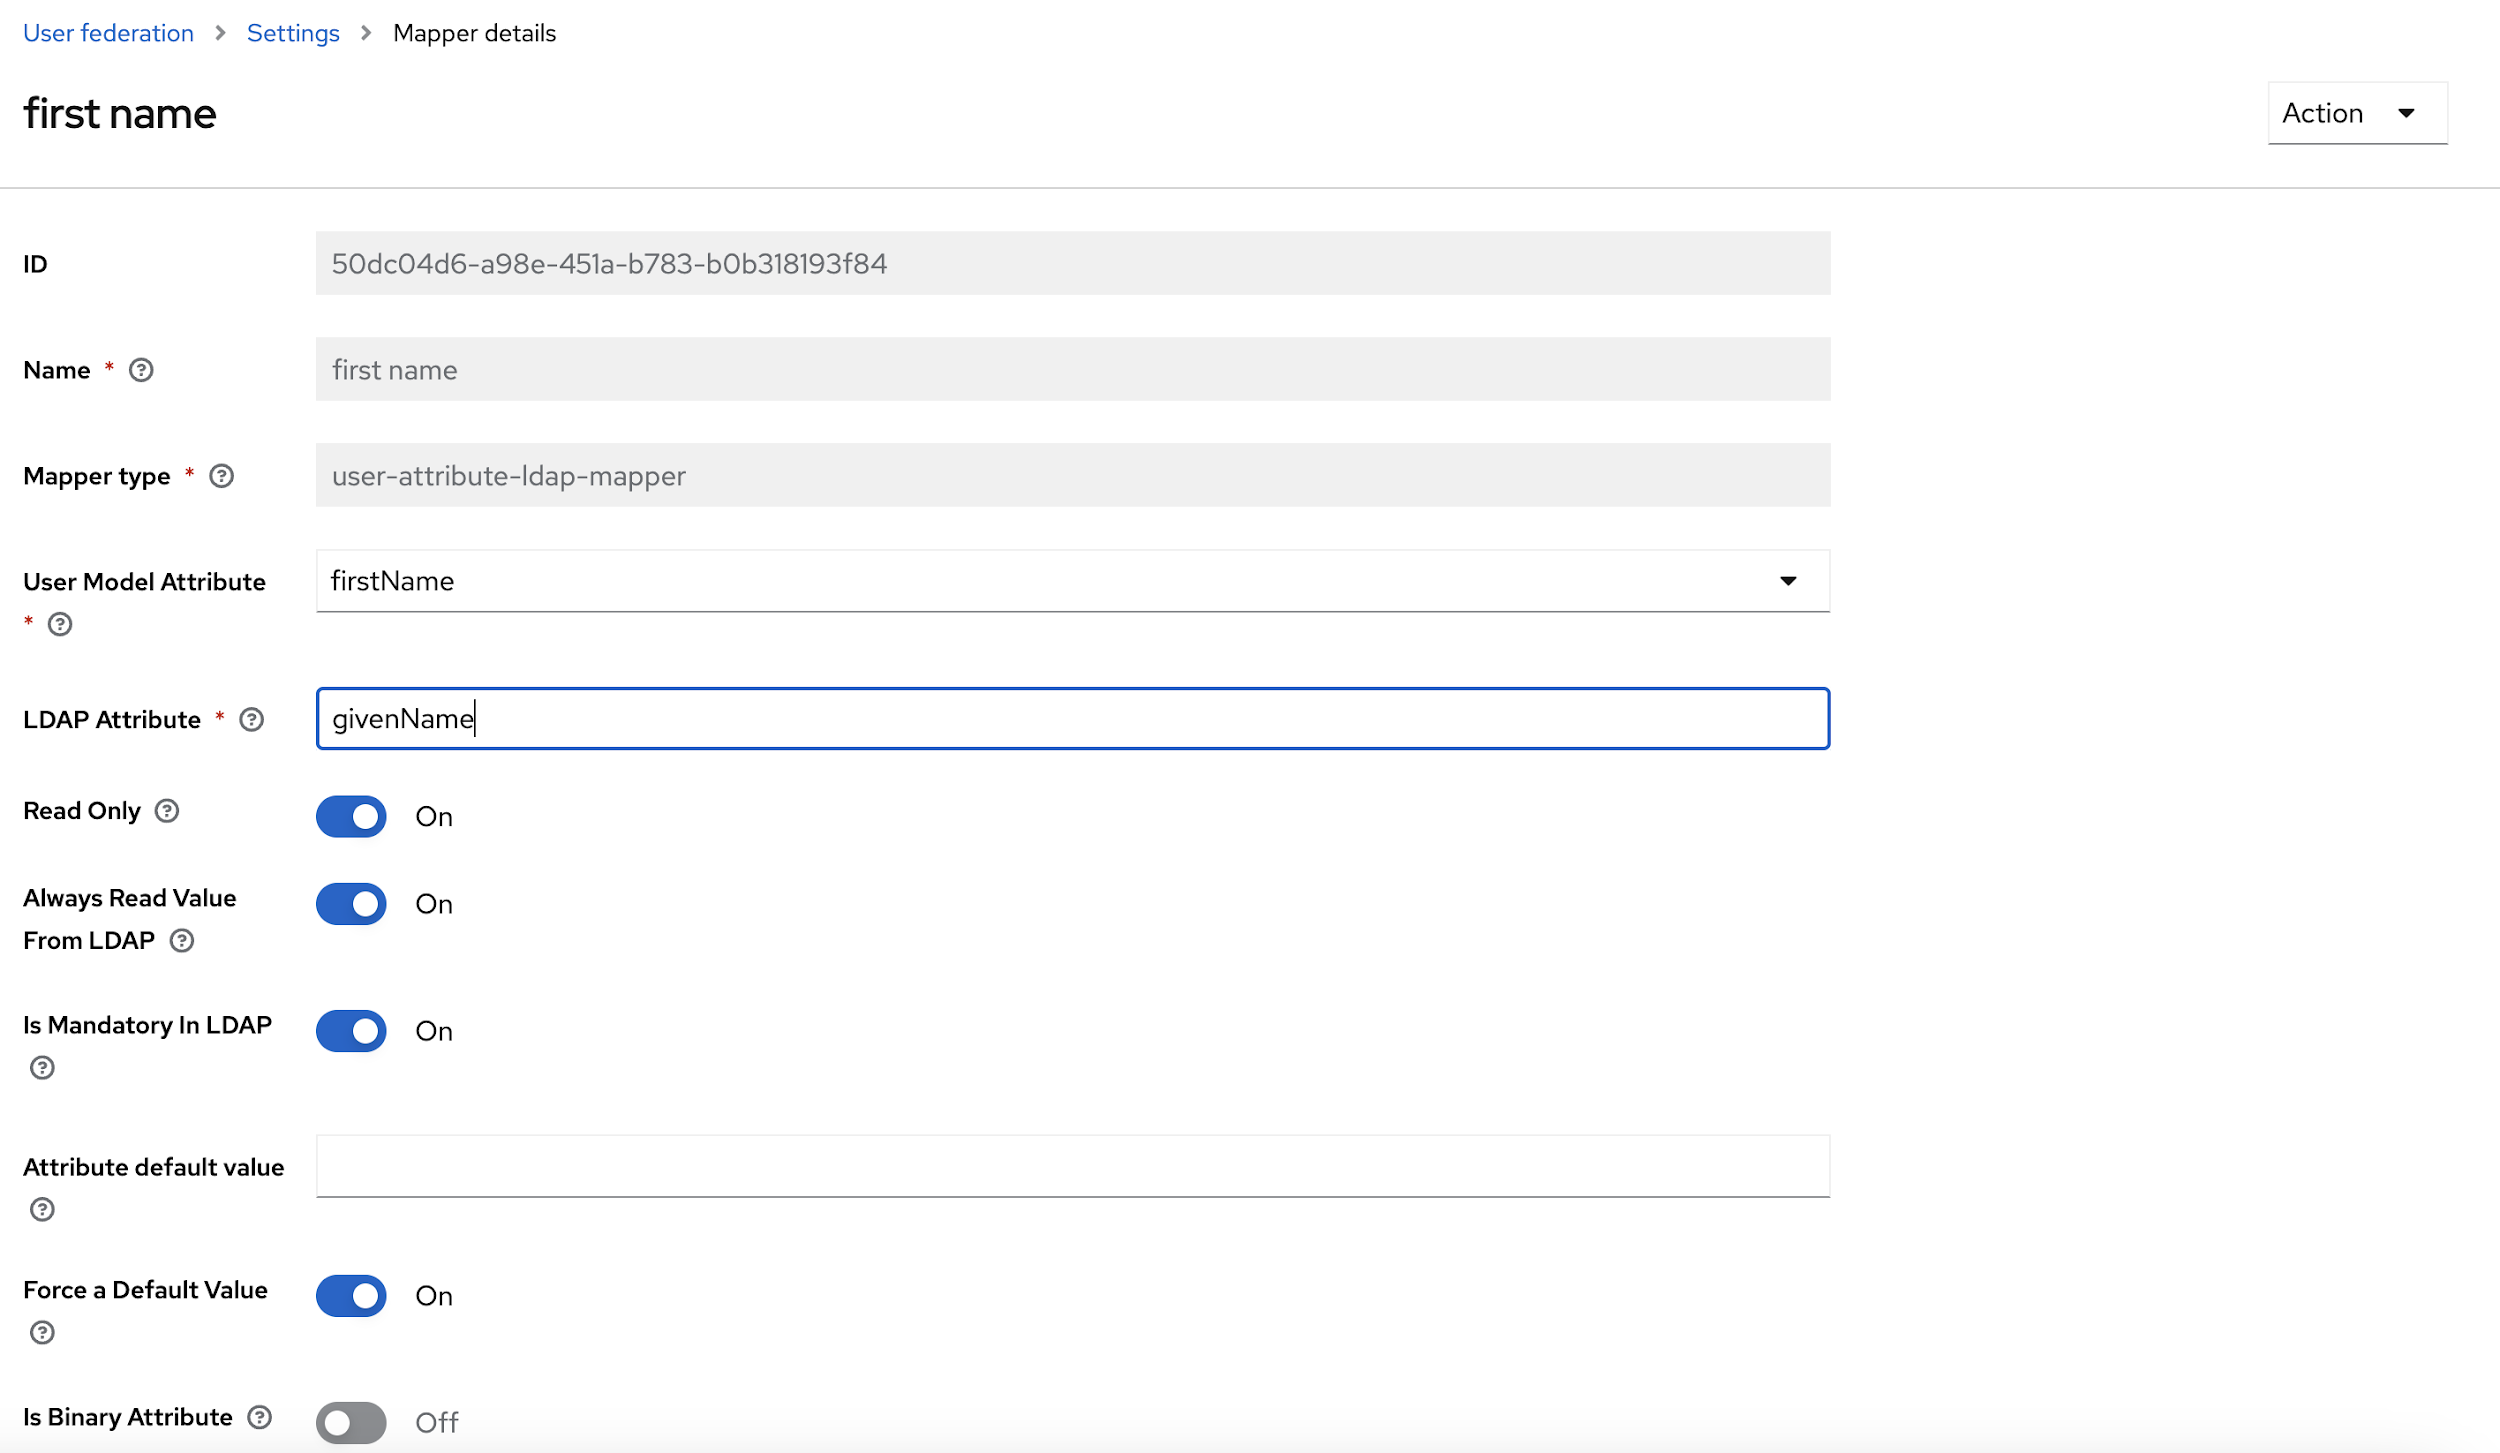
- From the User Model Attribute drop-down select, Email, first name, last name and
user name options, and update the LDAP attribute with respective data, and click
Save.
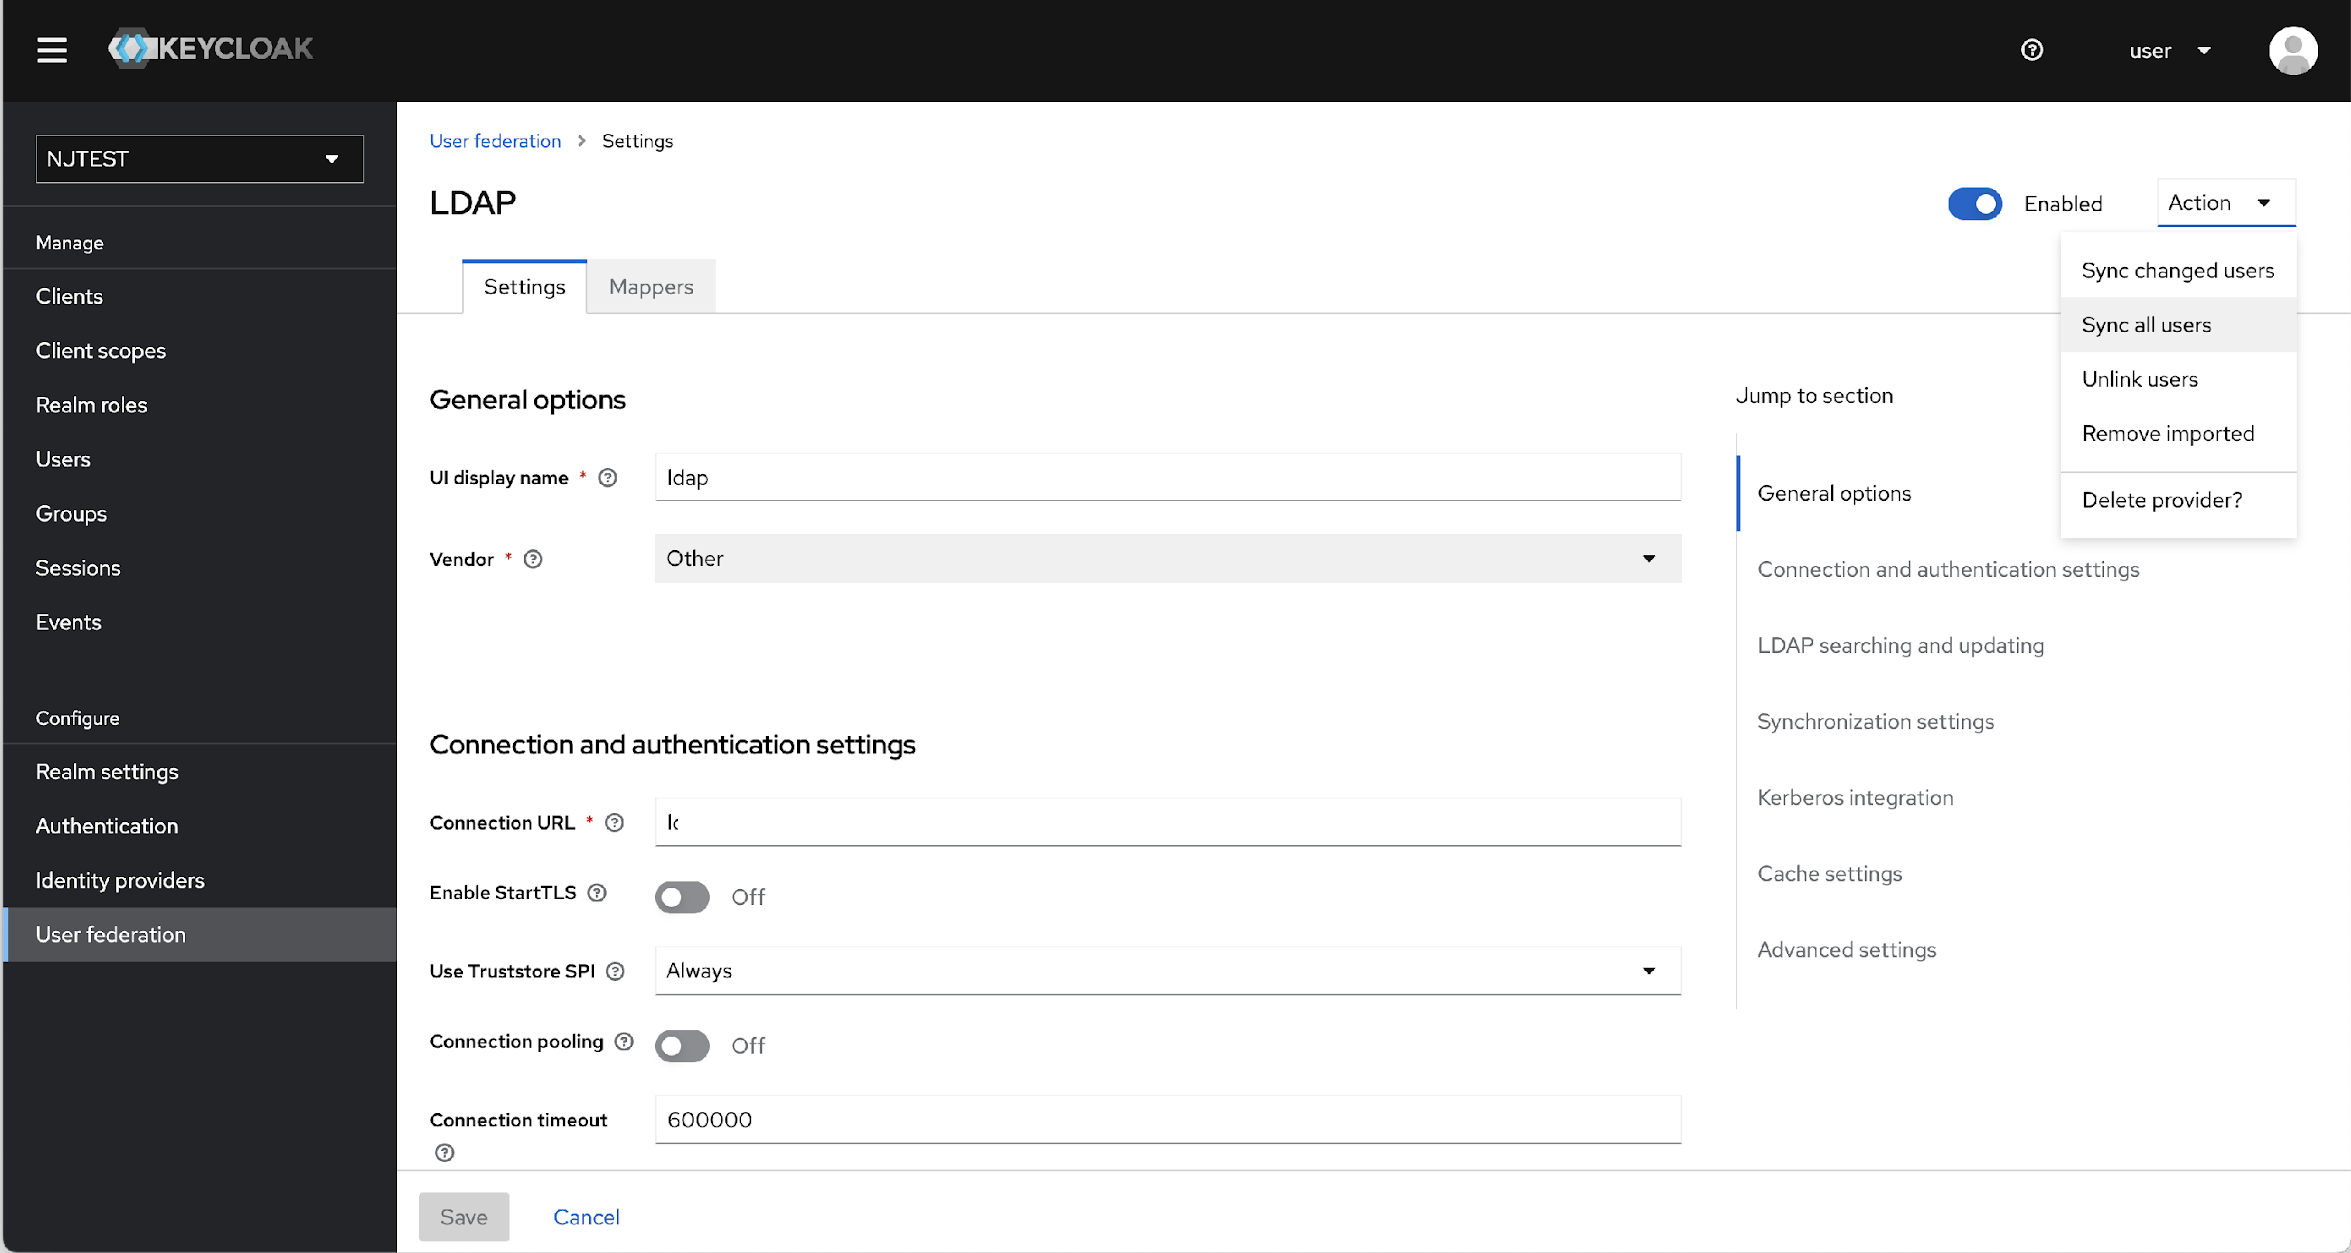
- After updating the Mapper details, at the top right corner of the page, click
Actions and select the Sync all users option.
- After successful syncing, from menu bar, navigate to Users. The Users page will
display all users imported from configured AD as shown below..
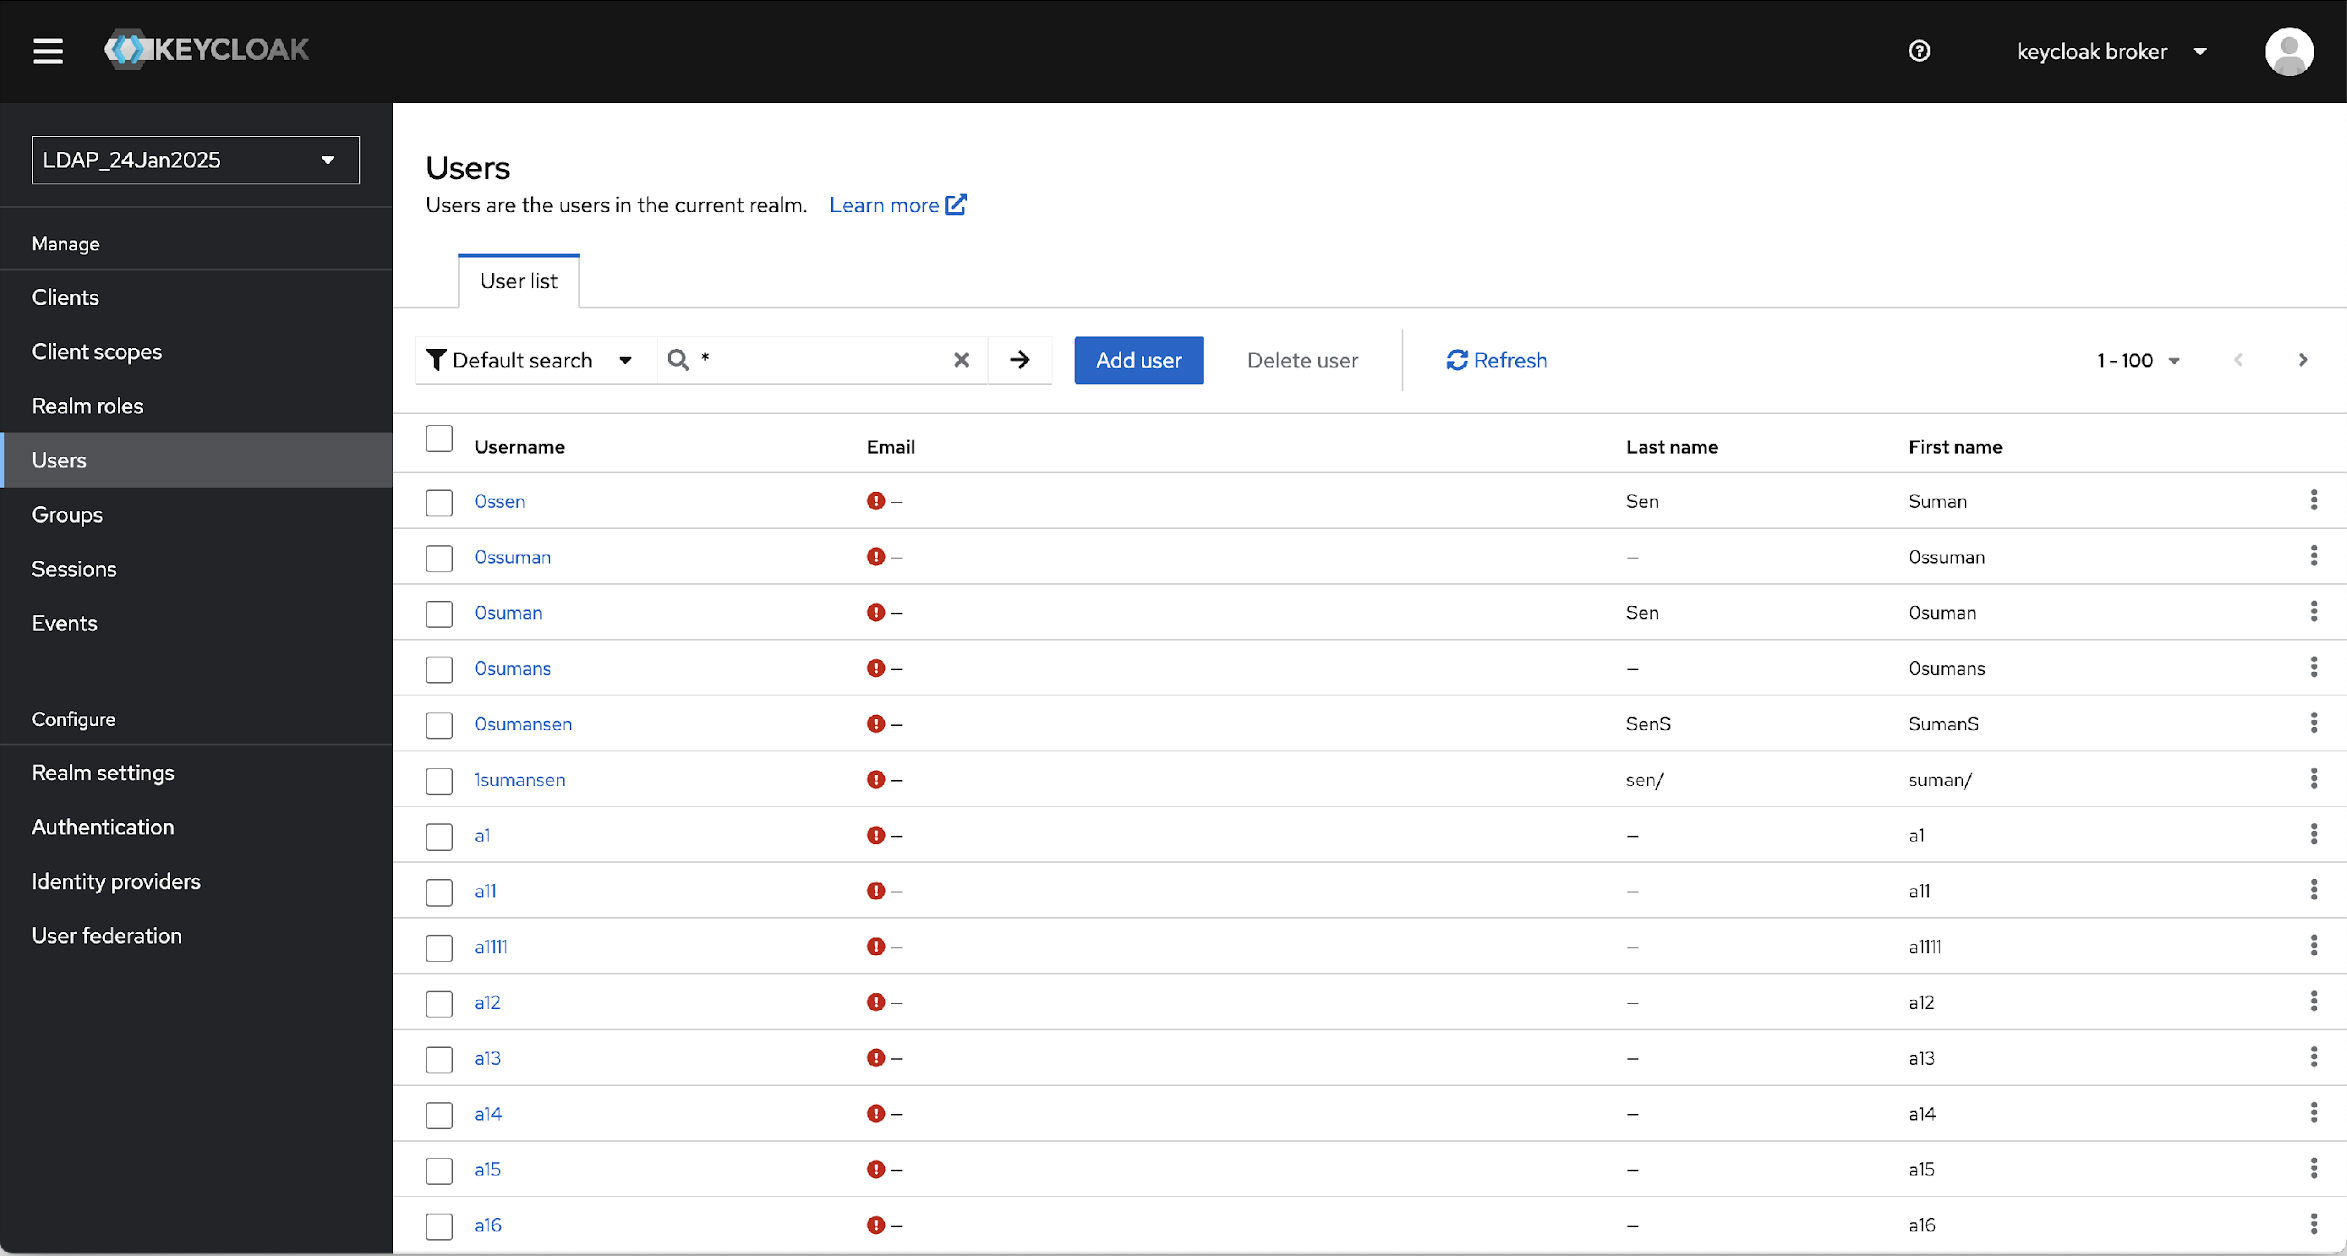
- Try to search any user and confirm that users are imported or synced.
Upload and Mount Custom Keycloak Themes
To upload and mount custom Keycloak Themes, follow the steps below:
- Extract the contents of the theme ZIP archive. Reach out to support team for the archive file.
- Upload the extracted folder to the S3 path:
s3://*-s3-cdp-app/keycloak-templates/themes/ - Update the Devtron deployment template to mount the S3 location into the
Keycloak
container:
/etc/keycloak-templates/themes