Configuring a scan using AppScan Go!
AppScan Go! steps you through configuring and running a static scan. Run the scan in the cloud or use a plugin to automate scanning.
Before you begin
To use AppScan Go!, download it and install it to your local system:
- In AppScan on Cloud:
- Click Create Scan to open the wizard.
- Click SAST.
- Click Upload an archive to scan.
- In the Generate an IRX files section of the wizard,
choose the platform (Windows, Mac, or Linux) for which to download the
utility and click Download.Important:AppScan Go! requires the Static Analyzer Command Line Utility (
SAClientUtil). AppScan 360° users must use the versions of the Static Analyzer Command Line Utility and AppScan Go! included with the AppScan 360° installation. AppScan on Cloud users must use the versions downloaded from the AppScan on Cloud service. They are not interchangeable. - Extract the files and install the utility to your local system:
- On Windows systems, launch
appscan-go-2.3.1-installer.exeand follow the prompts. - On Linux and Mac systems, run
appscan-go-installer.shfrom Terminal.Note:On Linux,appscan-go-installer.shuses the RPM file as part of the installation process.
The installation configures AppScan Go! and the Static Analyzer Command Line Utility.
- On Windows systems, launch
Note:
Configure AppScan Go! to use a system proxy if necessary.
About this task
Procedure
-
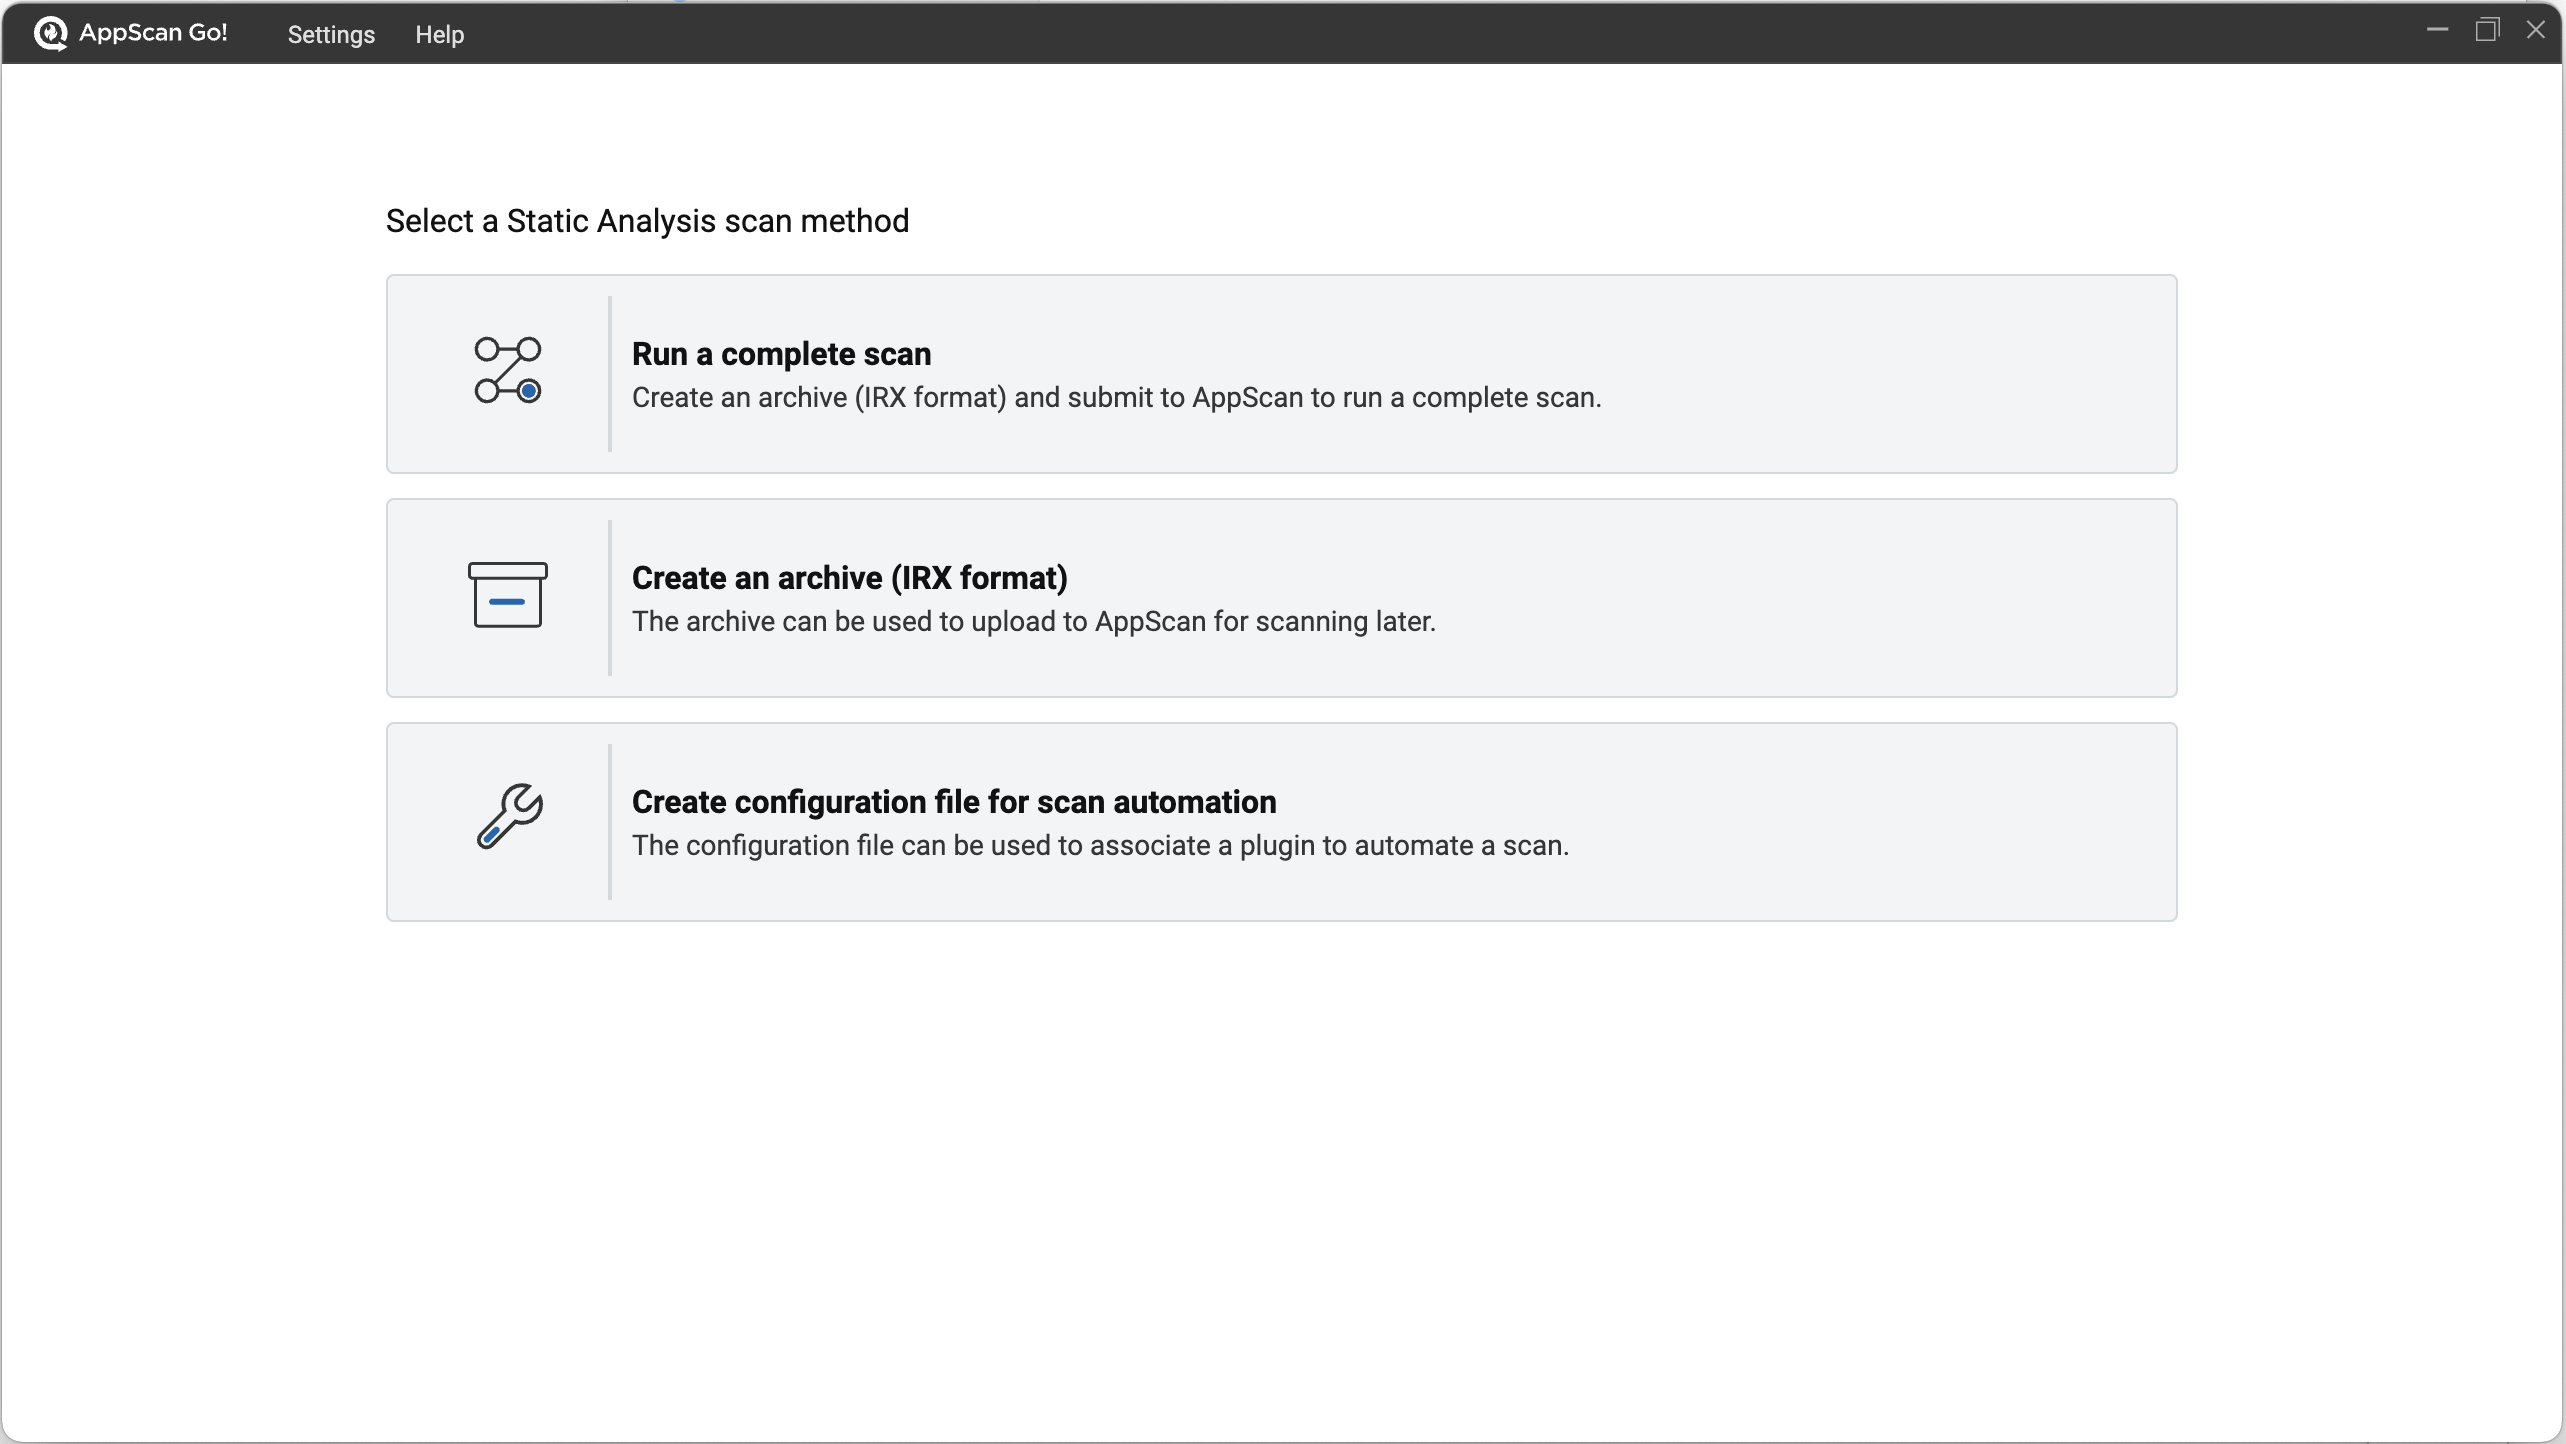
From your local system, launch AppScan Go!
You do not have to be logged in to the AppScan on Cloud service to begin setting up a scan. You do need to be logged in to complete a scan.
-
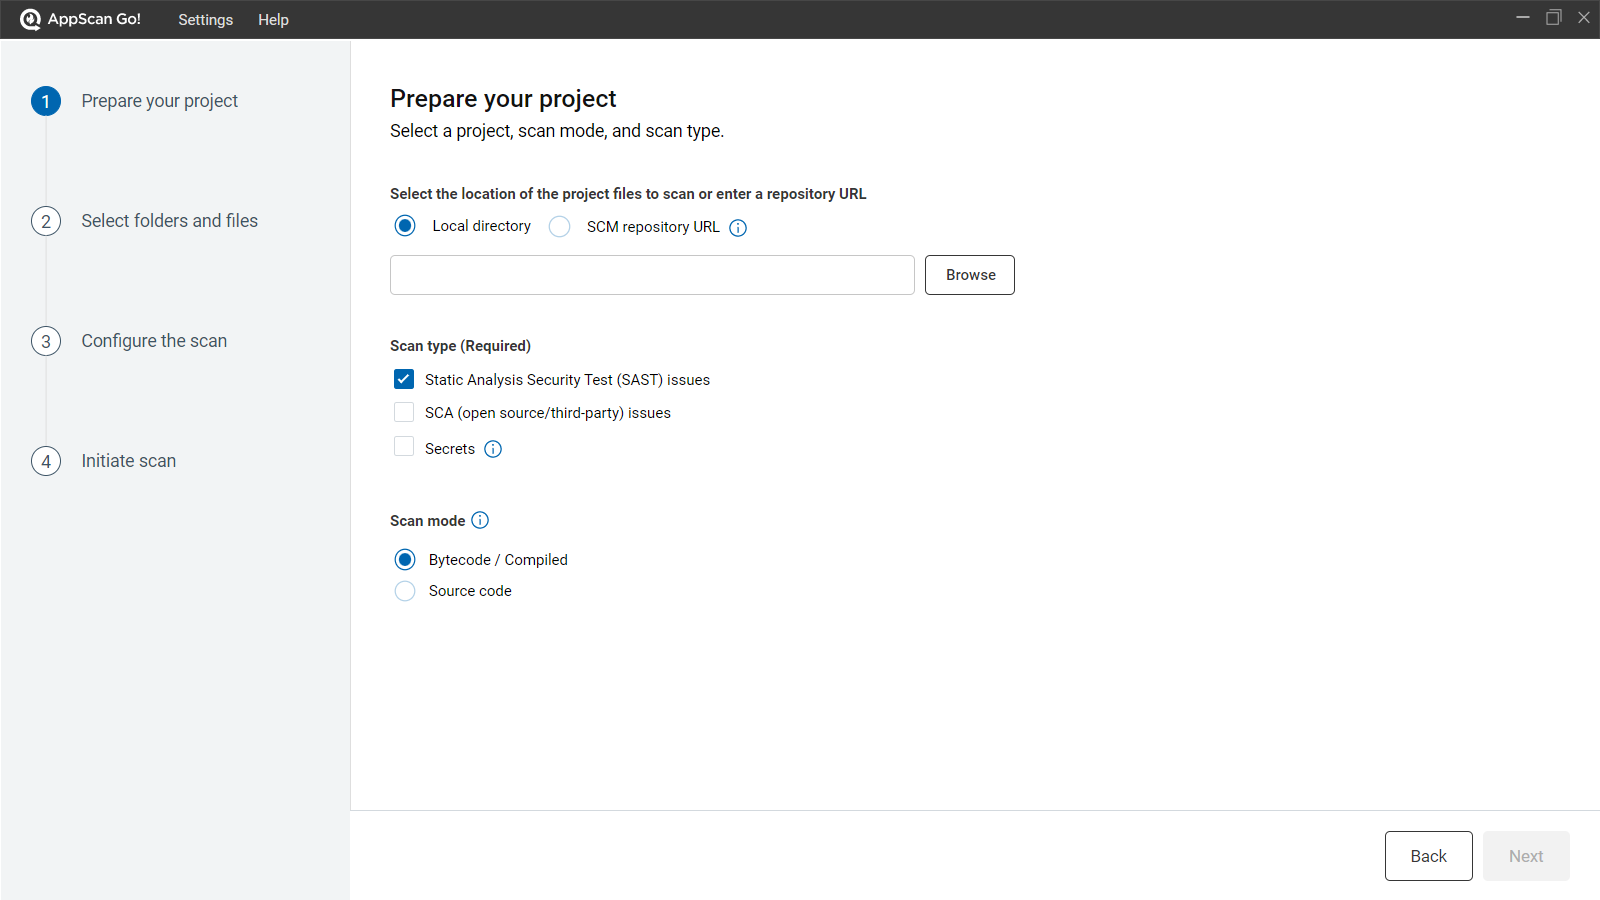
Specify the location of files to scan, and scan mode and type, then click
Next.
-
Specify the location of the project files to scan: a
local directory or software configuration management (SCM)
repository.
- If you are scanning a local directory, browse to the folder that contains the files to scan and click Select Folder. AppScan Go! allows you to choose folders only.
- If you are scanning a repository, enter the SCM repository URL,
click Connect to repository, login to the
SCM, and select the correct branch.Note:Ensure that you have Git version 2.40.1 or newer installed, and that you are using a personal access token for authentication.
AppScan Go! supports connections to GitHub, GitLab, BitBucket, and Azure Repos.
-
Specify the location of the project files to scan: a
local directory or software configuration management (SCM)
repository.
-
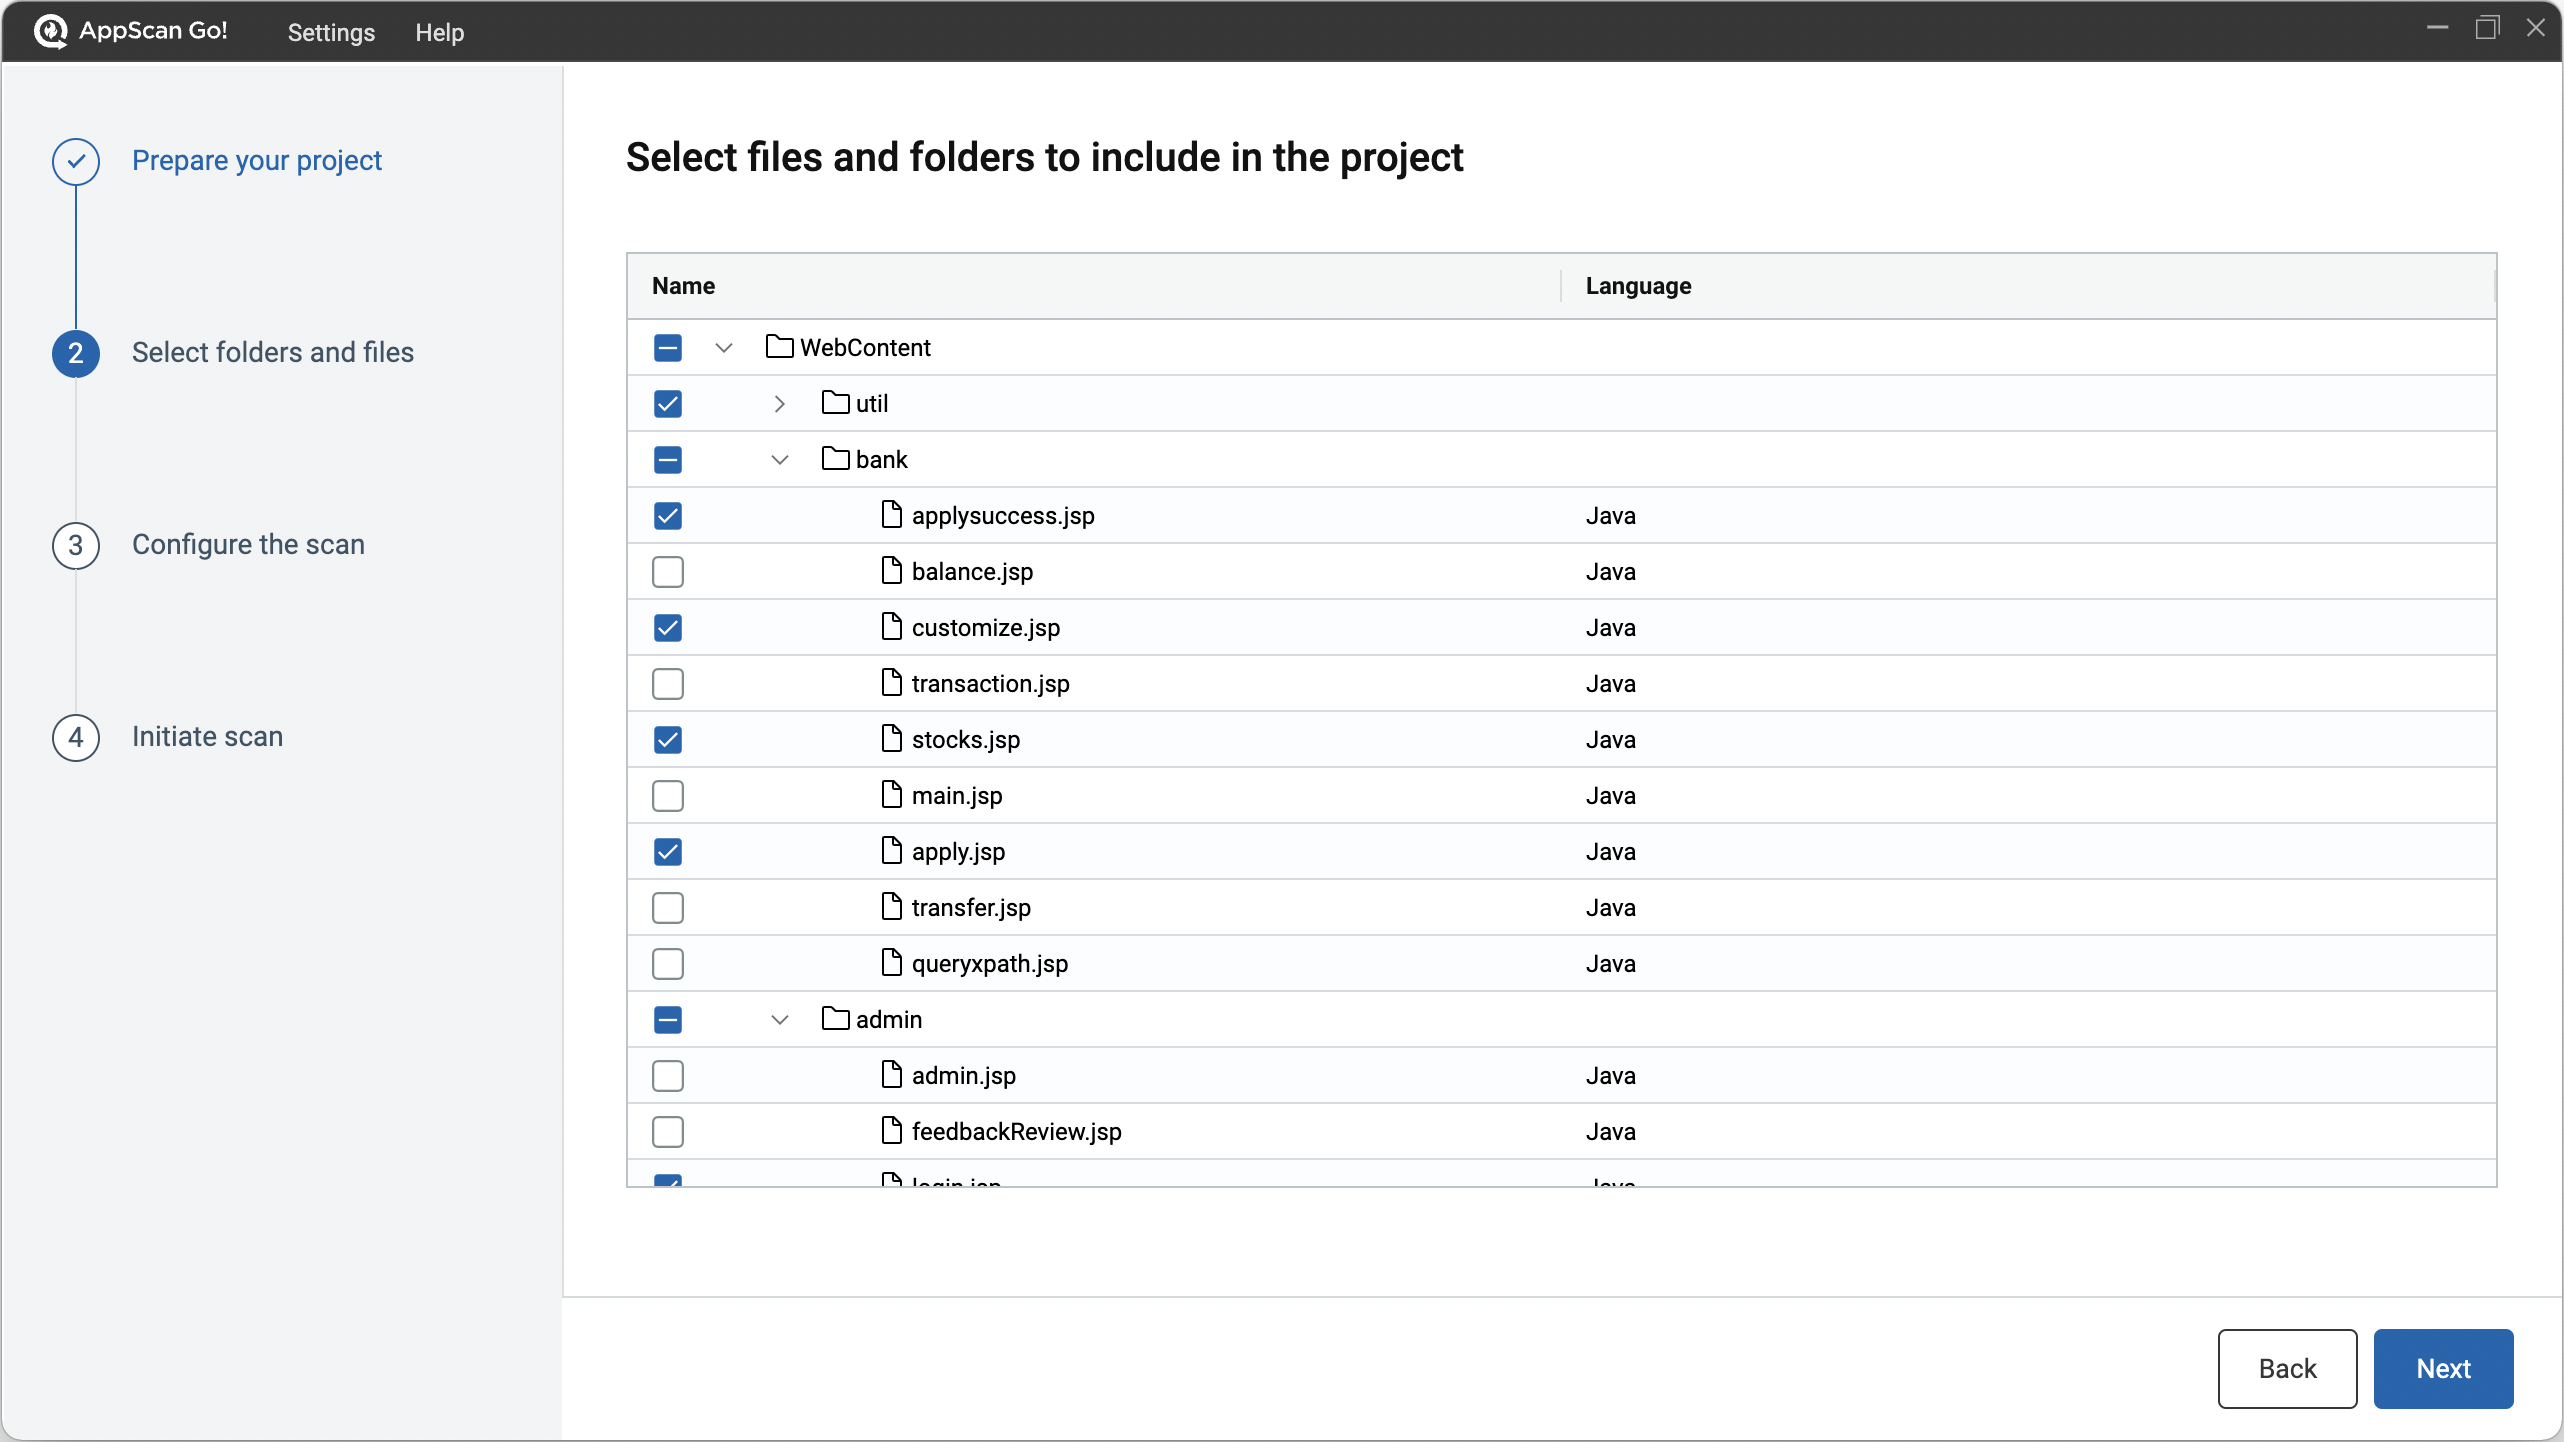
AppScan Go! retrieves appropriate
files from the selected folder and lists them for review. Review, select, or
deselect files, then click Next.
-
If you opted to run a complete scan, or prepare an IRX file, configure scan
settings, then click Next.
Note:You must be logged in to AppScan on Cloud to see the list of available applications.
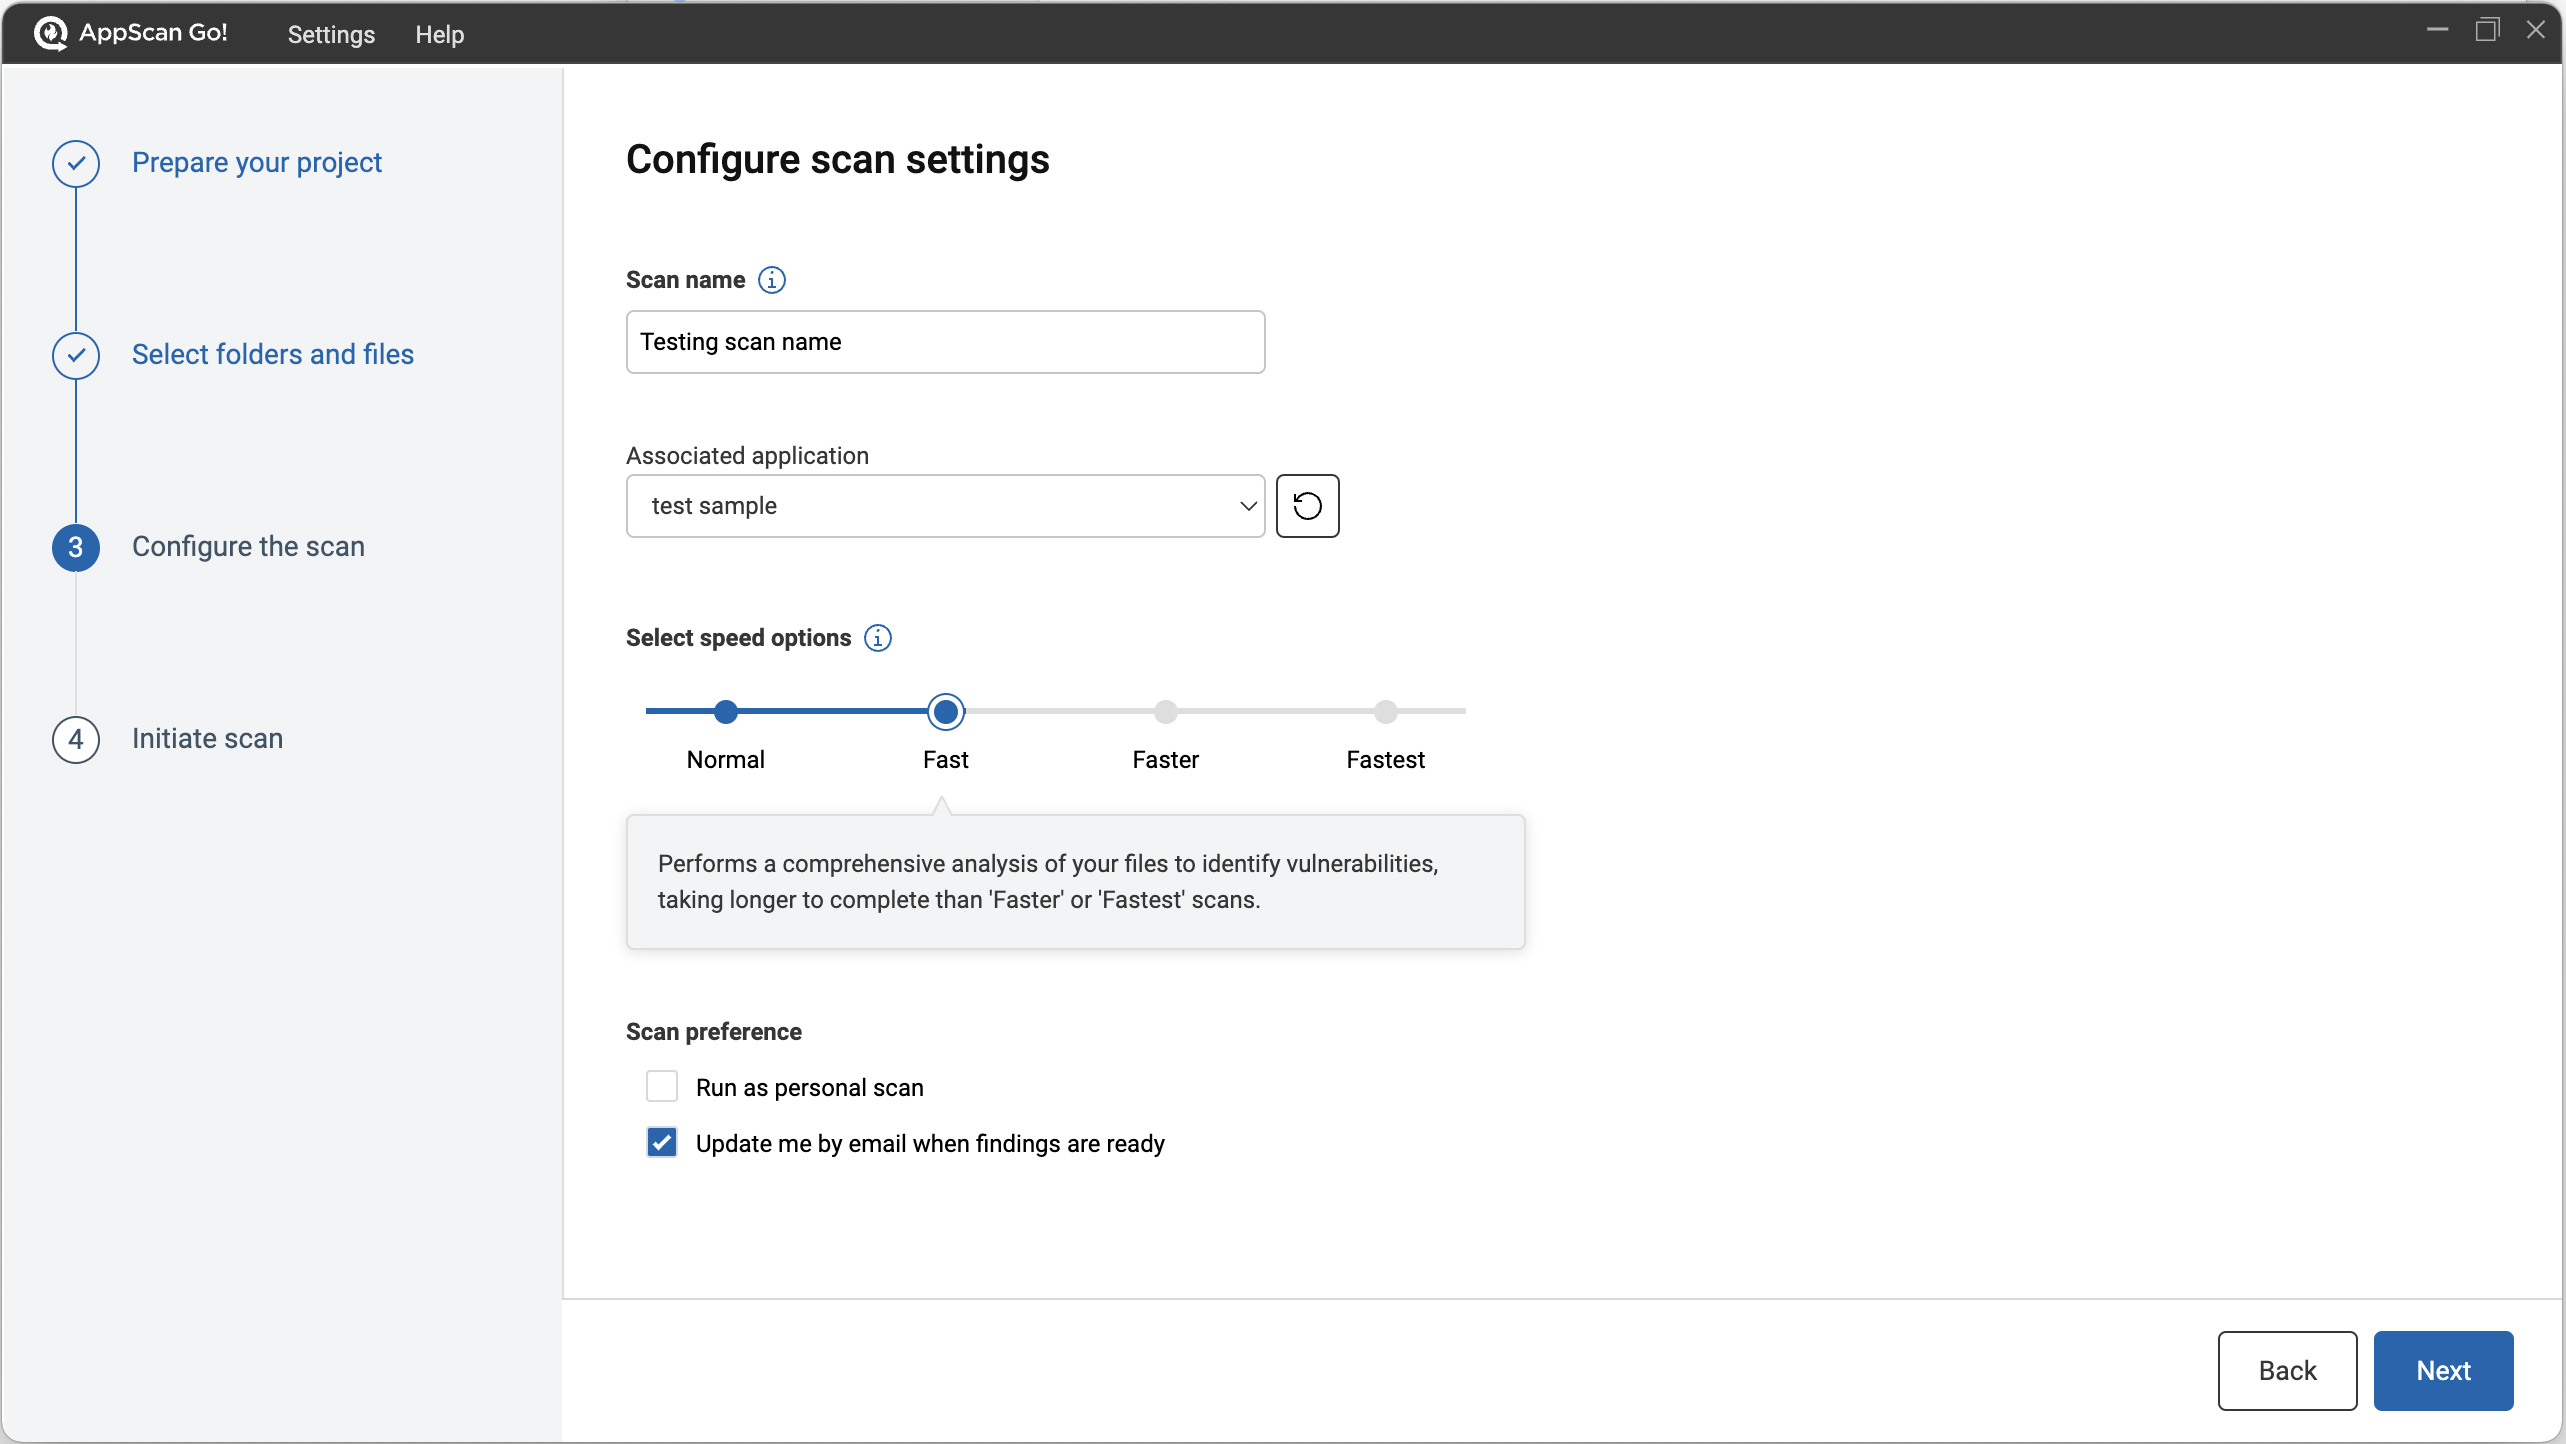
Setting Description Scan name Specify a name for the scan or accept the default name created by AppScan Go!. Associated application When running a complete scan, choose the application to associate with the scan. Scan speed options (SAST only) Choose Normal, Fast, Faster, or Fastest scan based on need and time demands. Note that scan speed is not a configurable option for SCA/open source scans. - A
normalscan performs a comprehensive analysis to identify the most detailed list of vulnerabilities and will take the longest time to complete. - A
fastscan performs a more complete analysis of your files to identify vulnerabilities, and usually takes longer to complete than anormalscan. - A
fasterscan provides a medium level of detail on the analysis and identification of security issues, and takes a bit more time to complete than the 'Fastest' scan. - The
fastestscan performs a surface-level analysis of your files to identify the most pressing issues for remediation. It takes the least amount of time to complete.Note:Scan speed does not necessarily correlate to relative number of vulnerabilities found in the code. For example, thenormalanalysis may rule out false positives that might be reported in afastestscan and therefore report fewer vulnerabilities.
Scan preferences When running a complete scan, specify scan preferences: - Run as a personal scan: Indicate whether the scan will be kept private and not included in umbrella project data.
- Update me by email when findings are ready: Indicate whether to email when the scan is complete. This is particularly helpful for Normal scans.
- Allow intervention: If selected, our scan enablement team attempts to fix the configuration if the scan fails or finds no issues. Results may be delayed.
- A
-
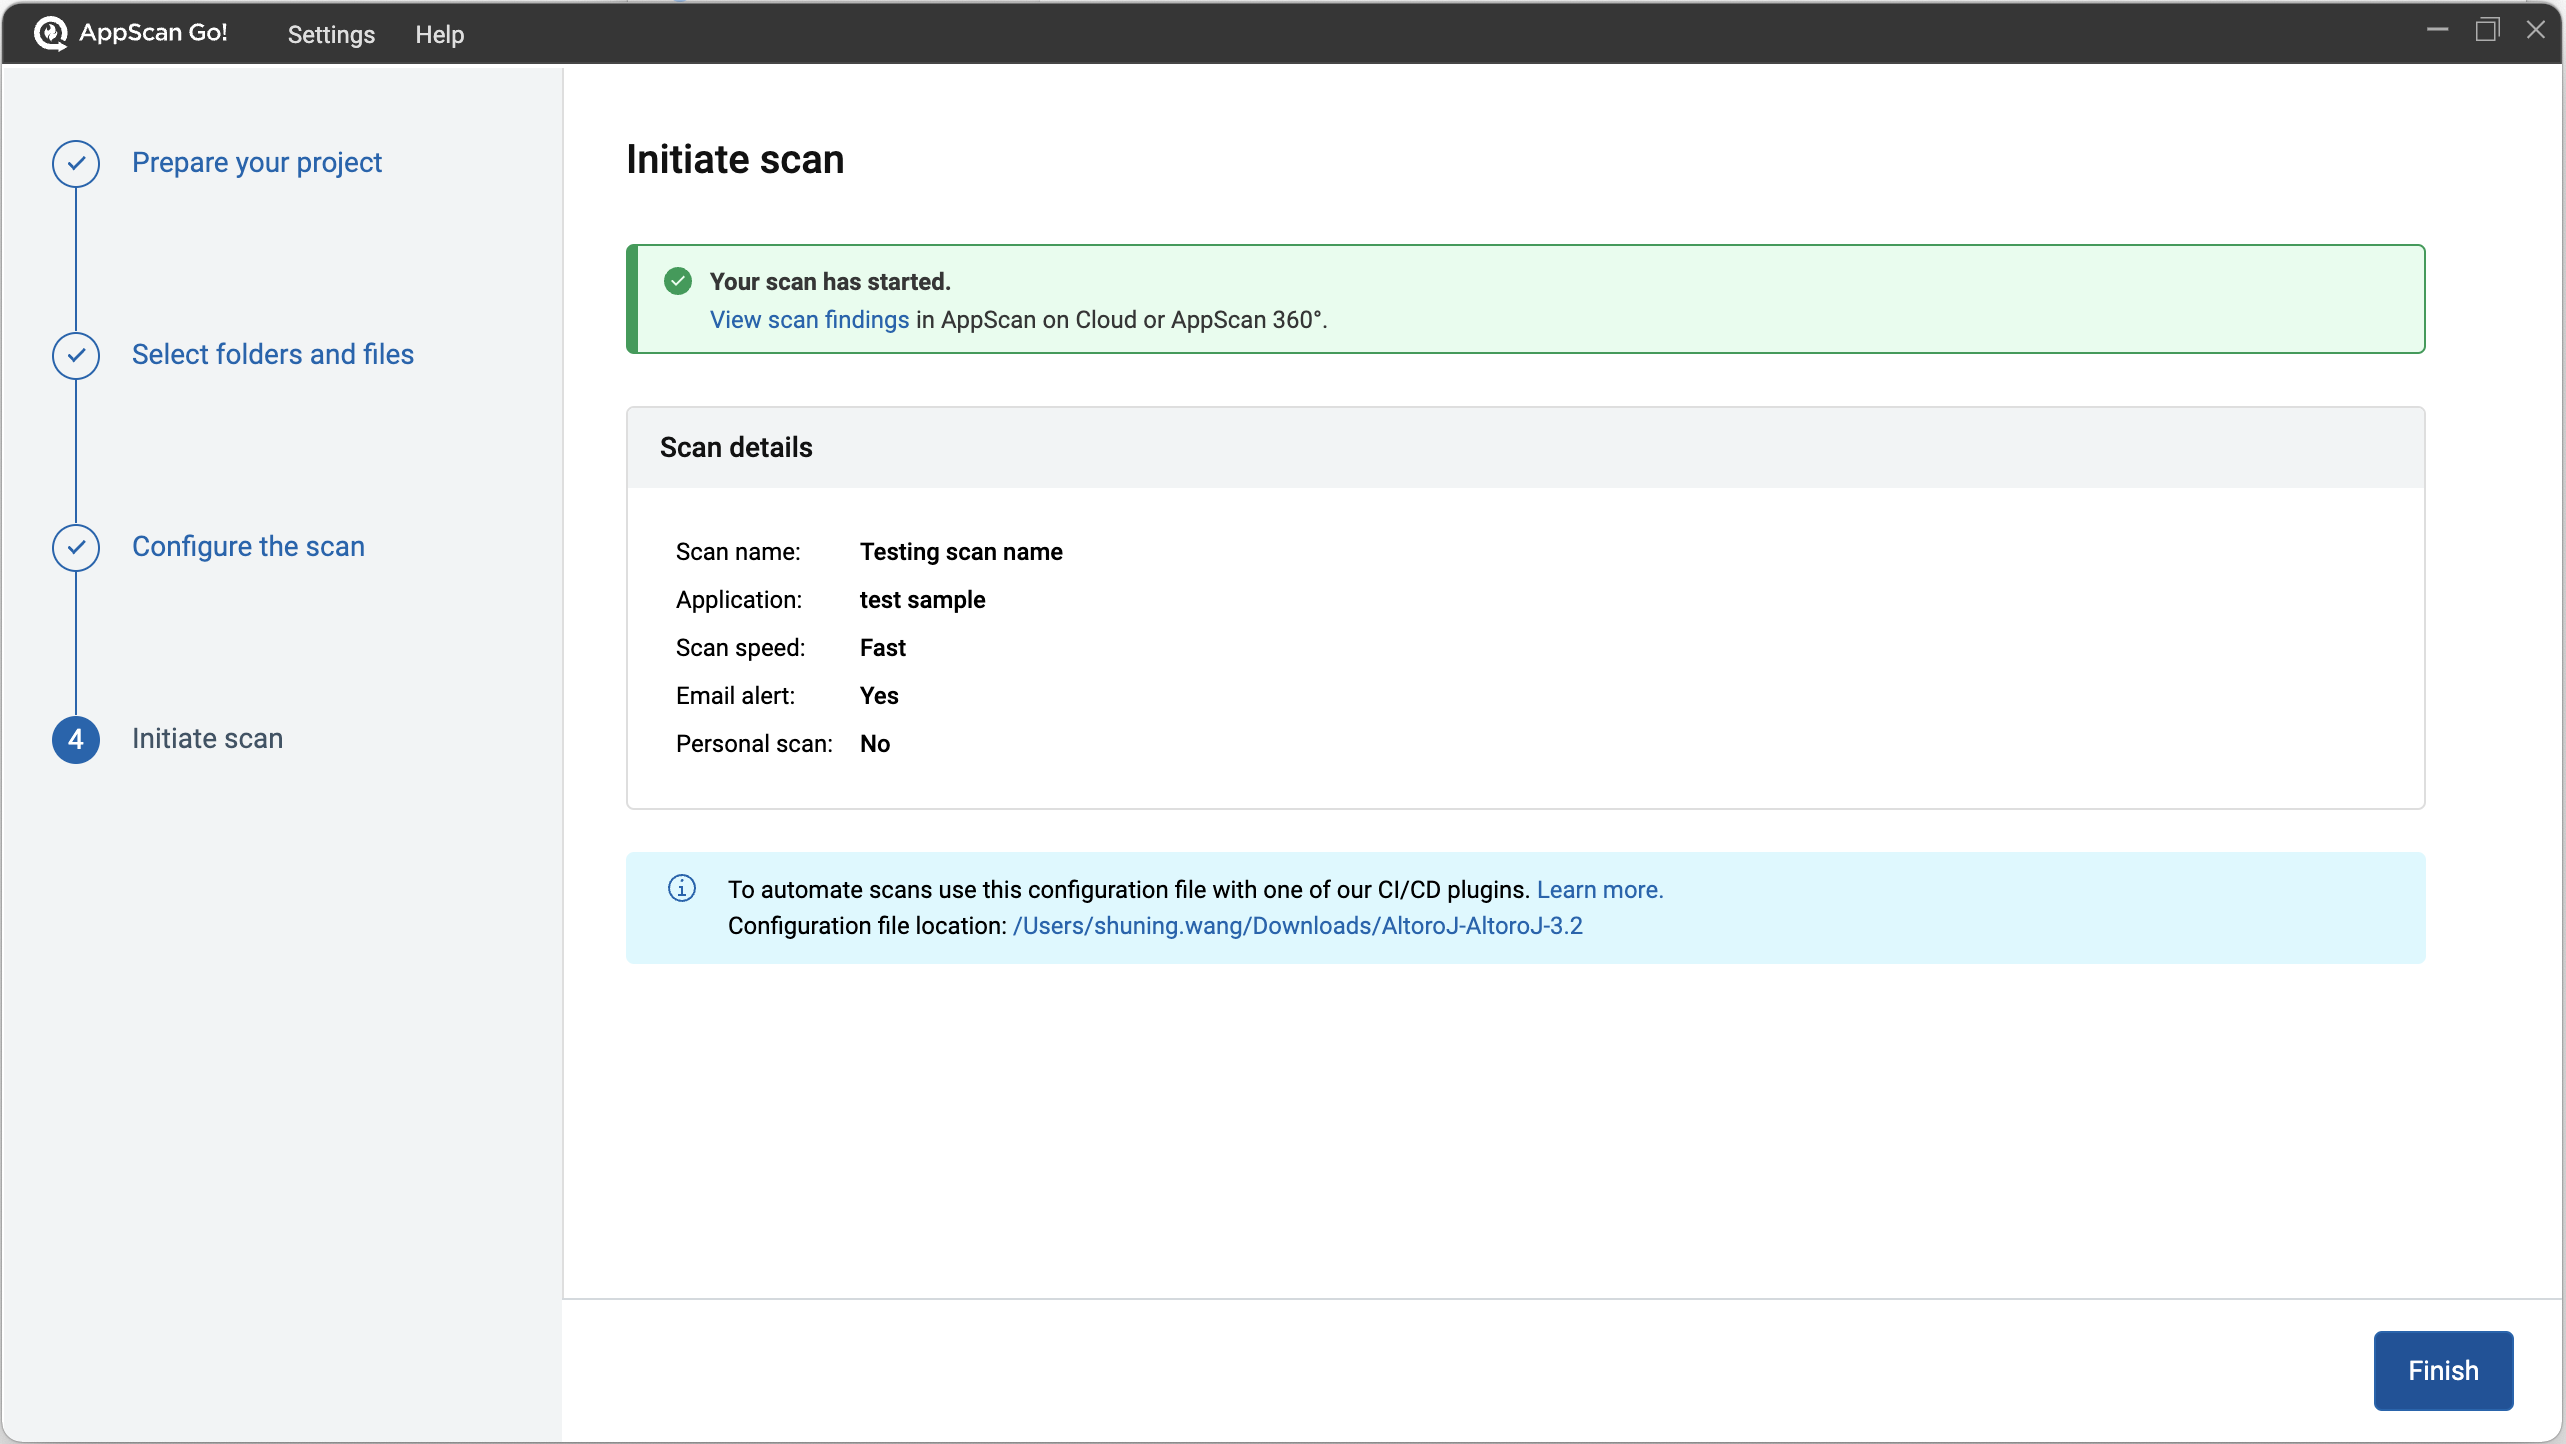
If you opted to run a complete scan, AppScan Go! gathers information for
any supported files in the directory and all of its subdirectories, then creates
an IRX file in the specified scan location. AppScan Go! then uploads the
resulting IRX file to the AppScan on Cloud service. When the scan upload is complete, click
Finish.
Note:You must be logged into an AppScan service to complete a scan. See Account information.
-
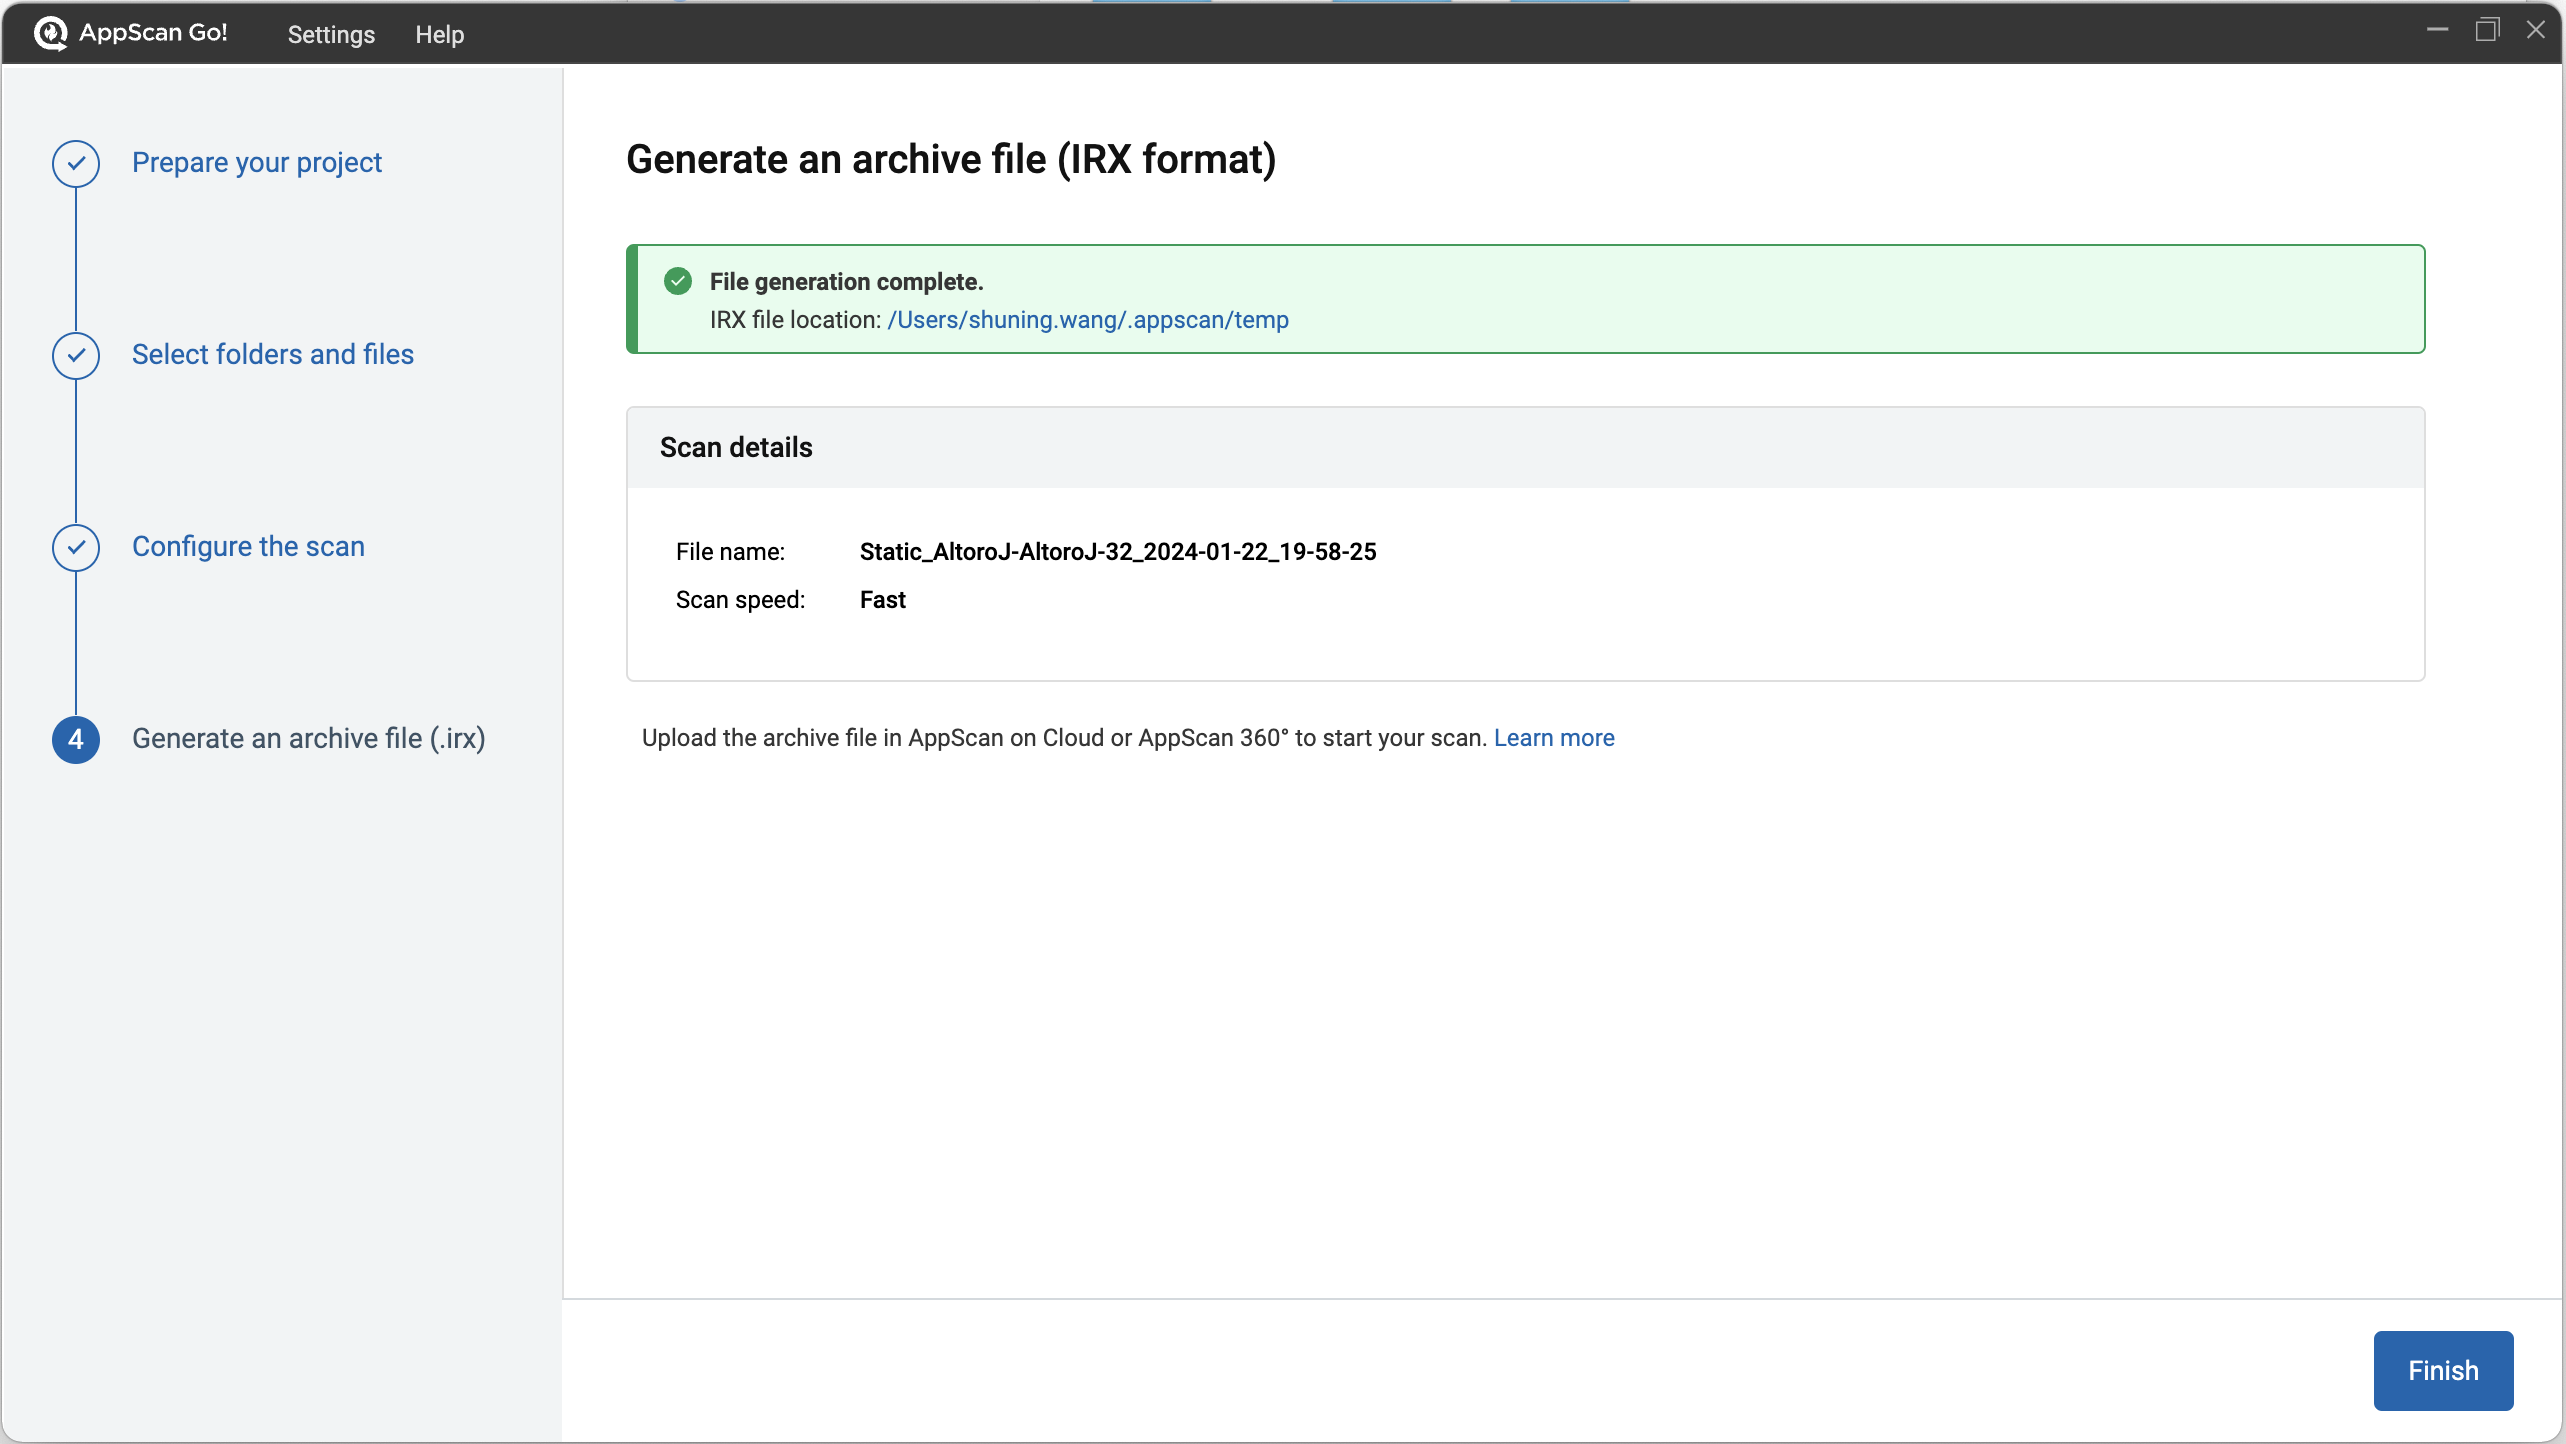
If you opted to create an IRX file, AppScan Go! gathers information for
any supported files in the directory and all of its subdirectories, then creates
an IRX file in the specified scan location. When file generation is complete,
click Finish.
-
If you opted to create a configuration file for automating scans, AppScan on Cloud saves the scan configuration file
(appscan-config.xml) to the folder with your files to
scan. Click Finish to exit AppScan Go!
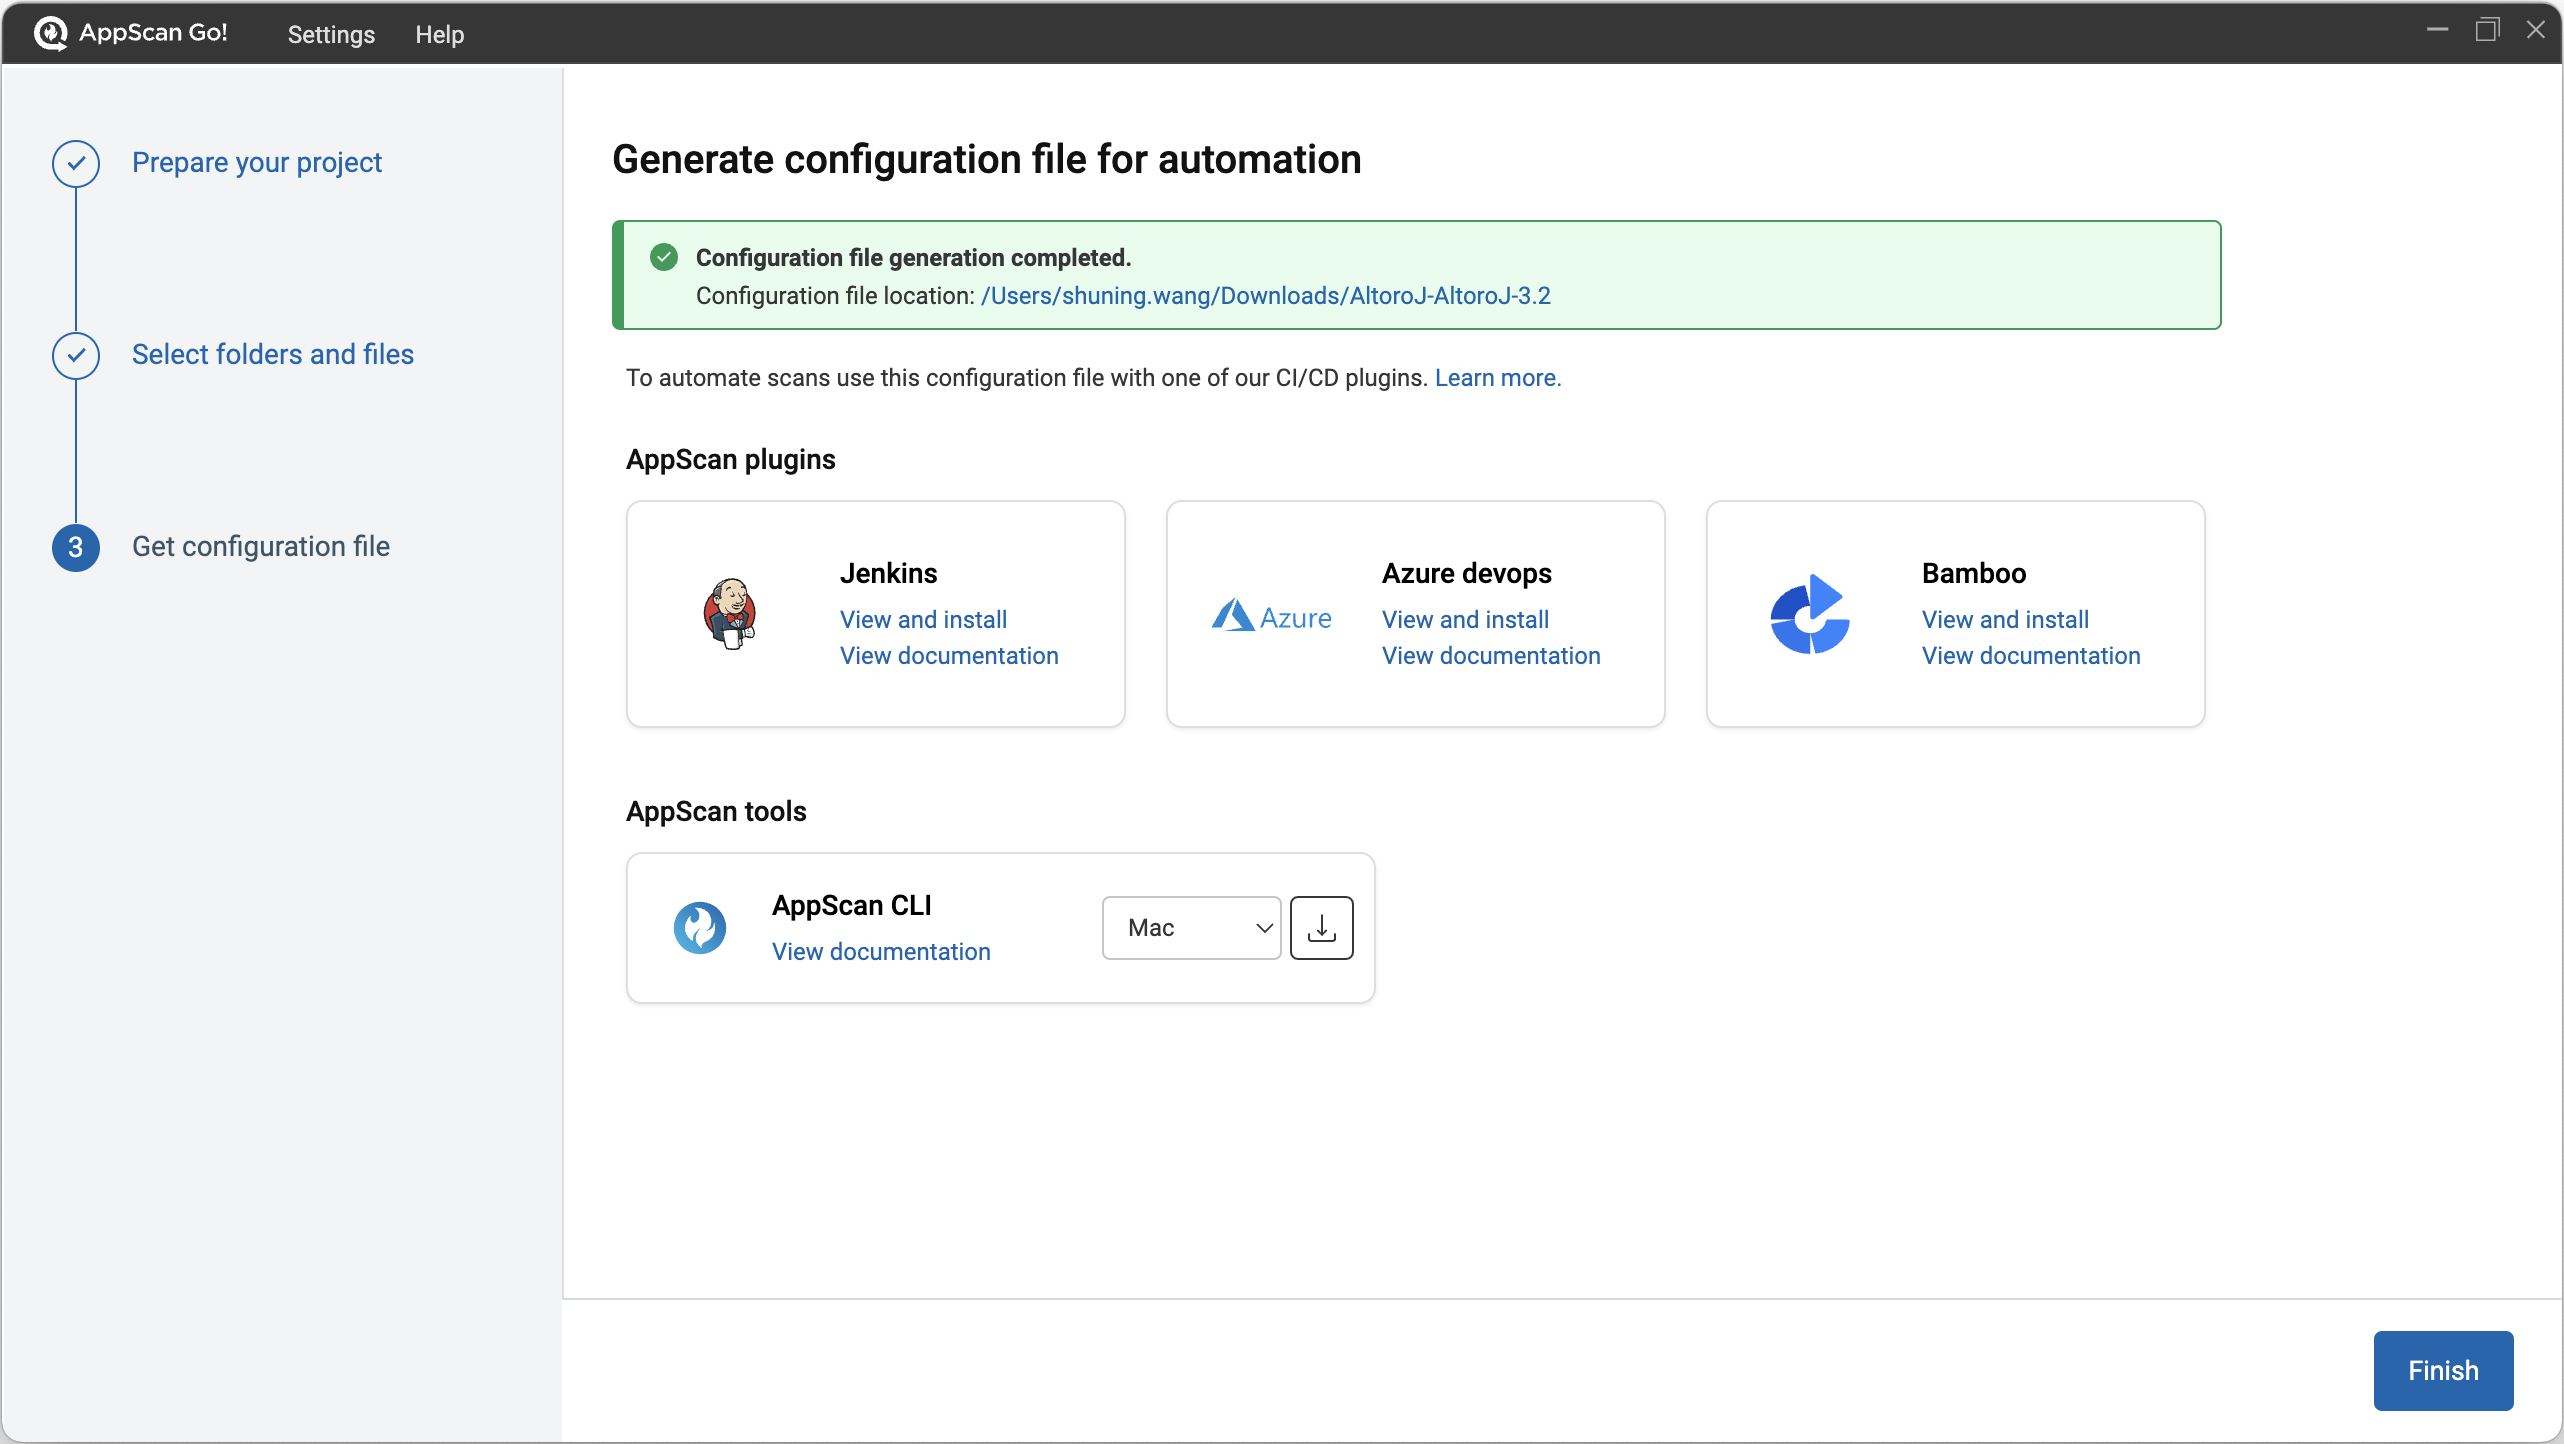
You can exit the utility at this point and pick up again later, login to the AppScan on Cloud service and configure and run the scan now, or use the configuration file to automate scanning using one of the listed plugins.Note:For additional information on using configuration files, see Configuring IRX file generation with the CLI. -
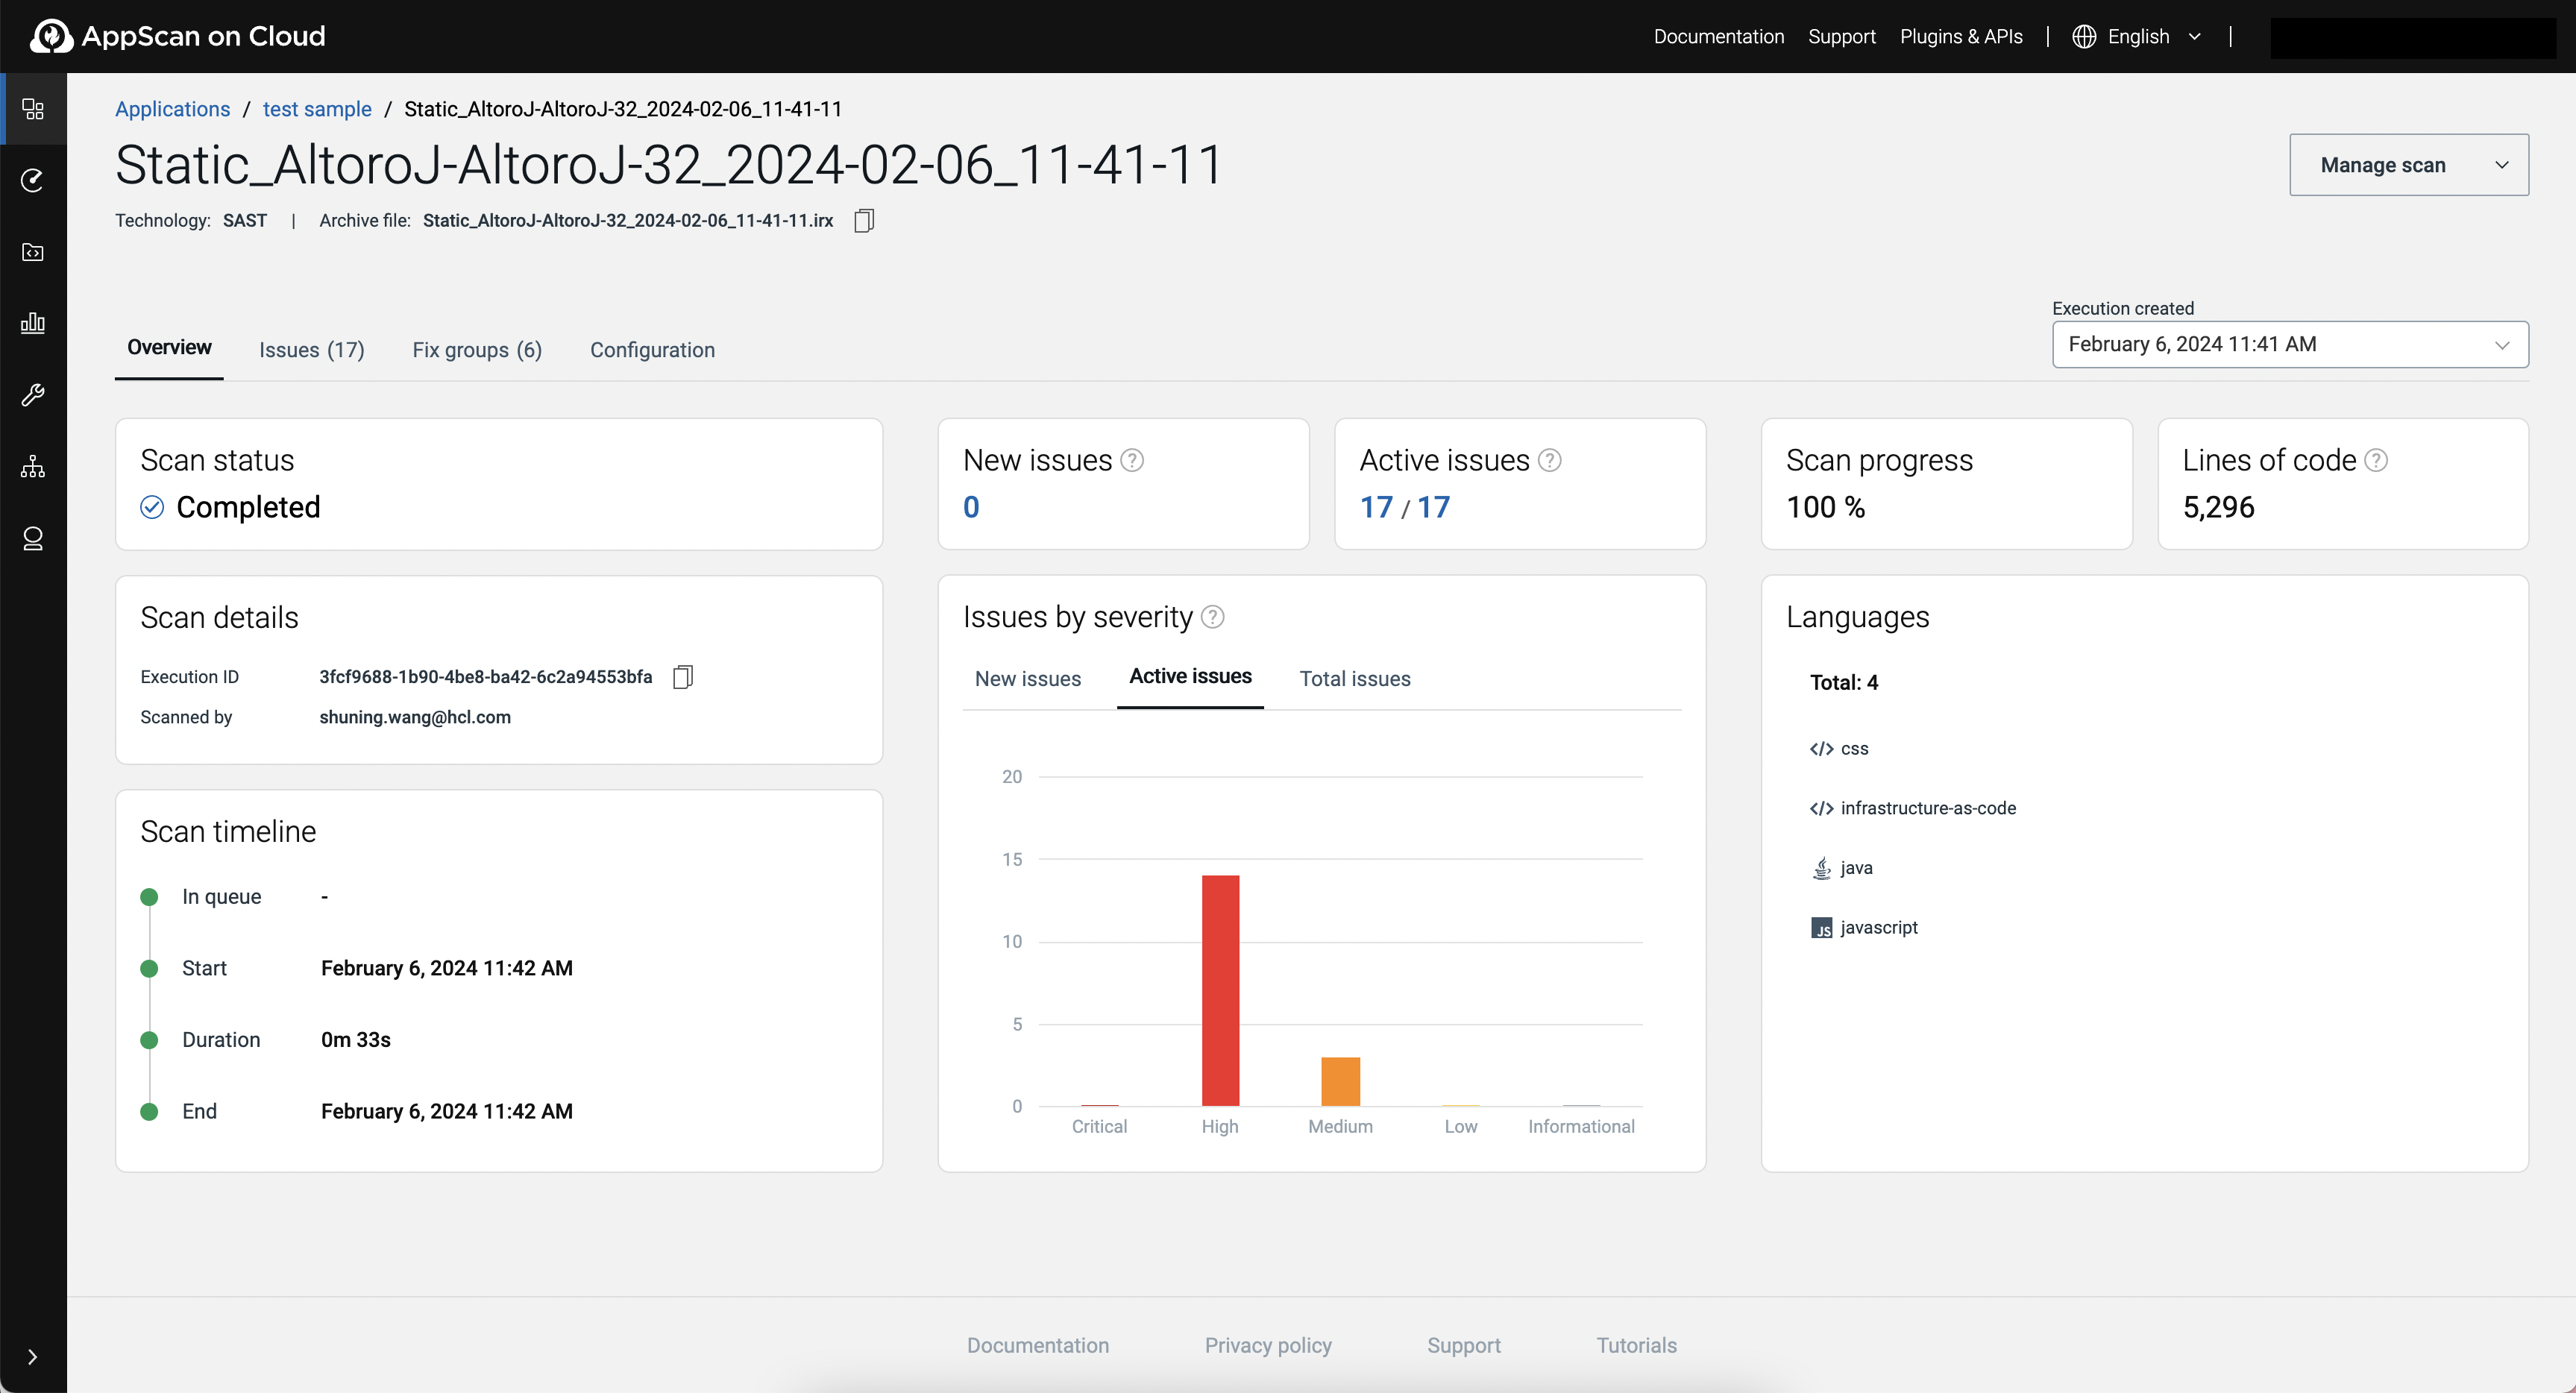
Open AppScan on Cloud to review the status or results of the scan, or to
start a scan with the IRX file generated by AppScan Go!