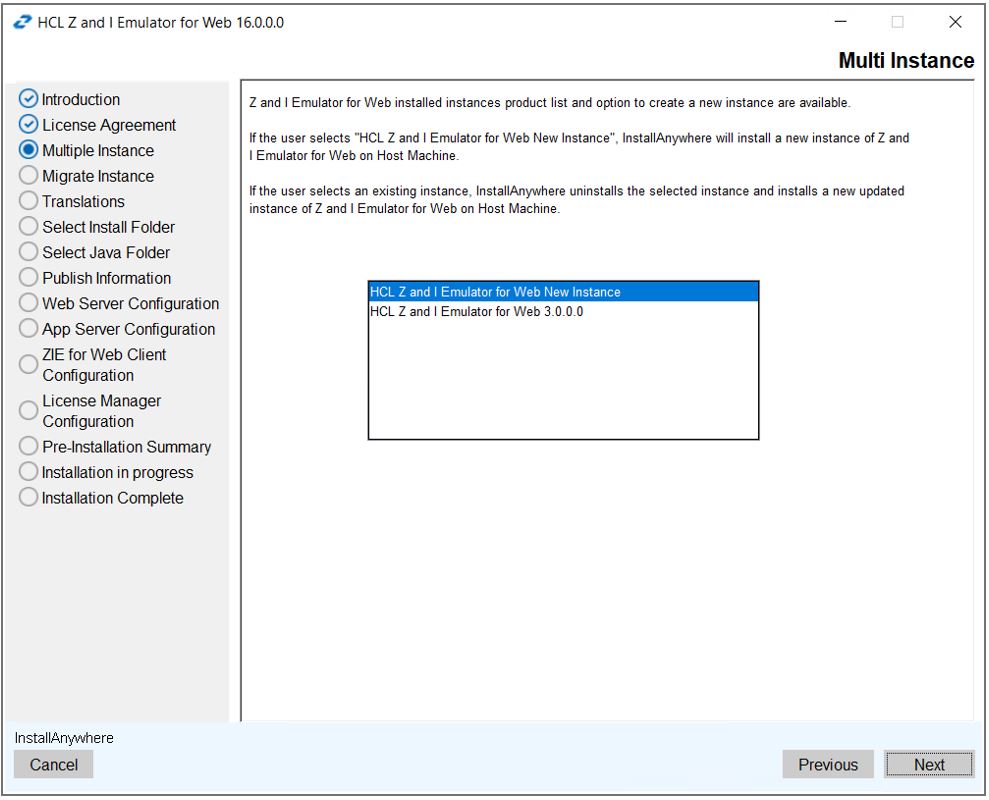
Multiple Instance or Upgrade Installation
- Z and I Emulator for Web v16.0.1.0 search the previous installed release of HCL Z and I Emulator for Web v16.0.0.0 and displays on Multiple Instance dialog.
- Z and I Emulator for Web v16.0.1.0
supports upgrade instance from v16.0.0.0, suppose user wants to perform upgrade
installation from v16.0.1.0 to v16.0.0.0, then needs to select "Z and I Emulator for Web v16.0.0.0" in
multiple instance dialog and it performs upgrade installation with base product
configurations.Note:
- When upgrading or configuring multiple instances, the IBM HTTP
Server may block the NSMProp file configuration in the
<Installation Path>\privatedirectory. If the page does not load, manually update the secure port entries in the NSMProp file with the following values:CONFIGSERVER_PARMS = %INSTALL_PATH% 8999 9001
- When upgrading or configuring multiple instances, the IBM HTTP
Server may block the NSMProp file configuration in the
GUI Mode Multiple Instance or Upgrade Installation
- Select the HCL Z and I Emulator for Web 16.0.0.0 and click
Next.
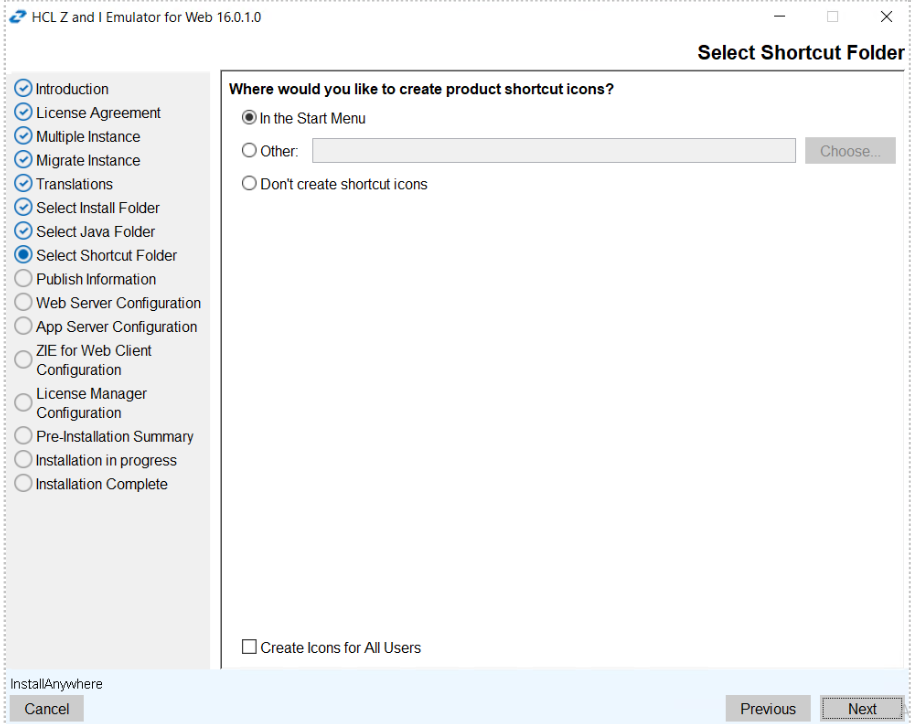
- The Select Shortcut Folder sreen appears. Select the required option to
creat the shortcut icon.
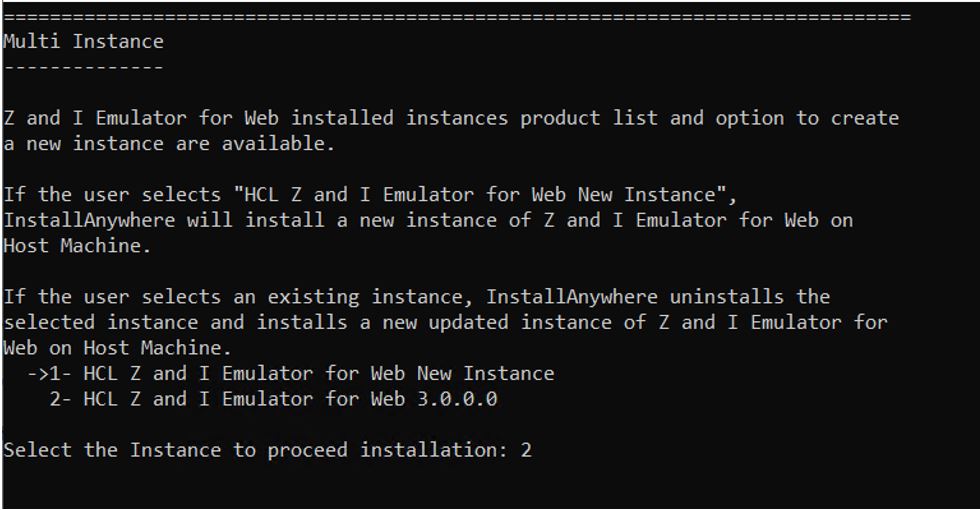
Console Mode Multiple Instance or Upgrade Installation
The Z and I Emulator for Web v16.0.0.0 is installed on the host. Z and I Emulator for Web v16.0.1.0 displays a multiple instance console dialog with HCL Z and I Emulator for Web installed product list. If the user selects Z and I Emulator for Web v16.0.0.0, it performs upgrade installation with base configurations.
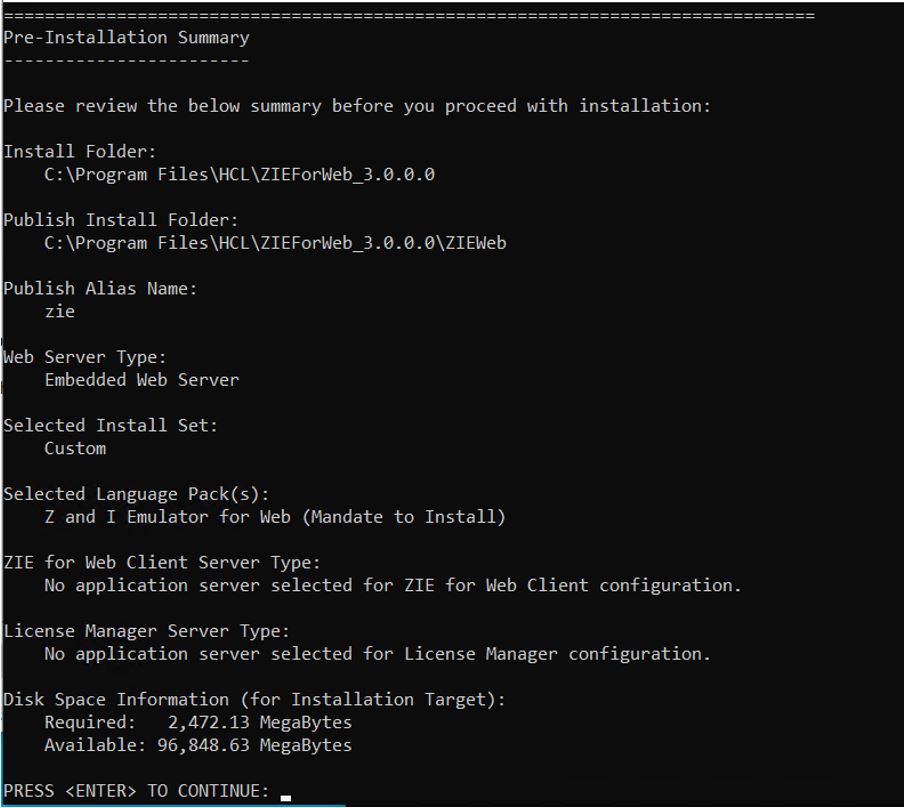
Silent Mode Multiple Instance or Upgrade Installation
The Z and I Emulator for Web Version 16.0 supports silent mode installation either upgrade scenario or multiple instance type installation.
For more information, refer to Installing the HCL Z and I Emulator for Web, Deployment Wizard and HACL Tool kit in Silent Mode.
Deployment Wizard Upgrade Installation
Z and I Emulator for Web supports upgrade installation.
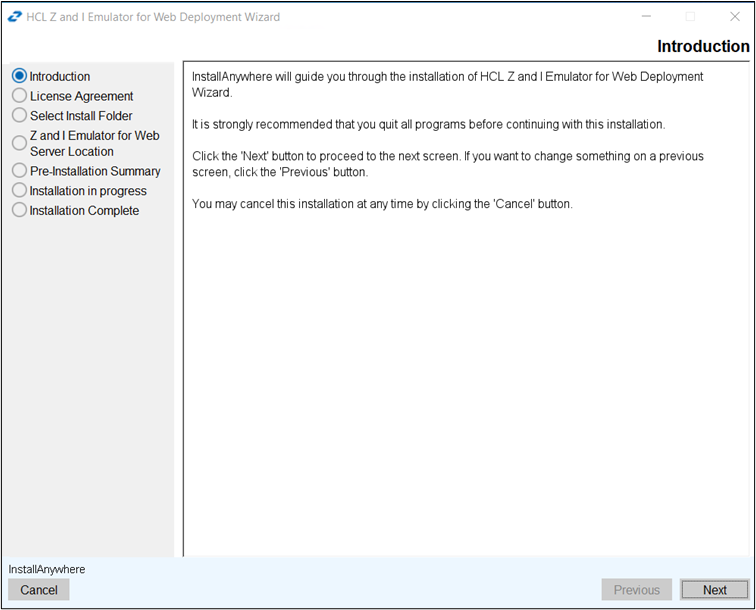
- Launch the Deployment Wizard installer.
- TheZ and I Emulator for Web
Wizard window appears, click OK.

- The Introduction screen appears, click Next.
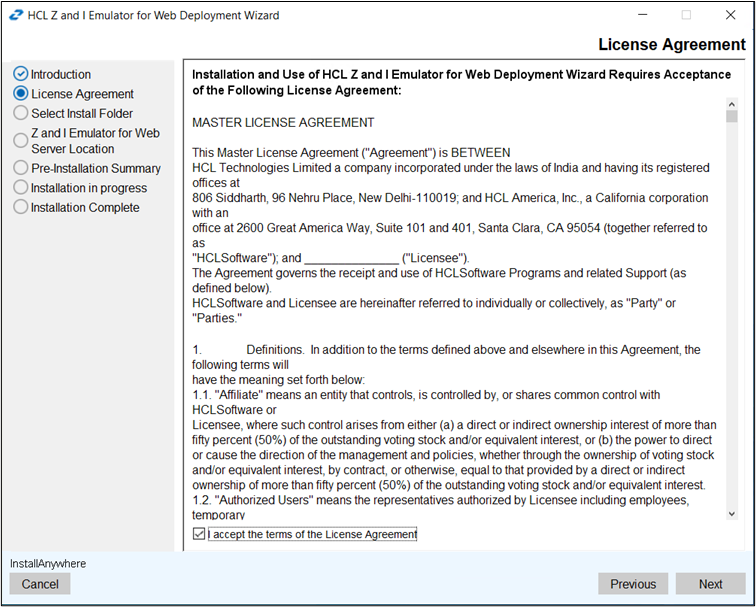
- The License Agreement screen appears. Click the I accept the terms of the
License Agreement check box and click Next.
- The Select Install Folder screen appears, click Next.
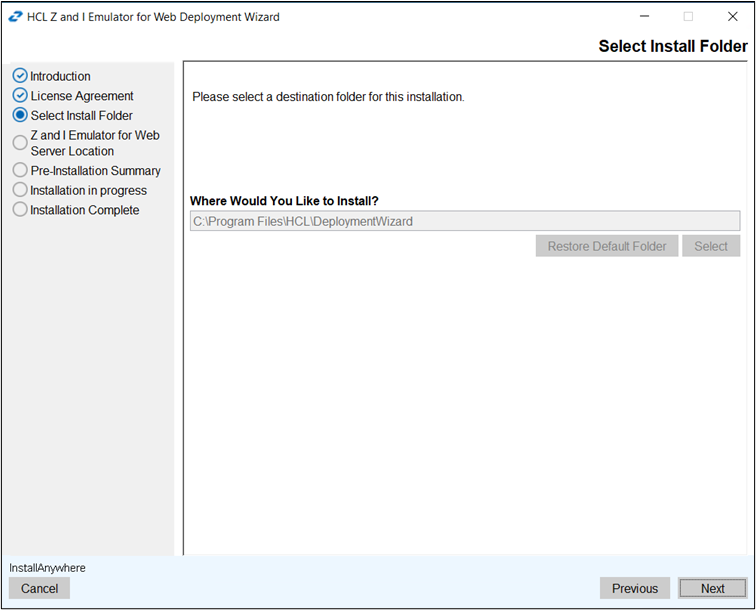 Note: During upgrade, a user will not able to change the installation path.
 - The Z and I Emulator for Web Server Location screen appears. Enter
the Z and I Emulator for Web server location in the field and click
Next.
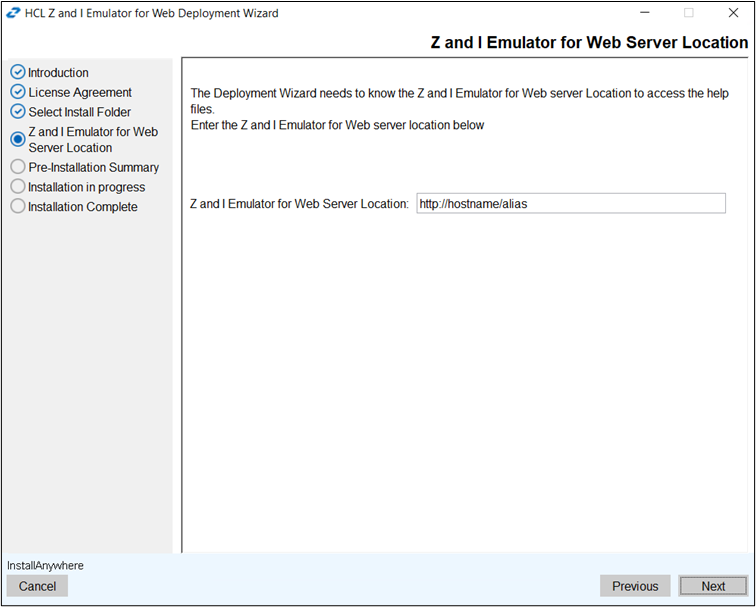 Note: Previous configured Z and I Emulator for Web server location will be retained.
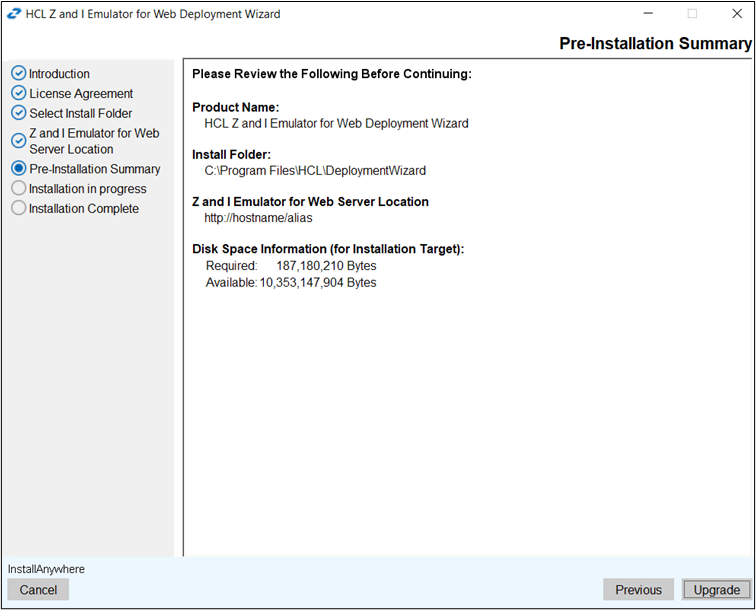
 - The Pre-Installation Summary screen appears. Review the summary
details and click Upgrade.
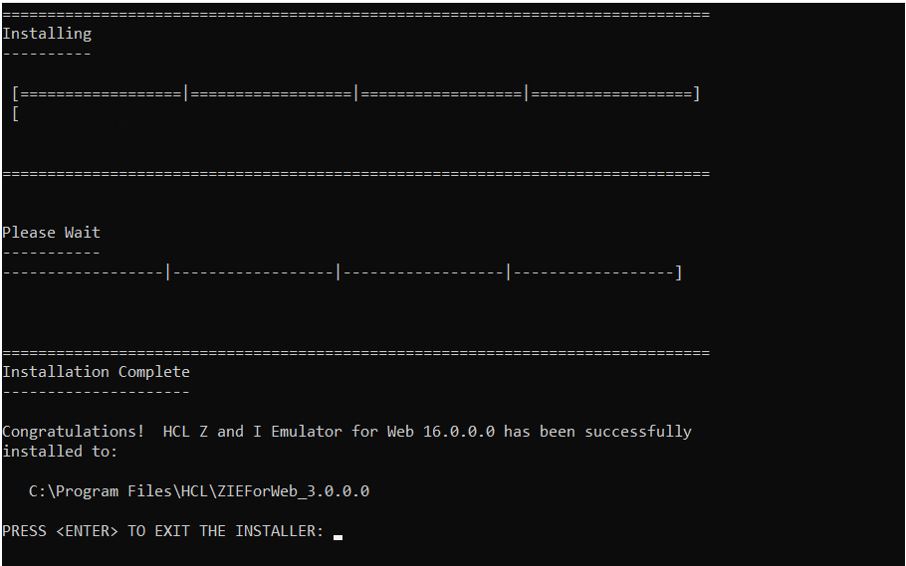
- The upgrade process gets start.
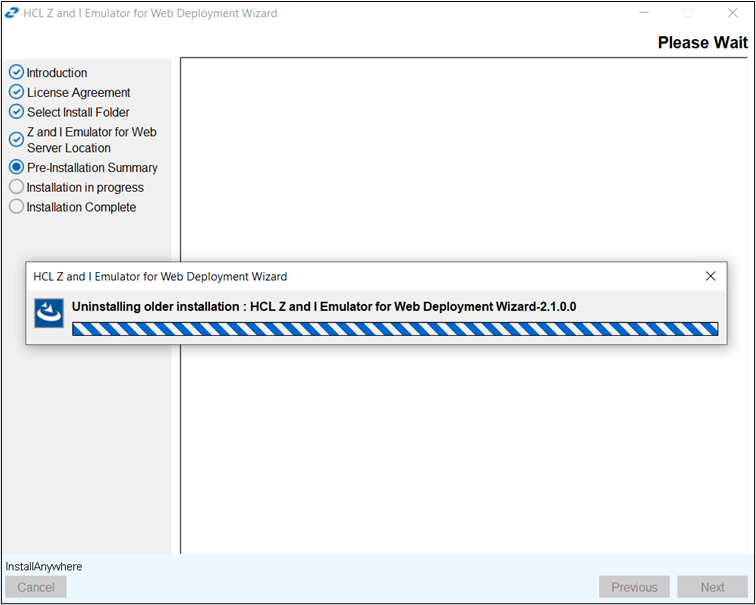 Note: During an upgrade, the installer uninstalls the existing version and installs the latest version.
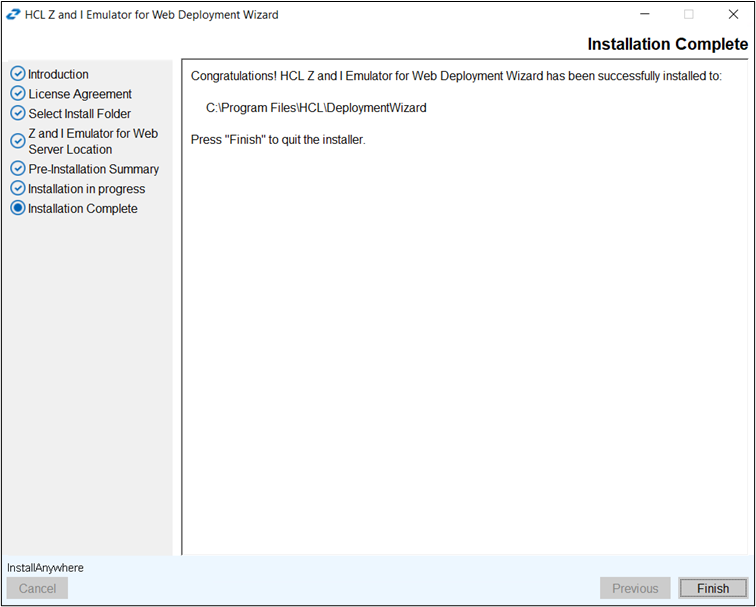
 - After successful upgradation, the Install Complete screen appears.
Click Finish.
Host Access Toolkit Upgrade Installation
Z and I Emulator for Web Toolkit supports Upgrade installation.
- Launch the HCL Host Access Toolkit installer.
- The Z and I Emulator for Web
Host Access Toolkit window appears, click OK.
- Update installation do not support Host Access Toolkit upgrade and below
popup message appears.
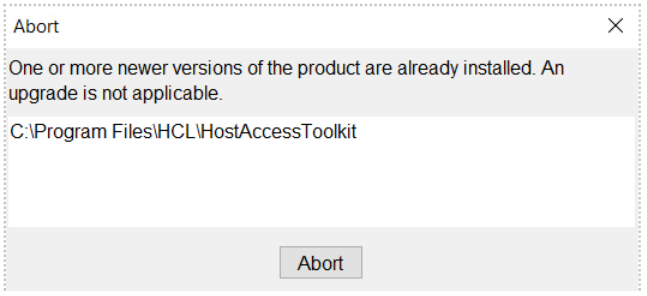
When the above message appears, user needs to uninstall the existing Host Access Toolkit and install the v16.0.1 Host Access Toolkit as fresh install.