Creating a Pipeline
About this task
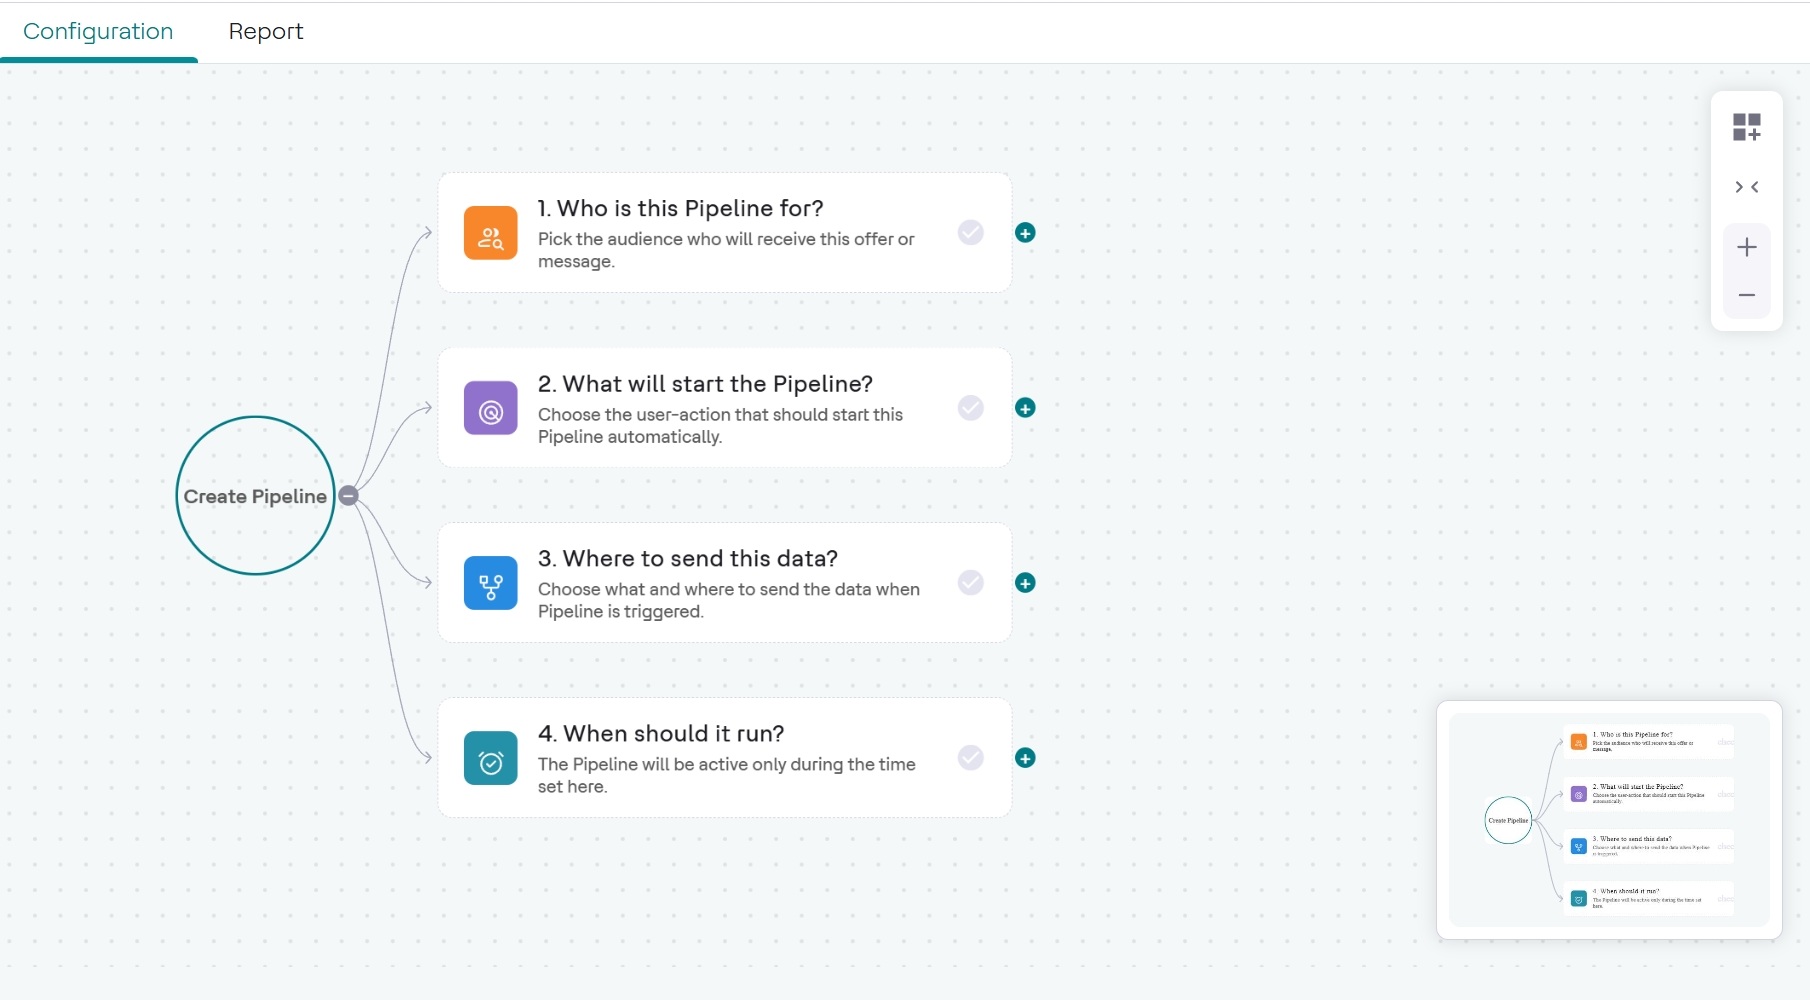
A pipeline dictates how incoming data feeds are evaluated and where the resulting events are sent. The creation process is divided into four primary configuration nodes.
Procedure
-
Navigate to the Pipelines section to start a new pipeline.
-
Click Next. The Pipeline visual configuration canvas appears.
-
Click Next. The Pipeline visual configuration canvas appears.
-
Configure Step 1: Who is this Pipeline for? (Audience)
-
Set the operator (e.g., Not Equal To) and enter the corresponding value
(e.g.,
""to target all available audiences).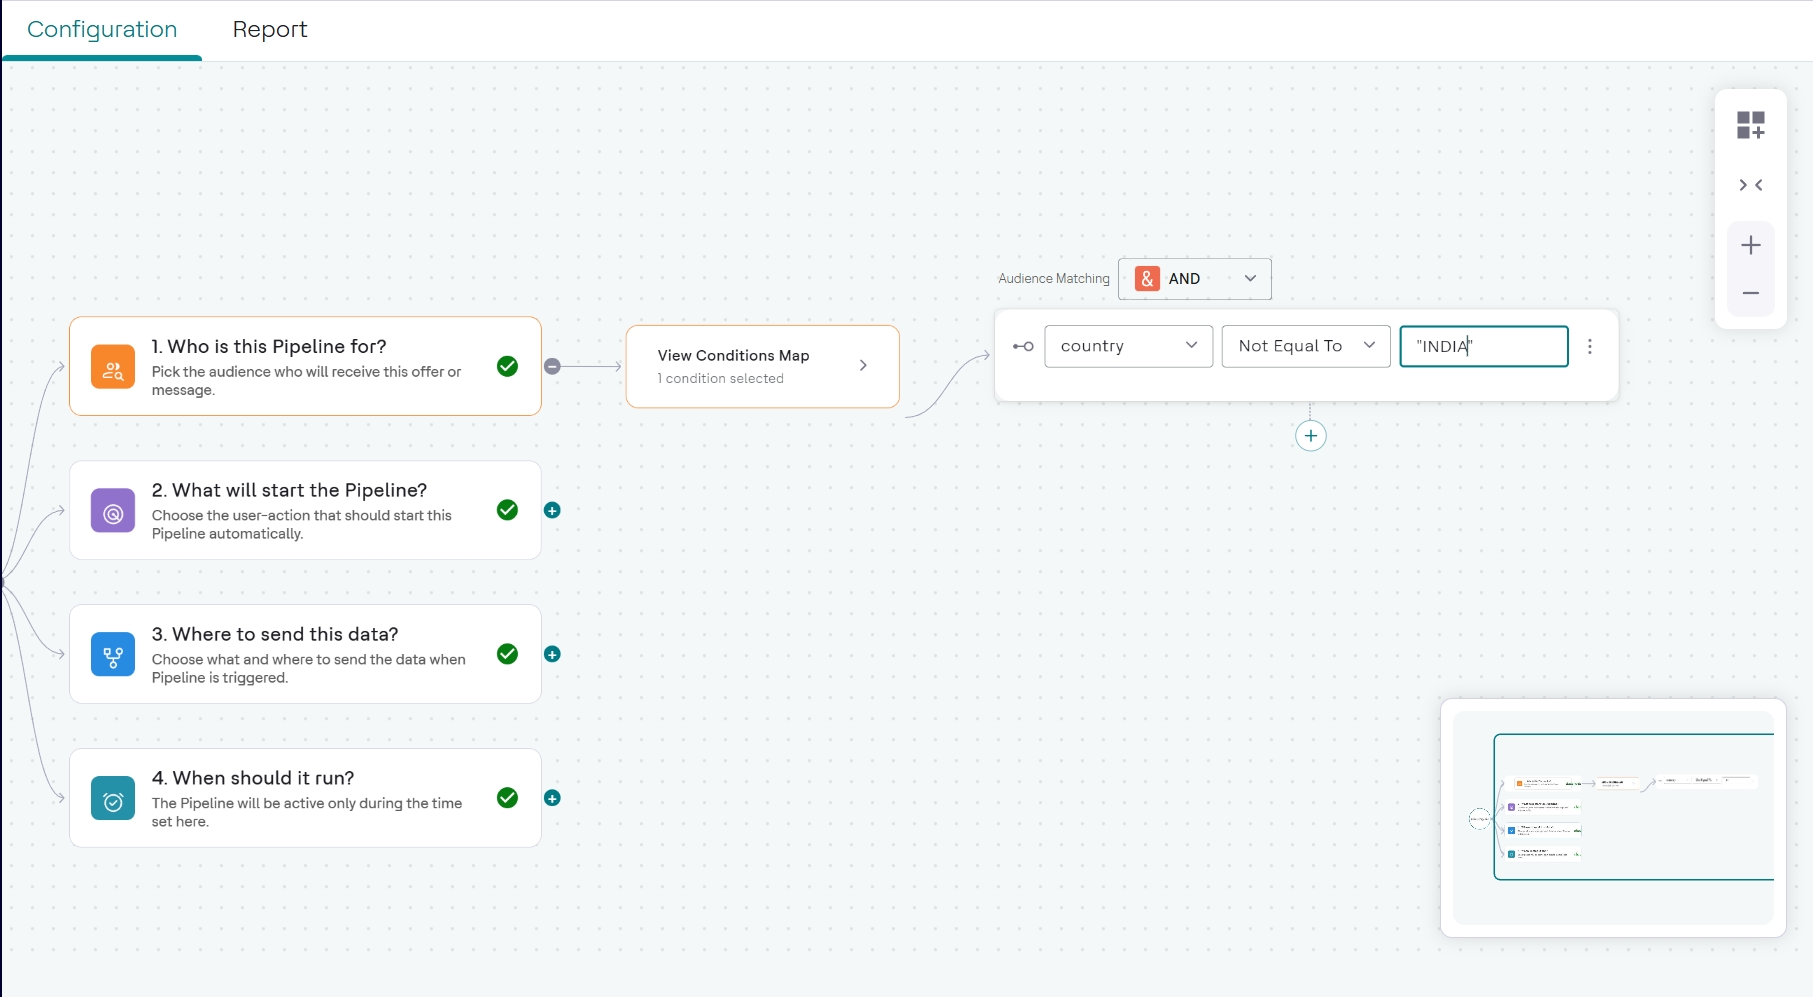
-
Set the operator (e.g., Not Equal To) and enter the corresponding value
(e.g.,
-
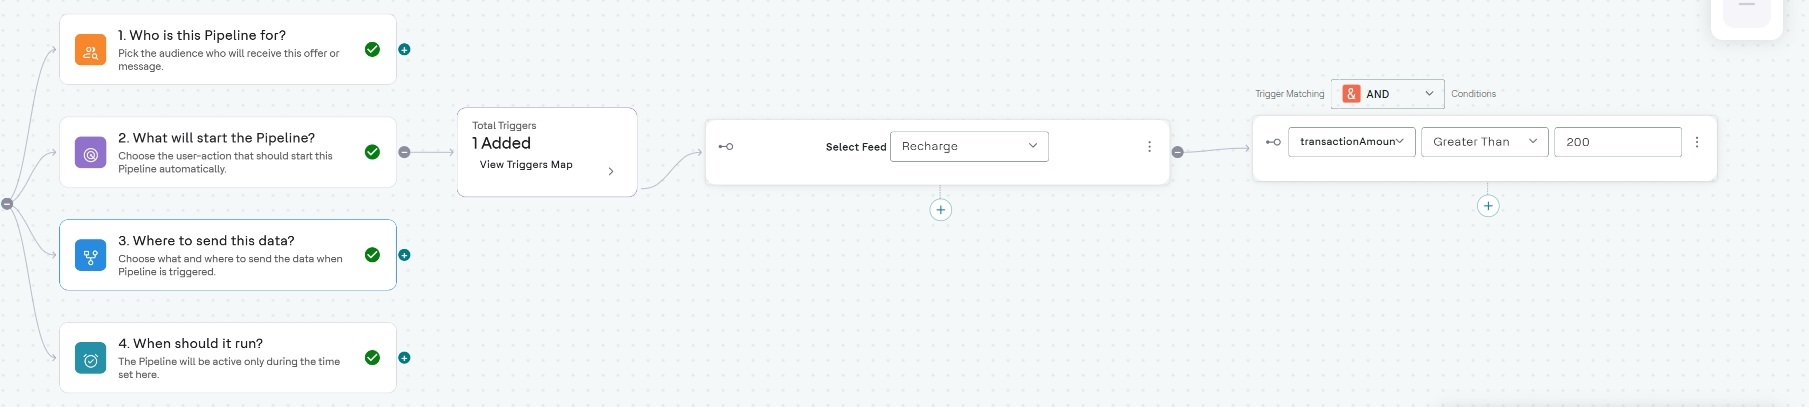
Configure Step 2: What will start the Pipeline?
-
Under the Trigger Matching section, define the condition that must be met to
trigger the event. Select a Tuple Attribute (e.g., TransactionAmount),
set the operator (e.g., Greater Than), and enter the threshold value (e.g.,
200).
-
Under the Trigger Matching section, define the condition that must be met to
trigger the event. Select a Tuple Attribute (e.g., TransactionAmount),
set the operator (e.g., Greater Than), and enter the threshold value (e.g.,
-
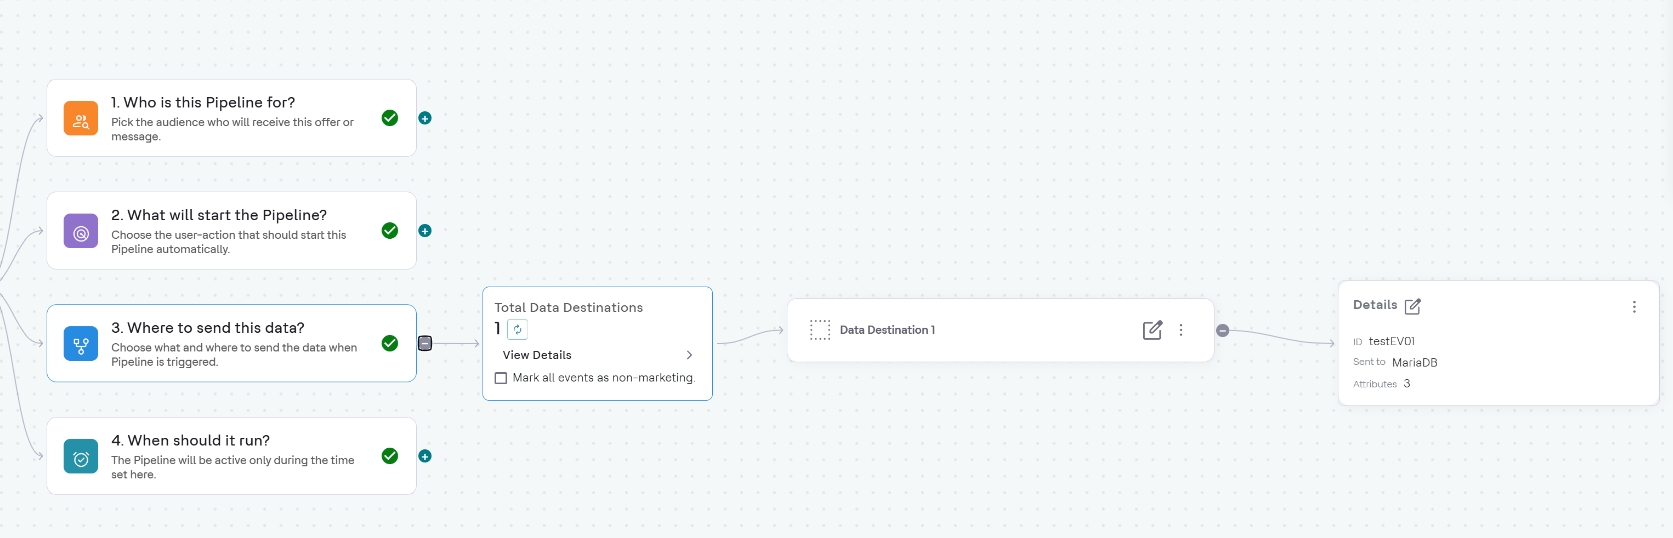
Configure Step 3: Where to send this data? (Destination)
-
In the Event ID field, enter a unique identifier for the event (e.g.,
rechargeCust).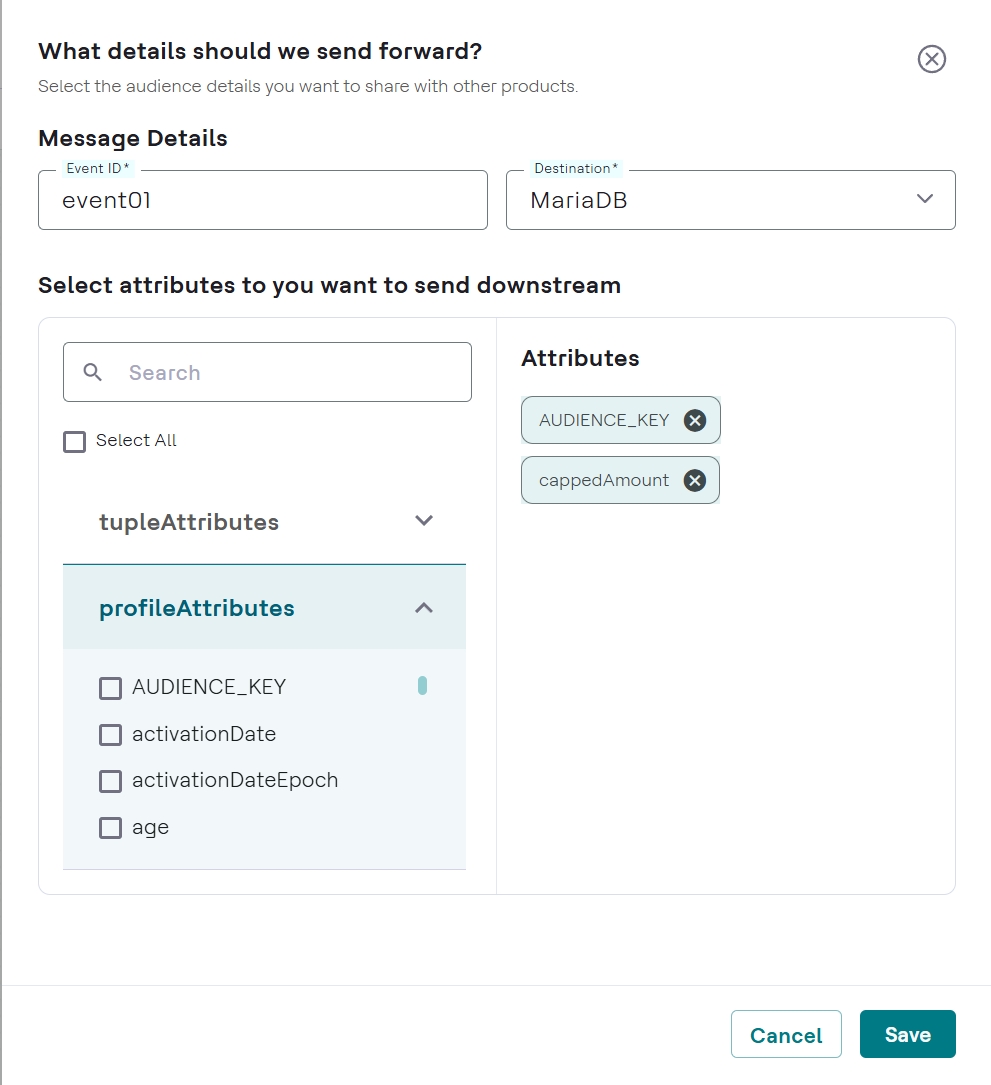
-
In the Attributes section, select the checkboxes for all data points (e.g.,
AUDIENCE_KEY,transactionAmount, you want to forward to the destination from tupleAttributes and profileAttributes.- Profile Attributes: Customer-level data stored in the customer profile
(e.g.,
firstName,city,gender,emailID). These are relatively static and represent who the customer is. - Tuple(Transactional) Attributes: Event-level data fields that come from
incoming real-time data feeds (transactions/events), and its attributes are the
individual fields within that record — for example,
transactionAmount,eventTime,duration, etc.
- Profile Attributes: Customer-level data stored in the customer profile
(e.g.,
-
In the Event ID field, enter a unique identifier for the event (e.g.,
-
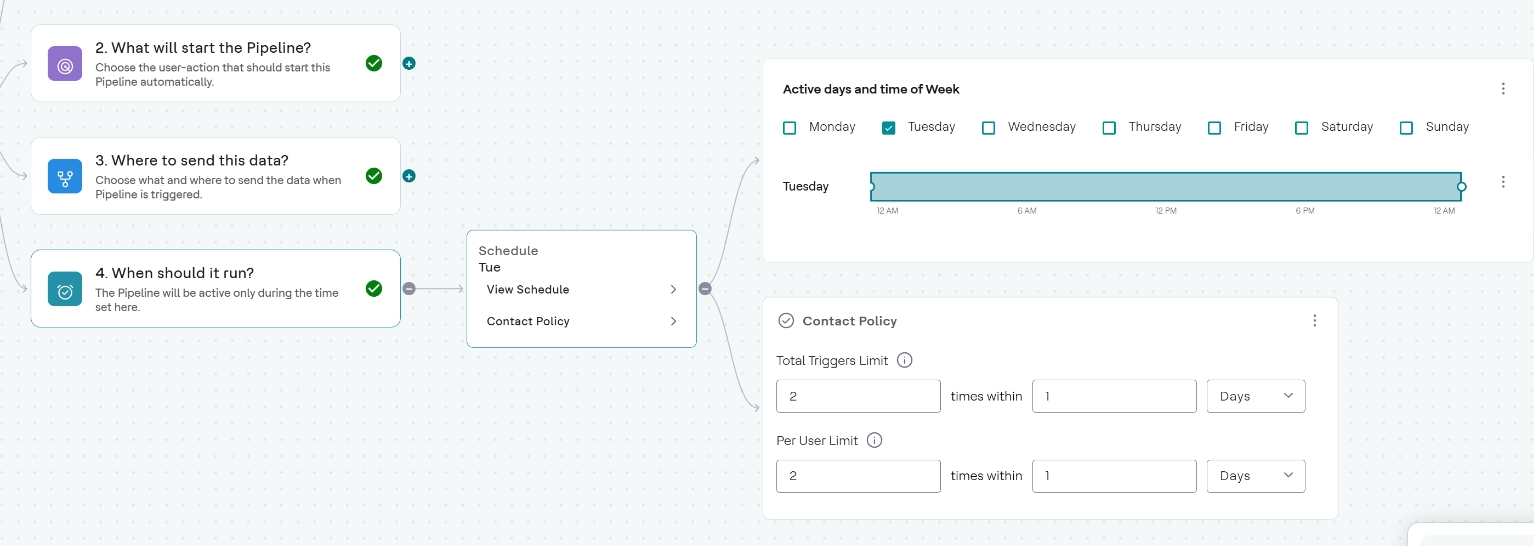
Configure Step 4: When should it run? (Schedule and Contact Policy)
-
Set the Total Triggers Limit and Per User Limit (e.g., maximum 100
times within 1 day).
-
Set the Total Triggers Limit and Per User Limit (e.g., maximum 100
times within 1 day).