Adding custom JavaScript code as a test step in a Web UI test
You can manually add JavaScript files (*.js) with defined functions as a test step in the Web UI test.
Procedure
- Copy the JavaScript file with .js extension to the required project folder of your workspace.
- Double-click the test to open it from the Test Navigator view in HCL OneTest™ UI.
-
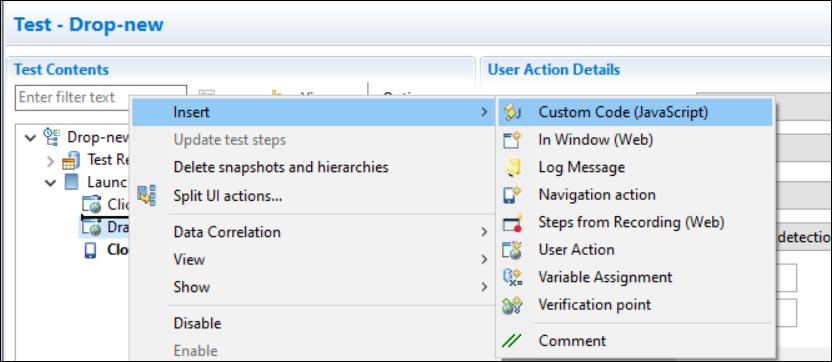
Select one of the following options:
- Select the Launch application node, and then click .
- Select a step, and then click .

The Select JavaScripts dialog is displayed.
-
Select a JavaScript file under the project name to be added to the test step,
and then click OK.
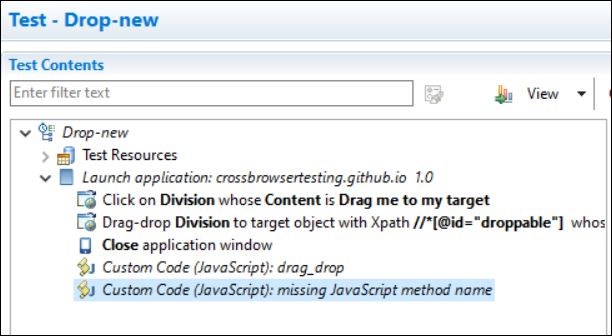
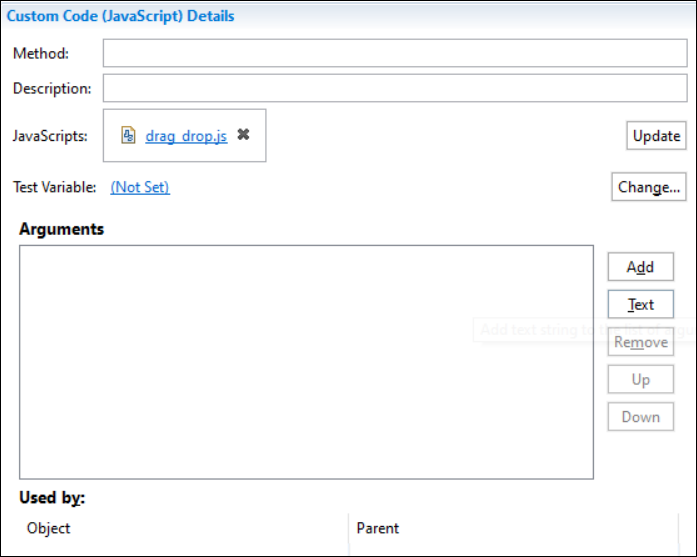
The file is displayed as a link in JavaScripts in the Custom Code (JavaScript) Details pane. A new test step is added to the test script. If you selected the Launch application node, the new step is inserted as the last step in the script, and if you selected a test step, the new step in inserted before the selected step.
-
Specify the JavaScript method name to be executed in the
Method field, and optionally provide the
description.
When a method name is provided, the test step is named Custom Code (JavaScript):method-name.

-
Specify the parameters in the Arguments field if the
JavaScript method has some parameters to be added by using one of the following
options:
- Click Text to enter the static text as an argument, and then click OK.
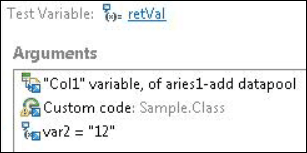
- Click Add to select the available data source arguments, datasets, test variables, or java custom code as a parameter to the JavaScript method, and then click Select. You must have created the variable or dataset, and added a return value.
 Note: You can also delete the added JavaScript file by clicking the
 icon, or edit the file by clicking the link to open the file in an
editor screen.
- Optional: Click Update to add one more JavaScript file.
- Save the test.
-
Run the test.
The JavaScript custom code is executed within the Web application.