Custom Application Builder
The custom application builder in Nomad for web browsers provides the ability to create a new application with fundamental components such as a view, form, and action bars created automatically. Users can provide a brief description of the data elements that an application needs to manage. Alternatively, a user can generate an application based on a comma-separated value (CSV) formatted file and optionally import data from that file into the new application.
Creating a Custom Application
- Launch Nomad for web browsers.
- In the main menu, navigate to .
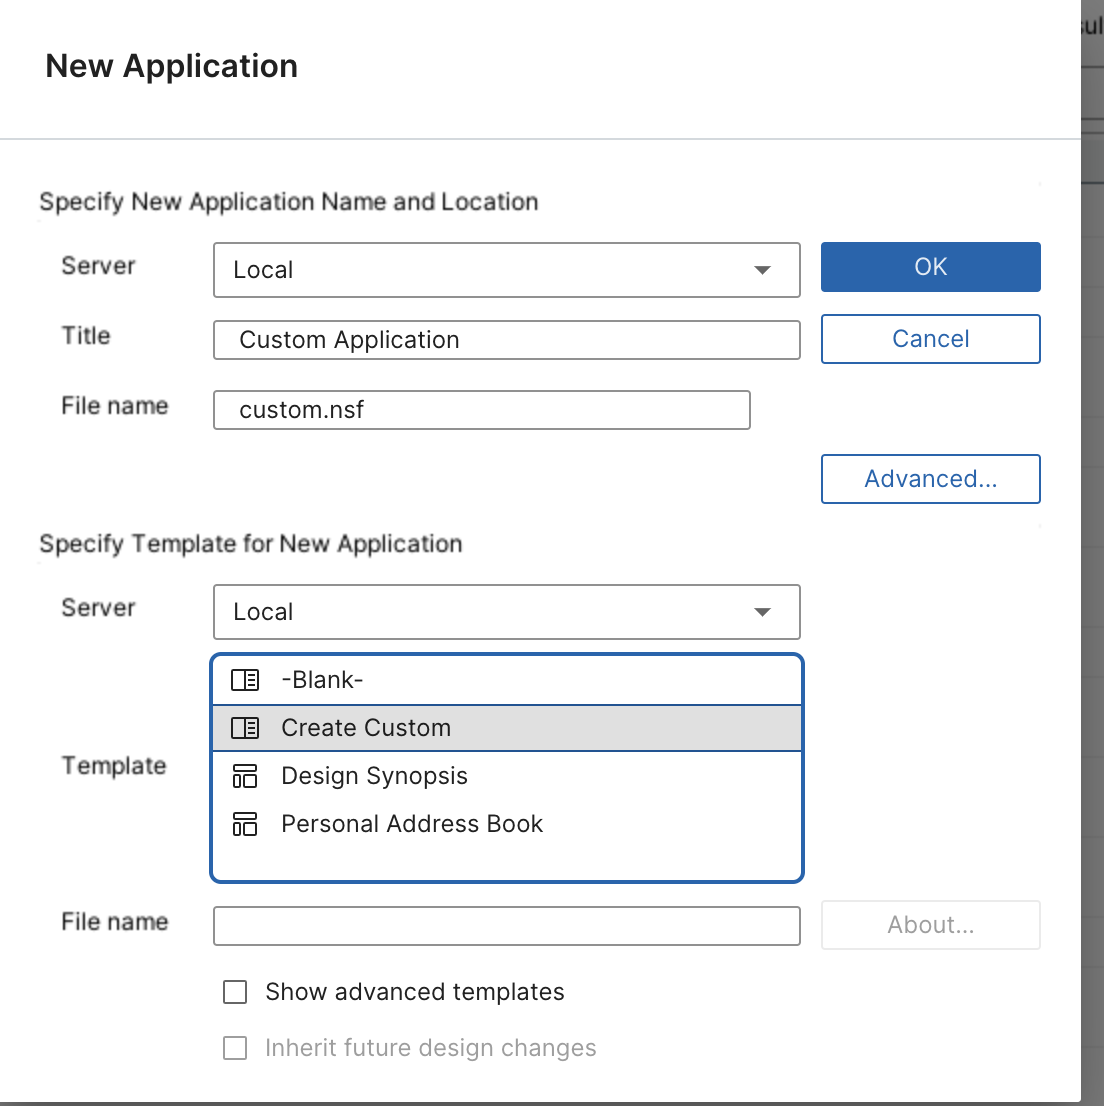
- In the section titled Specify New Application Name and
Location:
- Select a server that allows you to create a database.
- Enter a descriptive title for the database.
- Enter a descriptive filename for the database.
- In the section titled Specify Template for New
Application:
- Select Local.
- Select Create Custom.
- Click OK to launch the Customize New Application wizard. The following image shows the "New Application" dialog as described in the steps above:

Selecting a Theme
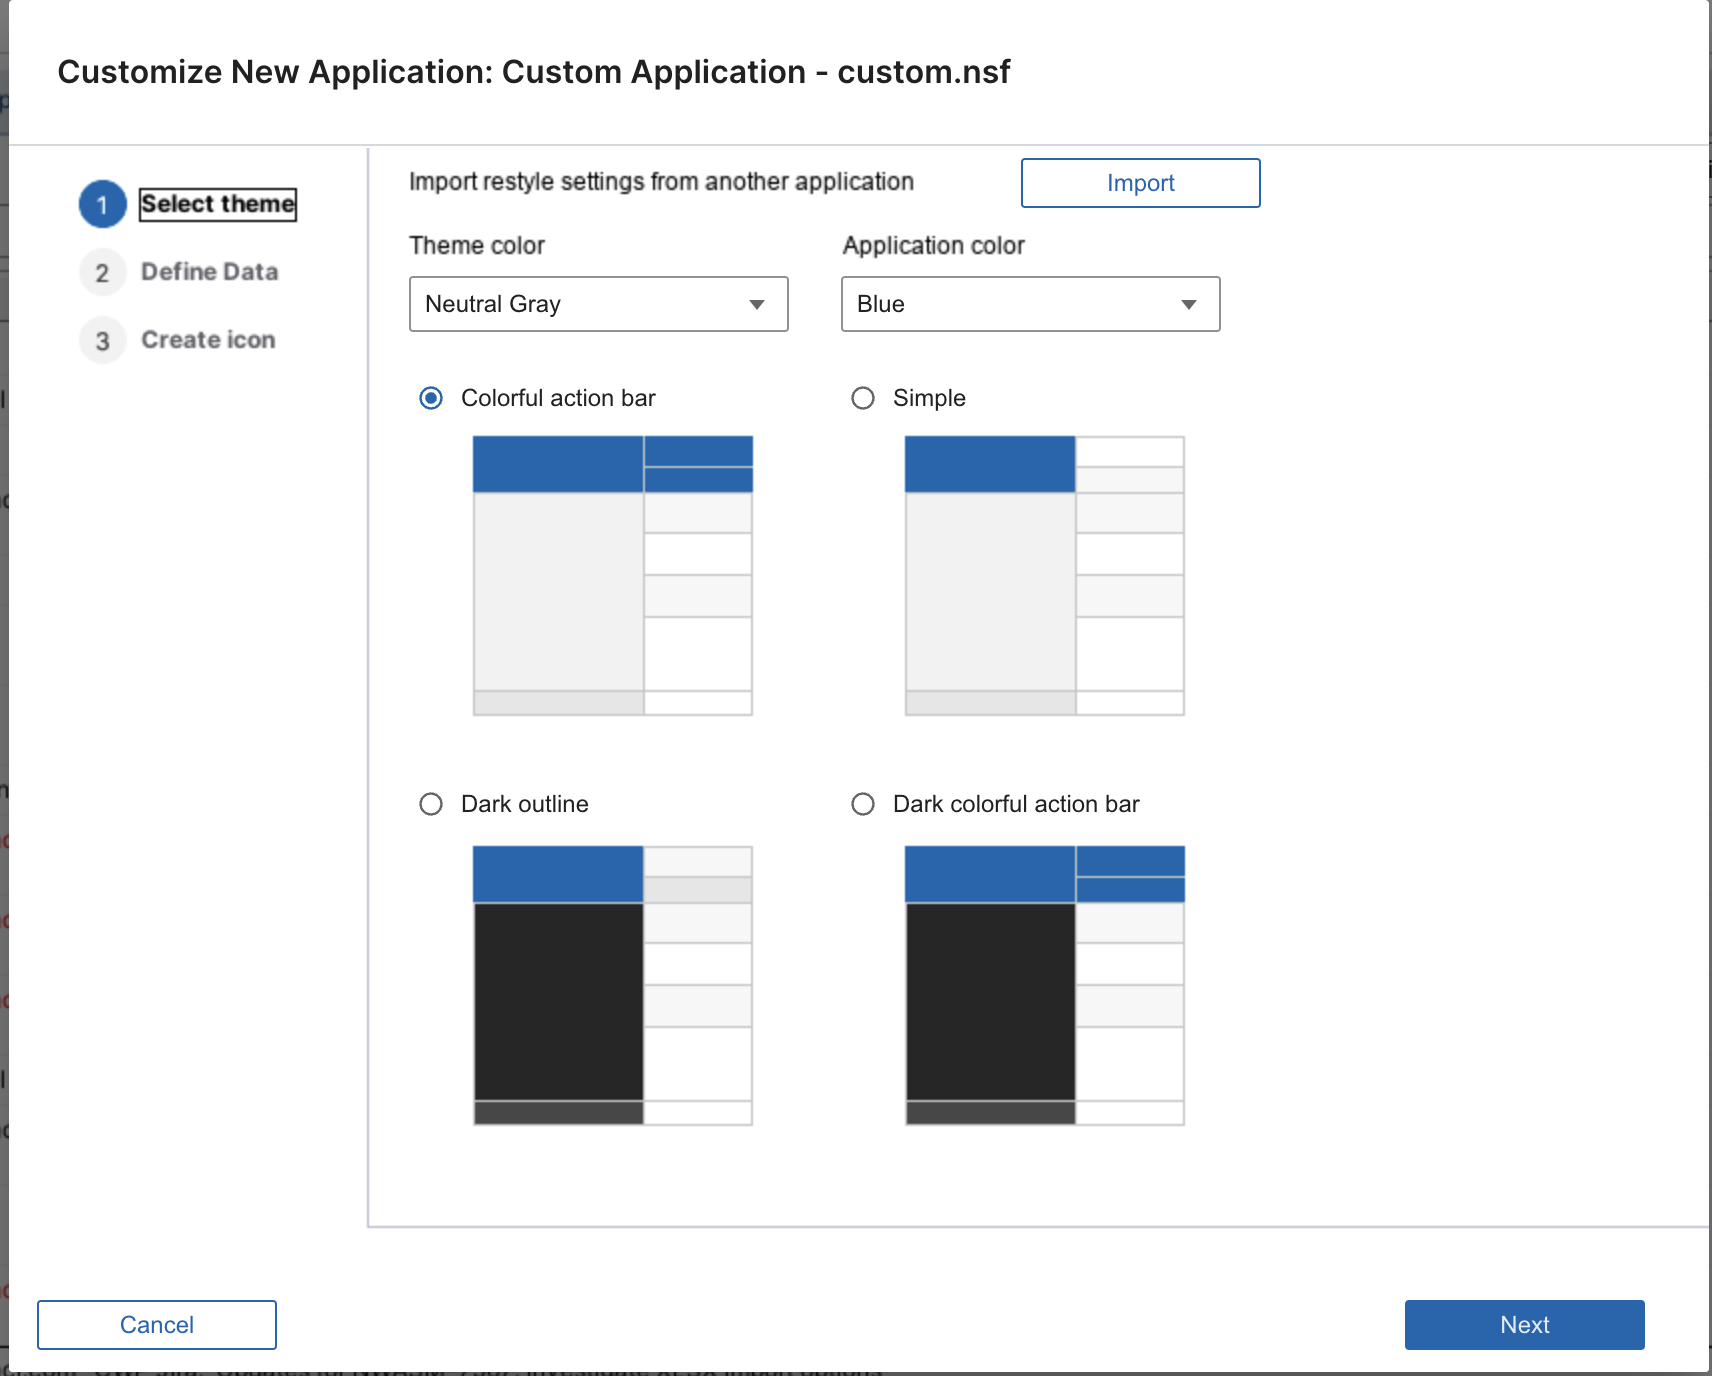
In the Select Theme pane:
- Select the "Import" button to use restyle settings from a previously restyled database.
- Click "Next" to move to the "Define Data" pane.
Alternatively:
- Select a theme color.
- Select an application color.
- Select a layout.
- Click Next to move to the Define Data pane.
The following graphic shows the Select Theme pane:

Defining Data
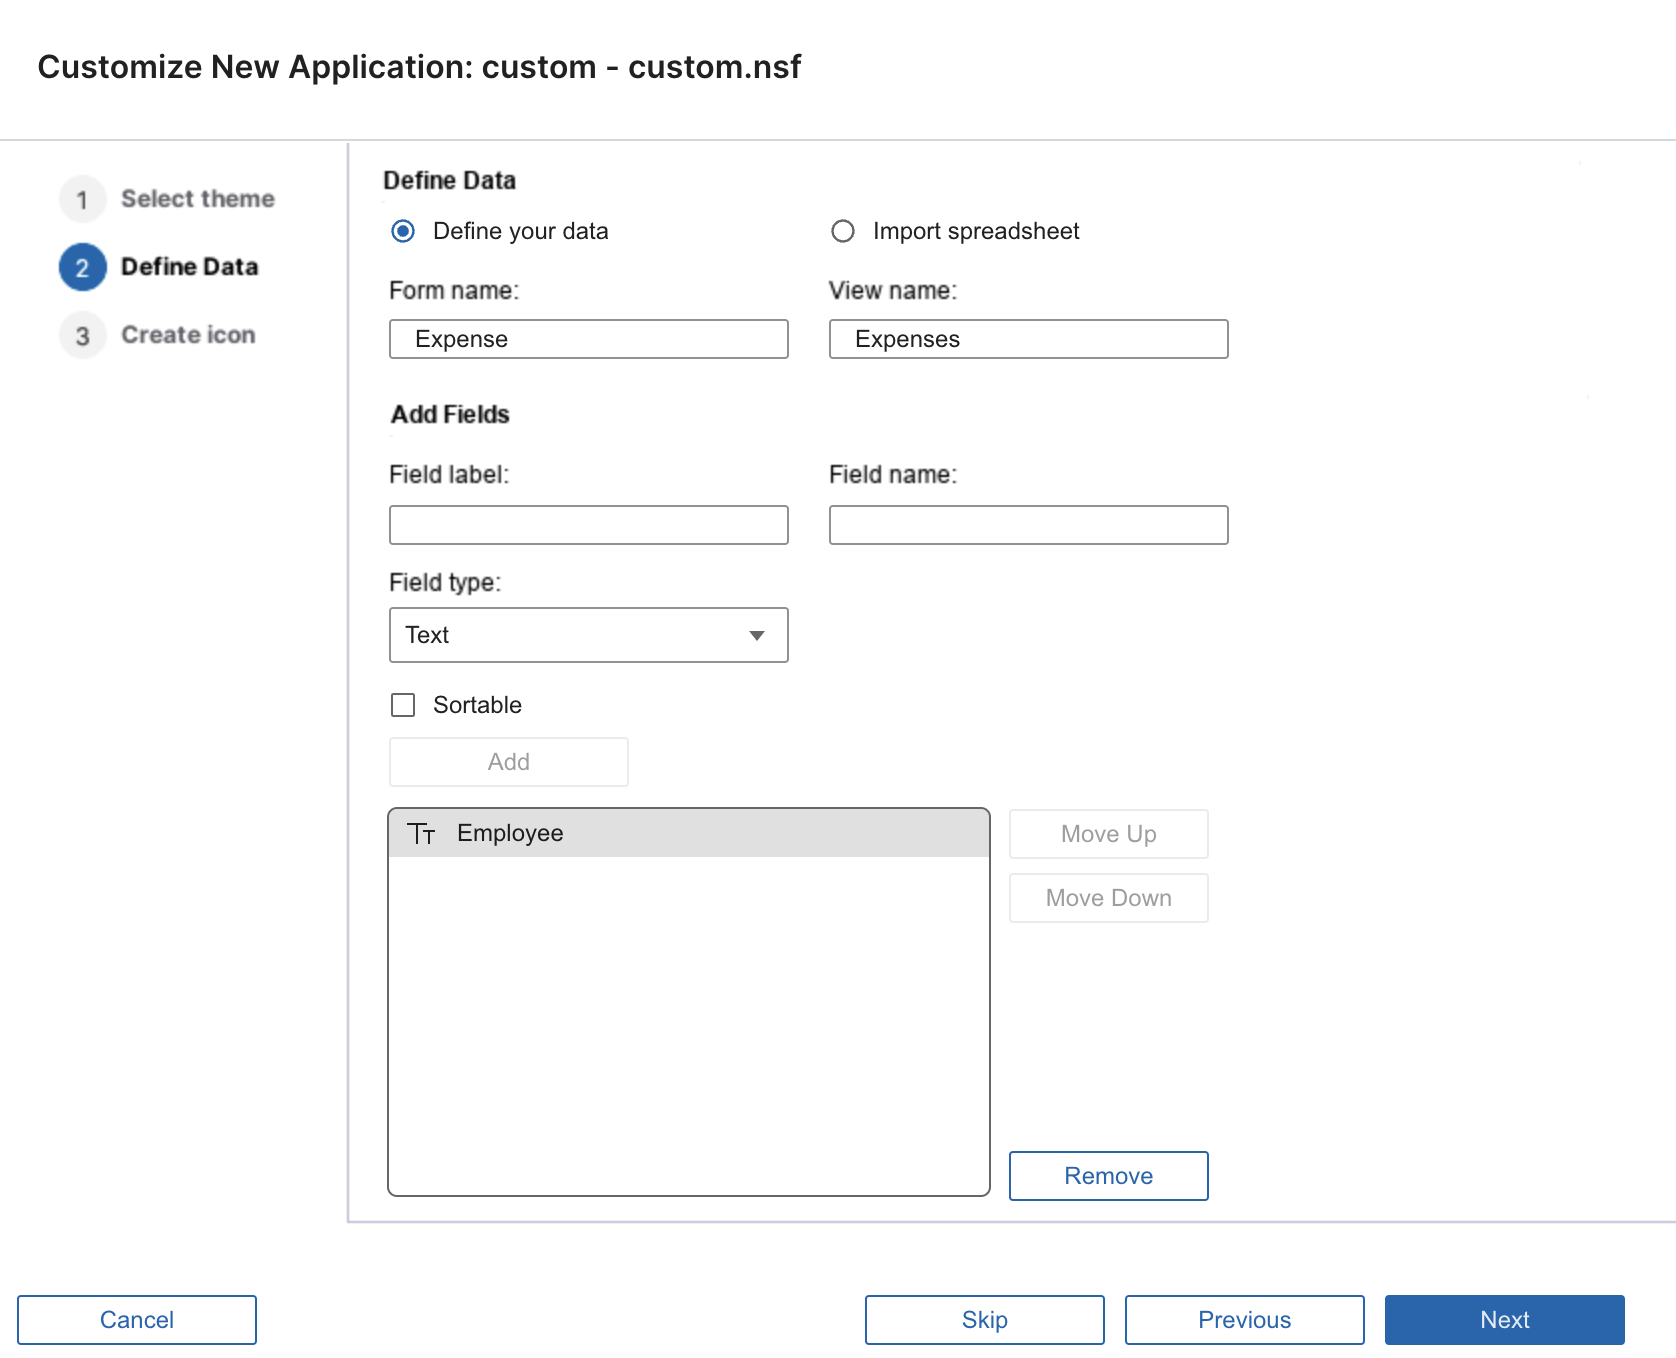
There are two options for defining data. The first is to describe each field manually providing a display label, programmatic field name and data type. The second is to import the field description and optionally import data from a comma-separated value (CSV) formatted file.
To describe each field manually on the "Define Data" panel:
- Select the Define Your Data button.
- Enter a form and a view name.
- Add fields that capture the values your application needs.
Defining Fields
Each field is described with a set of properties as described here:
- Field label - The human-readable name that describes the field.
- Field name - The programmatic name used by the application code to
reference the field. The following characters are prohibited:
<space>$#%&*{}\:<>?/+|"',\`- - Field type:
-
- Text - Text stored with no formatting.
- Integer - Notes number limited to positive and negative integers.
- Decimal - Notes number limited to fixed-point decimal values.
- Currency - Notes number limited to currency values. Values are formatted as currency using the locale indicated by the local operating system.
- Scientific - Notes number displayed with scientific notation.
- Date - Notes time-date value formatted with the date display preferences indicated by the local operating system.
- Time - Notes time-date value formatted with the time display preferences indicated by the local operating system.
- Date & Time - Notes time-date value formatted with both time and date preferences indicated by the local operating system.
- Rich Text - Notes rich text value with advanced formatting capabilities including image display.
- Sortable - Check this box if the value should be represented in the view
with a sortable column.Note: You must select this when adding the field. It cannot be changed once the field is added.
- Click the Add button to add the field to the application. The Move Up and Move Down buttons allow fields to be re-ordered. The top-down ordering shown in the wizard will be the top-down ordering in the generated form and the left-to-right ordering in the generated view.
- Click the Remove button to remove any field definitions not needed.
The following graphic shows the wizard about to create a new application with a form named "Expense", a view named "Expenses", and a single text field named "Employee":

Importing CSV
Importing a CSV file will produce an application with fields that correspond to the columns in the CSV. The datatype of each column will be determined by the corresponding value in the second row. Cells in a row that extend past the rightmost cell in the first row will be ignored. The character encoding of the CSV file is assumed to be UTF-8. The data import process runs in the background so that large files can be consumed while continuing to use Nomad for web browsers for other tasks.
Creating an Icon
Select the default app icon, use the icon builder to create your own or import an icon image from the file system. Click OK to create the application.