Enabling Zookeeper as Windows Service
This section describes the procedure for enabling Zookeeper as a Windows service. Please follow the following steps:
- Download nssm-2.24.zip file from the path mentioned in the source field of Apache SOLR Requirements and unzip it.
- Copy nssm.exe from nssm-2.24\win64 to <zookeeper_install_dir >\bin.
- Go to the bin folder i.e., < zookeeper_install_dir >\bin and open the Command Prompt as Administrator.
- Execute the command
below:
nssm install zookeeper - The window below will be displayed.
Figure 1. Enabling Zookeeper as Windows Service 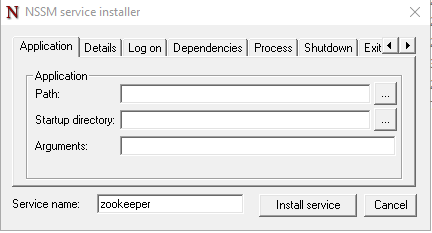
- Click Application tab and enter the information as mentioned below:
Path: <zookeeper_install_dir> \bin\zkServer.cmd
 Startup Directory: <zookeeper_install_dir> \bin
Figure 2. Enabling Zookeeper as Windows Service (cont.) 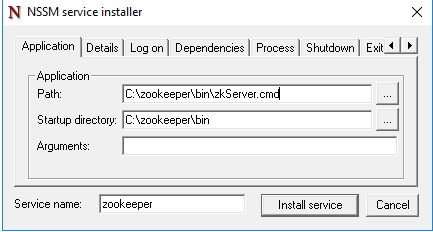
- Click Details tab and enter the information as displayed in the image below:
Figure 3. Enabling Zookeeper as Windows Service (cont.) 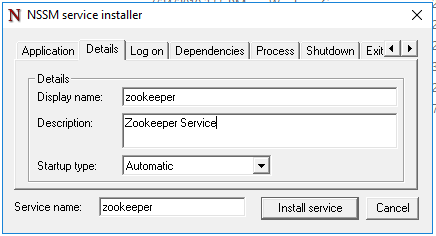
- Click Install Service.
Upon successful installation, the following message will appear.
Figure 4. Enabling Zookeeper as Windows Service (cont.) 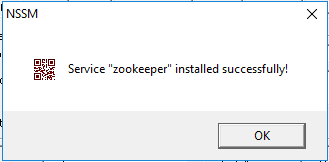
- Press Win+R, type services.msc and press OK.
Figure 5. Enabling Zookeeper as Windows Service (cont.) .png)
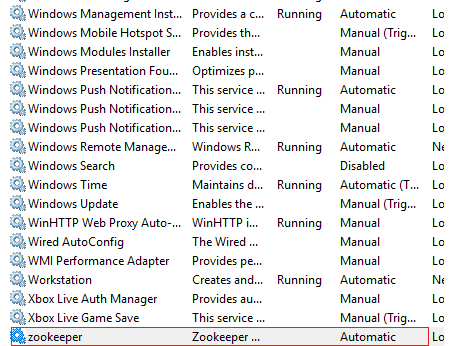
- Search for zookeeper service and click on zookeeper service.
- Click Start the service on the left panel to start the service.
- If the services start without any error or warning pop-up means zookeeper is installation
is success. Else change the clientPort and restart again.
Figure 6. Enabling Zookeeper as Windows Service (cont.)