Upgaradation Procedure
- Press “Win+R”, type “services.msc” and press Enter.
Figure 1. Java Upgradation .png)
- Search for solr service, click on “solr server” service and then click
“Stop” the service on the left panel to stop the service.Note:Solr Server / Solr Server
Figure 2. Java Upgradation (Cont.) 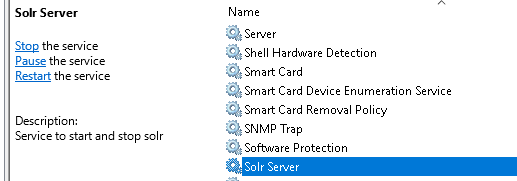
- Download the folder jdk-23.0.1.zip from the path mentioned in the source field of Java Details .
- Search for folder with the name ‘Java’ in the path e.g.: C:\Program Files or find the path using JAVA_HOME variable from environmental variables and copy the folder and take backup, it should not be in the same location.
- Delete the contents inside the folder ‘Java’.
- Extract the downloaded zip file jdk-23.0.1.zip, copy the contents and paste inside
‘Java’ Folder.
Figure 3. Java Upgradation (Cont.) .png)
- Please perform the following steps to check/set environment variable for latest Java
version:
- Open File Explorer, go to This PC,
right-click and select Properties.
Figure 4. Java Upgradation (Cont.) 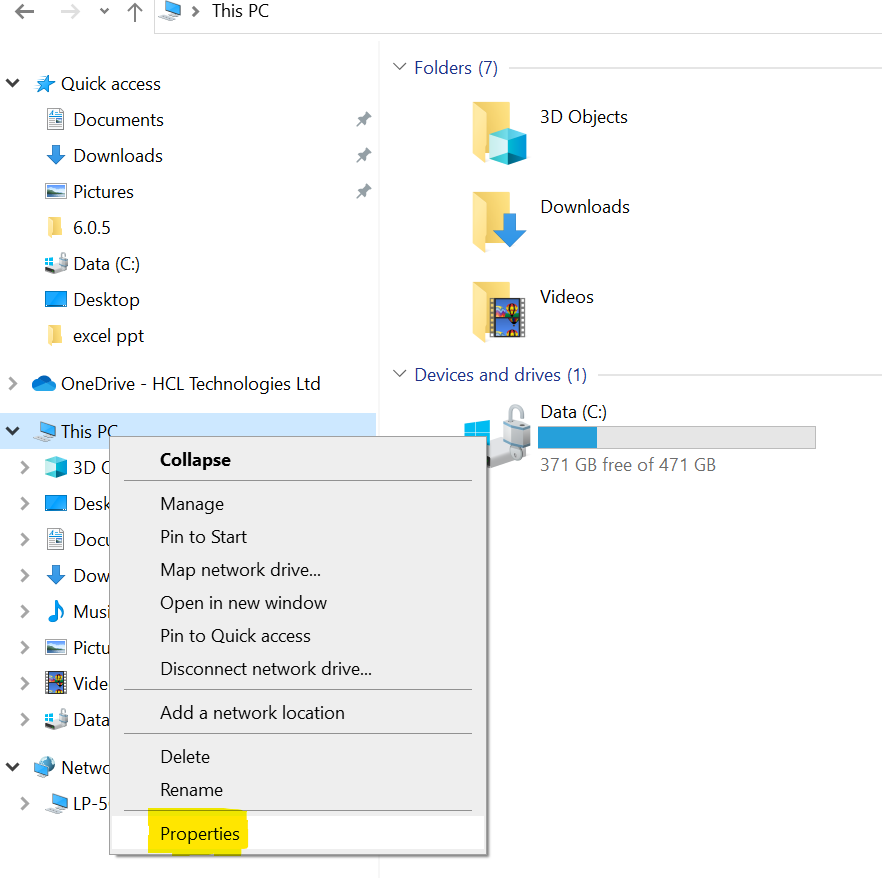
-
Click on Advanced tab in System Properties window.
Figure 5. Java Upgradation (Cont.) .png)
-
Click Environment Variables.
-
Search for ‘‘JAVA_HOME’ in the Variable name section’ and rename it as JAVA_HOME_OLD and click ok to close the box.
-
Click New under System Variables section.
-
Enter ‘JAVA_HOME’ in the Variable name section and e.g.: ‘C:\Program Files\Java’ in Variable value section.
-
Click OK to close the box.
Figure 6. Figure 72 – Java Upgradation (Cont.) .png)
-
Under System variables section, find the variable named Path, select that variable
Figure 7. Java Upgradation (Cont.) 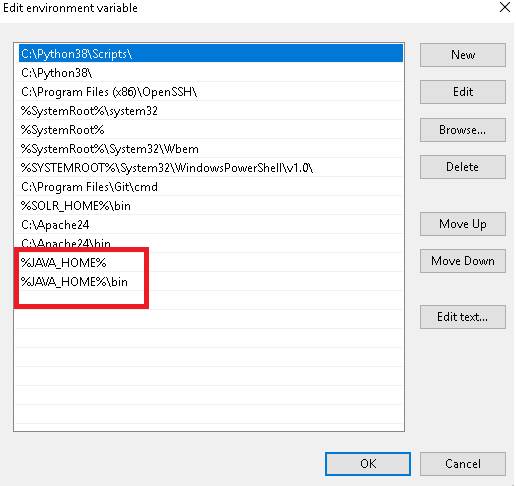
-
Now check, %JAVA_HOME% the Variable value exist or not, if not then add the variable value.
-
Further check %JAVA_HOME%\bin the Variable value exist or not, if not then add the variable value.
-
Click OK to close the dialog box.
- Open File Explorer, go to This PC,
right-click and select Properties.
- To validate successful installation of Java, open Command Prompt as Administrator, and type java –version and press Enter on the keyboard.
- On successful Java installation, Java
Version will be displayed.
Figure 8. Java Upgradation (Cont.) .png)
- If Java version is correct as mentioned in above figure, then Go to Control Panel System and Security System Advanced System Settings. Click Environment Variables. A new dialog box appears. Click New under System Variables section.
- Search for ‘‘JAVA_HOME_OLD” in the Variable name section, select it and Click ‘Delete’ button.
- Check the java version again.
- Press “Win+R”, type “services.msc” and press Enter.
Figure 9. Java Upgradation (Cont.) .png) Note:Upgrade the Solr version to 9.7.0 After Java version 23 upgradation.
Note:Upgrade the Solr version to 9.7.0 After Java version 23 upgradation. - Search for Solr service. Click on “Solr Server” service and then click
“Start” the service on the left panel to stop the service.Note:Solr Server / Solr Server
Figure 10. Java Upgradation (Cont.) .png)