Knowledge Management
Key Concepts
- Knowledge Base: It is a logical grouping of knowledge articles. Grouping can be done by business functions, for example, IT knowledge base / HR knowledge base, etc. or by technical tracks, for example, Windows / Linux, etc. or as per business requirements.
- Knowledge Owner Group: This group comprises of subject matter experts (SMEs) responsible for the accuracy, correctness, and relevance of the content of a knowledge article.
- Knowledge Management Group: It is a process management group which ensures that knowledge management key performance indicators (KPIs) are adhered to.
- Article Types: There are different knowledge article types that can be created, few which are available by default with the product with the option to create more company-specific article types as per requirements. The default article types available are: General, FAQ (i.e. Frequently Asked Question), News, Known Error, Patch Review, Process & Policy, Technical Tip, Temporary Fix, and Technical SOP.
- Approval Set: Approval sets are used to configure approvals which are applicable for knowledge article review prior to publishing them for wider usage. There are different approvals levels that can be set to trigger approvals to an individual, group, or contextual approvals.
- Approval Rules: Approval rules are custom business logics configured to trigger the approval sets and apply them when certain configured conditions are met. Approval rules for knowledge module can be configured against conditions such as, Category, Subcategory, Type, Knowledge Base, Knowledge Management Group, Knowledge Owner Group, Author, and Article Type.
- View Count: Every time an article is viewed (through global search / work item board / service board or incident checkout page or via Offering details page), the view count gets incremented.
- Use Count: Every time an article is related on work items (WIs) / configuration items (CIs) / service offerings, the use count gets incremented.
- Versioning: Article versioning is available and each time ‘Create a new version’ button is clicked upon against a knowledge article, its version is automatically incremented, and a new version of the same article gets created for further configuration or use. The old version of an article remains published until the new version is reviewed and published, also, once the new article is published, the old one gets closed.
Key Roles
Knowledge Author
- View and create knowledge articles
- Edit self-authored knowledge articles in Draft state
- Share knowledge articles
- Search for knowledge articles
- Update the expiry date of knowledge articles
- Move an article to outdated status
- Update / change the author of a knowledge article
- Submit an article for review
- Move an article from Outdated to Closed state
Knowledge Owner Group
- View and create knowledge articles
- Edit self-authored knowledge articles in Draft state
- Share knowledge articles
- Search for knowledge articles
- Update the expiry date of knowledge articles
- Move an article to outdated status
- Update / change the author of a knowledge article
- Submit an article for review
- Instantly publish a knowledge article
- Move an article from Outdated to Closed state
Knowledge Management Group
- Create a knowledge base
- View and create knowledge articles
- Edit self-authored knowledge articles in Draft state
- Share knowledge articles
- Search for knowledge articles
- Update the expiry date of knowledge articles
- Move an article to outdated status
- Update / change the author of a knowledge article
- Submit an article for review
- Instantly publish a knowledge article
- Move an article from Outdated to Closed state
Status Transitions
| Status | Description |
| Draft | The draft status is the creation phase for a knowledge article, and anyone can edit while it is still in draft |
| Submitted | Article submitted for review |
| Review | The article is awaiting review by a reviewer or an approver |
| Rejected | The knowledge article is rejected due to irrelevance or is unsatisfactory or in cases when it does not meet quality standards |
| Published | Published articles are the ones searchable by authorized users |
| Outdated |
The knowledge article has reached its expiration date or user manually expired the article |
| Closed | Articles at this stage cannot be moved back to circulation |
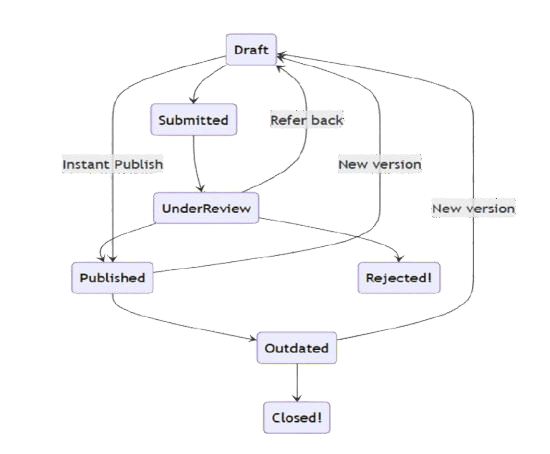
Status Transitions
| From | To |
| Draft | Submitted |
| Submitted | Under Review |
| Under Review | Published |
| Under Review | Rejected |
| Under Review | Draft |
| Draft | Published |
| Published | Outdated |
Default Notifications
| Trigger Condition | To | cc |
| Knowledge Article Pending for Approval - Notify Approver | Approvers | Requestor |
|
Knowledge Article Pending for Approval Reminder - Notify Approver |
Approvers | Requestor |
| Knowledge Article Pending for Approval - Notify Approver (With Link) | Approvers | Requestor |
| Knowledge Article Pending Approval Reminder - Notify Approver (With Link) | Approvers | Requestor |
| Knowledge Article Published | Knowledge Author | Knowledge Owner Group |
| Knowledge Article has been marked as outdated | Knowledge Author | Knowledge Owner Group |
| Knowledge Article is marked closed | Knowledge Author | Knowledge Owner Group |
| Knowledge article is referred back | Knowledge Author | - |
| Knowledge Article is rejected | Knowledge Author | - |
Attributes and Validations
| Attribute | Type | Validations | Mandatory |
| Company | Typeahead with dropdown |
Default value: Auto populate with logged in user’s company |
Yes |
| Author | Typeahead with dropdown |
Default Value: Auto populate with logged in user’s company |
Yes |
| Knowledge Base | Dropdown | - | Yes |
| Article Type | Dropdown | - | Yes |
| Source | String | Auto populated, non-editable | No |
| Category | Dropdown | - |
Mandatory if admin preference – Knowledge Category Levels = 1 |
| Subcategory | Dropdown | - |
Mandatory if admin preference – Knowledge Category Levels = 2 |
| Language | String, non-editable | Default value: English | Yes |
| Expires on | Date and Time [date | hour | min] | Default value: Auto populate and auto calculate | Yes |
| Knowledge Management Group | String | Auto populated | - |
| Knowledge Owner Group | String | Auto populated | - |
| Title | String | - | Yes |
| Article Content | Rich Text | Max. 64000 chars | Yes |
| Source | Read only text field | Auto populated | Yes |
| Version | Read only text field | Auto populated | Yes |
Product Walkthrough
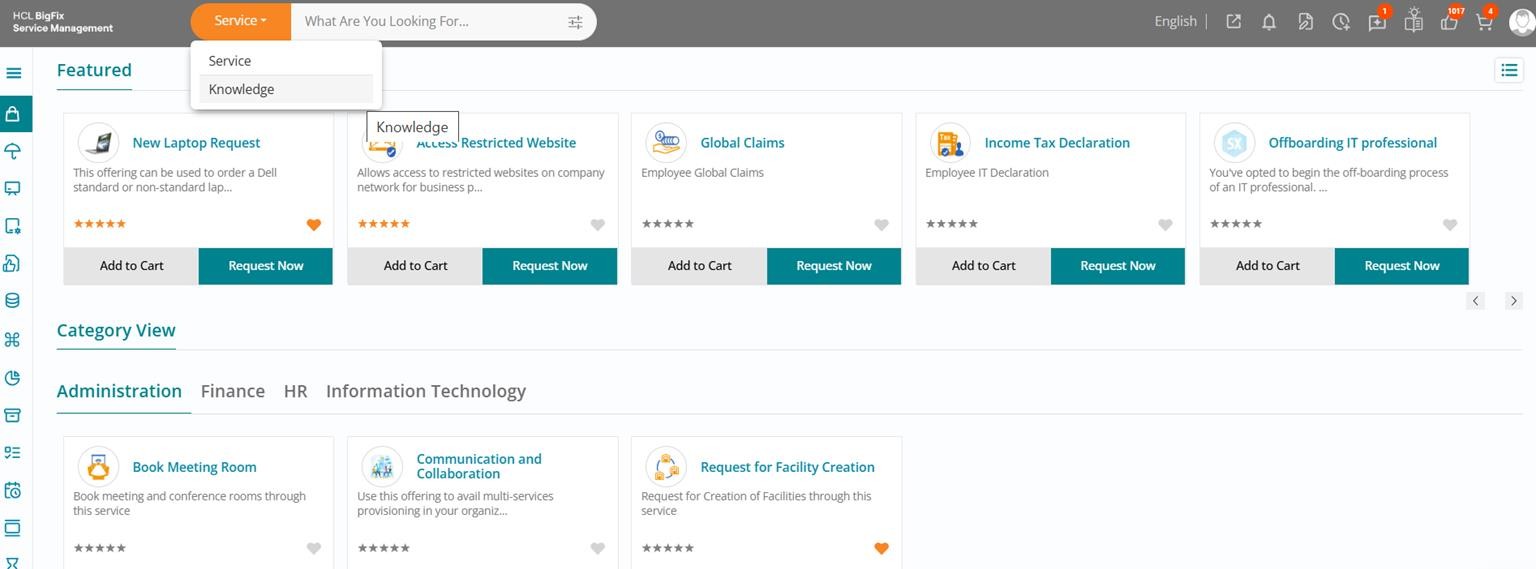
Search for a Knowledge Article – Global Search
Click on the global search drop down upon landing on the consumer homepage / service catalog page and select Knowledge.
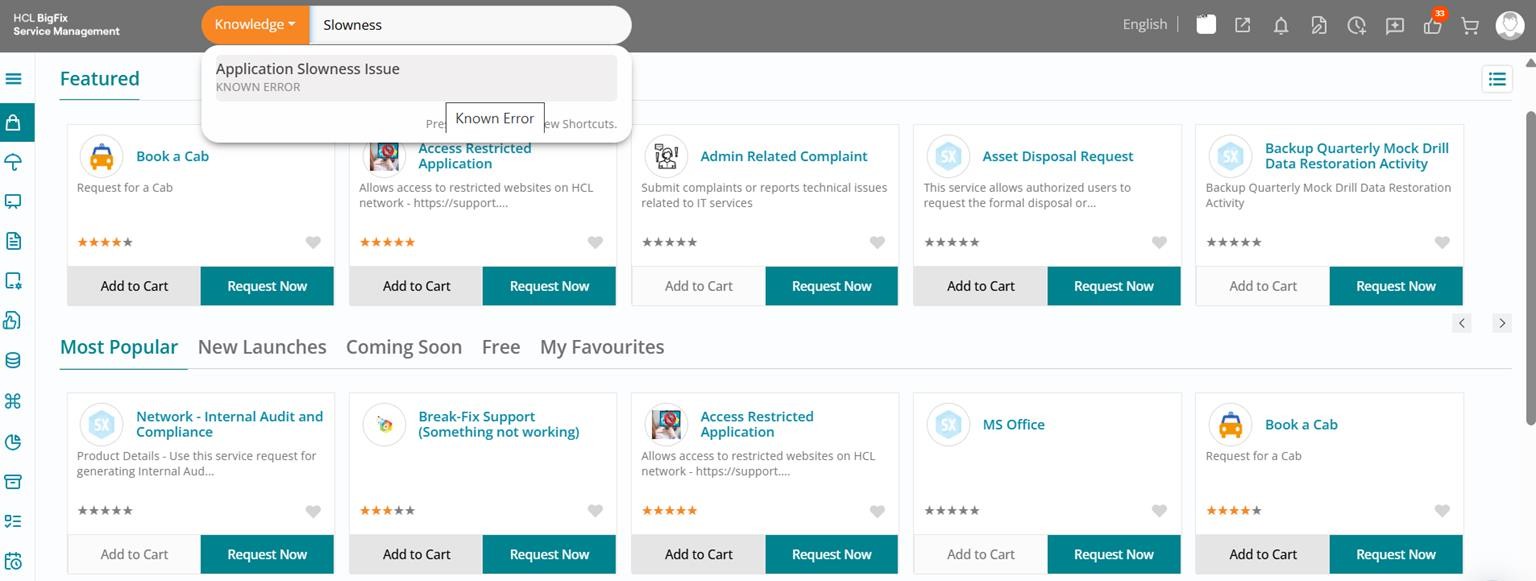
Type the search keyword and you will start seeing all related knowledge articles that match the criteria.
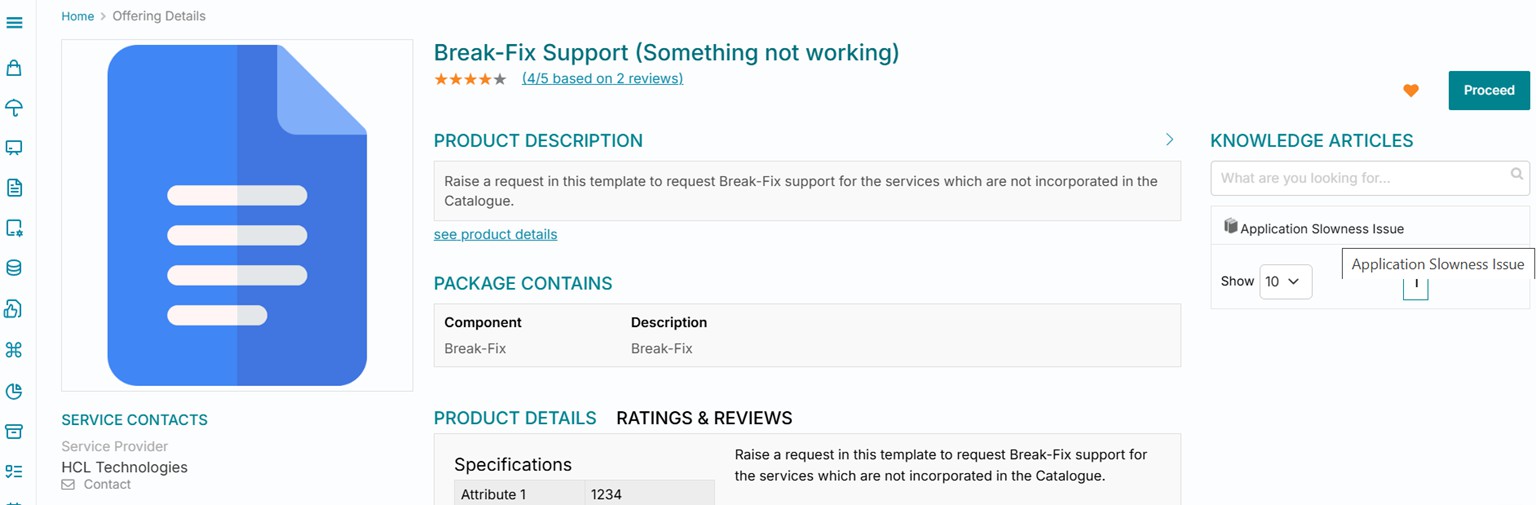
Search for a Knowledge Article – Offering Details
An alternate way of searching for a knowledge article is from within the Offering Details page of any service offering. All related knowledge articles are visible in the right section of the page.
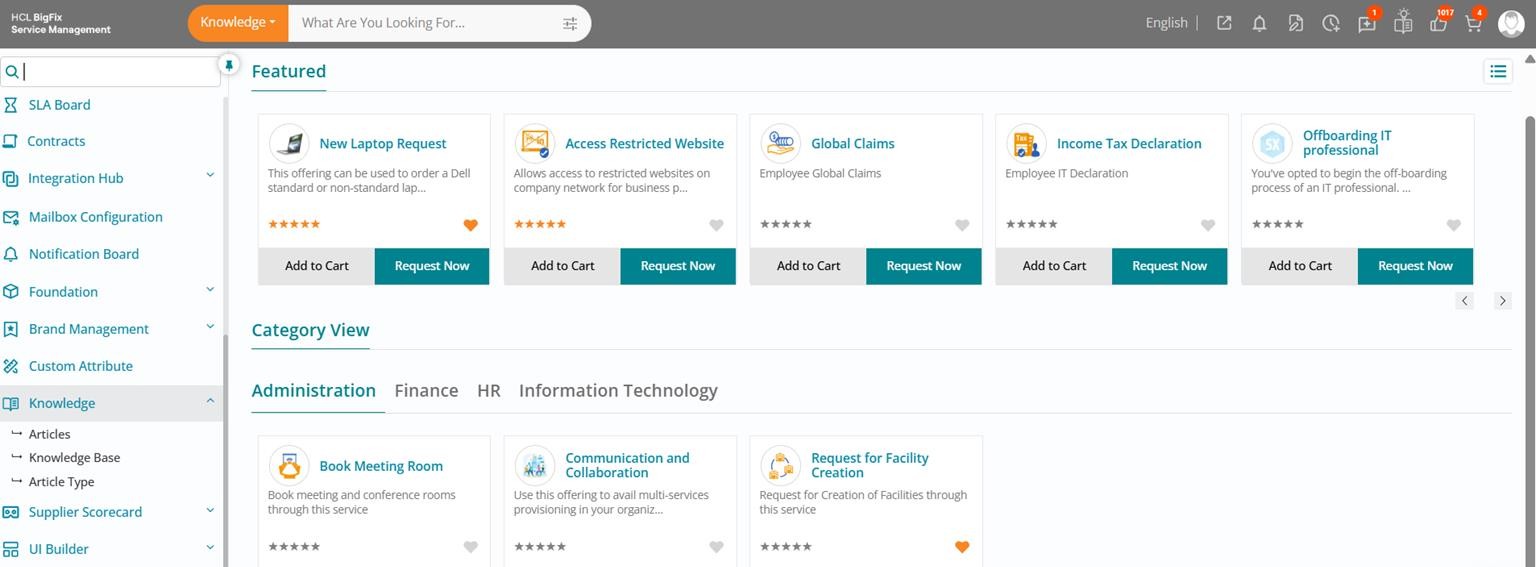
Navigate to Knowledge Module
Use the left application menu and either search for knowledge or scroll to reach the ‘Knowledge’ section.
Expand it to find the options Articles, Knowledge Base, and Article Type listed.
Create a Knowledge Base – Navigate to List View

The first step of setting up knowledge management in the product is creating a knowledge base. Click on Knowledge Base in the left application menu to begin.
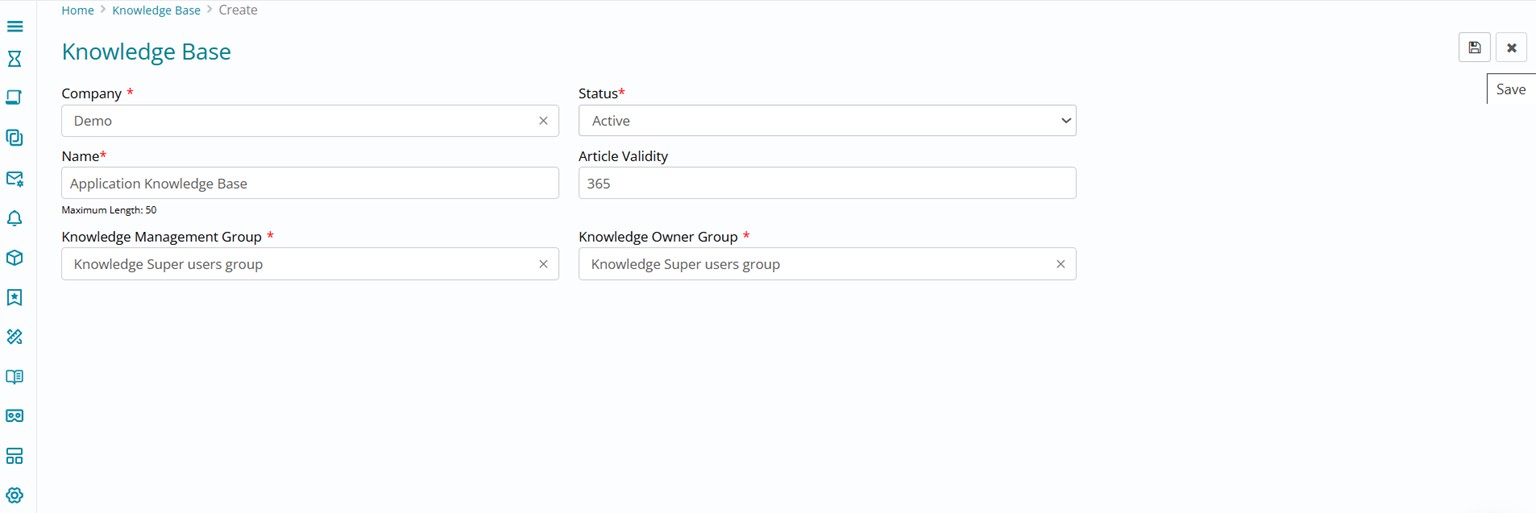
Create a Knowledge Base
The list view of all available knowledge bases in the system will appear. Click on the Create (+) button visible towards the top right of the page.

Fill in the details and click on Save button visible towards the top right of your page. Ensure that you select the appropriate knowledge management knowledge owner groups while filling the details.
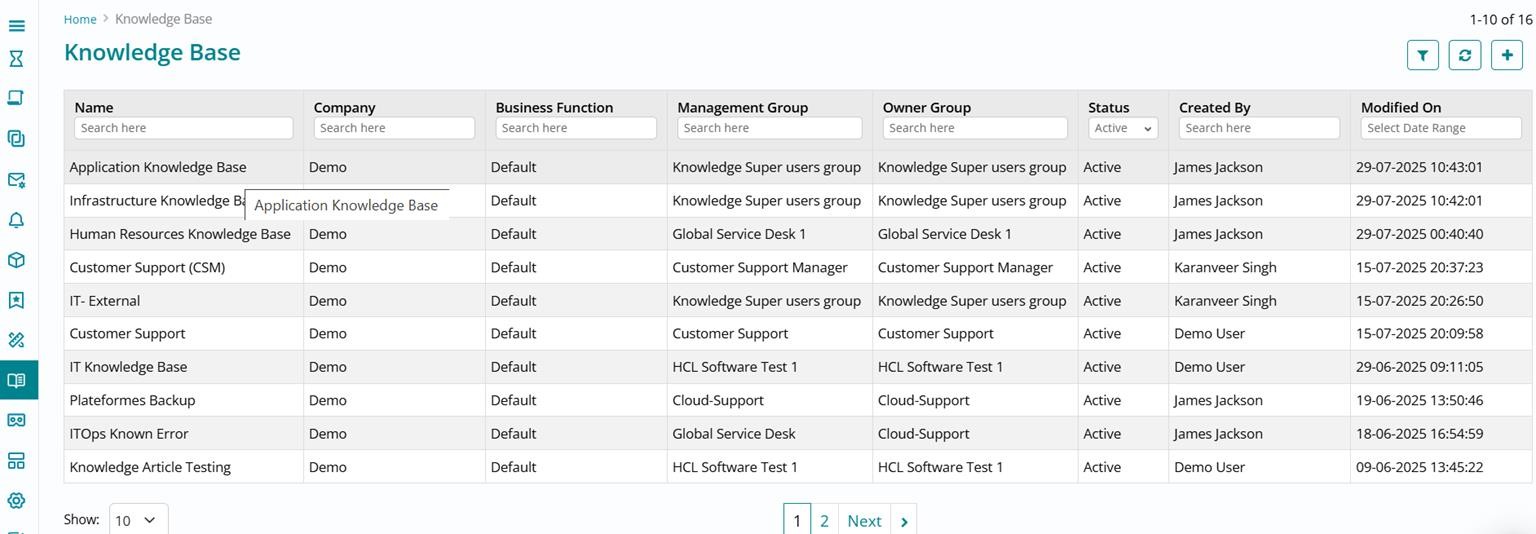
Close the form once you have created a knowledge base and you can see that it appears on top of the list view.
Create a New Article Type – Navigate to List View
The next step of setting up knowledge management in the product is creating an article type. Click on Article Type in the left application menu and you can view the list of default article types that are available out-of-box with the product.
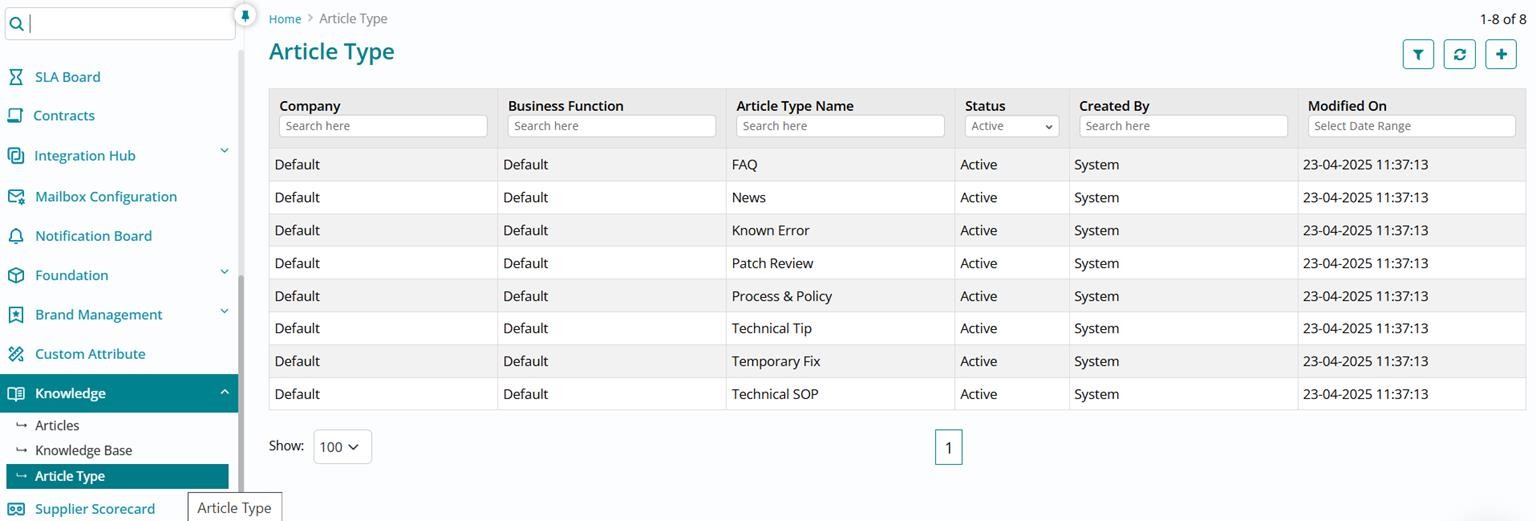
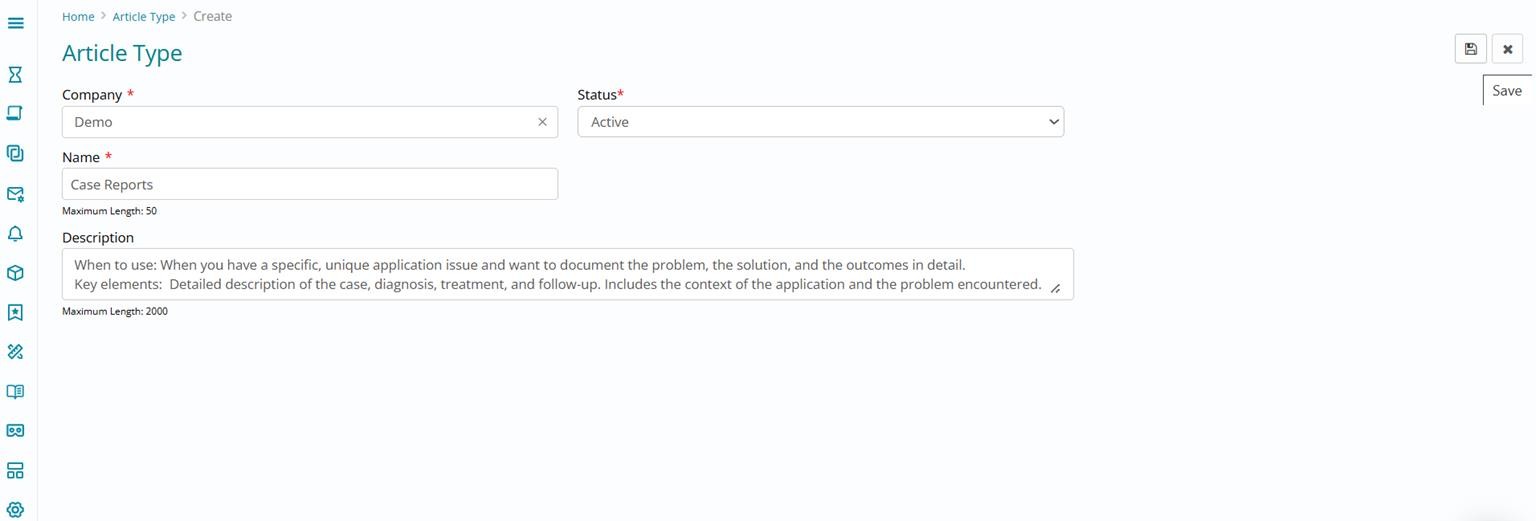
Click on the Create (+) button visible towards the top right of the page to start creating a new article type.

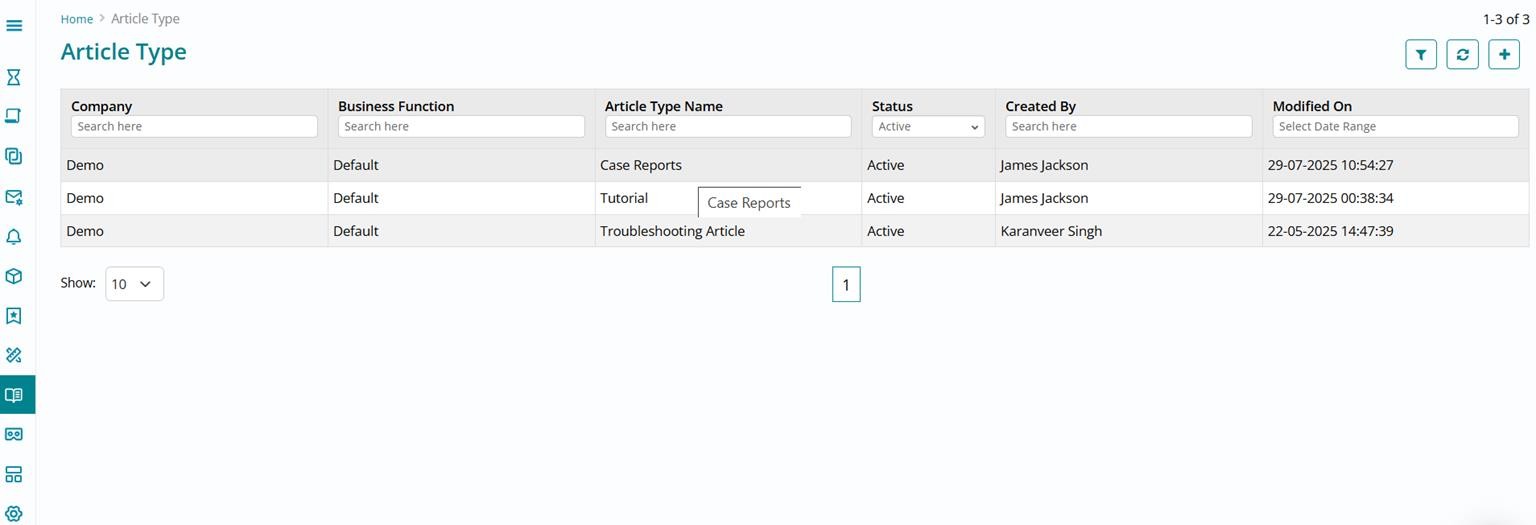
Fill in the details and click on Save button visible towards the top right of your page. Ensure that you update the appropriate description such as when to use this article type while filling the details.
Close the form once you have created an article type and you can see that it appears on top of the list view.
Let’s create a knowledge article next. Click on Articles in the left application menu and you can view the list of knowledge articles available in the system.
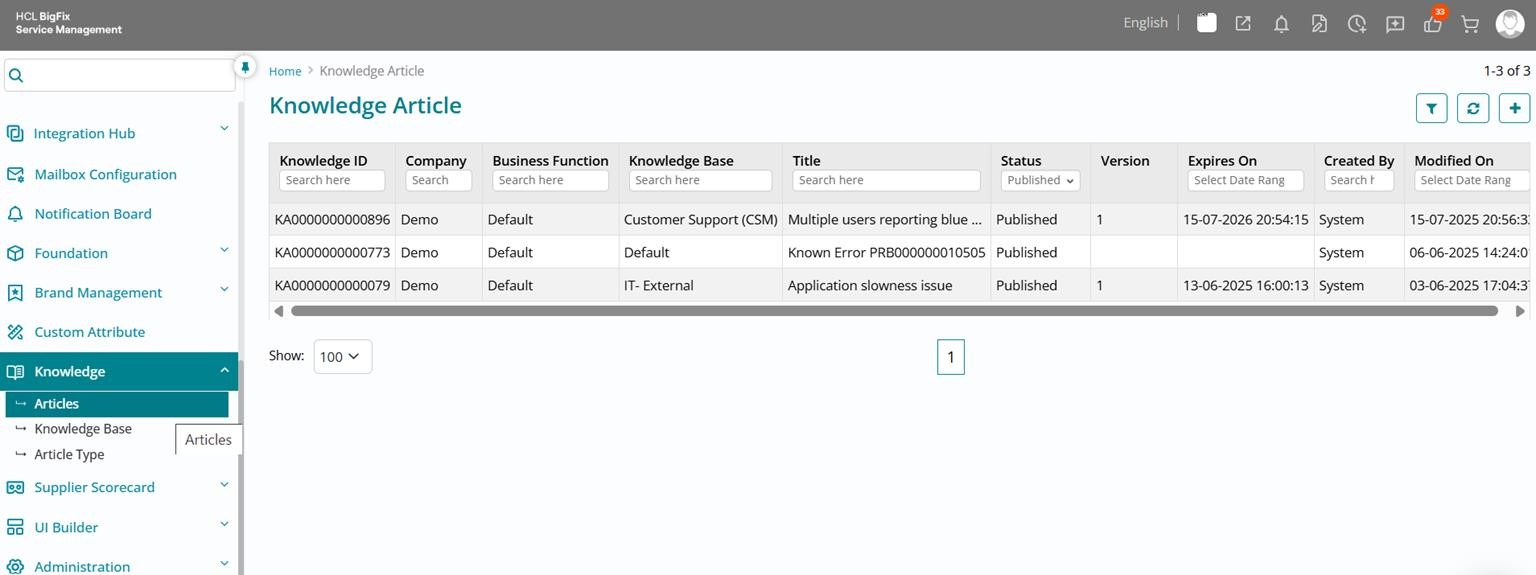
Click on the Create (+) button visible towards the top right of the page to start creating a new knowledge article.

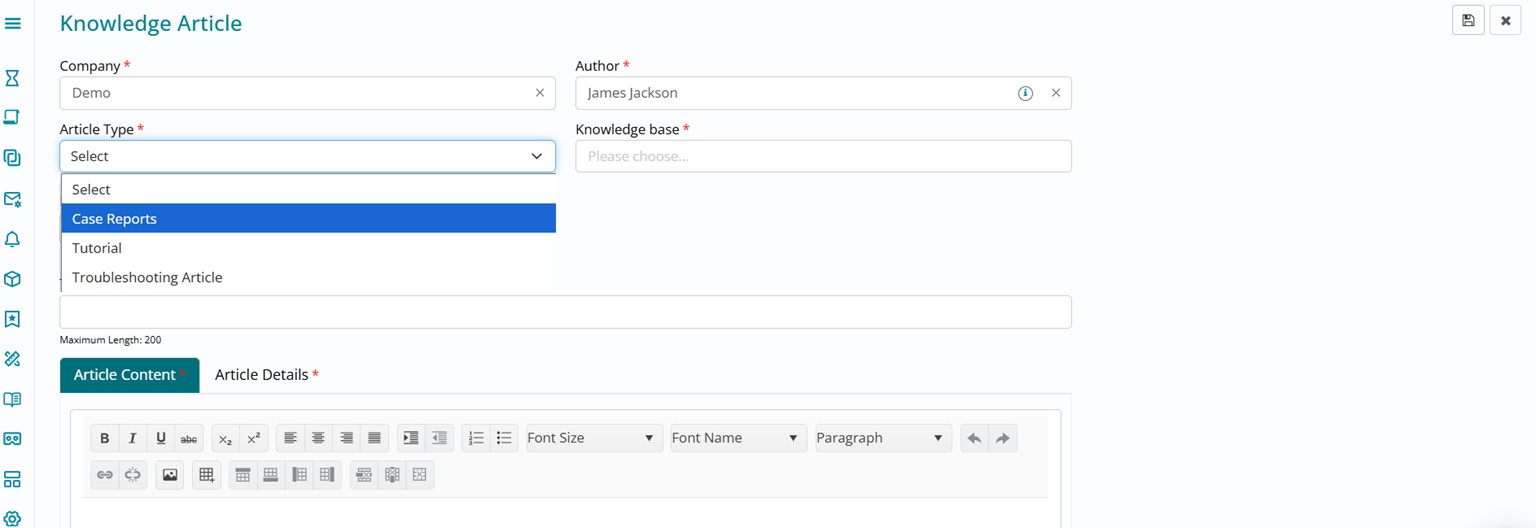
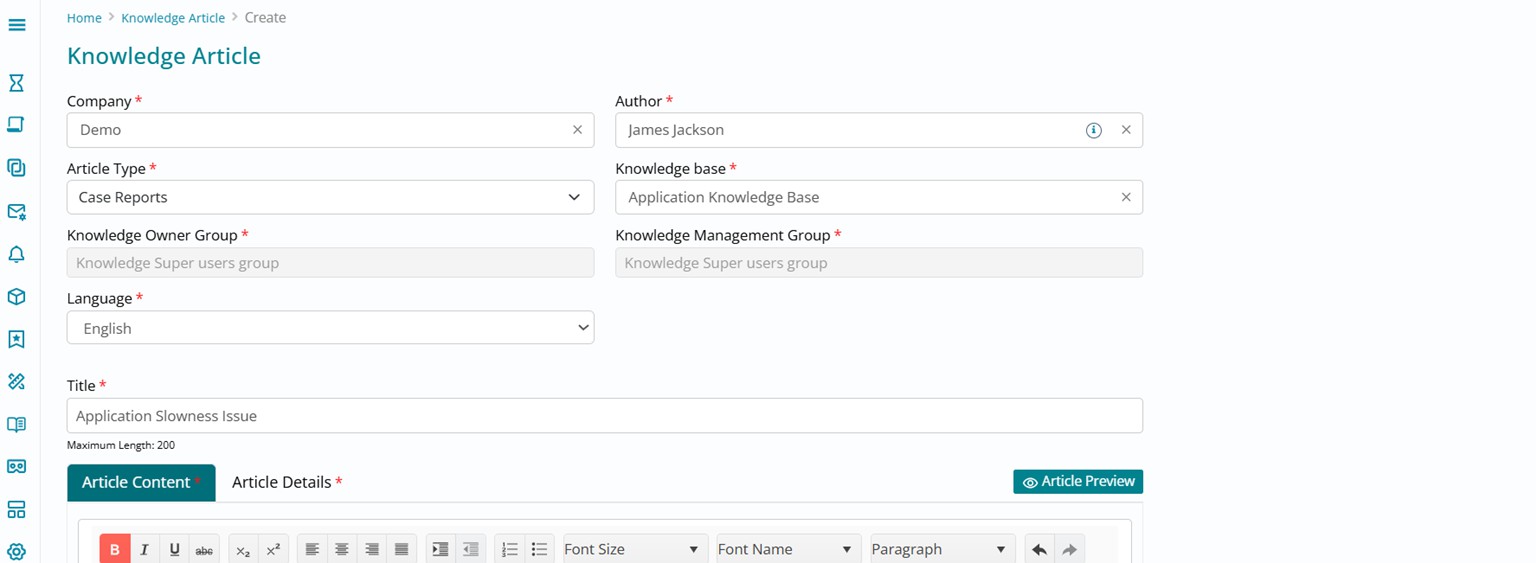
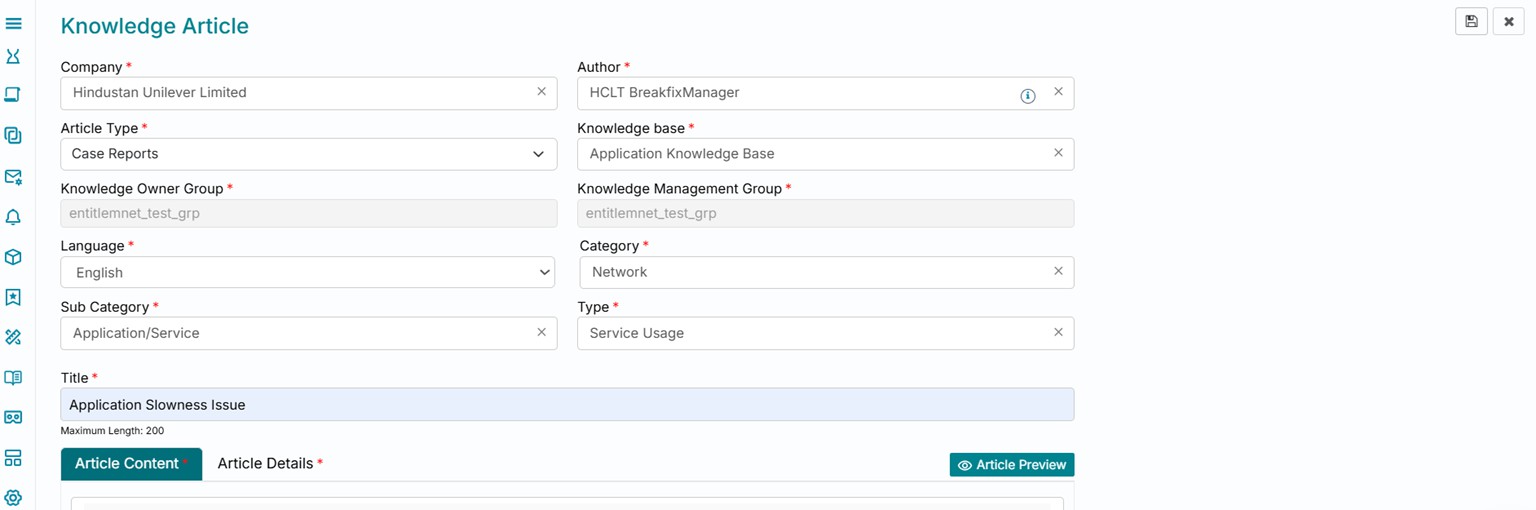
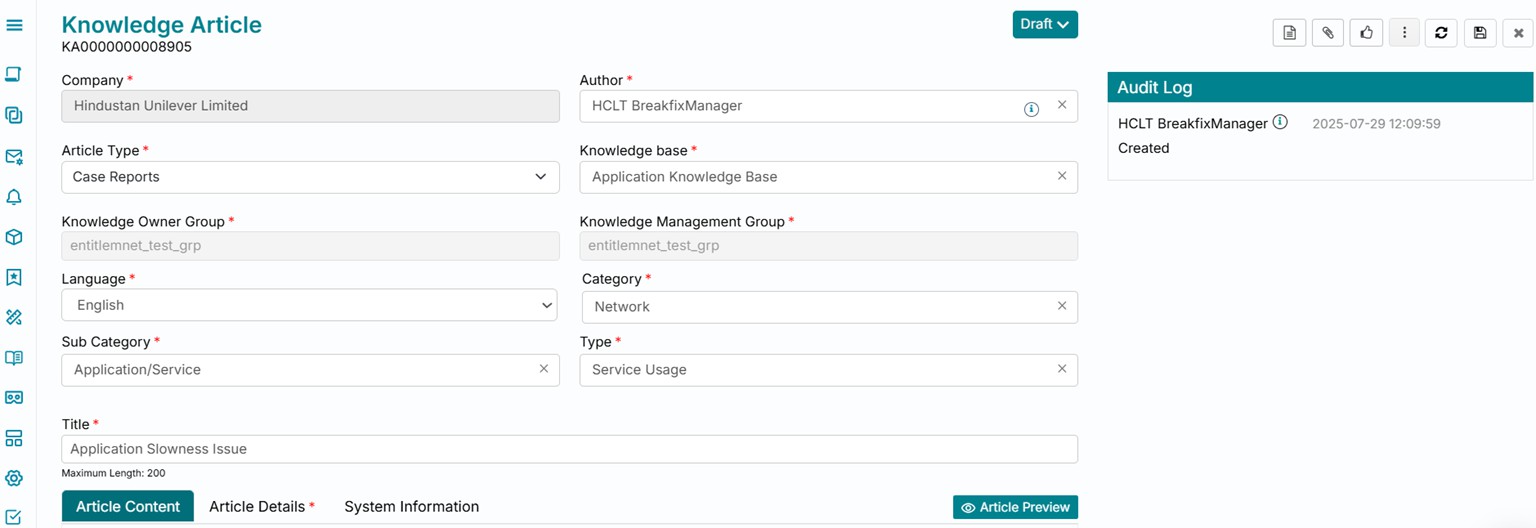
Fill in the knowledge article create form. Select the right article type from the list available for the selected company.
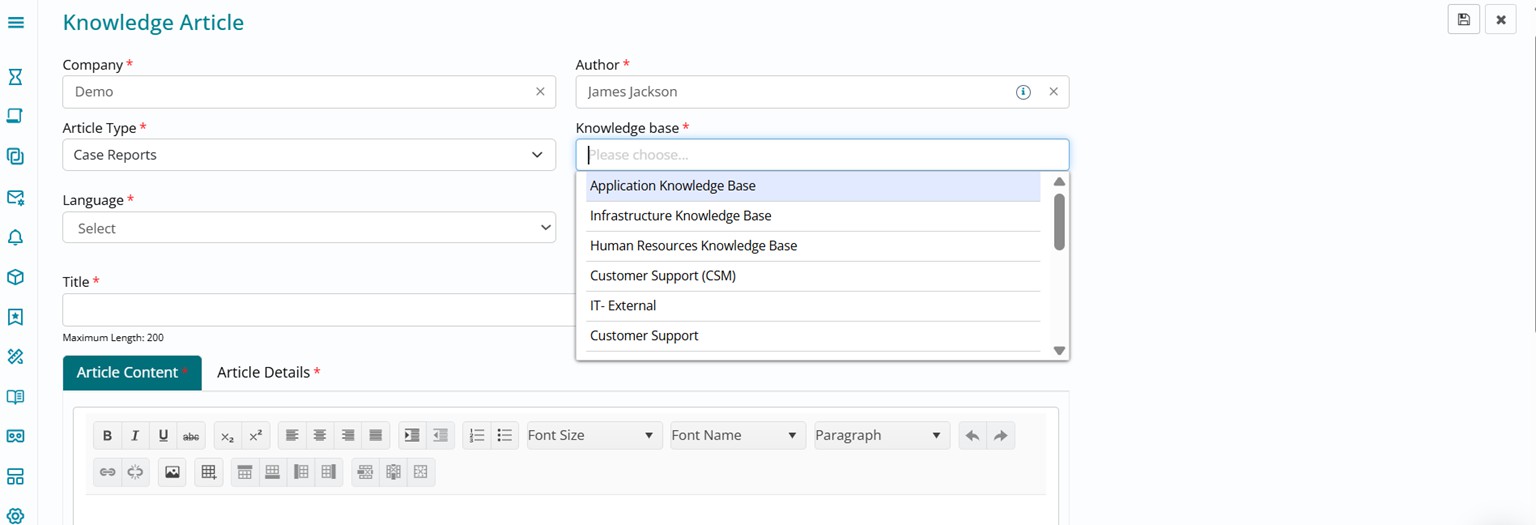
Select the right knowledge base from the list available for the selected company.
Upon selecting a knowledge base, the Knowledge Owner Group and Knowledge Management Group fields will get auto populated. These are the same groups which were selected when creating a knowledge base.
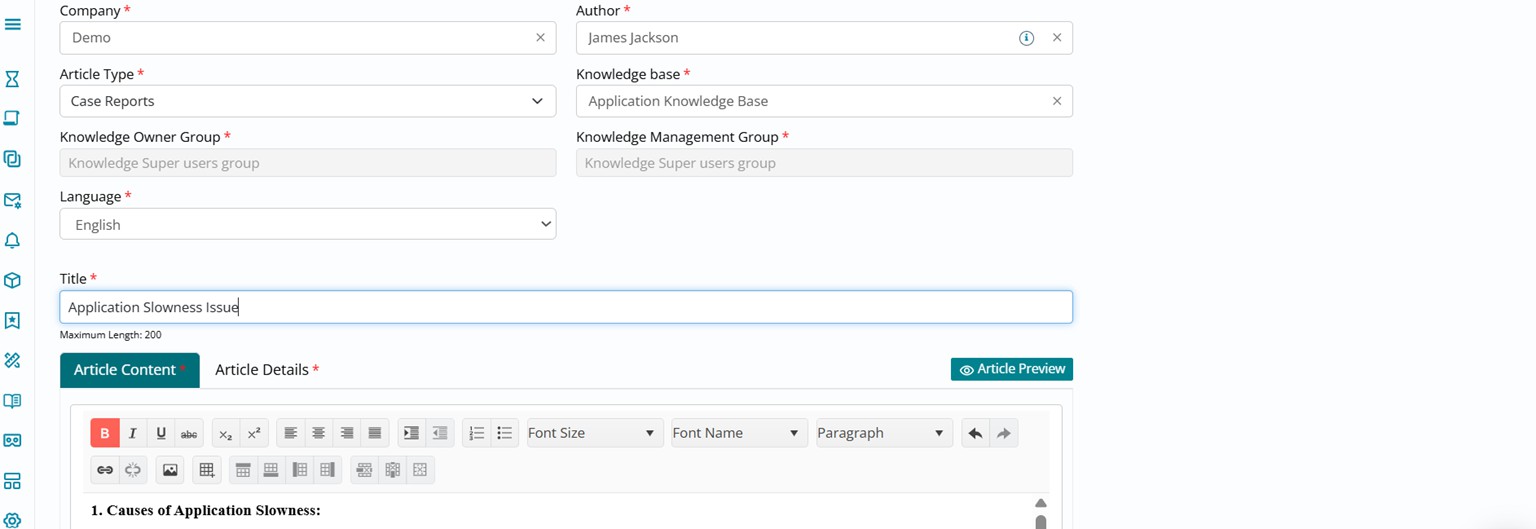
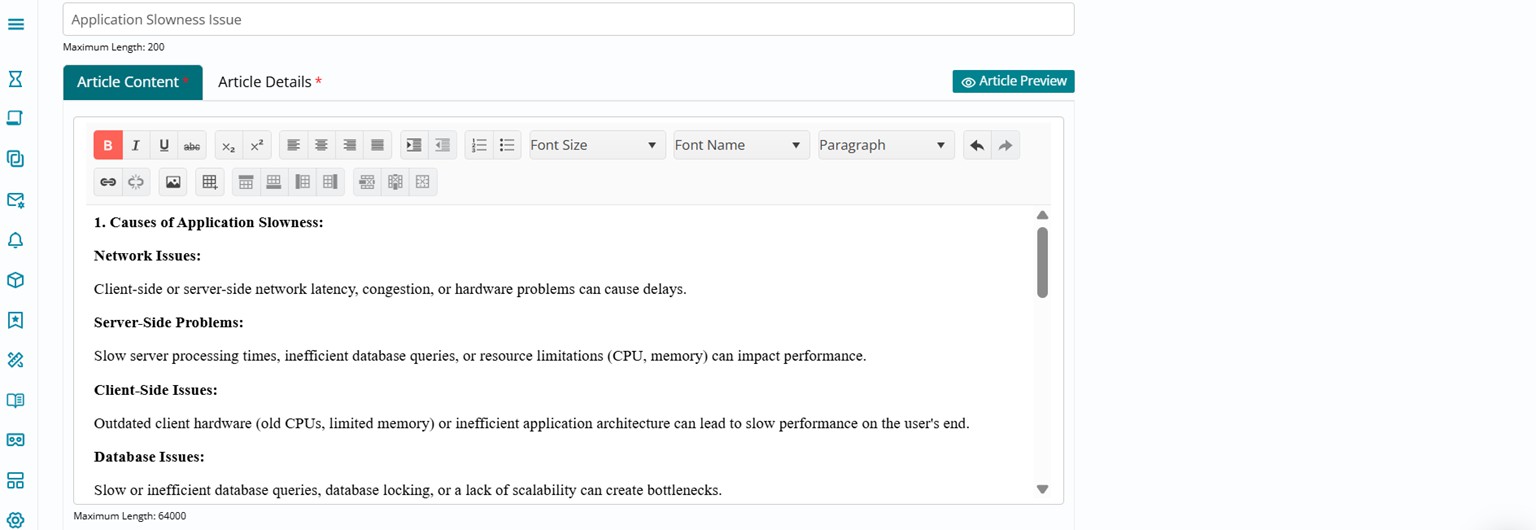
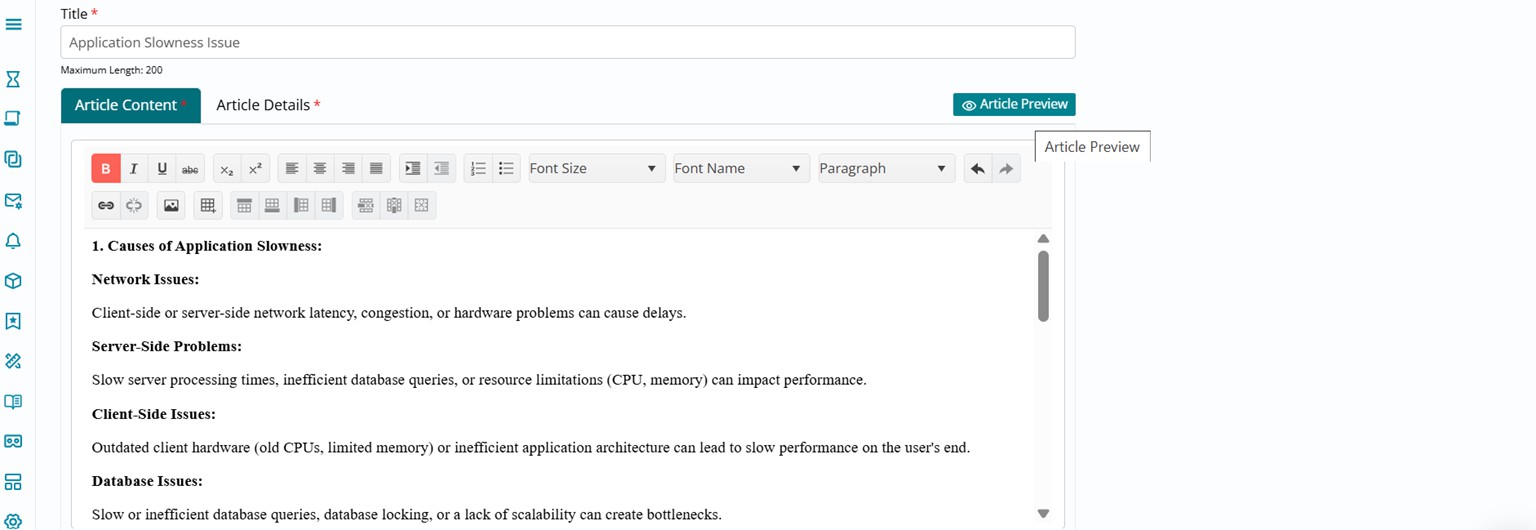
Update the Title and Body of the article in the Article Content selection. Make use of the Rich Text editor options available to improve the visibility of the knowledge article by formatting it appropriately.
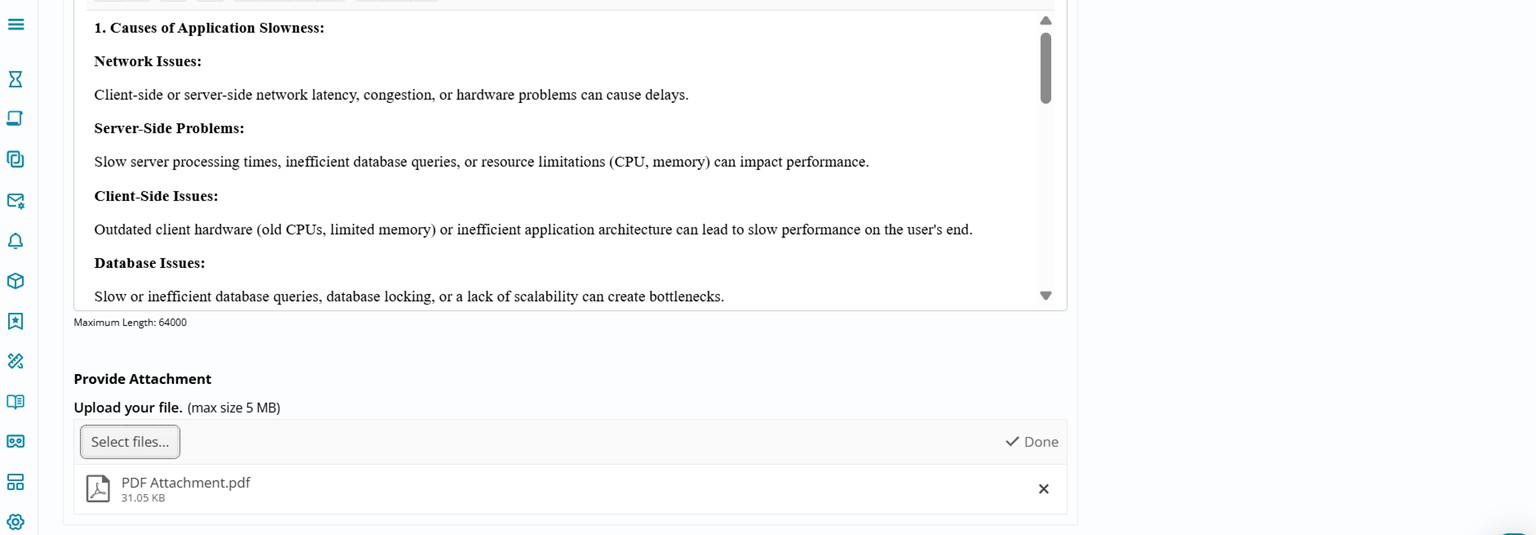
Scroll down and add an attachment from the Provide Attachment section on the article form.
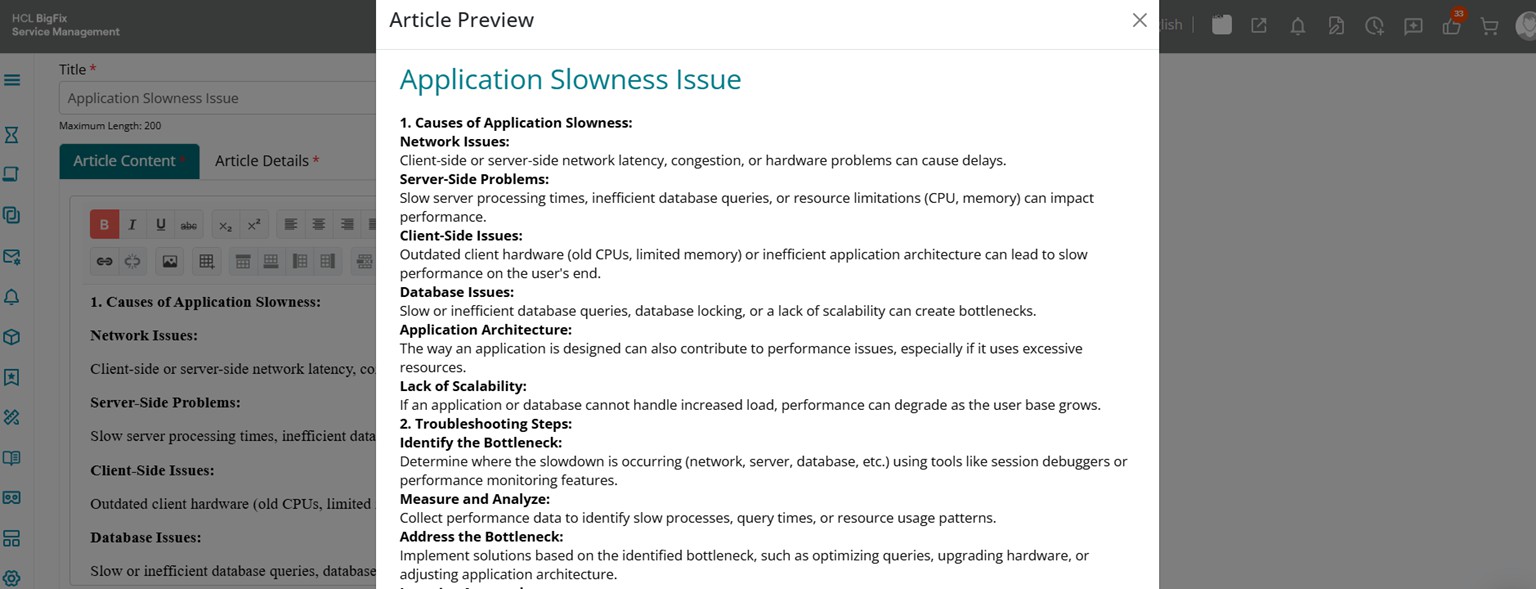
You can also preview the article prior to saving it by clicking on the Article Preview button on the article form.
The article opens in a page preview mode and you can view how the article would look like for the end users once it is published.
Close the preview mode and if you feel any further modifications to the article are needed, make those edits in the Article Content section. If the article needs to be scheduled for publishing or expiry at a certain date and time, it is possible to do that from the Article Details section. The use count and view count metrics are also incrementally updated in the Article Details section.
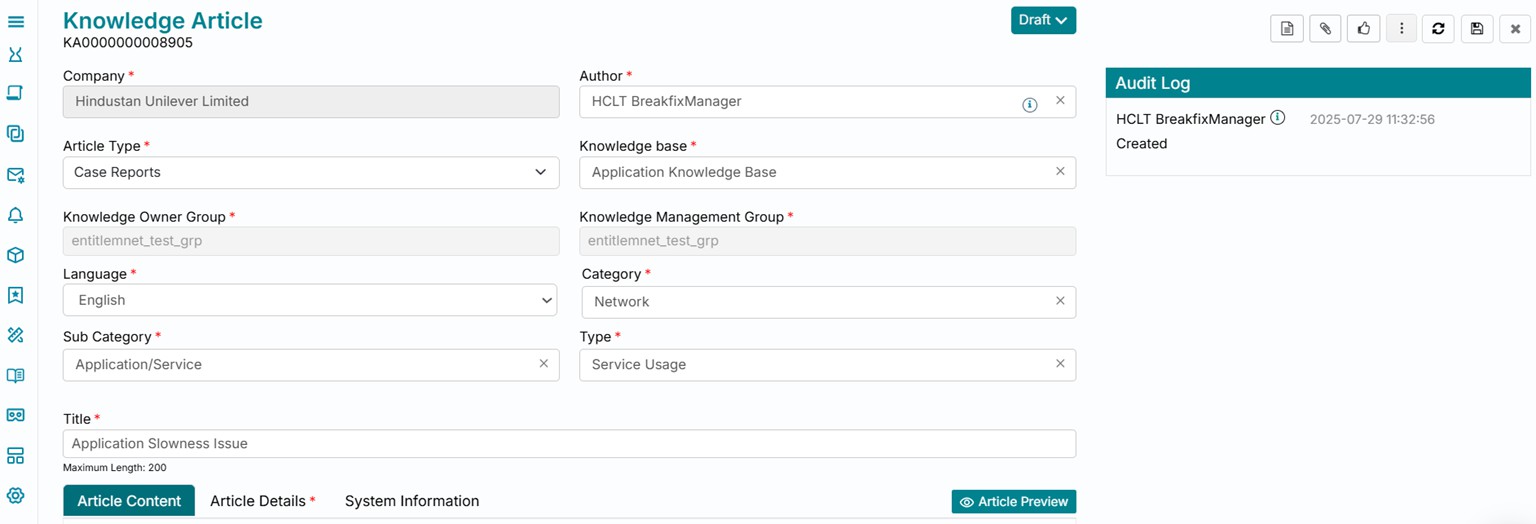
Click on Save button visible towards the top right of your page once you have made the required changes if any.
The knowledge article gets saved in Draft status and the corresponding audit log is updated.
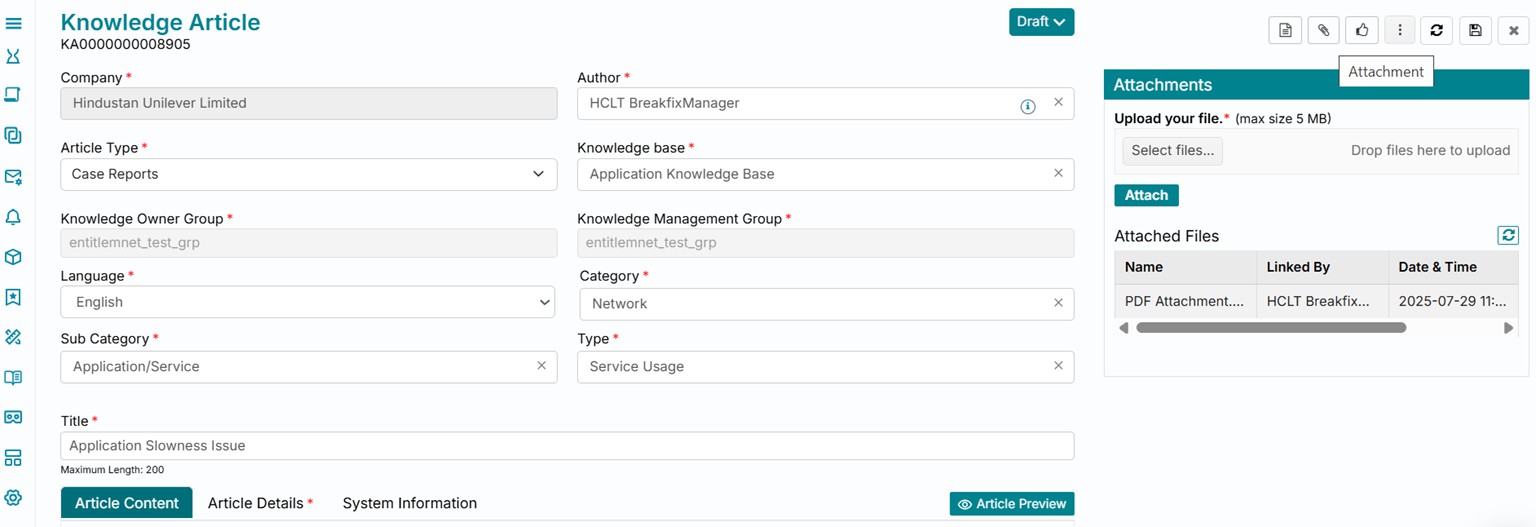
Update Attachments to a Knowledge Article
You can click on the Attachment button visible on the top right section of the page to view existing attachments or add new ones to the article.
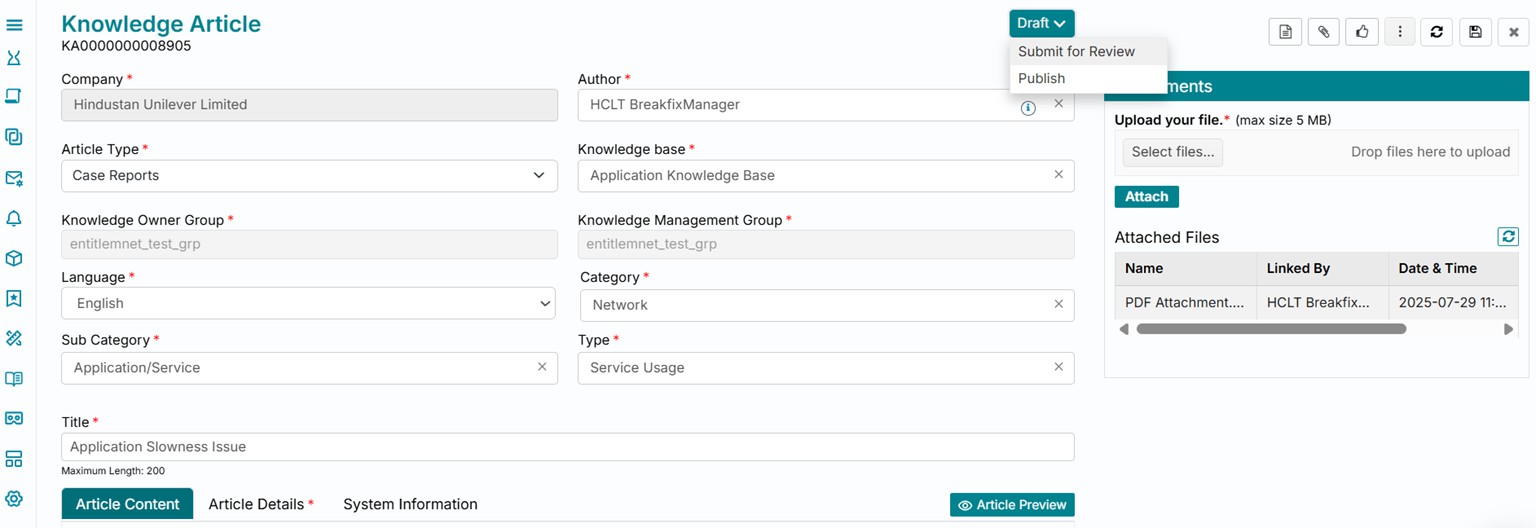
Knowledge Article Ticket Lifecycle – Instant Publish
There are two possible actions from Draft status of the knowledge article if the authorized role is available. One option is that you can click on Publish button and instantly publish the knowledge article.

Submit for Review
Another option which is more likely to be used is to click on Submit for Review button and submit the article for appropriate review. This will trigger approvals based on the approval set and rules configured by the administrator.
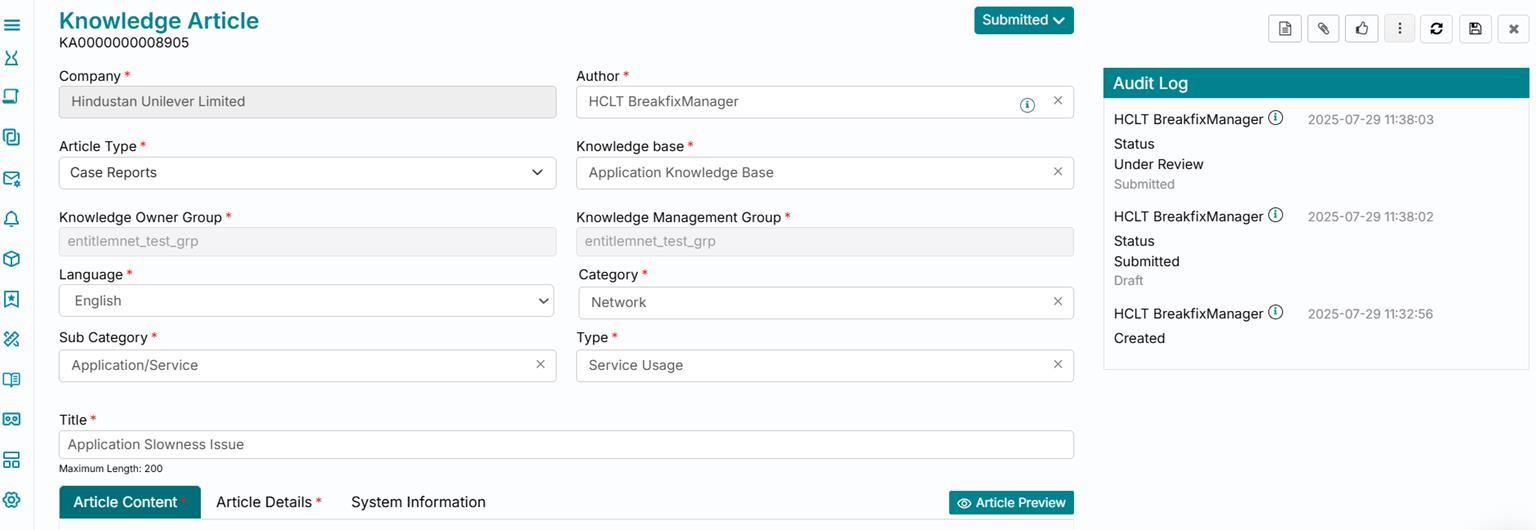
Submitted
The knowledge article moves to Submitted status and the corresponding audit log is updated. This is an interim status and upon refreshing will automatically move the article to Under Review status.
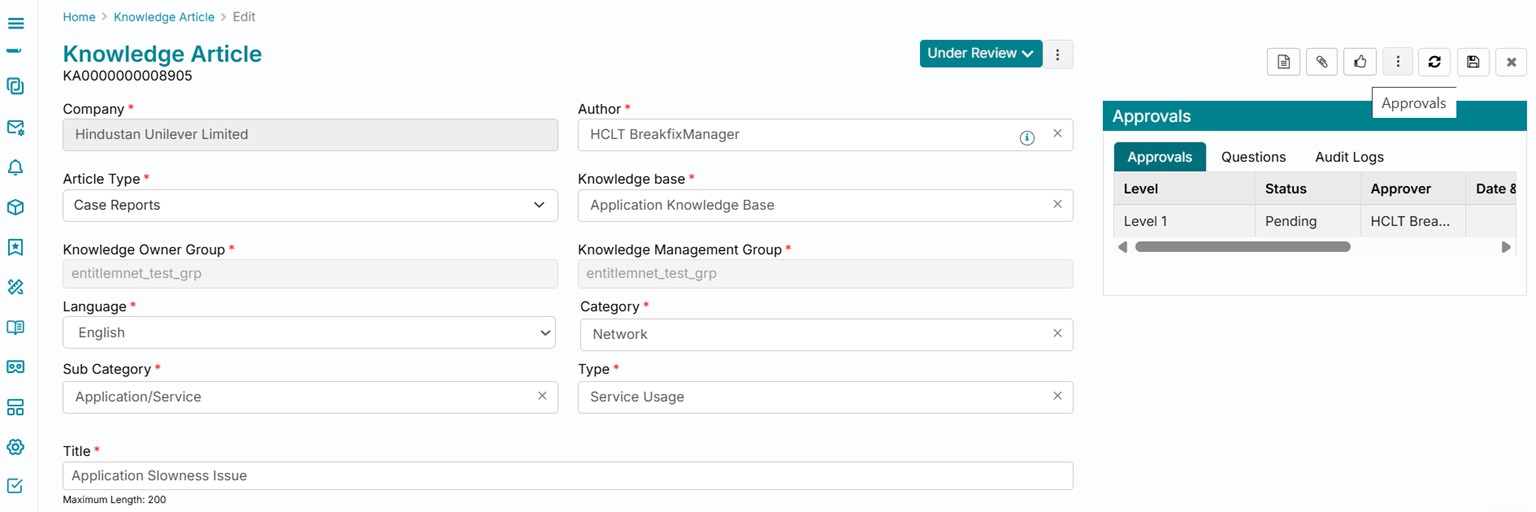
Under Review
The article once refreshed using the Refresh button from the top right section of the screen moves the ticket to Under Review status. Click on the thumb icon i.e., Approvals button to view the approvals awaited in this article’s lifecycle.
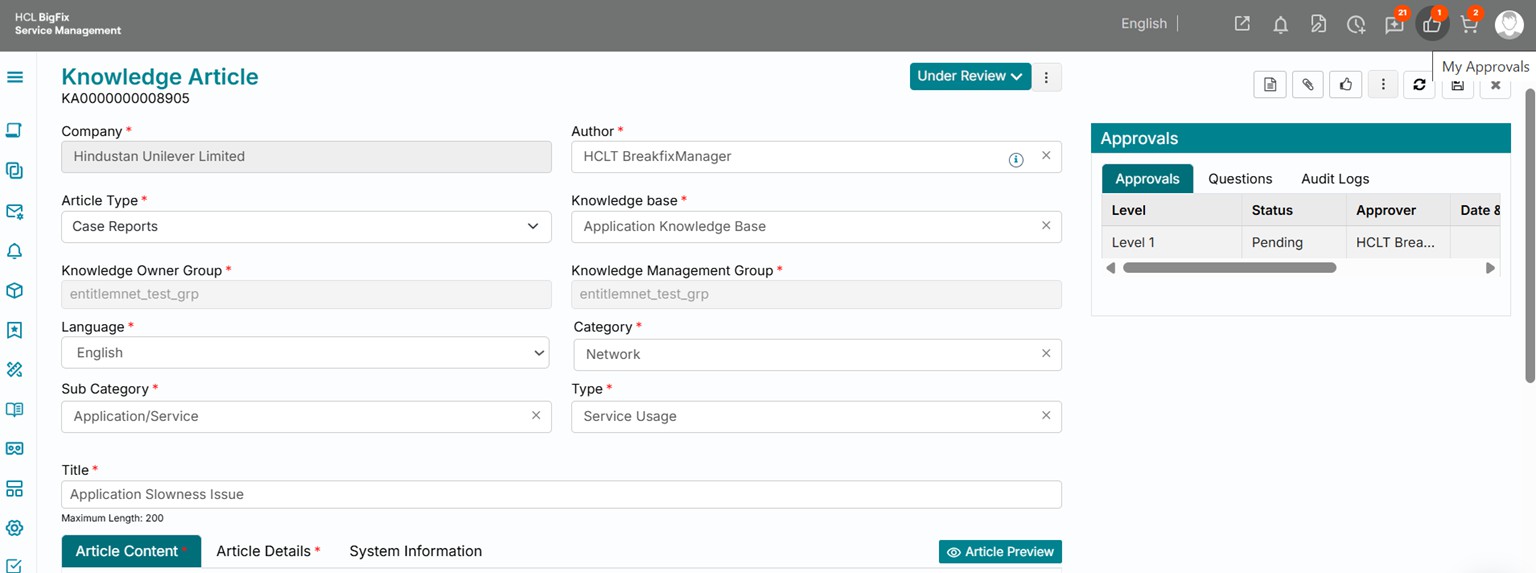
Approvals
If you have the appropriate approval role and authority based on the approval set configured by the administrator, click on My Approvals from the top right of the page.
You will be navigated to the My Approvals section of the consumer homepage from where you can click on the appropriate request, in this case, the knowledge article record awaiting your review and subsequent approval action.
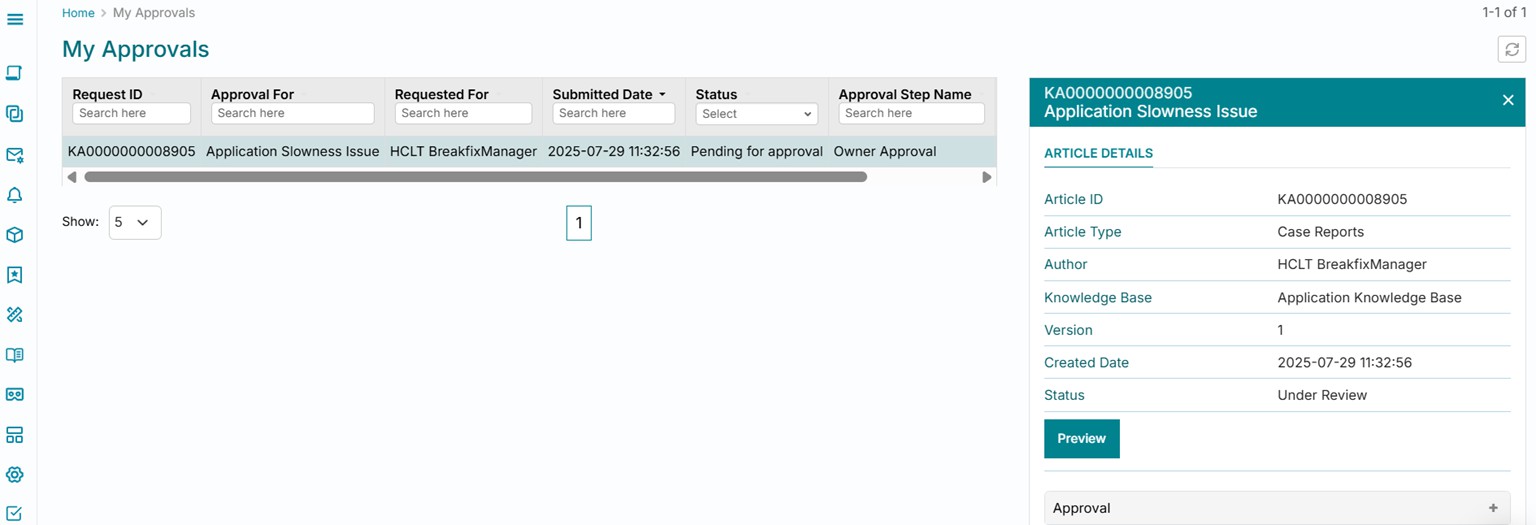
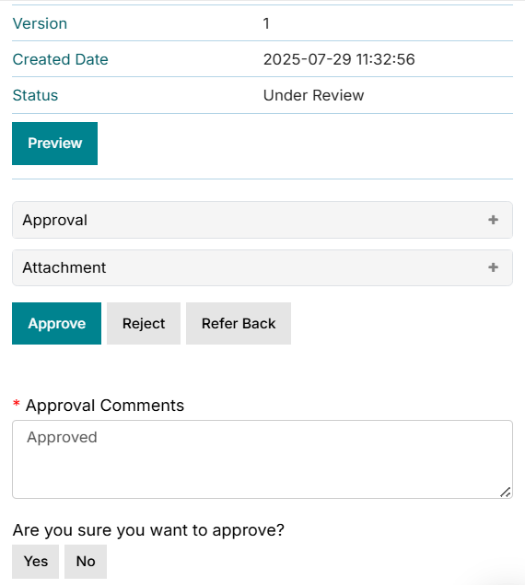
You can preview the article and browse through its content and details, following which you can take one of the three actions
- Approve
- Reject
- Refer Back.
Approving the record will move it to Published status, rejecting it will move it to Rejected status, whereas refer back will move it back to Draft status.
Published
Clicking on Approve button followed by providing your approval comments has published the article for the appropriate audience.
Clicking on Approvals button from the right section also shows the approval history against the selected article.
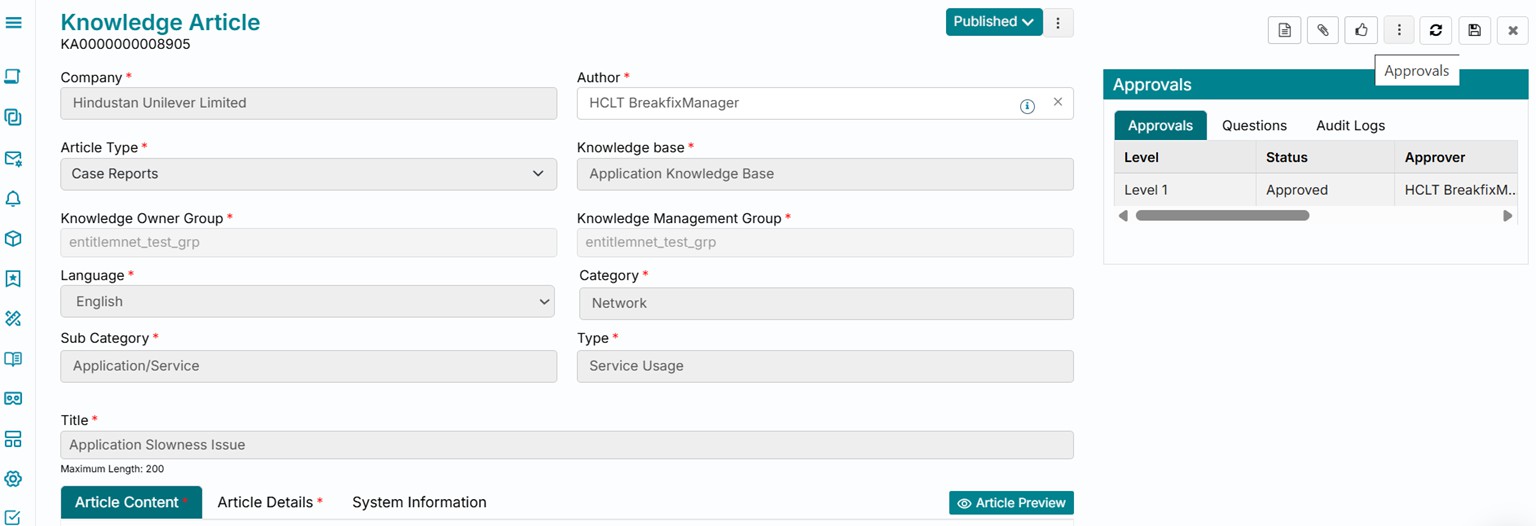
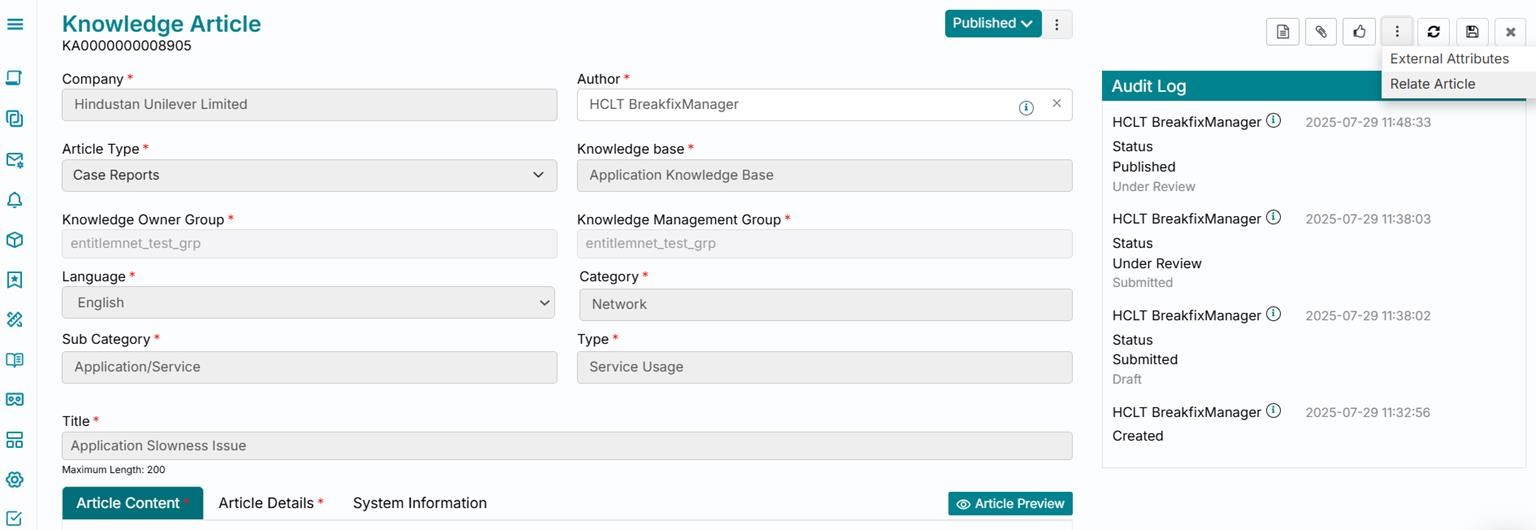
The article once published also updates the corresponding ticket audit log.

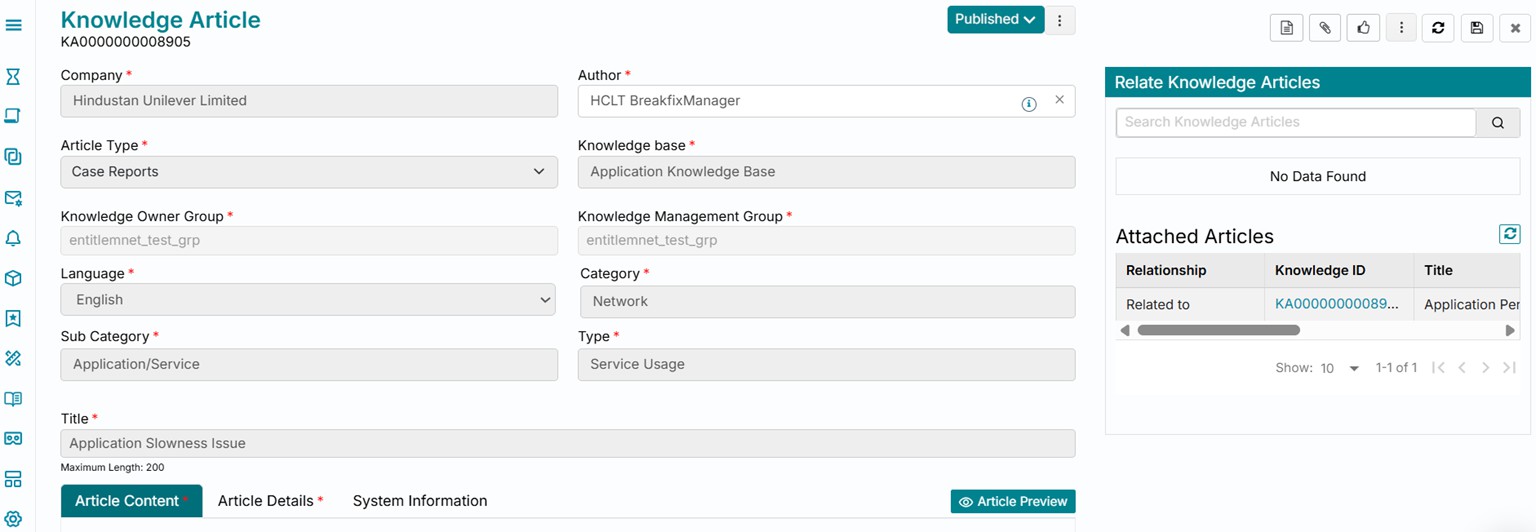
Relate a Knowledge Article
You can relate a knowledge article to another one by using the Relate Article option available upon
clicking the three vertical dots from the top right section of the page.
Select from the list of available articles which can be related from within the knowledge base based on your search query. Click on Relate button to proceed with your action.
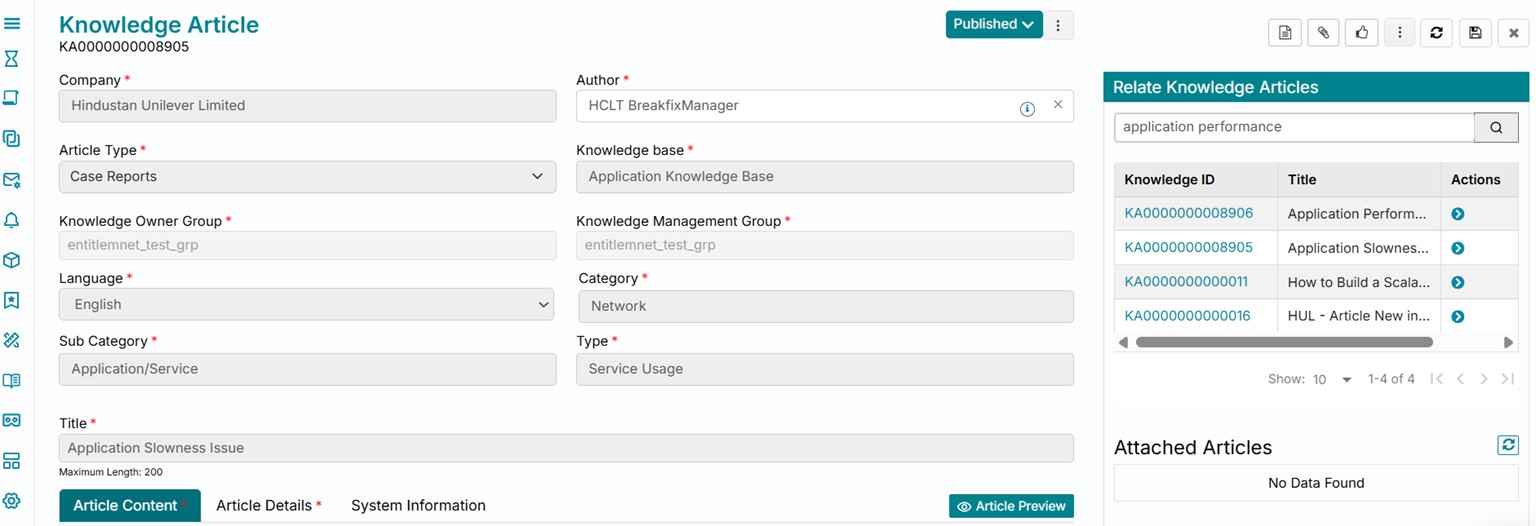
The knowledge article is now related to another one as seen from the right section of the page. You can also click on the related knowledge ID and view its details by directly navigating to open the related article in a new tab.
Outdated
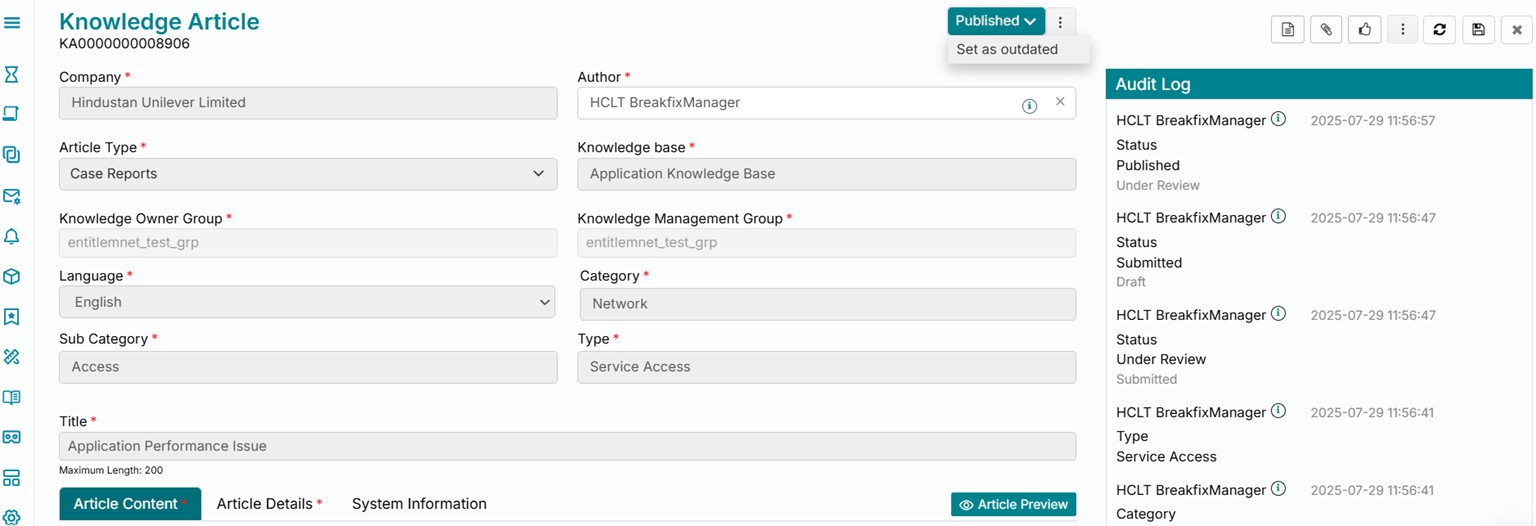 One of the actions that can be performed on a published article is to manually
move it to Outdated status, or another option is to set an expiry date to automatically
move it to Outdated status from the Article Details section of the form. Clicking on Set
as outdated will move the article status to Outdated.
One of the actions that can be performed on a published article is to manually
move it to Outdated status, or another option is to set an expiry date to automatically
move it to Outdated status from the Article Details section of the form. Clicking on Set
as outdated will move the article status to Outdated.
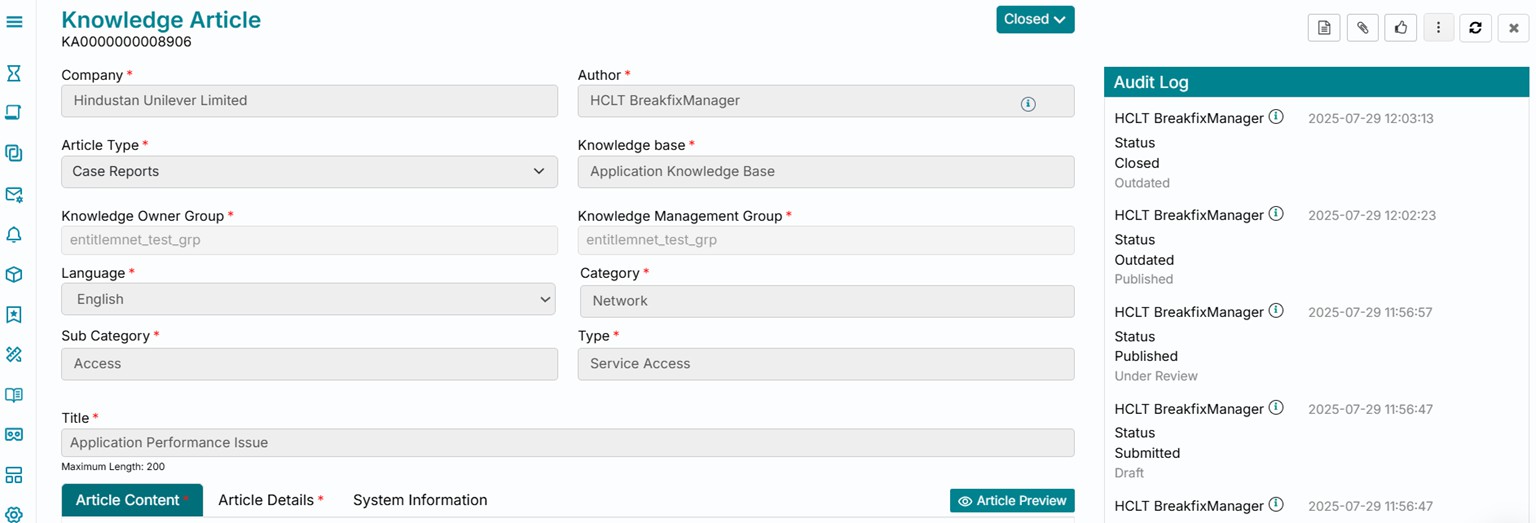
Closed
Once outdated, i.e. hidden from the appropriate audience, an article can be closed by moving it to Closed status. This can be done by clicking on the Close article button. This ends the ticket lifecycle of a knowledge article on the product.

An article once closed gets locked for any editing.
Create a New Version
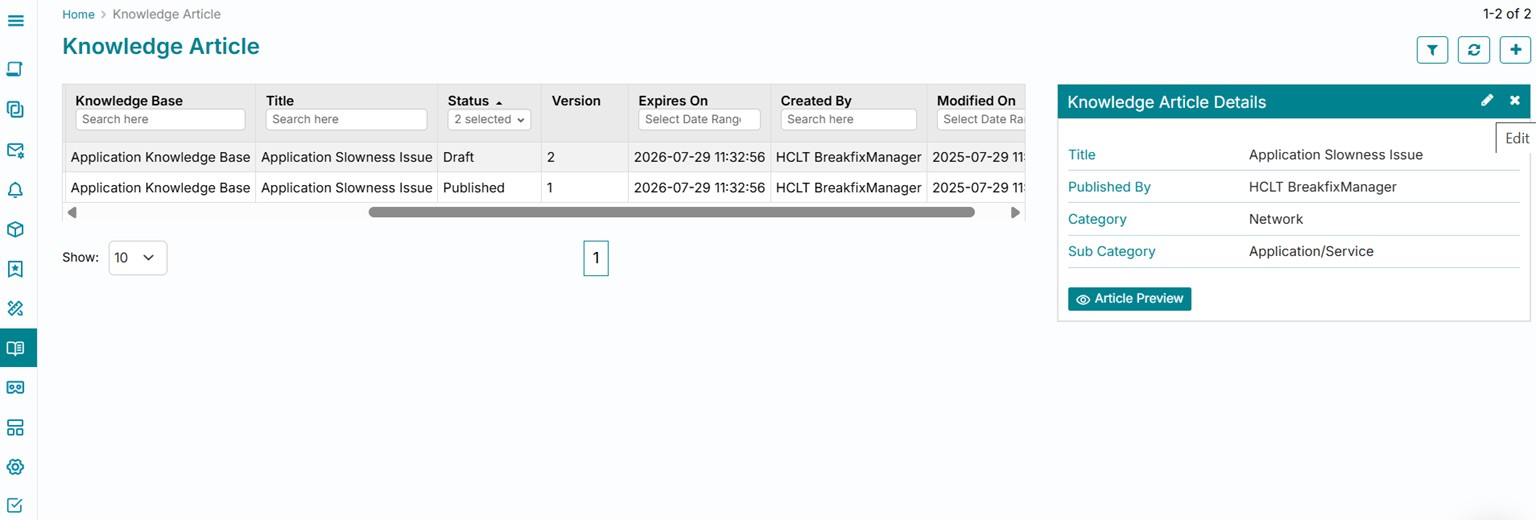
Another option that is available on a published knowledge article instead of moving it to Outdated status is clicking on the three vertical dots beside the status button followed by clicking on Create a new version.

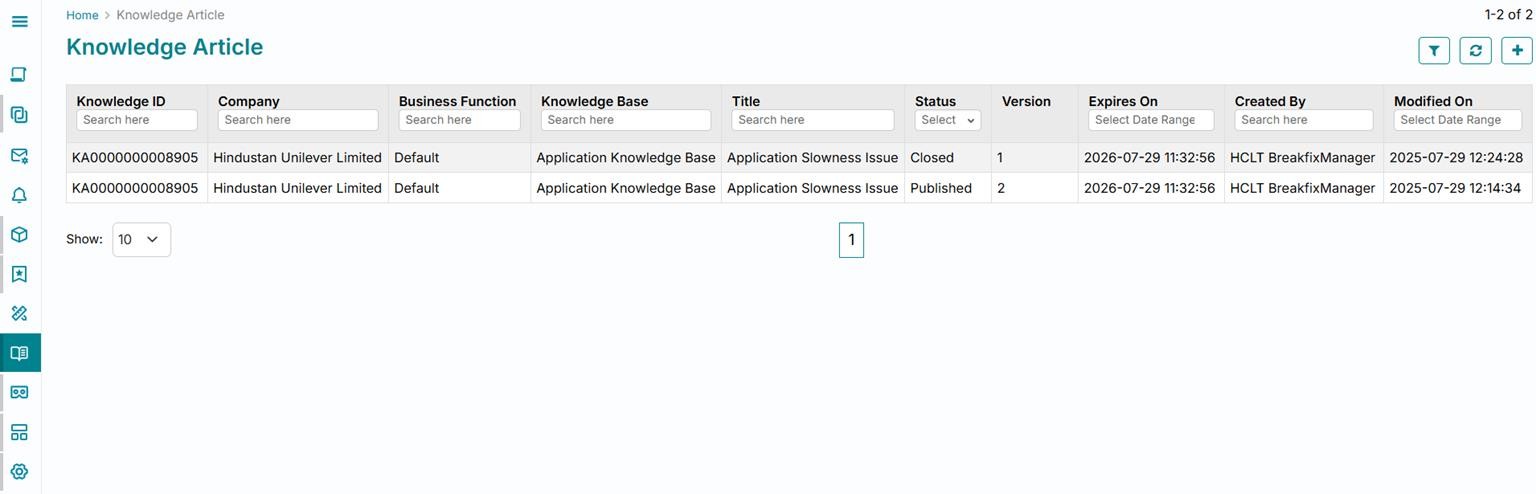
As visible from the list view, a new version of the published article is created in Draft status with all the values of the first version copied automatically into the new version. The first version continues to remain Published.
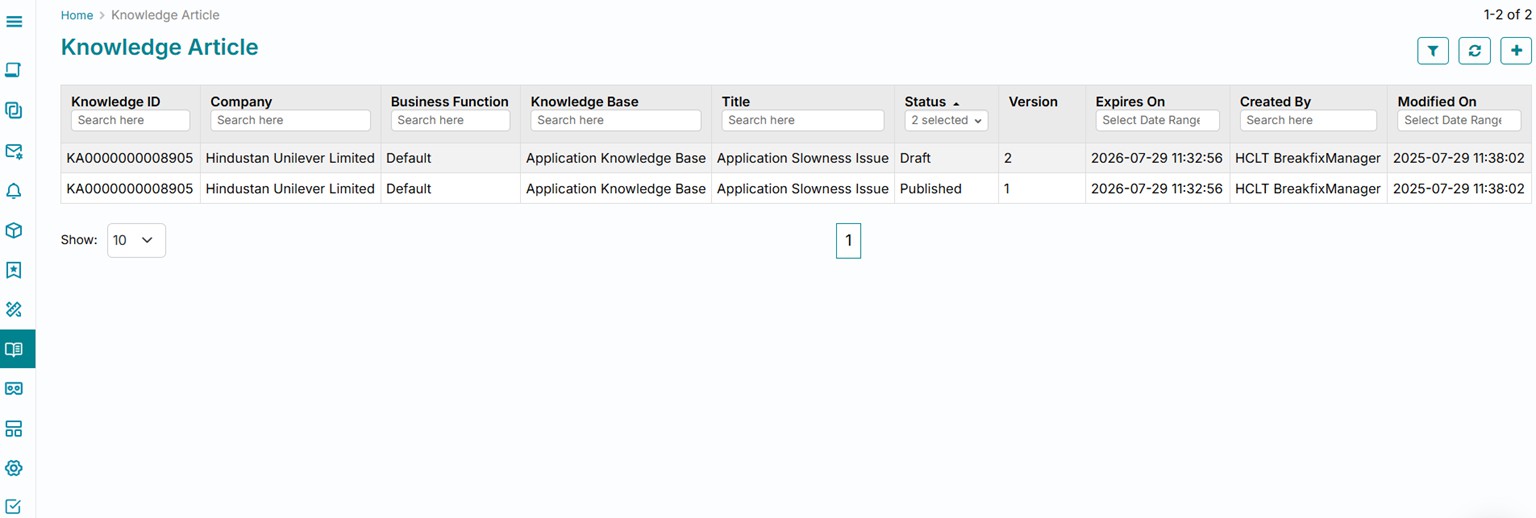
Click on the newly created draft i.e., second version of the article from the list view and click on Edit button from the right section to view the article and revise it accordingly.
The corresponding audit log is constantly updated. You can repeat the lifecycle for this version of the article again after making the necessary revisions by moving it to Under Review and then Published status.
As visible from the list view, the new version once Published automatically moves the prior version to Close status thus maintaining the latest version visible for the appropriate audience.