In this lesson, you configure the Commerce Composer tool to manage Madisons store
pages. To configure the tool, you use the Data Load utility to turn on the Commerce Composer store function in the Madisons
starter store.
About this task
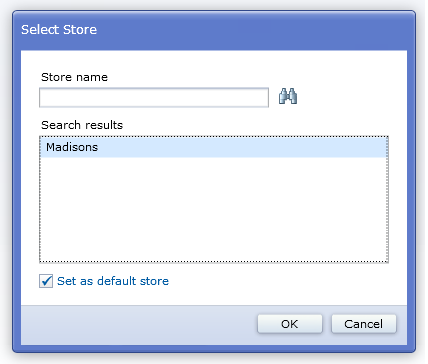
By enabling the store function with the
Data Load utility, your
Deprecated featureMadisons store can be selected by business users in the
Commerce Composer tool as shown in the following
image:

Procedure
Update the Data Load utility files with your environment
settings.
-
In a file manager utility, go to the temporary directory where you extracted the
CommerceComposerStoreSupportTutorial.zip compressed file.
-
Go to the source\dataload directory. Ensure that the following files
exist:
- dataload_storefunction.csv
- The CSV input file that contains the data that the Data Load utility loads.
- dataload_storefunction_env.xml
- The data load environment configuration file, which includes the environment variables for your
WebSphere Commerce instance. These variables include
the following information:
- Business context variables, including the store identifier, catalog identifier, and the default
language and currency for your store.
- Database environment settings, including the database type, name, and schema.
- dataload_storefunction_config.xml
- The business object configuration file, which defines your business context information,
database connection property, ID Resolver, and data writer class.
- dataload_storefunction_load.xml
- The data load order configuration file, which controls the order that the Data Load utility loads data.
-
Open the dataload_storefunction.csv file for editing. Update the value for
the
storeid column to match the store ID for your Madisons store. In this tutorial,
the value of the storeid column is 10851.
-
Open the dataload_storefunction_env.xml file for editing.
-
Update the following code in the file to use the correct values for your store:
<_config:BusinessContext storeIdentifier="Madisons" catalogIdentifier="Madisons" languageId="-1" currency="USD">
  </_config:BusinessContext>
-
Update the following code to use the correct values for your database:
<_config:Database type="derby" name="..\db\mall" schema="APP"/>
-
Save and close the file.
Run the Data Load utility to enable the Commerce Composer store function for your Madisons
store.
-
Ensure that your WebSphere Commerce Server is stopped before you run the Data Load utility. For more information about
stopping your server, see Starting and stopping WebSphere Commerce Test Server.
-
In a command-line utility, go to the
WCDE_installdir\bin directory.
-
Run the following command to load the input CSV files to enable the Commerce Composer store function for your
store:
dataload temporaryDirectoryPath\source\dataload\dataload_storefunction_load.xml
Where
temporaryDirectoryPath is the path to the temporary directory
where you extracted and modified the contents of the
CommerceComposerStoreSupportTutorial.zip compressed file.
-
Verify that the Data Load utility
loaded successfully by checking the log file for the utility. Ensure that the following statement
displays in the log file: "Load completed successfully with no errors.".
The wc-dataload.log log file for the Data Load utility is generated in the
WCDE_installdir\logs directory.
-
Open the Commerce Composer tool. Ensure that your store displays in the
Select Store list.


