
Testing your customization code
In this lesson, you are testing your folder customization in Management Center.
 Attention: This tutorial is based on
the folder support that is included in Feature Pack 5 and is not recommended
if you are on a newer feature pack level. Beginning with Feature Pack
6, support is provided by default for grouping e-Marketing Spots,
activities, customer segments, marketing content, promotions, and
attribute dictionary attributes. This support includes the capability
of creating, changing, and deleting folders within the Management
Center Catalogs, Marketing, and Promotions tools. You are not able
to group folders created by following this tutorial with folders that
are created by using Management Center. If you create Management Center
folders by following the steps included in this tutorial, delete those
folders before you create folders by using Management Center. For
more information about folders, see Folders.
Attention: This tutorial is based on
the folder support that is included in Feature Pack 5 and is not recommended
if you are on a newer feature pack level. Beginning with Feature Pack
6, support is provided by default for grouping e-Marketing Spots,
activities, customer segments, marketing content, promotions, and
attribute dictionary attributes. This support includes the capability
of creating, changing, and deleting folders within the Management
Center Catalogs, Marketing, and Promotions tools. You are not able
to group folders created by following this tutorial with folders that
are created by using Management Center. If you create Management Center
folders by following the steps included in this tutorial, delete those
folders before you create folders by using Management Center. For
more information about folders, see Folders. Support is provided by
default for grouping content pages and layouts in the Commerce Composer tool.
This support includes creating, changing, and deleting folders with
the Commerce Composer tool.
Support is provided by
default for grouping content pages and layouts in the Commerce Composer tool.
This support includes creating, changing, and deleting folders with
the Commerce Composer tool.
Procedure
- Start your WebSphere Commerce Test Server.
- Open the Marketing tool.
- Select your Aurora starter store.
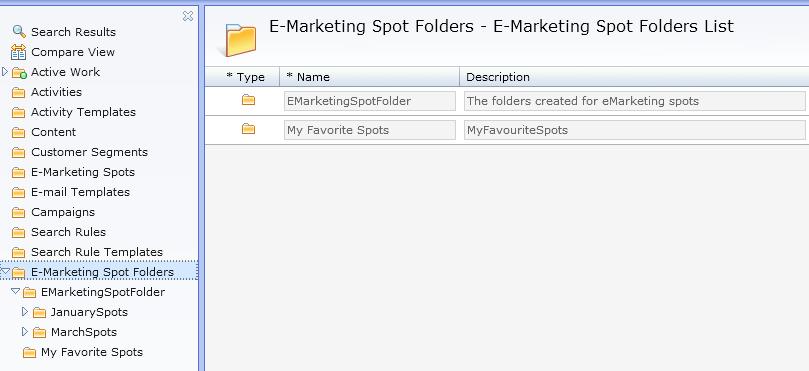
- From the explorer tree, select . The following image displays
the folders list in the left navigation panel:
- Right-click a sample folder EMarketing SpotFolder;
select Show E-Marketing Spot Folders List
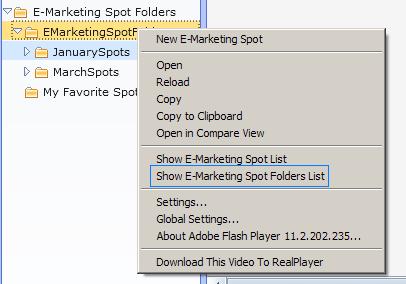
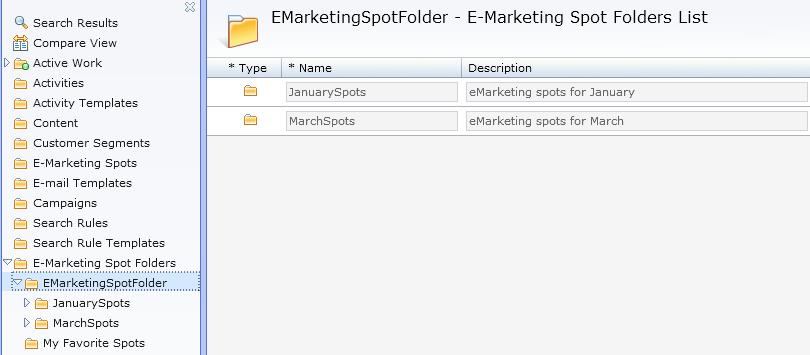
- The corresponding sub folders display in the main work
area. Ensure that your main work area display resembles the following
image:
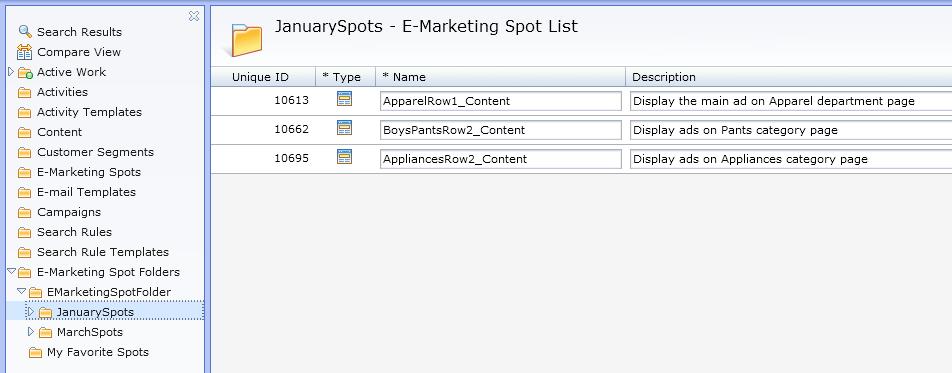
- Right-click a sub folder JanuarySpots;
select Show E-Marketing Spot List
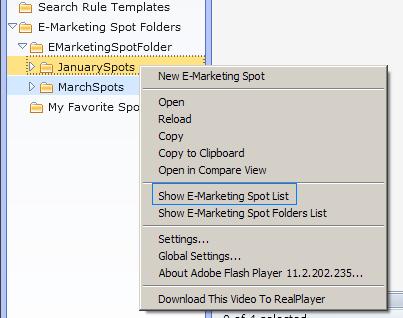
- The E-Marketing Spot List displays in
the folder. Ensure that your E-Marketing Spot List
resembles the following image:
- Click the
 Toolbar icon
to open the utilities view. Browse your E-Marketing Spots with the
utilities view and drag or copy the E-Marketing Spot from
the utilities view to your folders.
Toolbar icon
to open the utilities view. Browse your E-Marketing Spots with the
utilities view and drag or copy the E-Marketing Spot from
the utilities view to your folders.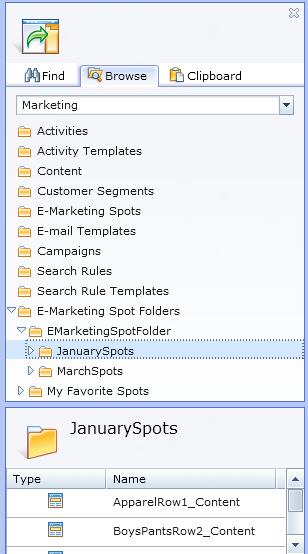
- Save your changes.