
Creating a properties field in Management Center
You can enable a customizable field in the properties view for a price list in the Catalog Filter and Pricing tool. You can use the extra field to display offers and discounts for certain regions to your customers.
About this task
Procedure
-
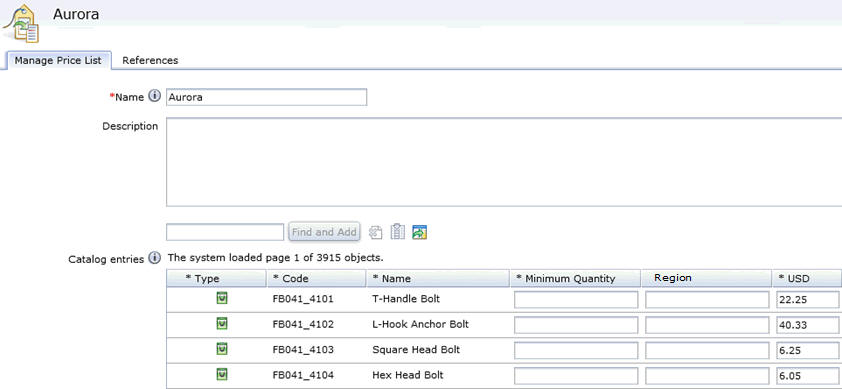
Activate the
FIELD1column in the Management Center user interface, and change the name fromFIELD1to become the Region column.-
Modify the PriceListPrimaryObjectDefinition.def
file to change the user interface to add the
FIELD1, or Region column to Management Center. - Go to WCDE_installdir\LOBTools\WebContent\config\commerce\price\objectDefinitions and open the PriceListObjectDefintion.def file.
-
Find the following line of code:
<ServiceParam name=qualifier propertyName=qualifier
</DeleteService> -
Add the line of code directly after:
<PropertyDefinition displayName=. Save and close the file.field
propertyName=x_field
required=true
/> - Go to WCDE_installdir\LOBTools\WebContent\config\commerce\price\listViewDefinitions and open the PriceListListView.def file.
-
Find the following code:
<GridNumeric editable=true
name=maximumQuantity
propertyName=maximumQuantity
text=$(catalogResources.maximumQuantity)
/> -
Add the line of code directly after:
<GridText editable=.true
name=x_field
text=field
visible=true
width=100
/>
Thefieldcolumn is now displayed on the Manage Price List tab in the Catalog Filter and Pricing tool. -
Modify the PriceListPrimaryObjectDefinition.def
file to change the user interface to add the
-
Modify the Management Center mapping file.
- Go to WCDE_installdir\LOBTools\WebContent\WEB-INF\config\com.ibm.commerce.price folder and open the wc-price-clientobjects.xml file.
-
Find the following code:
<_config:URLParameter name=.storeId
nounElement=/PriceListIdentifier/ExternalIdentifier/StoreIdentifier/UniqueID
/> -
Add the line of code directly following the code from Step 2.b.:
<_config:URLParameter name=x_
                                        nounElement=/PriceEntry/UserData/UserDataField
                                    type=UserData key=false
/> -
In the same file, find the following code:
<_config:URLParameter name=./storeId
nounElement=PriceListIdentifier/ExternalIdentifier/StoreIdentifier/UniqueID
/> -
Add the line of code directly following the code from Step 2.d.:
<_config:URLParameter name=x_
                                        nounElement=/PriceEntry/UserData/UserDataField
                                    type=UserData key=false
/> -
In the same file, find the following code:
<_config:URLParameter name=.priceListId
nounElement=/PriceListIdentifier/UniqueID
key=true
return=true
/> -
Add the line of code directly following the code from Step 2.f.:
<_config:URLParameter
                                            name=x_
                                        nounElement=/PriceEntry/UserData/UserDataField
                                            type=UserData
                                            key=false
/> - Restart the test server to reflect the change in the XML file.
-
Customize the server-side logic to display the new Region
field in Management Center.
- Choose the price entry command that you want to modify to display the new Region field in.
-
In the
userDatafield, update thefieldvalue with the property name.For example, if you want the property to be named Region,fieldmust be updated toregion.for (Map.Entry<String, String> entrys : userDataFields .entrySet()) { System.out.printIn(userdata
+ entrys.getKey() +value
+ entrys.getValue ()); } } else { userData = CommerceFoundationFactory.eINSTANCE .createUserDataType(); } userData.getUserDataField() .put(field
,123
; priceEntry.setUserData (userData); } - Go to WCDE_installdir\LOBTools\WebContent\WEB-INF\config\com.ibm.commerce.price folder and open the SerializePriceEntry.jspf file.
-
Find the following code:
<defaultStoreCurrency>${priceEntry.price.price/currency}</defaultStoreCurrency> -
Add the following code directly before the code you just found:
<c:forEach var=userDataField
items=$(priceEntry.userData.userDataField)
> <x_${userDataField.typedKey}><wcf:cdata data=userDataField.typedValue}
/></x${userDataField.typedKey}> </c:forEach>