Configuration Instructions
Configure a customer instance of the Service Graph Connector for HCL BigFix following the initial deployment of the application.
About this task
Procedure
-
Configure the MID Server security policy.
Beginning with Rome, the out-of-the-box (OOB) MID Server security policy checks for certificates when communicating with the MID Server. For more information on MID Server certificate check policies, refer to ServiceNow documentation.
Customers see certificate errors while using the Service Graph Connector for HCL BigFix if BigFix Inventory does not use valid certificates that are trusted by the MID Server. To avoid these issues, leverage trusted certificates with BigFix Inventory (Configuring secure communication), or disable the checks within ServiceNow by setting the flags to false for the Internet or Intranet depending on how the MID Server communicates with the instance.
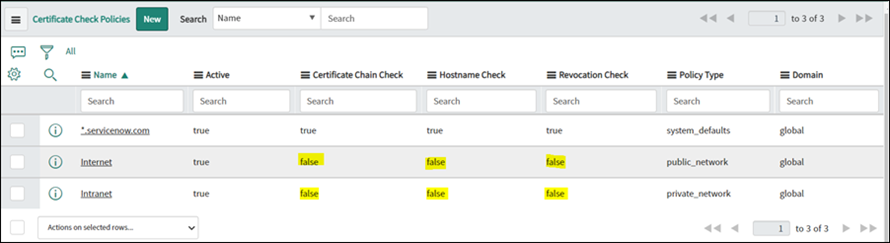
- Navigate to the MID Server security policies.
- Locate the Internet and Intranet policies, depending on how your MID Server communicates with the instance.
- Set the respective certificate check flags to false.
-
Configure the MID Server capability.
Ensure that the MID Server has the appropriate capabilities assigned to communicate with BigFix.
- Create a new MID Server capability if one does not already exist.
- Associate the capability with your MID Server or MID Servers.
-
Configure application access permissions for the CMDB tables.
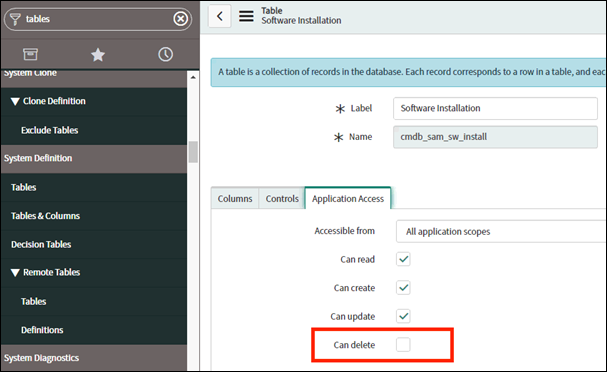
To allow the Service Graph Connector for BigFix to remove software records from the Configuration Management Database (CMDB) that no longer exist on endpoints, you must enable delete permissions for the relevant CMDB tables. For details and reference, refer to ServiceNow Table design and runtime settings.
-
Navigate to the specific CMDB table you want to configure, such as
Software Installation
(
cmdb_sam_sw_install). - Select the Application Access tab.
- Select the Can delete checkbox.
-
Navigate to the specific CMDB table you want to configure, such as
Software Installation
(
-
Add the Discovery Source.
Register BigFix as a discovery source within your ServiceNow instance.
-
Open that record and select Run Fix Script.

-
Open that record and select Run Fix Script.
-
Configure the BigFix connection parameters using the guided setup.
Use the guided setup to configure the API and HTTP connections.
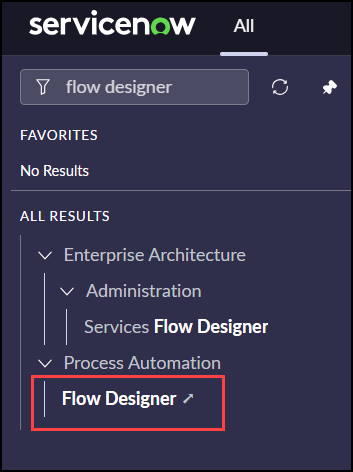
- In the application menu, navigate to .
- Follow the directions provided within the guided setup process.
- In the Configure the Connection section, follow the provided instructions to complete the necessary tasks.
-
Configure the API key.
-
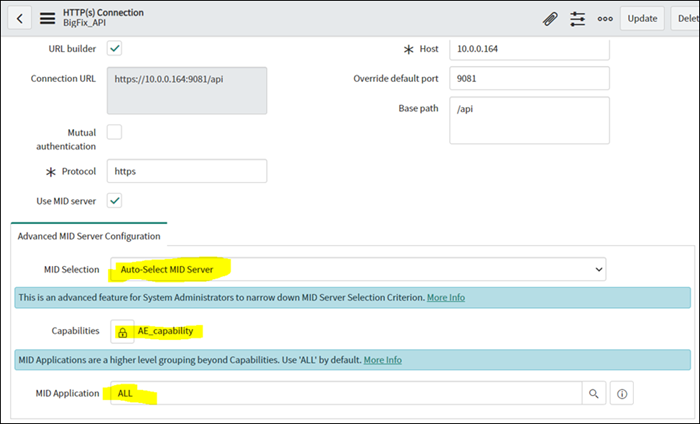
Configure the HTTP connection.
-
Verify that Capabilities is selected and
MID Application is set to
ALL.
-
Verify that Capabilities is selected and
MID Application is set to
ALL.
-
Test the configuration.
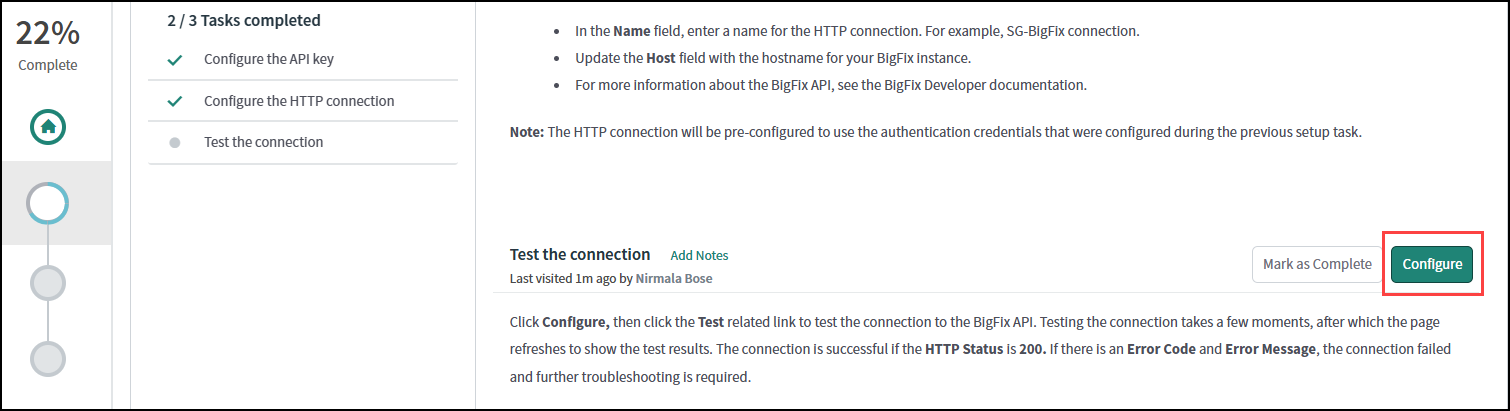
After configuring connection details, the Setup Guide allows for connection testing. Verify that your instance can successfully retrieve data from BigFix.
-
In the Setup Guide, locate the Test the connection task and
select Configure.
-
Select Test Load 20 Records.

-
In the Setup Guide, locate the Test the connection task and
select Configure.
-
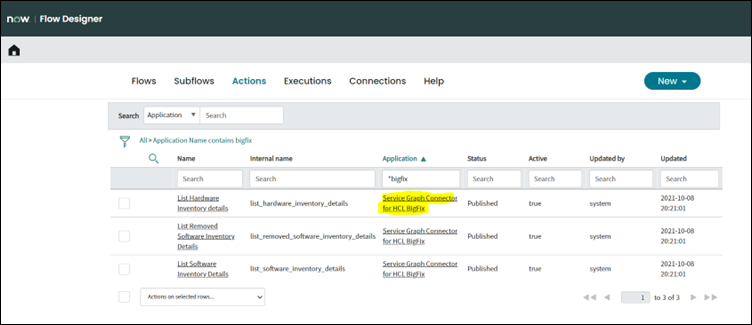
Test Flow Designer data streams.
-
Navigate to Flow Designer and under Data
Streams, look for data streams under the application
Service Graph Connector for HCL BigFix.
-
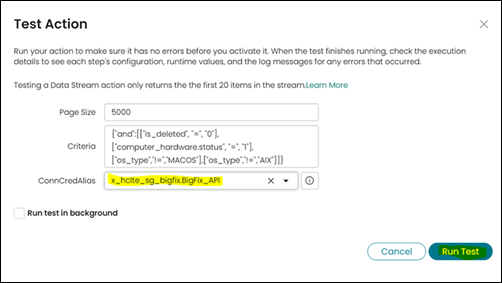
Open any data stream, for example: List Hardware Inventory
Details.

-
Select the Connection Alias and select Run
Test.
-
Navigate to Flow Designer and under Data
Streams, look for data streams under the application
Service Graph Connector for HCL BigFix.
-
Manage the Criteria flags by adjusting the relevant system properties.
The following system properties control the values within the Criteria field. If modifications are necessary prior to testing, adjust these properties to meet specific customer requirements.