
Access and security
Learn how to securely sign in to and out of the BigFix UI application, change your password, update your profile, review your account activity, and set your language and theme.
Learn how to securely log in and out of the BigFix UI application, change your password, and update your profile information. Regularly updating your password and keeping your profile information current helps maintain the security and accuracy of your account. It also covers session handling and password-management features that help maintain account security after setup.
After completing the BigFix UI setup (as outlined in the BigFix UI Administration Guide), users can log in with the credentials created during setup. This topic explains how to access the BigFix UI through the login page, how to sign out securely, and how to change the account password when required.
To manage your account, select the profile icon in the upper-right corner. The Account panel opens with four tabs: Profile, Password, Account Activity, and Settings. The panel also includes a Log out link.
BigFix UI supports two ways to log in:
- Local credentials: Enter your Login Name and Password, and then select Log in to BigFix. See Logging In.
- OIDC single sign-on: Select Log in via OIDC and authenticate with your organizational credentials. This option appears only when the instance admin enables OIDC. See Logging In with OIDC Single Sign-On.
Logging In
To access the BigFix UI application, follow these steps:
- Open the BigFix UI application URL: Launch your preferred web browser and navigate to
https://<host>[:port]/uito access the BigFix UI application. - (Optional) The Authorized Access Only page might appear before
the login page. This notice confirms that the system is restricted to authorized users.
After you read the message, select Continue to proceed to the login
page.

- The instance admin controls this notice from the BigFix UI. To change it, expand Administration from the side navigation, select Identity Management, select the Admin user and account policy card, and then select the Account Policy tab.
- On the User management - account policy page, the Legal notice message section contains a toggle that shows or hides the notice, and the Authorized access only (required) field that holds the message text.
- When the toggle is off, the page does not appear and users go straight to the login page.
- For the default message text, the field descriptions, and the steps to edit and save the notice, see Account Policy Settings.
Note: Only the instance admin can change this message. The Admin user and account policy card is not visible to other administrators. - (Optional) Select your interface language: In the lower-right corner of the login page,
select the language selector, and then choose a language from the list. Use the
Search box to find a language quickly. Note: In the July 2026 release, English is the only available language. Additional languages are planned for a future release.
- Enter your credentials: On the Initiate launch sequence: Log in.
page, enter your Login Name and Password in
the respective fields. Select the eye icon in the Password field to
show or hide the password that you typed. Note: If you are a first-time user, check the email you received from BigFix for the credentials.
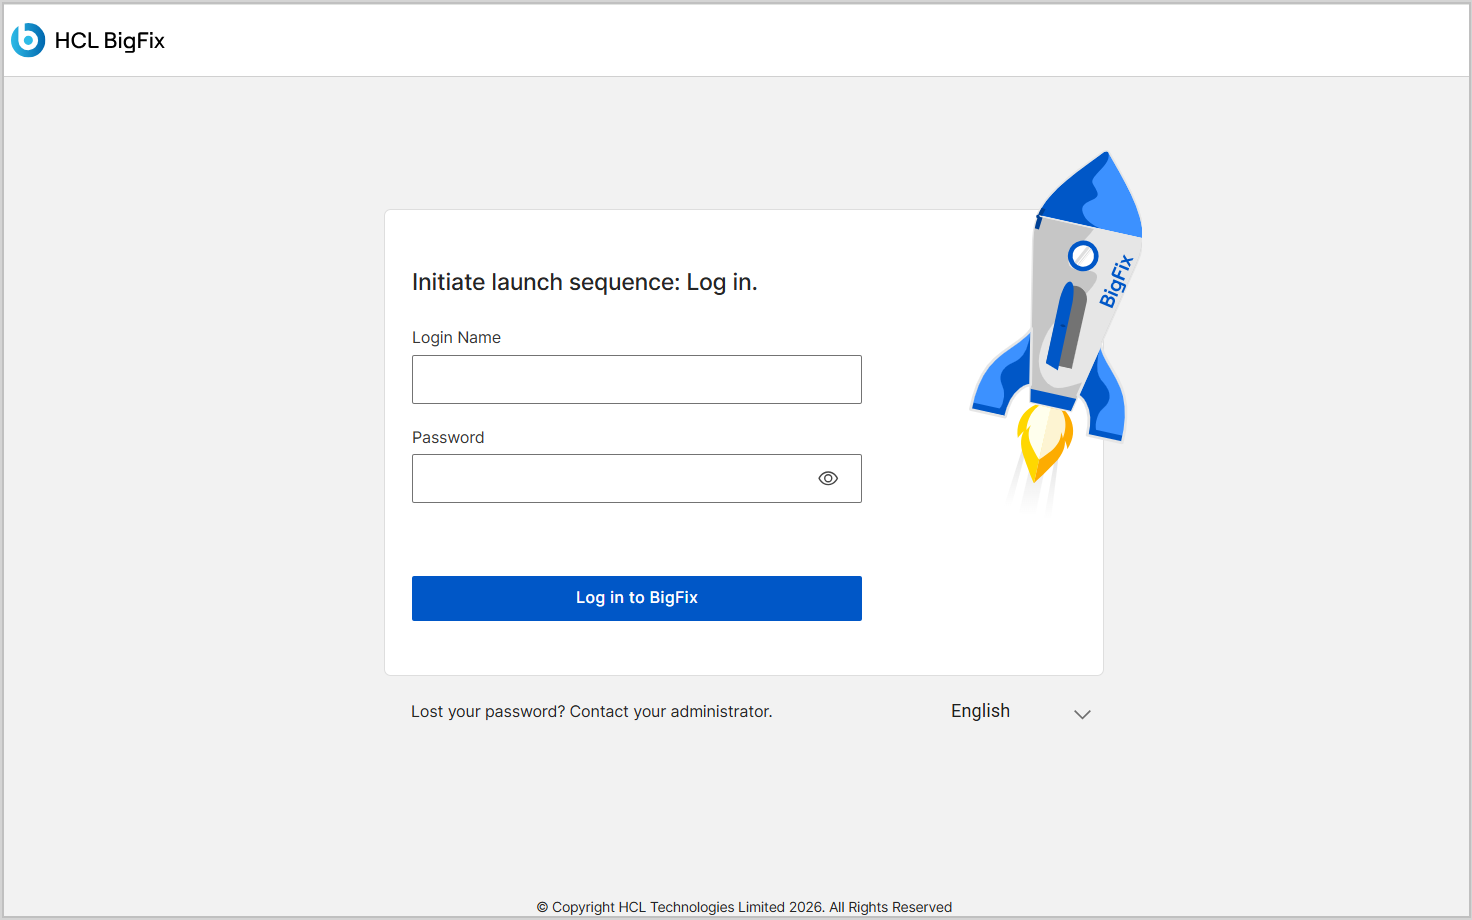
- After you enter your credentials, select Log in to
BigFix.Note: If you forget your password, the login page does not offer a self-service reset. Select Lost your password? Contact your administrator. and ask your administrator to reset it.
- Change the temporary password: A first-time user receives a welcome email containing a temporary password. On first login, the application prompts you to change the temporary password.
- After you log in successfully, you are taken to Customizable Dashboard, the home page of BigFix UI.
- The Login Information panel appears as a notification overlay in
the upper-right corner upon login. It provides essential security details about your
account activity:
- Last log in: Displays the date and time of your previous successful login.
- Last failed attempt: Displays the date and time of the most recent unsuccessful login attempt for your account.
- Failed attempts since last log in: Shows the number of incorrect password entries recorded since your last successful session.
- Last password change: Indicates when your account password was last updated.
- Last role change: Displays the date and time of the most recent modification to your assigned user roles or permissions.
Note: You can view these same details any time on the Account Activity tab of the Account panel. See Viewing Account Activity.
Logging In with OIDC Single Sign-On
If the instance admin enables OpenID Connect (OIDC), the login page shows a Log in via OIDC button below Log in to BigFix, separated by an OR divider. Use this option to log in with the credentials that your organization already issues you, instead of a separate BigFix UI password.
Before you log in with OIDC, your administrator must configure the identity provider and create your account as an Identity provider (Idp) user bound to a BigFix operator. For details, see OIDC Configuration and Configuring OIDC single sign-on.
- Open the BigFix UI application URL in your browser:
https://<host>[:port]/ui. - If the Authorized Access Only page appears, read the message and select Continue.
- Select Log in via OIDC. Note: If the button does not appear, OIDC is not enabled. Ask your instance admin to check the OIDC configuration.
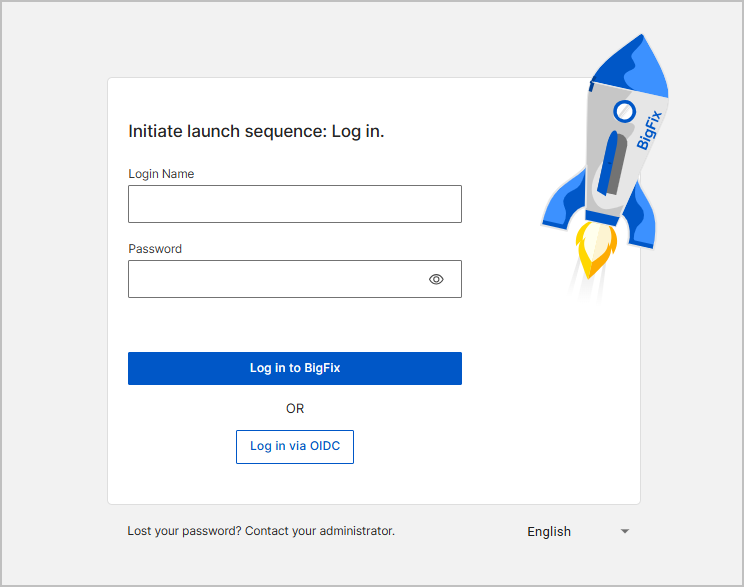
- The browser redirects you to the login page of your identity provider. Enter your organizational credentials, and complete any other checks that your provider requires, such as multifactor authentication.
- After the provider authenticates you, the browser returns to BigFix UI. BigFix UI validates the token, creates your session, and opens the Customizable Dashboard with the permissions of the BigFix operator that your account is bound to.
For the full procedure, including the prerequisites that must be met before your first sign-in, see Logging in with OIDC.
Logging Out
To ensure the security of your account, always log out when you are finished using the application:
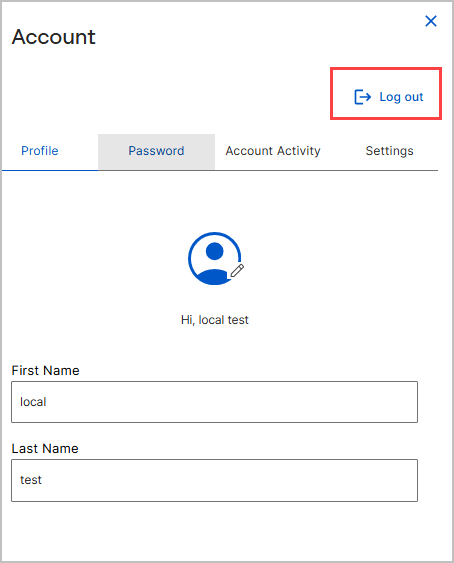
- Open the Account panel: Select your profile icon in the upper-right corner of the application window. The Account panel opens.
- Select Log out. This securely logs you out of your account and
redirects you to the login page.
Changing Your Password
If you need to change your password for security reasons or periodic updates, follow these steps:
- Open the Account panel: Select your profile icon in the upper-right corner to display your account information.
- Select the Password tab.
- Enter the current password: In the Old Password field, enter your current password for verification.
- Enter the new password: Under Set new password, type your new
password. The password must meet the following criteria, which the application confirms as
you type:
- Match the Confirm New Password field.
- Contain 15 characters or more.
- Contain at least one lowercase letter.
- Contain at least one uppercase letter.
- Contain at least one number.
- Contain at least one special character:
~!@#$%^&*().
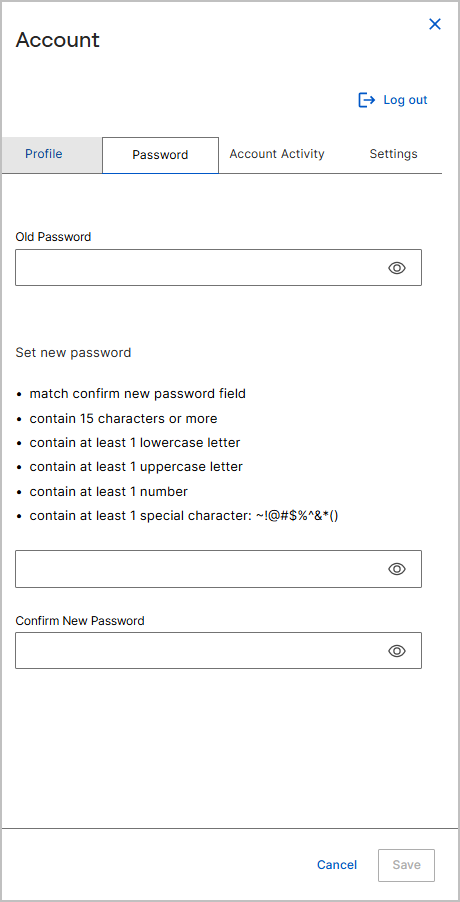
- Confirm the new password: In the Confirm New Password field, re-enter the new password.
- Select Save to apply the changes. To discard your changes, select Cancel. After you change your password, you must log in again with your new password.
Changing Your Profile Information
To update your profile information, such as your first name, last name, and profile picture:
- Open the Account panel: Select your profile icon in the upper-right corner, and then
select the Profile tab.
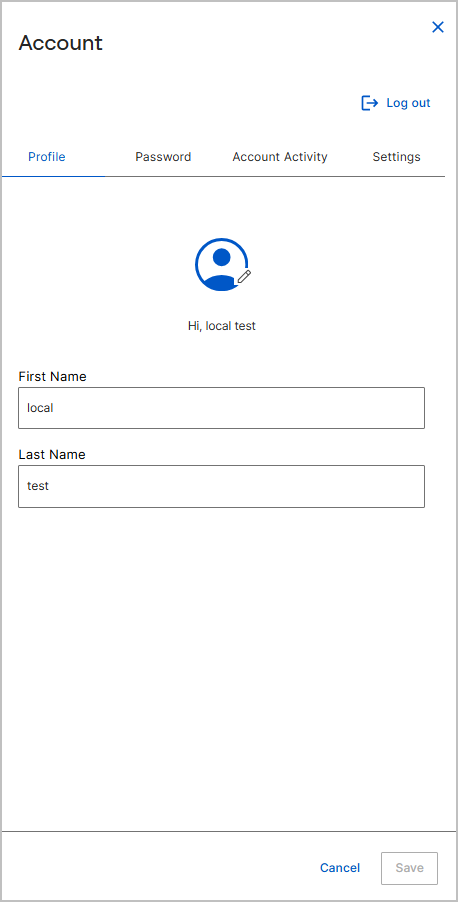
- Update the fields: Modify your First Name and Last Name as needed. Ensure that the required fields are filled in.
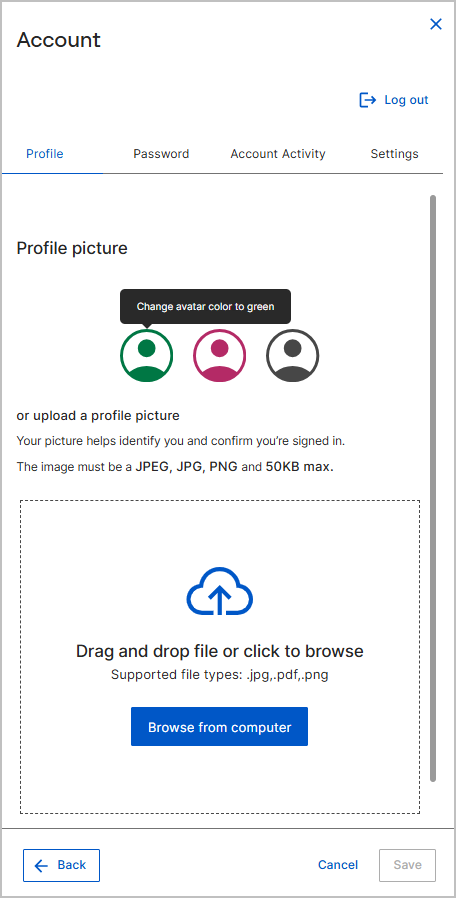
- (Optional) Change your profile picture:
- Select the edit (pencil) icon on the profile avatar. The Profile picture window opens.
- Do one of the following:
- Under Select an avatar, select one of the provided avatars.
- To upload your own picture, drag and drop an image onto the upload area, or select Browse from computer and choose a file. The image must be a JPEG, JPG, or PNG file, up to 50 KB.
- Select Save. To return to the Profile tab without changing the picture, select Back or Cancel.
- Select Save to save your changes. To discard your changes, select Cancel. Your profile information updates immediately.
Viewing Account Activity
The Account Activity tab shows recent security details for your account, such as your last sign-in and last password change. Use it to confirm your recent activity and to spot unexpected sign-in attempts.
- Open the Account panel: Select your profile icon in the upper-right corner. The Account panel opens.
- Select the Account Activity tab.
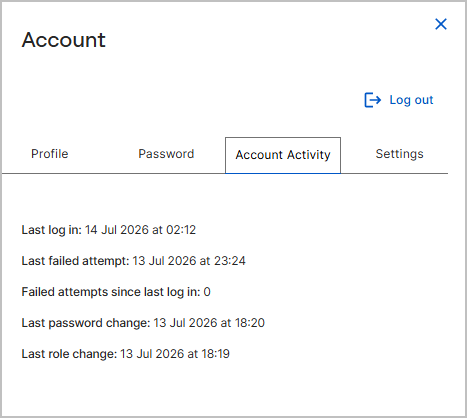
The tab displays the following read-only details:
| Field | Description |
|---|---|
| Last log in | Date and time of your previous successful login. |
| Last failed attempt | Date and time of the most recent unsuccessful login attempt for your account. |
| Failed attempts since last log in | Number of incorrect password entries recorded since your last successful session. |
| Last password change | Date and time when your account password was last updated. |
| Last role change | Date and time of the most recent change to your assigned user roles or permissions. |
Changing Language and Theme Settings
On the Settings tab, you can set the display language and the theme (color mode) for the BigFix UI. These preferences apply to your account.
- Open the Account panel: Select your profile icon in the upper-right corner. The Account panel opens.
- Select the Settings tab.
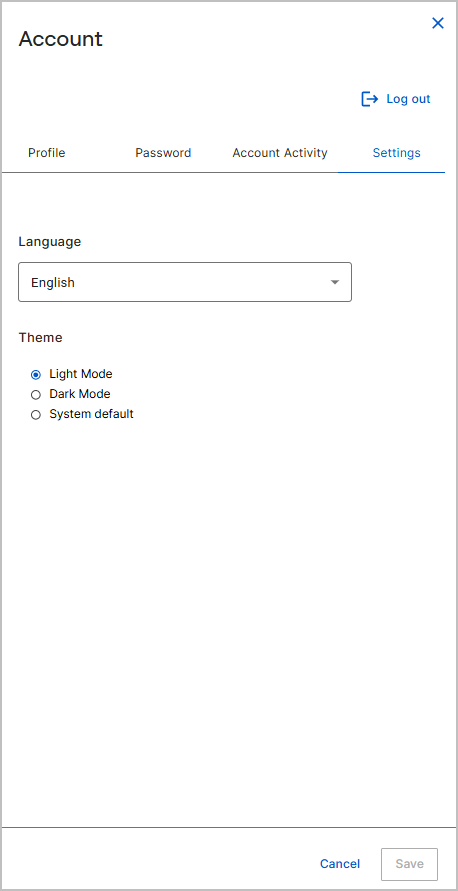
- From the Language list, select your preferred language. Note: In the July 2026 release, English is the only available language. Additional languages are planned for a future release.
- Under Theme, select a display mode. The following options are
available:
- Light Mode: Displays the interface with a light background. This is the default.
- Dark Mode: Displays the interface with a dark background.
- System default: Matches the theme configured in your operating system.
- Select Save to apply your preferences. To discard your changes, select Cancel.
Session Timeout and Re-authentication
To maintain account security, the BigFix UI automatically ends inactive sessions after a predefined timeout period.
- When a session times out, the user is redirected to the login page.
- Users must re-enter their credentials to regain access.
- Unsaved work or in-progress actions might be lost when the session expires.