Configuring OIDC single sign-on
Connect BigFix UI to your OIDC identity provider, test the connection, and enable single sign-on so that users can log in with Log in via OIDC.
Before you begin
- You must be logged in as the instance admin.
- BigFix UI is registered as a client application in your identity provider, with
the redirect URL set to
<scheme>://<bfui-host>:<port>/oidc/callback. You have the Provider URL, Client ID, and Client Secret. See Registering BigFix UI with your identity provider. - The provider is reachable over HTTPS from the BigFix UI server and from the client browser, with a trusted certificate. See Provider URL accessibility.
- The identity provider is configured on the BigFix Console, and the identity provider operators exist. See Configuring the identity provider on the BigFix Console.
Procedure
-
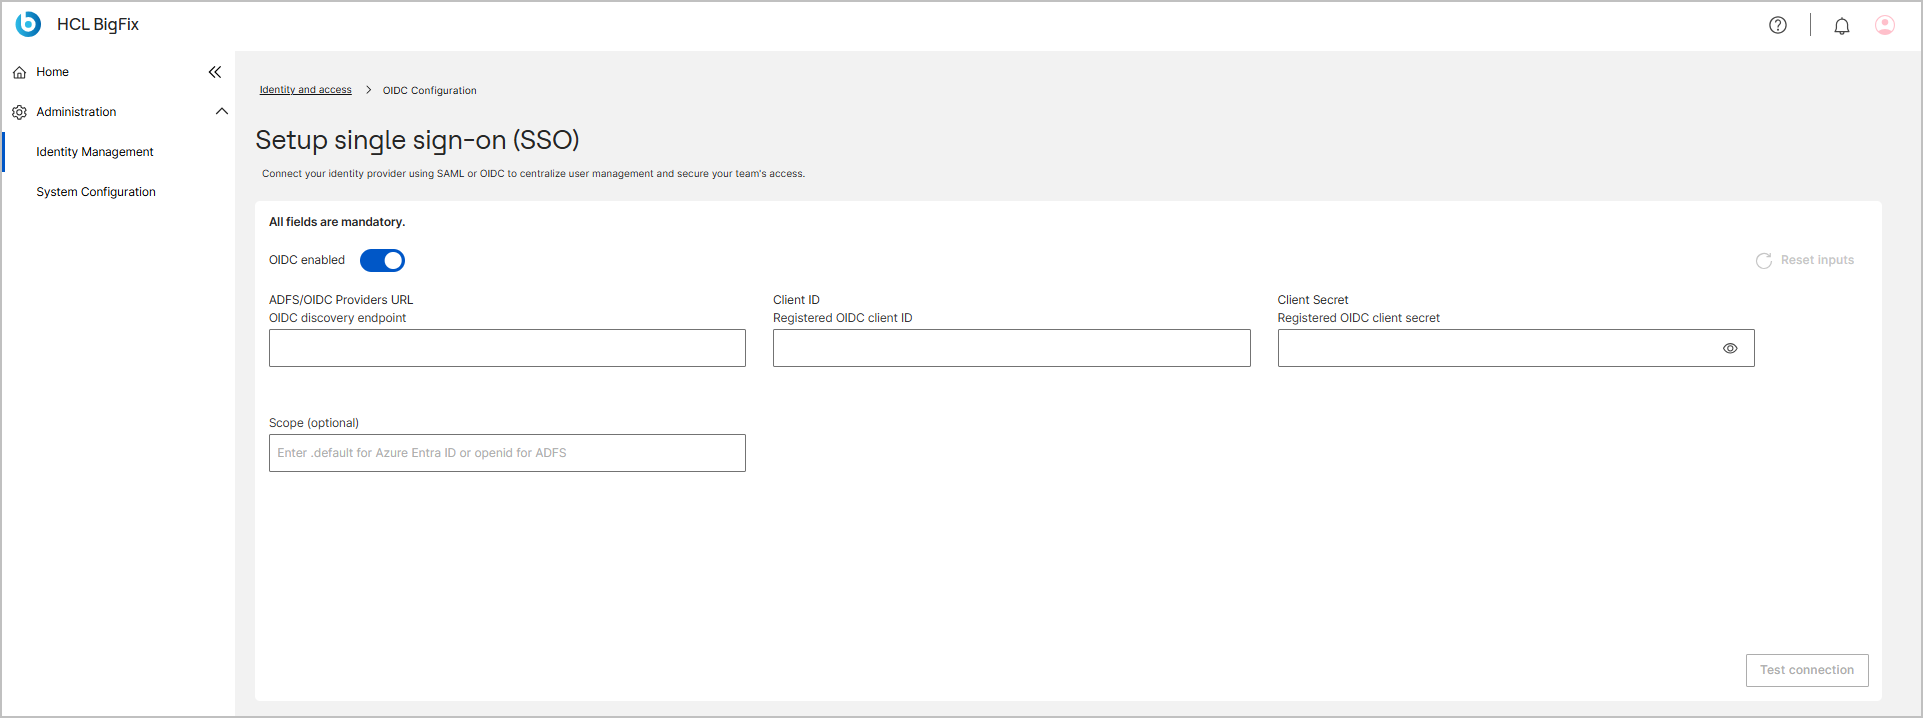
Expand Administration from the side navigation, select
Identity Management, and then select the
OIDC Configuration card.
The Setup single sign-on (SSO) page opens.
-
If a configuration already exists, click Edit details.
Otherwise, continue with the next step.
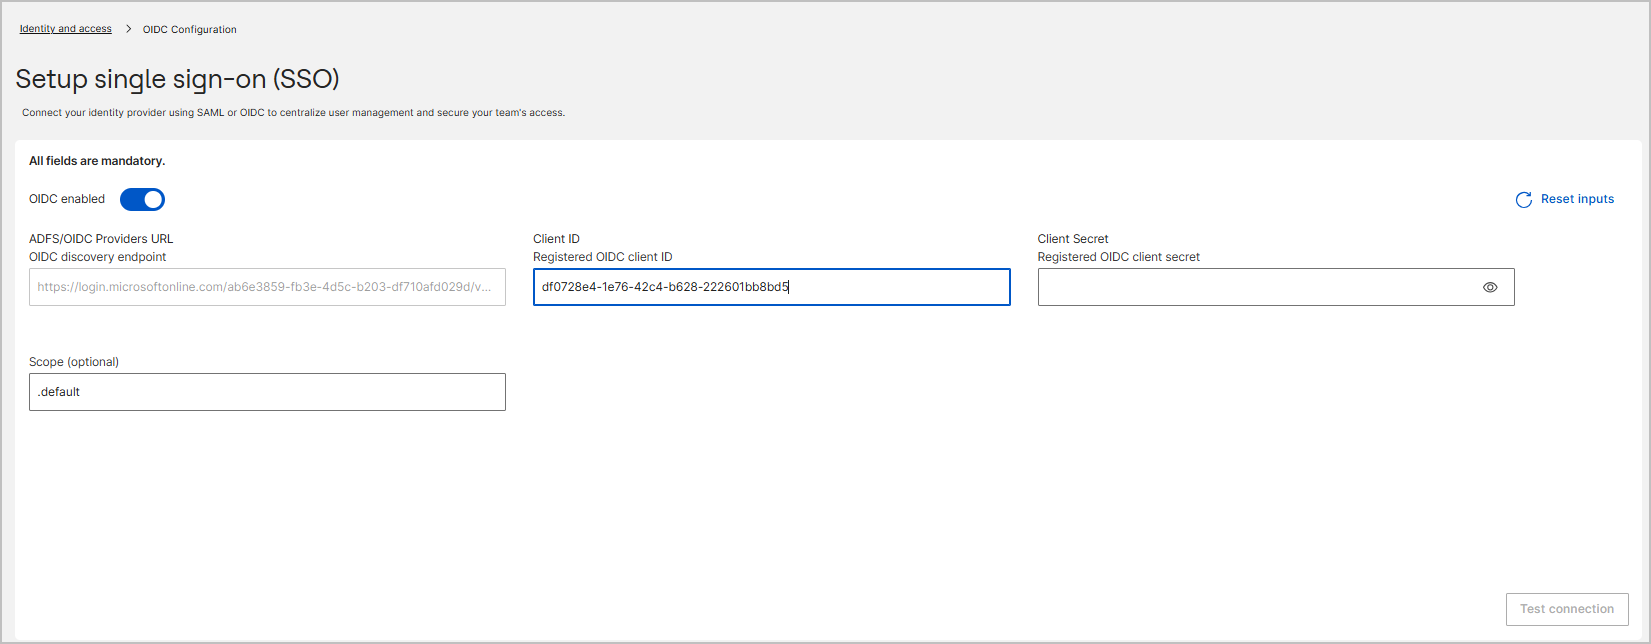
All fields are mandatory unless marked optional.
- Turn on the OIDC enabled toggle.
-
Complete the configuration fields.
Table 1. OIDC configuration fields Field Description ADFS/OIDC Providers URL The OIDC discovery endpoint of your provider, for example https://adfs.corpdemo.local/adfs. The format depends on the provider. See Provider URL. The Provider URL identifies the configuration and cannot be changed afterwards.Client ID The registered OIDC client ID for BigFix UI. Client Secret The registered OIDC client secret for BigFix UI. Click the eye icon to show or hide the value. Scope (optional) Enter .defaultfor Azure Entra ID oropenidfor ADFS. Leave empty for Okta. The scope is mandatory for Azure Entra ID. See Scope.To clear the values you entered, click Reset inputs.
-
Click Test connection.
The button is enabled after all mandatory fields are complete. BigFix UI attempts to connect to the provider with the values that you entered.
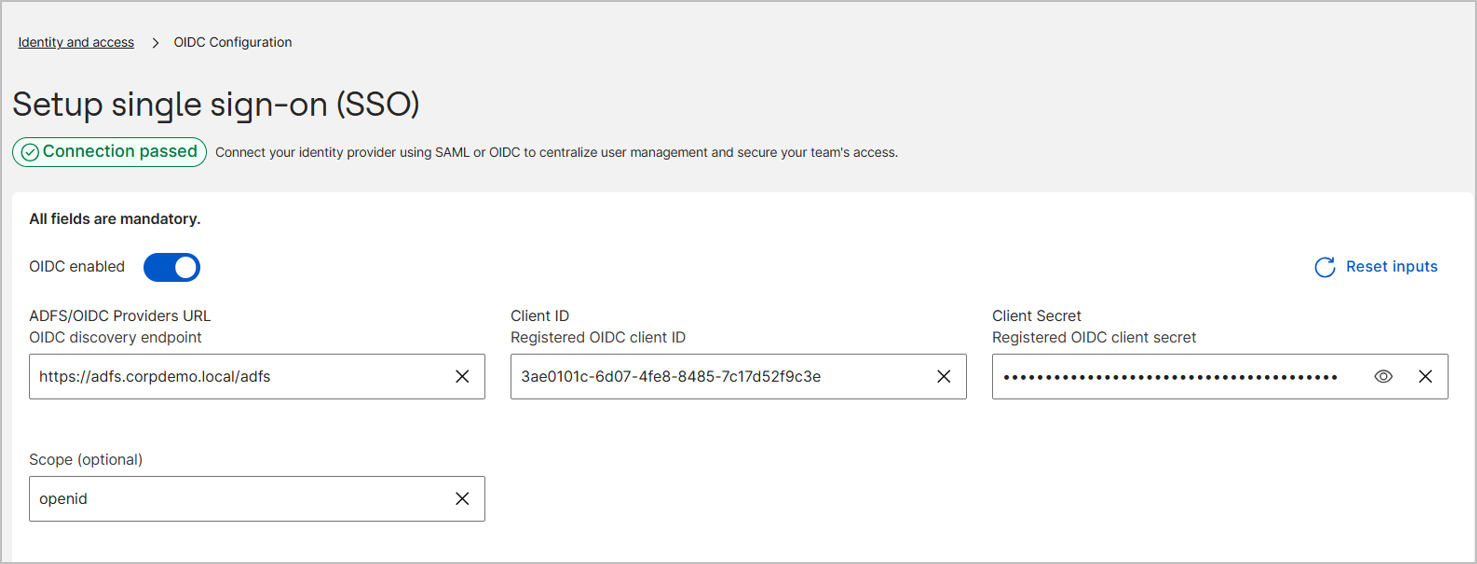
- If the values are valid, the Connection passed
status is displayed next to the page title. Continue with the next
step.
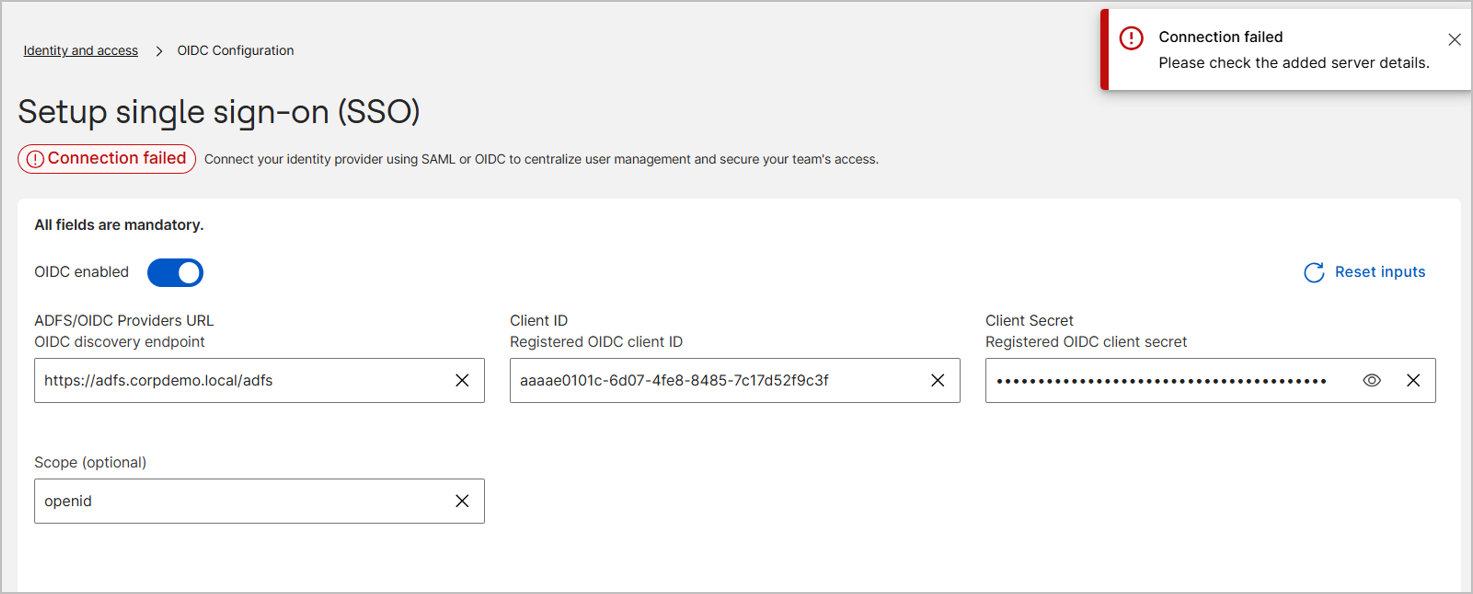
- If the values are not valid or the provider cannot be reached, the
Connection failed status is displayed. Correct
the Provider URL, the credentials, the certificate trust, or the network
access, and test again.
- If the values are valid, the Connection passed
status is displayed next to the page title. Continue with the next
step.
-
Save the configuration.
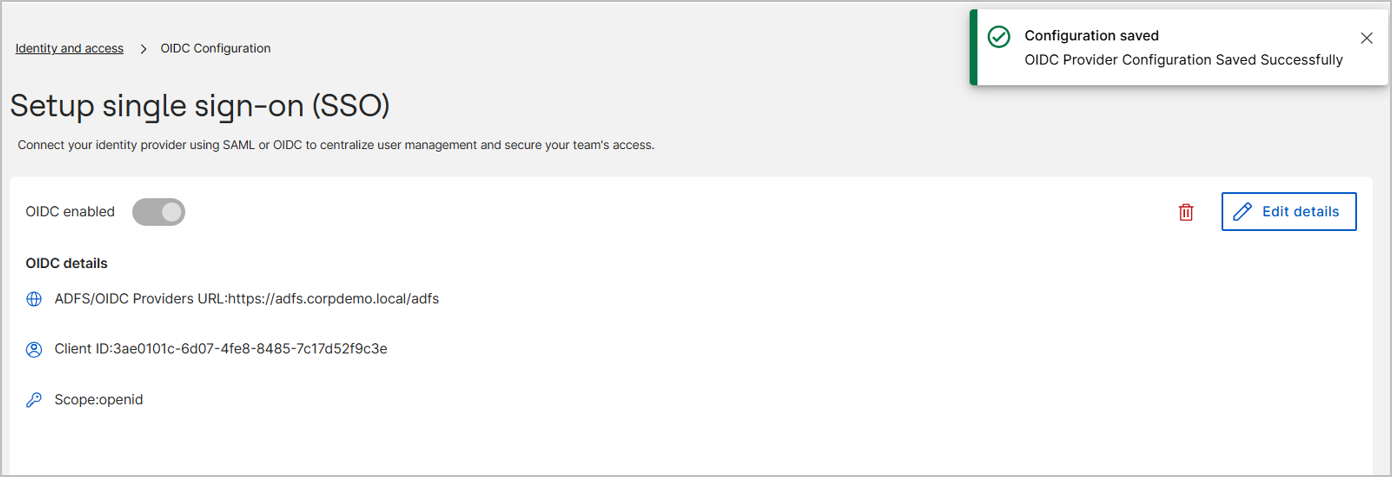
The Configuration saved message confirms that the OIDC provider configuration is saved. The Setup single sign-on (SSO) page shows the OIDC details with the Provider URL, Client ID, and scope. The client secret is not displayed.
Results
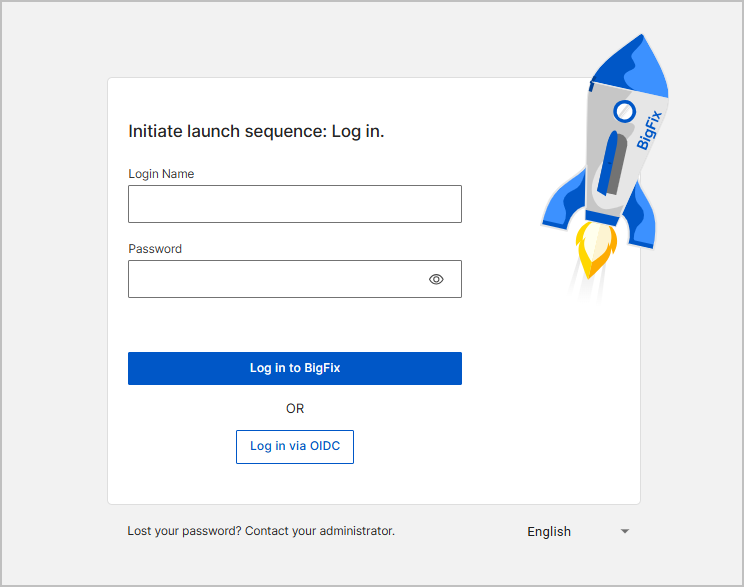
The BigFix UI login page now shows the Log in via OIDC button below Log in to BigFix.
What to do next
- Create the users that will sign in through the provider as Identity provider (Idp) users in User & Role Management, bound to a BigFix operator. See Creating a new user.
- Ask a test user to click Log in via OIDC, authenticate at the provider, and confirm that the BigFix UI dashboard opens. See Logging in with OIDC.
- To temporarily stop OIDC logins without losing the configuration, turn off the OIDC enabled toggle. To remove the configuration, click the Delete (trash can) icon.