Creating a new user

Use the Create user wizard in User & Role Management to add new users in BigFix UI. You define how users authenticate, bind them to a BigFix operator, assign their roles, and review the applications they can access.

Before you begin

  • User & Role Management is visible only to administrators. Ensure you are logged in as an administrator.
  • A BigFix operator must exist for each user that you create. The user is bound to the operator and inherits its permissions.

About this task

Administrators create new users from the Users tab of User & Role Management. Clicking Create user opens a guided three-step wizard: User, Role, and Summary. In the first step you select the authentication method and enter the user details. In the second step you define whether the user is an Administrator or Non Administrator, bind the user to a BigFix operator, and assign roles. In the final step you review the information and click Create.

The fields on the User step change with the authentication method that you select. This topic describes both the Identity provider (Idp) method and the Local method.

To create a new user, complete the following steps:

Procedure

  1. Access the Create user wizard.
    1. Log in to BigFix UI as an administrator.
    2. Expand Administration from the side navigation, select Identity Management, and then select the User & Role Management card.
    3. On the Users tab, click Create user. The Create user wizard opens on the User step.
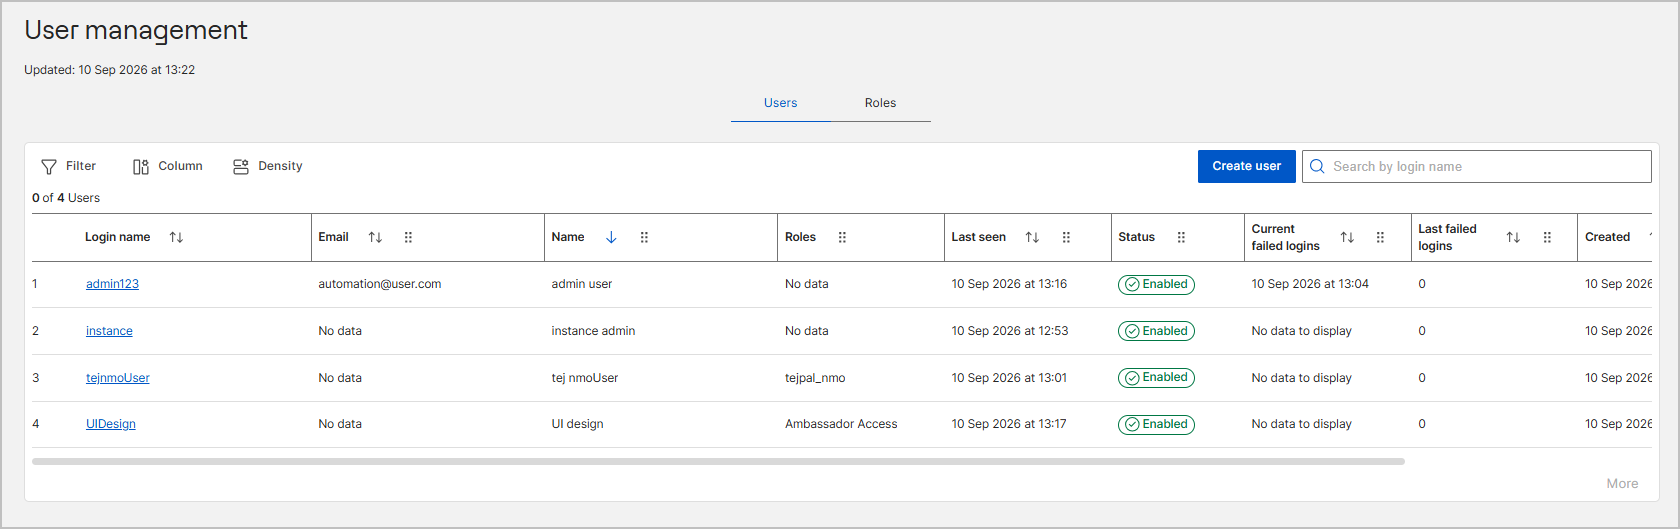
  2. On the User screen, under Select authentication method, select the method for the new user.
    • Identity provider (Idp): Select this option if your organization manages users through an external identity provider that is configured in OIDC Configuration. The identity provider authenticates the user, so you do not set a password in BigFix UI.
    • Local: Select this option to create a user account that BigFix UI manages directly. You set the login name and the initial password.
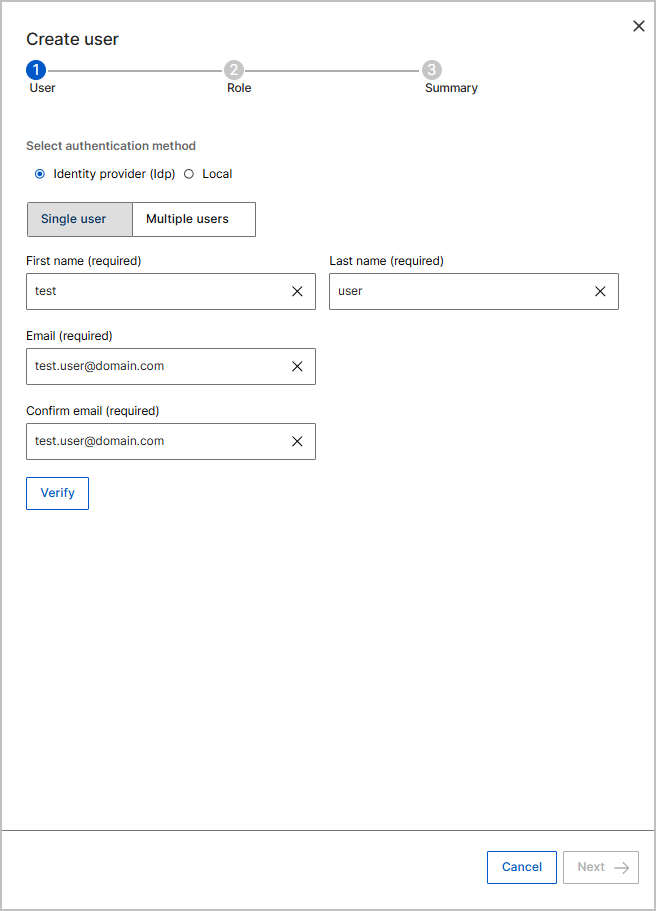
    Create user wizard, User step, with the Identity provider (Idp) method selected.

  3. If you selected Local, enter the user details.
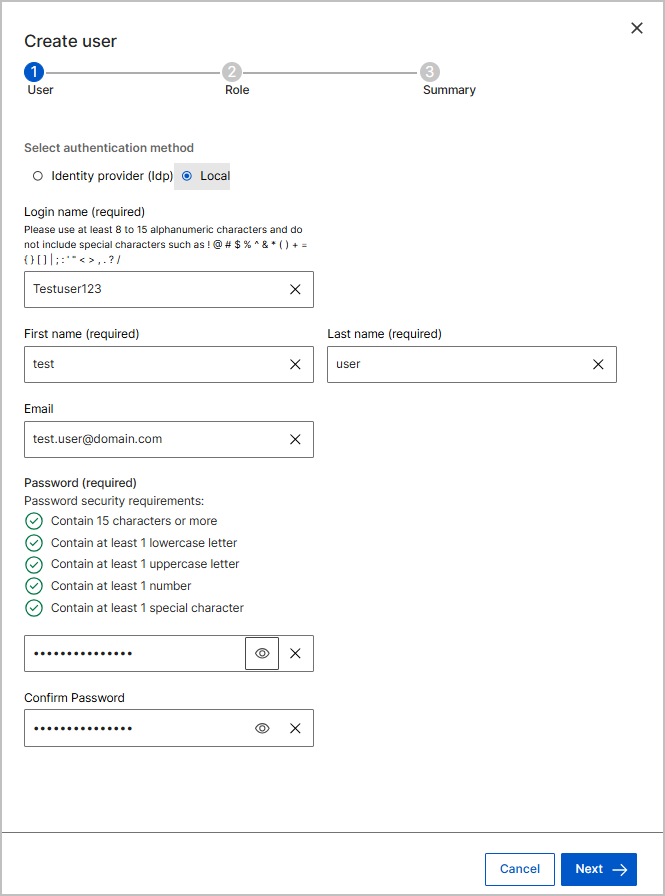
    Create user wizard, User step, with the Local method selected and the login name, name, email, and password fields completed.

    1. Complete the following fields.
      Table 1. Local user fields
      Field Description
      Login Name (required) Use at least 8 to 15 alphanumeric characters. Do not include special characters such as ! @ # $ % ^ & * ( ) + = { } [ ] | ; : ' " < > , . ? /
      First name (required) The first name of the user.
      Last name (required) The last name of the user.
      Email The email address of the user.
      Password (required) The initial password for the user. The Password security requirements list above the field is marked as met while you type. The password must:
      • Contain 15 characters or more
      • Contain at least 1 lowercase letter
      • Contain at least 1 uppercase letter
      • Contain at least 1 number
      • Contain at least 1 special character
      Confirm Password Re-enter the password. Both entries must match.

      To check what you typed, click the eye icon next to a password field. To clear a field, click the X icon.

    2. Click Next to open the Role screen.
      Note:
      Next stays disabled until you complete all required fields and the password meets every security requirement.
  4. On the Role screen, define BigFix access and assign roles.
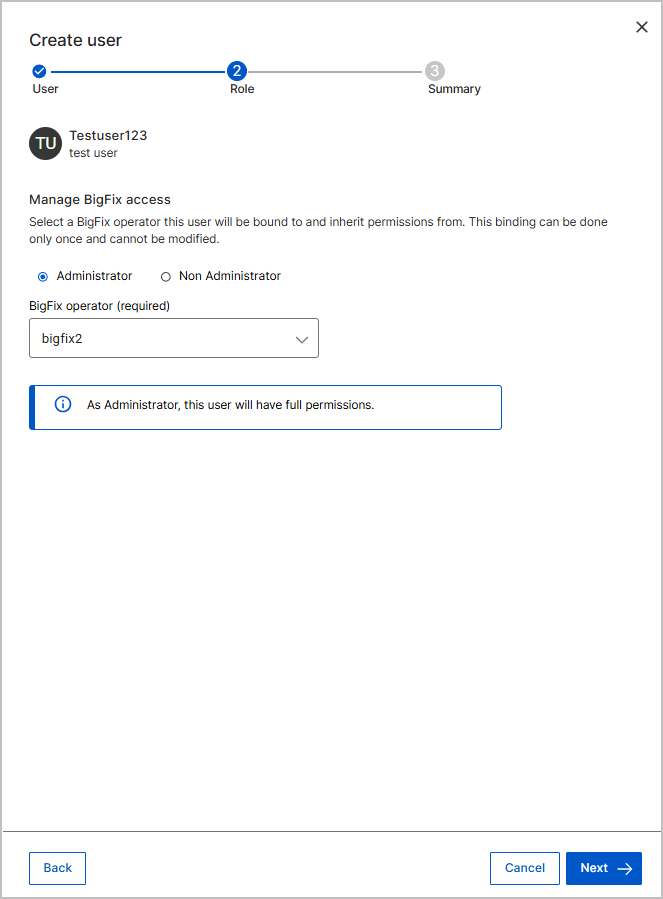
    The login name and full name that you entered appear at the top of the window.

    1. Under Manage BigFix access, select Administrator or Non Administrator.

      Your choice controls which operators appear in the BigFix operator (required) list. In both cases, the list shows only operators that are not already bound to another user.

      • Administrator: The list shows only master operators. The user gets full permissions in BigFix UI and keeps master operator permissions in the platform.
      • Non Administrator: The list shows all available operators, including master operators. The user inherits the permissions of the operator that you select.
    2. From the BigFix operator (required) list, select the BigFix operator that this user is bound to and inherits permissions from.
      Important:
      This binding can be done only once and cannot be modified after the user is created.
    3. Under Select desired role, select the check box next to each role to assign to the user. The list shows the roles defined in your environment.
    4. Review the What applications should this role access? section. It lists the applications the user can access based on the selected operator and roles.
    5. Click Next to open the Summary screen.
  5. On the Summary screen, review and confirm the user details.
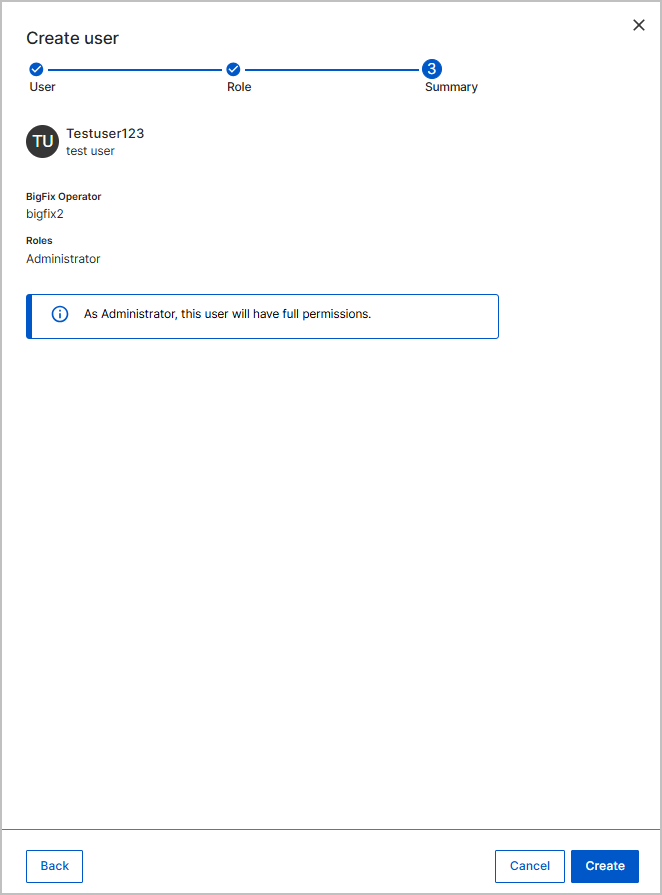
    1. Verify the login name, full name, BigFix Operator, Roles, and the applications listed under What applications should this role access?.
    2. Click Create.

Results

A User created! message is displayed, confirming that you have successfully created a new user. The wizard closes and the new account appears in the Users grid with the status Enabled. The user count above the grid increases by one.
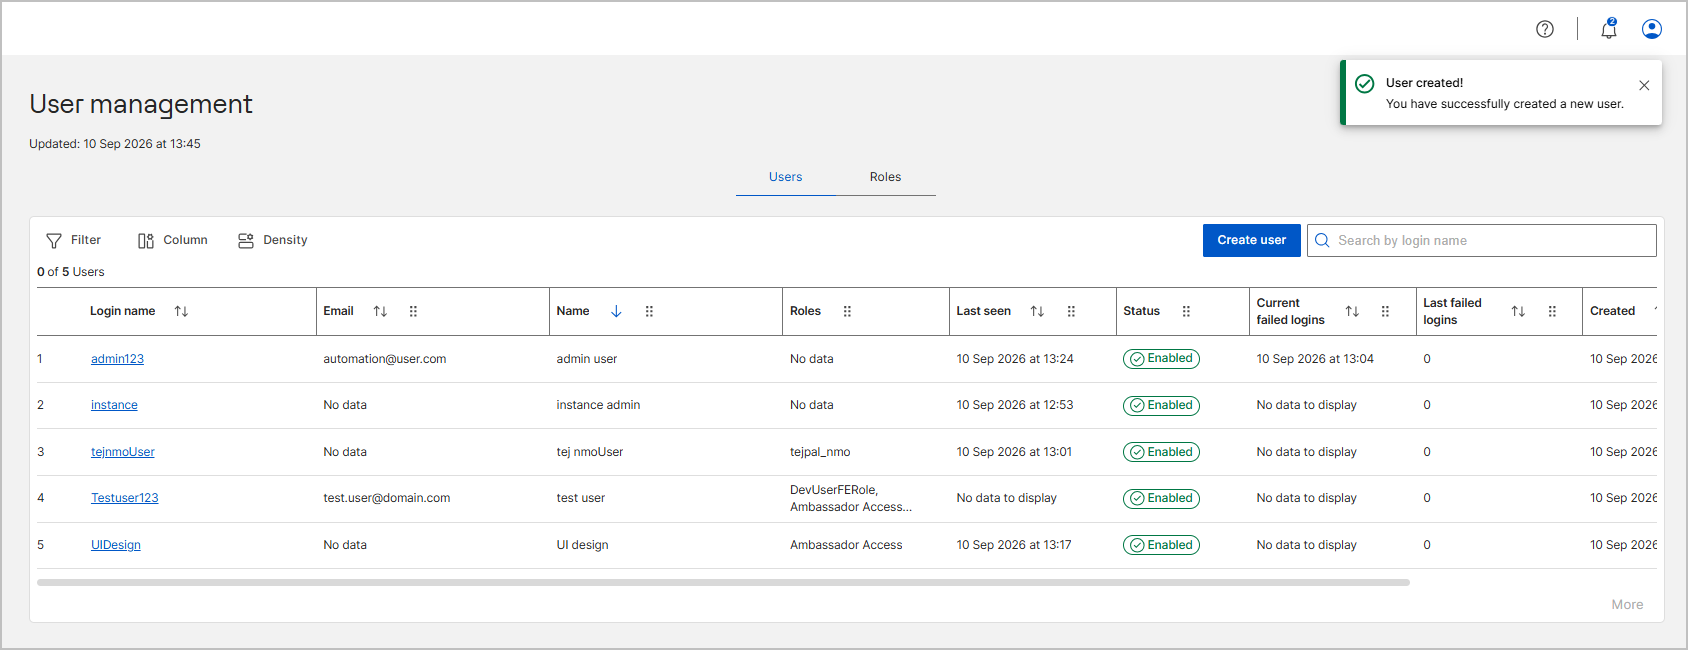
The User created! confirmation message displayed above the Users grid, which lists the new user account.

The grid row shows the login name, email, name, assigned roles, status, and creation date. Click the login name to open the user details page, where you can review the application authorization, user access restrictions, and permissions.

For local users, authentication uses the password that you set in the wizard.

For IdP users, no password is set or managed in BigFix UI. Authentication is handled by the configured identity provider (IdP).

What to do next

If you created a local user, share the login URL and the password with the user through a secure channel.

If you created an IdP user, the user can sign in to BigFix UI using their existing IdP credentials.

To change roles later, open the user details page and click Add Role, or edit the role itself. See Managing Roles.