OIDC Configuration
OIDC Configuration lets the instance admin connect BigFix UI to an external identity provider by using the OpenID Connect (OIDC) protocol, so that users can log in with single sign-on (SSO) using their existing organizational credentials.
Overview
With OIDC enabled, the BigFix UI login page shows an additional Log in via OIDC button. When a user clicks it, BigFix UI redirects the user to the identity provider's login page. After the identity provider authenticates the user, it redirects the browser back to BigFix UI, which validates the ID token, creates a BigFix UI session, and opens the dashboard.
Logging out of BigFix UI ends only the BigFix UI session; it does not log the user out of the identity provider.
OIDC authentication succeeds only for users that already exist in BigFix UI as Identity provider (Idp) users and are bound to a BigFix operator. See Creating a new user.
Configuration workflow
Setting up OIDC single sign-on spans the identity provider, the BigFix Console, and BigFix UI. Complete the following tasks in order:
- Register BigFix UI as a client application in your identity provider, and collect the Provider URL, client ID, and client secret. See Registering BigFix UI with your identity provider.
- Add the identity provider to the BigFix Console and create the identity provider operators. See Configuring the identity provider on the BigFix Console.
- Enter the provider details in BigFix UI, test the connection, and save the configuration. See Configuring OIDC single sign-on.
- Create the matching Identity provider (Idp) users in BigFix UI. See Creating a new user.
- Verify that a user can sign in. See Logging in with OIDC.
Supported OIDC providers
BigFix UI supports the following identity providers for OIDC authentication:
- Active Directory Federation Services (ADFS)
- Microsoft Azure Entra ID
- Okta
The Provider URL format, the Scope value, and the client ID and client secret differ for each provider. For the Provider URL and Scope values, see OIDC provider settings reference. Obtain the client ID and client secret from the application that you register with your provider. See Registering BigFix UI with your identity provider.
okta.com as its domain suffix. Custom Okta domains are
not supported in this release.Prerequisites
Before you configure OIDC in BigFix UI, register BigFix UI as a client application in your identity provider and collect the following values from it:
- Provider URL: The OIDC discovery endpoint, or issuer, of the provider.
- Client ID: The client ID registered for BigFix UI in the provider.
- Client Secret: The client secret registered for BigFix UI in the provider.
- Scope (optional): The scope value that your provider requires.
You must also register the BigFix UI redirect URL in the provider, and the provider must be reachable over HTTPS with a trusted certificate from both the BigFix UI server and the client browser. See Registering BigFix UI with your identity provider and OIDC provider settings reference.
The Setup single sign-on (SSO) page
The OIDC Configuration card opens the Setup single sign-on (SSO) page. When a configuration exists, the page shows the OIDC enabled toggle and the OIDC details (ADFS/OIDC Providers URL and Client ID), together with the following actions.
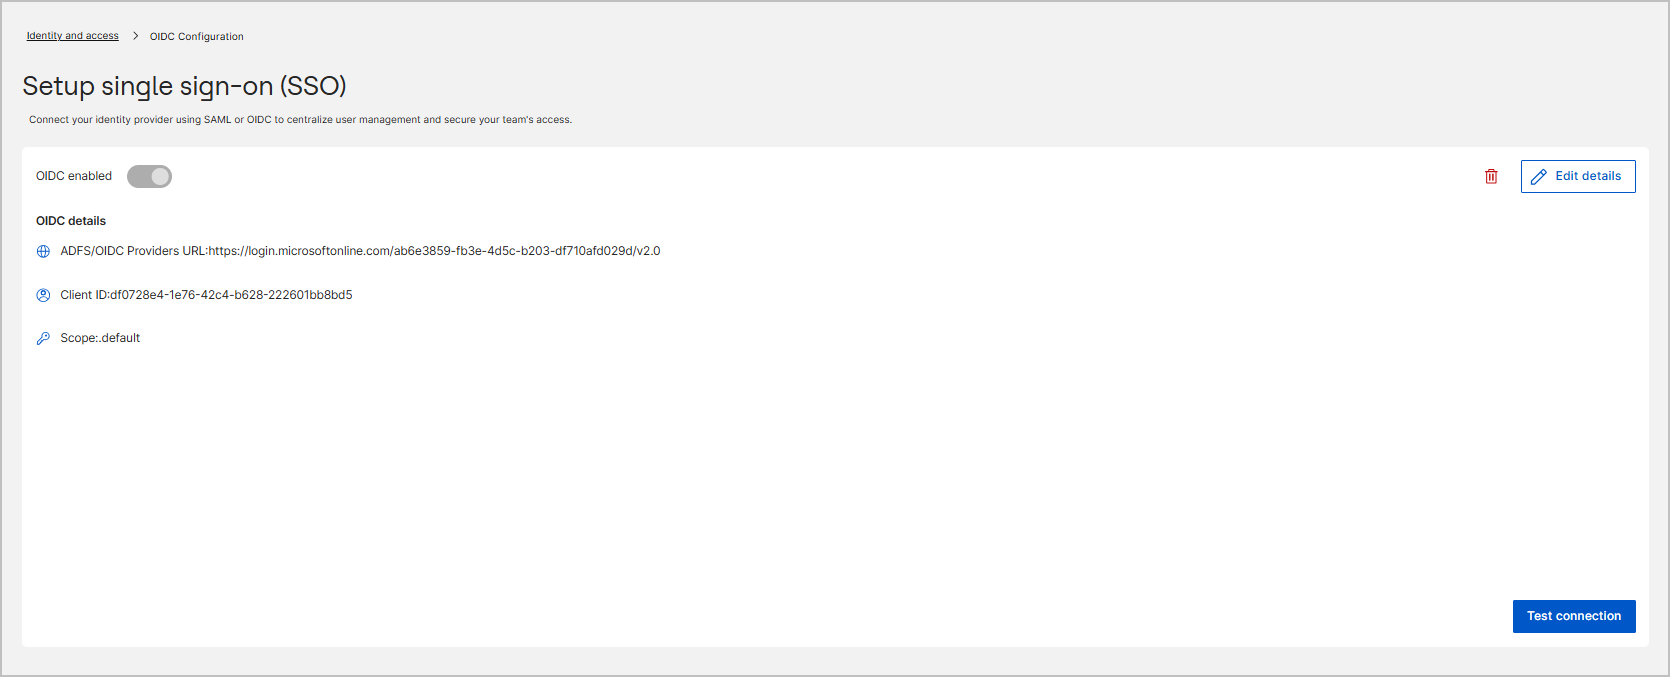
| Control | Description |
|---|---|
| OIDC enabled | Turns OIDC authentication on or off. When off, the Log in via OIDC option is not available on the login page. |
| Edit details | Opens the configuration fields for editing. See Configuring OIDC single sign-on. |
| Delete (trash can icon) | Removes the OIDC configuration. After deletion, the provider is no longer available for OIDC authentication. |
| Test connection | Verifies that BigFix UI can connect to the provider with the saved (or entered) configuration. |
| Reset inputs | Available while editing. Clears the values you entered in the fields. |