User & Role Management
The User & Role Management area of Identity management provides administrators with a centralized interface to manage user accounts, roles, permissions, and activities. This section walks you through the process of creating new users, disabling or deleting existing users, setting passwords, managing roles, and more.
Key features
- User account management
- User Creation and Registration: Admins can create new user accounts manually.
- Account Activation/Deactivation: Admin users can enable or disable user accounts as needed.
- User Activity Insights: Track login history, failed login attempts, and access status.
- BigFix operator binding: Bind each user to a BigFix operator from which the user inherits device and platform permissions.
- Role-based application access:
- Role Assignment: Assign one or more custom roles to users, granting them access to appropriate applications, devices, and sites.
- Granular Permission: Configure specific access levels (Admin, Users, or Read only) and feature rights for the Reporting application when creating or editing a role.
- Operational permissions: Define what a role or user can do on the platform, such as creating actions or using the Console, WebUI, or REST API. See Permissions reference.
- Authentication and Security
- Authentication Management: Support for both Local and Identity Provider (IdP) authentication methods
- Password Requirements: Enforce strong password, including complexity requirements and expiration periods.
- Profile Customization: Users can view or edit their personal information and update passwords securely.
User management
The User management page provides administrators with a centralized view of all users who have access to the BigFix UI.
To access the page, expand Administration from the side navigation, select Identity Management, and then select the User & Role Management card. By default the Users tab is displayed:
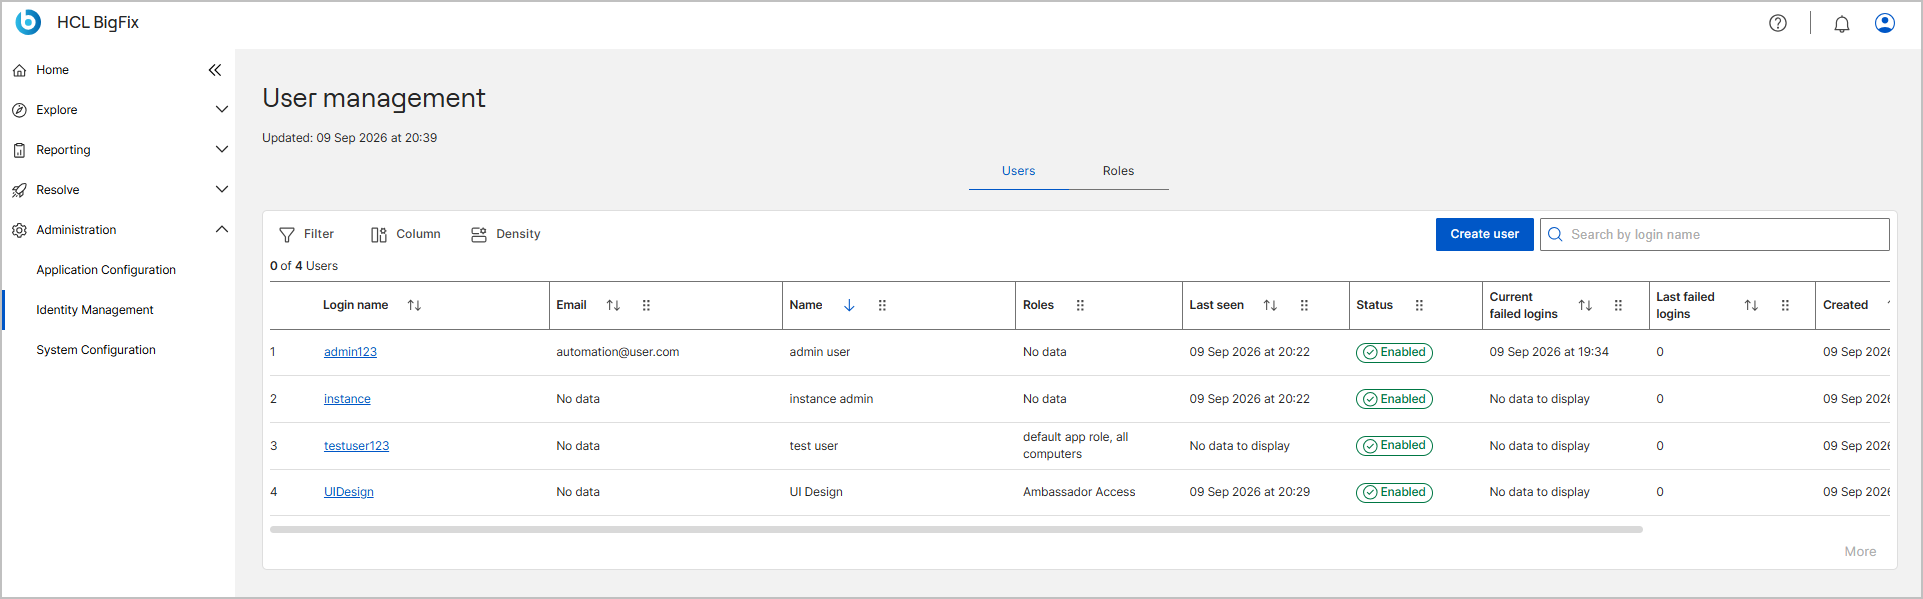
Use the Filter, Column, and Density controls above the user grid to narrow down the list of users, customize the columns that are displayed, and adjust the row spacing. Use the Search by login name field to quickly locate a specific user. For more information, see Table filter, Columns, and Density.
The user grid displays the following details for each user:
| Column | Description |
|---|---|
| Login Name | The name the user signs in with. Click a login name to open the user details page. |
| The email address of the user. | |
| Name | The full name of the user. |
| Roles | The roles assigned to the user. |
| Last seen | The date and time when the user last accessed BigFix UI. |
| Status | Indicates whether the user account is Enabled or Disabled. |
| Current failed logins | The date and time of the most recent failed login attempt in the current observation window. |
| Last failed logins | The number of failed login attempts recorded before the last successful login. |
| Created | The date and time when the user account was created. |
Administrators can create new users directly from the Users tab by selecting Create user. The guided flow allows you to:
-
Select an authentication method (Identity provider (Idp) or Local).
-
Add the user’s basic information and, for local users, the password.
-
Define the user as Administrator or Non Administrator, bind the user to a BigFix operator, and assign one or more roles.
-
Review and confirm access permissions.
After creation, users appear in the main table where administrators can manage roles, enable/disable access, or delete accounts. For detailed steps, see Creating a new user.
User details and actions
From the Users tab, clicking a Login Name opens the user details page, where administrators can view and manage individual user information.
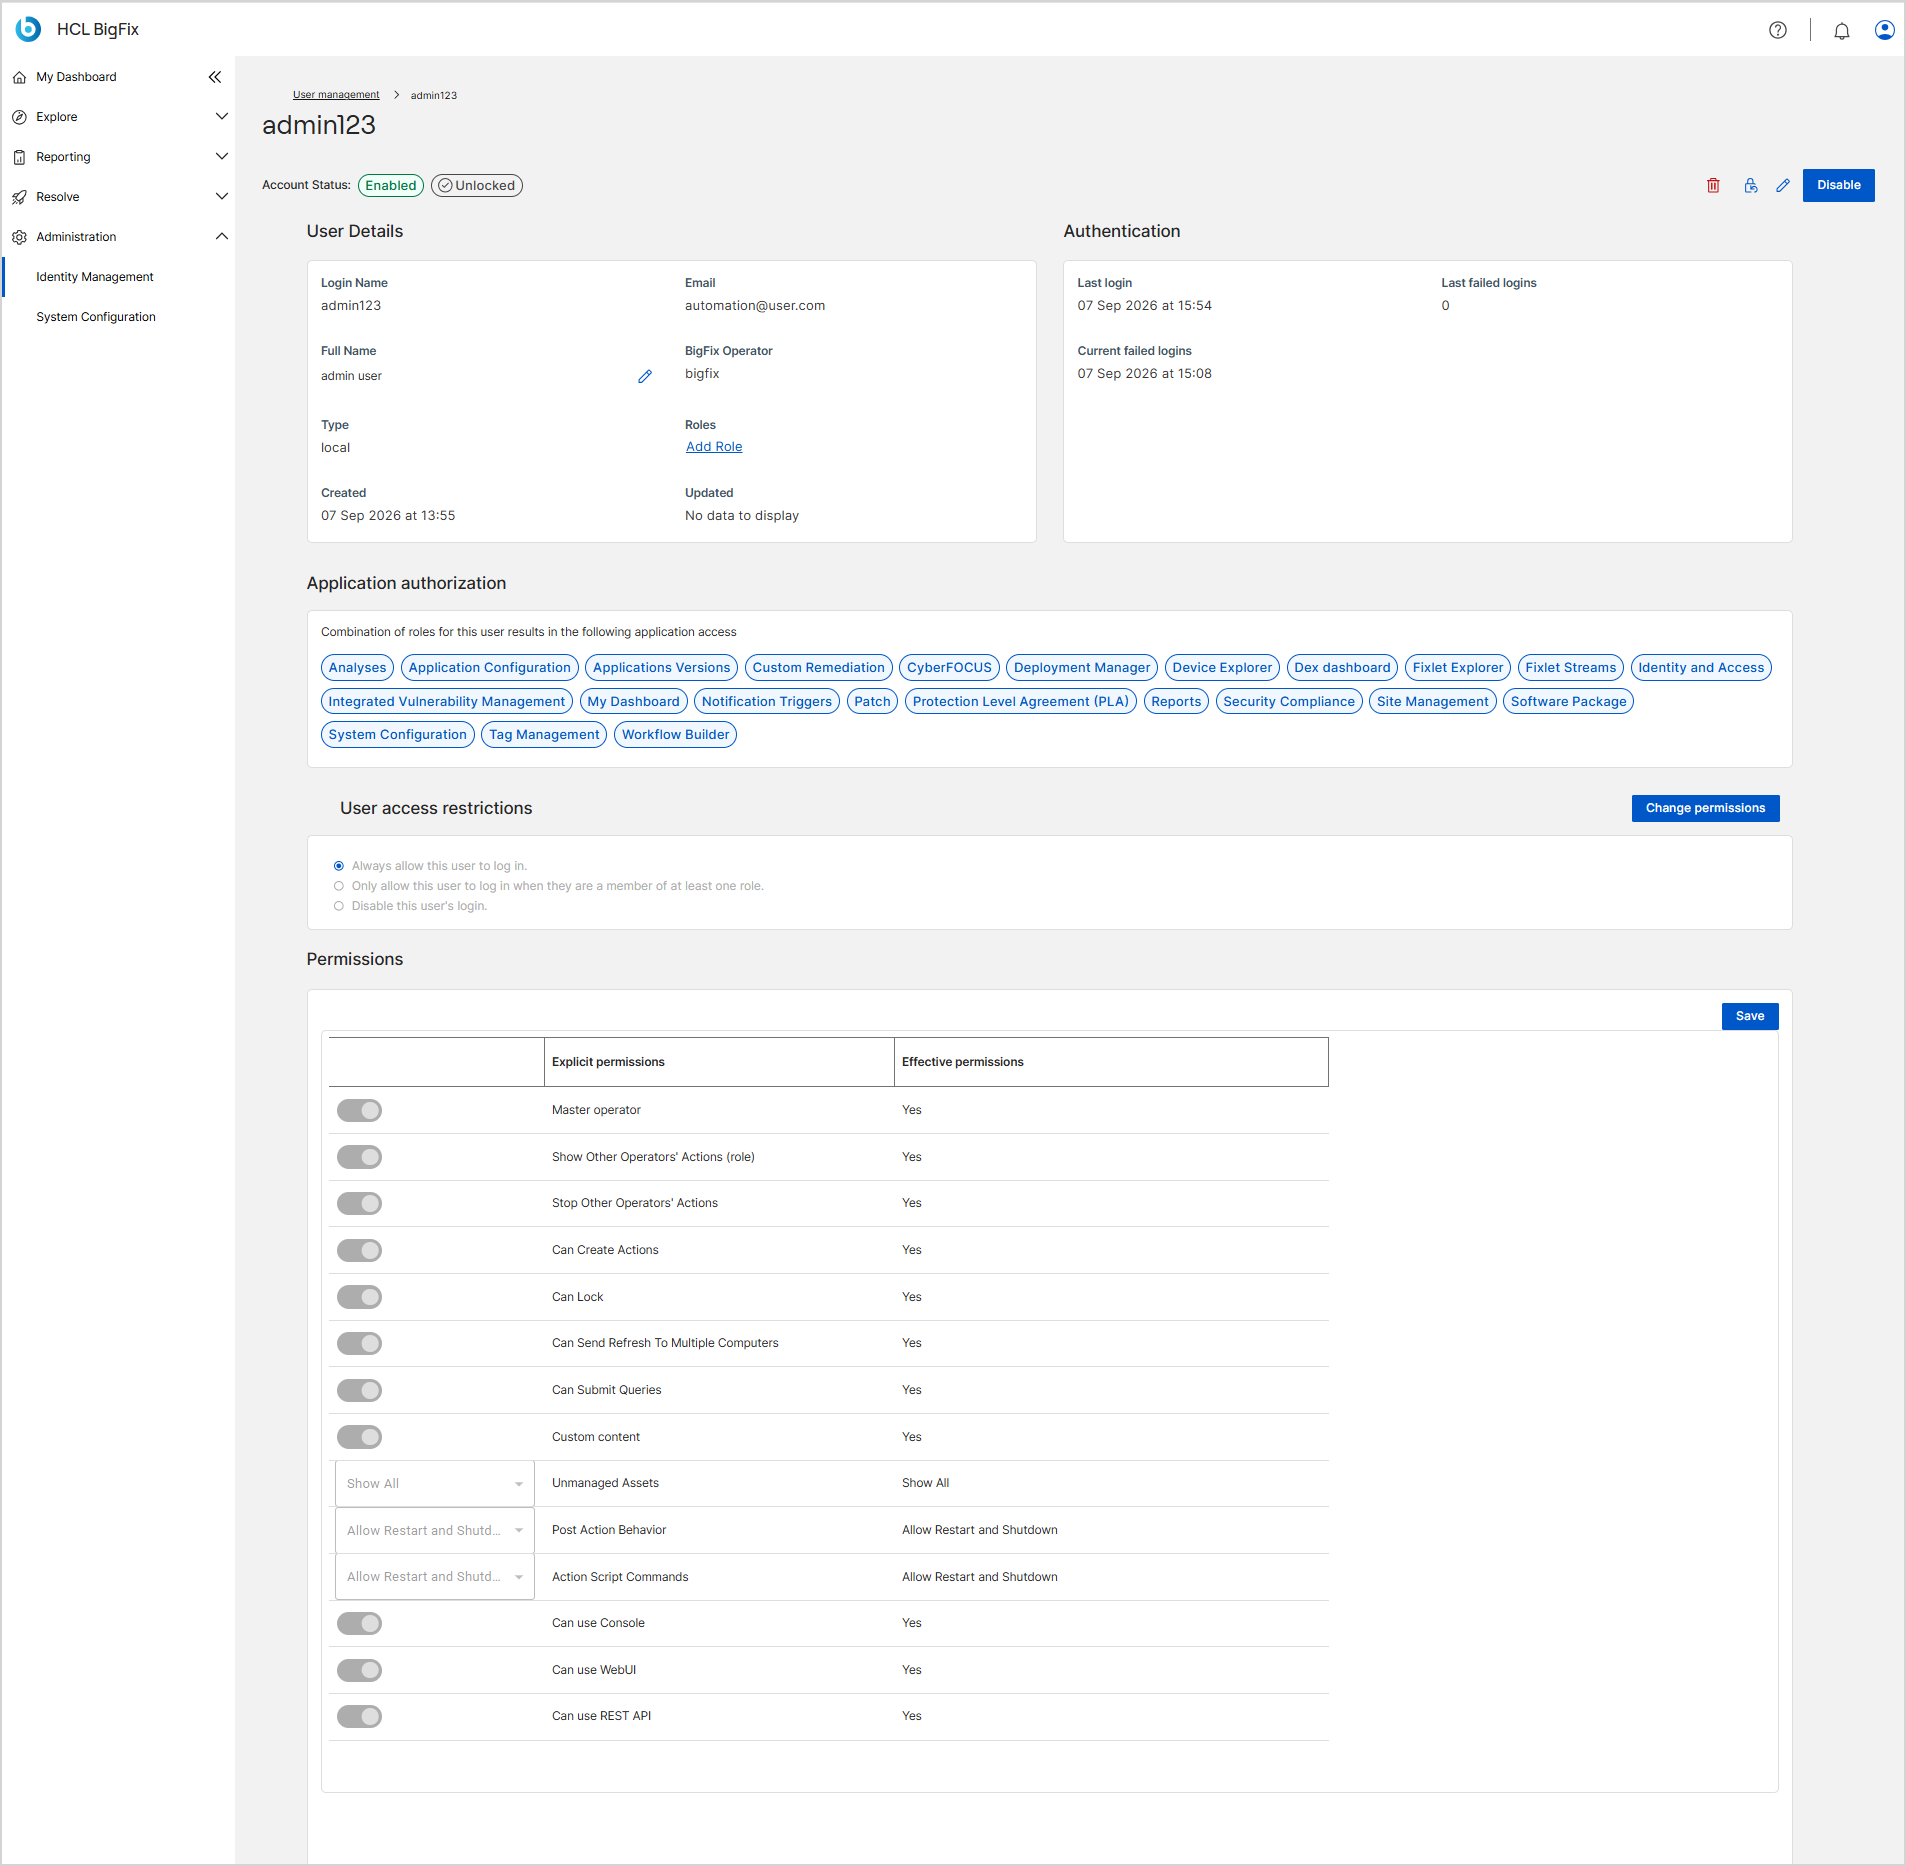
The Account Status badges indicate whether the account is Enabled or Disabled, and Locked or Unlocked. The actions in the upper-right corner let you Delete the user, Reset password, Edit user profile, and Disable or Enable the account. For details, see Editing user profile.
The user details page is organized in the following sections:
| Section | Description |
|---|---|
| User Details | Login Name, Email, Full Name (click the pencil icon to edit it inline), BigFix Operator bound to the user, Type (for example, local), Roles, and the Created and Updated timestamps. Click Add Role under Roles to assign a role to the user. |
| Authentication | Last login, Last failed logins, and Current failed logins. |
| Application authorization | The combination of roles for this user results in the listed application access. Each application the user can open is shown as a tag. |
| User access restrictions | Controls when the user can log in: Always allow this user to log in, Only allow this user to log in when they are a member of at least one role, or Disable this user's login. Click Change permissions to modify the selection. |
| Permissions | A table of Explicit permissions that you can grant to the user directly, next to the resulting Effective permissions. Click Save to apply changes. For the list of permissions, see Permissions reference. |
Role management
The Roles tab provides a centralized interface for managing access control across the BigFix environment. Administrators can create new roles, modify existing ones, and associate users based on their operational responsibilities. Each role defines access to specific applications, devices, sites, and permissions.
To access this page, open User & Role Management and select the Roles tab. The User management - roles page is displayed:
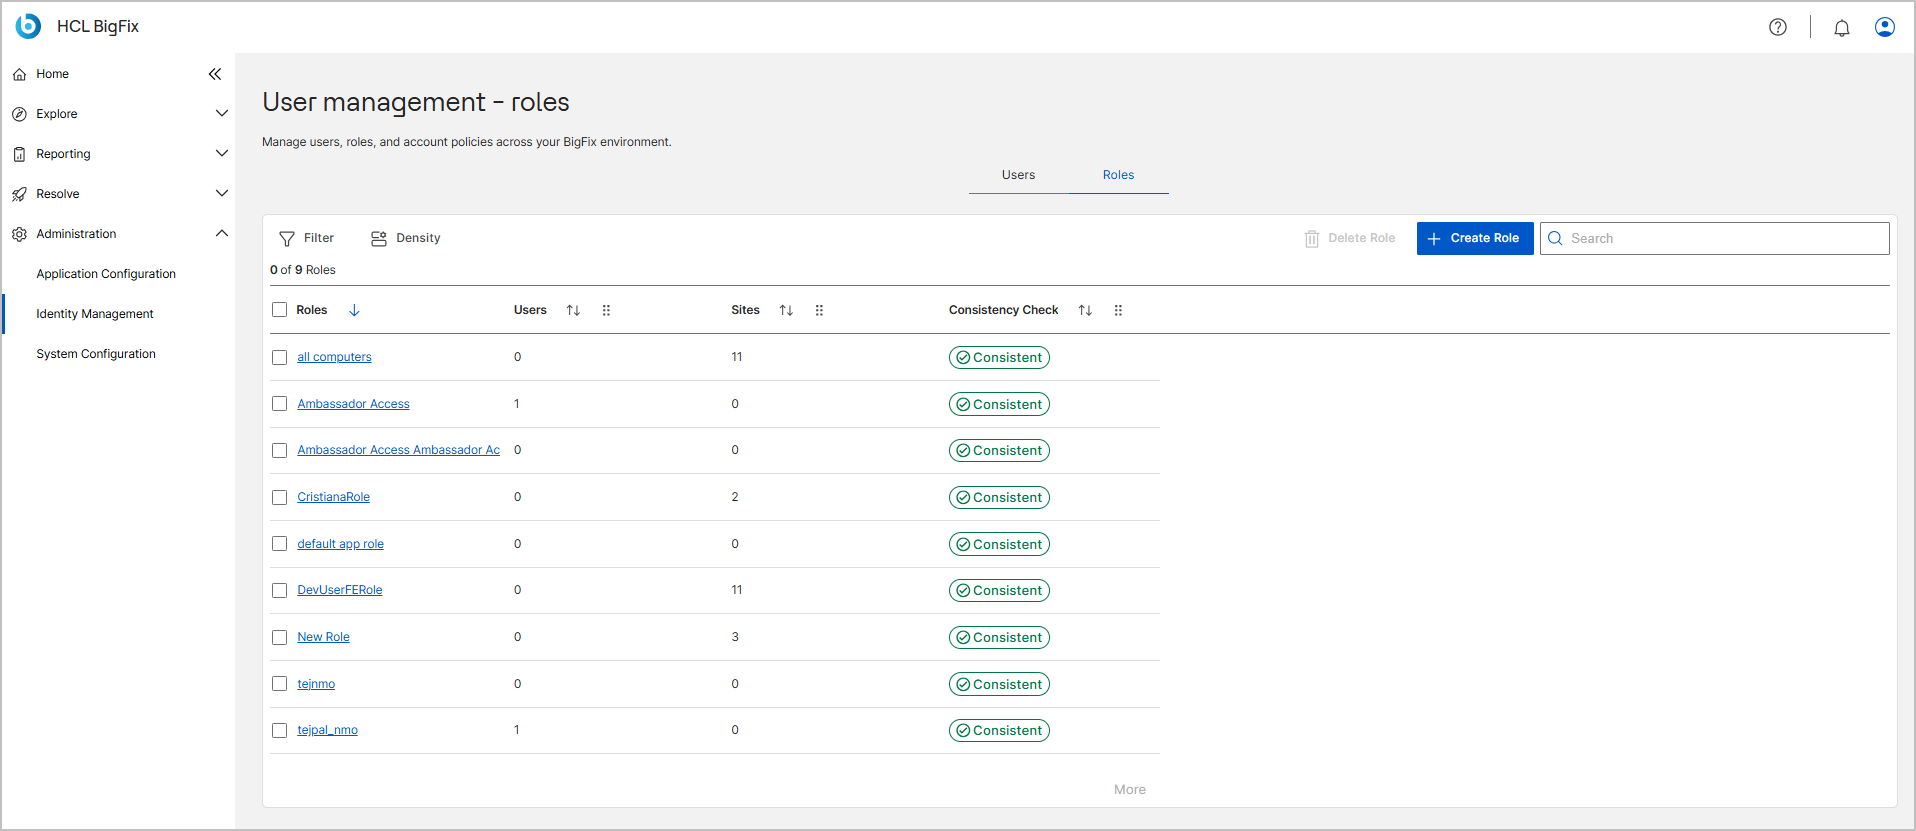
The roles grid displays the following details for each role:
| Column | Description |
|---|---|
| Roles | The role name. Click a role name to open the role details page. |
| Users | The number of users assigned to the role. |
| Sites | The number of sites the role has access to. |
| Consistency Check | Indicates whether the role definition on the BigFix platform and its application permissions in BigFix UI are in sync. A Consistent badge means no discrepancy was found. |
From this page, administrators can:
- Create new roles through a guided wizard that includes Devices, Applications, Permissions, Sites, and Summary steps.
- View and manage existing role details, including users, devices, applications, permissions, and sites.
- Select one or more roles using checkboxes and click Delete Role to delete them, if required.
For detailed steps, see Managing Roles.