Common Functionalities
Familiarize yourself with the functionalities that are available across modules. These features work the same way in the BigFix UI applications, such as Devices, Fixlets, Deployments, and CyberFOCUS, so you learn them once and apply them everywhere.
This section describes the controls that BigFix UI shares across its applications. The following features have their own topics:
- Managing Filters – Use the global filter, the table filter, and the query filter to narrow the records that you work with.
- Manage Reports – Save, load, and organize the custom reports that you generate.
- Managing Tags – Attach custom labels to Fixlets, deployments, reports, and analyses so that you can group and track related content.
- Prescriptive Guidance – Review actionable recommendations that are based on best practices and the current state of your environment.
The rest of this topic describes the controls that appear directly on list view and overview pages.
Filtering Data
A filter narrows a set of records to the ones that match the conditions you define. You build every filter the same way, from a Property, an Operator, and a Value. BigFix UI provides three filter types, each in a different place and with a different purpose.
Global filter
The global filter is the funnel icon in the upper-right corner of the Devices, Fixlets, CyberFOCUS, and Report Builder pages. It narrows the whole page, including the charts. The panel has Current filter, Saved filters, and Favourite filters tabs, so you can save a filter under a name of your choice, mark the ones you use most as favourites, and apply them again in a later session. For the steps, see Global filter.
Table filter
The table filter is the funnel icon above a data table on the Sites, Analyses, Deployments, All Reports, Scheduled Reports, User Management, and Roles pages. It narrows the rows of that one table. Select Add filter to combine conditions with And or Or, and then select Apply. You can't save a table filter. For the steps, see Table filter.
Filter by query
The query filter defines a set of devices or Fixlets, so it changes which records an object acts on, not just what you see. You use it wherever BigFix UI asks you to target a set of records: the remediation, Fixlet deployment, and custom remediation flows, the membership criteria of a dynamic device group, the device subscription rule of a custom site, and the device scope of a role. Where the filter targets devices, you can usually filter by Query, Device group, or Device list. For the steps, see Filter by query.
Manage Reports
Manage Reports saves, loads, and organizes the custom reports that you generate in BigFix UI. Use it to preserve a view that you use often, such as a set of filter conditions, columns, and charts, and to reopen it later.
Select Manage Reports in the upper-right corner of the List View to slide out the panel, which provides a Save Report tab and a Load Report tab. Reports that you save in one application are listed on the All Reports page, which gives you central management and quick access.
For the steps to save and load a report, see Manage Reports.
Columns
Use the column chooser to control which columns appear in the data table.
- Above the table, select Column. The column chooser opens.
- Optional: In the search box, enter a column name to filter the list.
- Select the checkbox next to each column you want to show, and clear the checkbox for each column you want to hide. You can display up to 63 columns; the panel shows the current limit as Max items limit: 63.
- Optional: Select Reset to restore the default column selection.
- Select Apply. The table updates to show the columns you selected.
Density
Use the density control to set the row spacing of the data table.
- Above the table, select Density. A menu opens.
- Select the row spacing you want:
- Compact – fits the most rows by reducing row height.
- Standard – the default row height.
- Comfortable – adds space between rows for easier reading.
The table updates immediately to use the spacing that you selected.
Sorting Data
Sorting can be applied to individual columns, allowing users to arrange data according to their current focus or needs. This feature enhances data readability and ensures users can efficiently work with large sets of information by keeping relevant details readily accessible. Sorting organizes your data in ascending or descending order based on a selected column. Each column in the list table includes a Sort icon (double arrows) that allows you to organize your data alphabetically or numerically
- To sort a column: Select the Sort icon in the column
header.
-
The first selection sorts the data in ascending order (for example, A to Z or 1 to 10).
-
Selecting the icon again sorts the data in descending order (for example, Z to A or 10 to 1).
-
- To clear a sort: Select the icon until the arrows return to their default, neutral state.
Exporting Data
The Export Data option is available on Deployments, CyberFOCUS, All reports, Report Builder, and list view pages of Devices, Fixlets. Use this option to download tabular report information from list view pages for offline analysis or record-keeping.
It enables users to export visible report data—filtered, sorted, or customized to commonly used spreadsheet formats like CSV or Excel.
This allows users to review device inventories, fixlet compliance, or deployment summaries outside the BigFix UI environment.
How to Export Data:-
Click the Export Report icon located in the upper-right corner of the page.
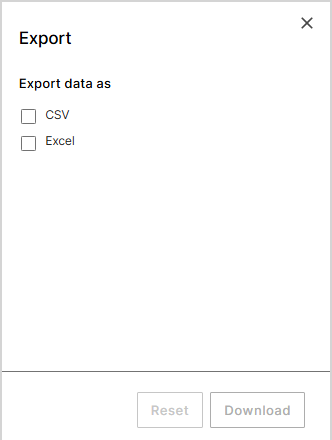
The Export panel slides out and displayed.
-
In the Export panel that appears:
- Select CSV to export raw comma-separated data for importing into other tools.
- Select Excel to export data into a formatted spreadsheet (.xlsx) file.
-
Choose Data to Export: Depending on the module and screen you are in, you have the option to export the entire dataset visible on the screen or apply filters to export a specific subset of data.Note:
- If applicable, apply filters or selections within the module to export only the necessary data, reducing file size and focusing on relevant information.
- Depending on your user role and permissions, access to certain data subsets may be restricted.
-
After selecting the desired format, click Download. The file gets generated and downloaded to your device.
- (Optional) Click Reset to clear all selections before downloading again.
Exporting Charts
The Export charts option is available on CyberFOCUS and Overview pages of Devices, Fixlets. Use this feature to capture dashboard visualizations from overview pages as image or document files for reporting and presentation purposes. It allows users to download graphical widgets such as bar charts, donut charts, or summary tiles that visualize system compliance, device types, or OS distribution trends.
Charts can be exported as JPEG, PNG, or PDF files, making it easy to include BigFix data visuals in internal reports or external presentations.
How to Export Charts-
Click the Export Report icon located in the upper-right corner of the page.
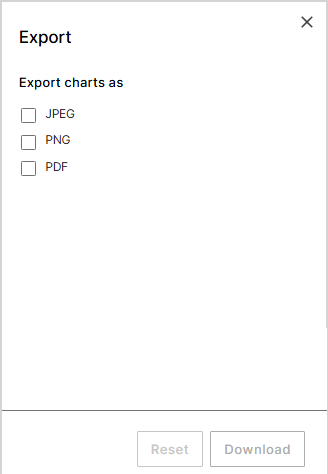
The Export panel slides out and displayed.
-
In the Export panel, select one or more of the following options:
- JPEG – Exports charts as compressed images suitable for quick sharing.
- PNG – Exports charts in higher resolution for professional documentation.
- PDF – Consolidates all visible charts into a single report document.
-
Choose Data to Export: Depending on the module and screen you are in, you have the option to export the entire dataset visible on the screen or apply filters to export a specific subset of data.Note:
- If applicable, apply filters or selections within the module to export only the necessary data, reducing file size and focusing on relevant information.
- Depending on your user role and permissions, access to certain data subsets may be restricted.
-
Confirm and Download: After selecting the desired format click Download. The file gets generated and downloaded to your device.Note:If you have choosen more than one format to export, the files will be downloaded in a single zip folder.
- (Optional) Use Reset to deselect all options before making a new export.
Viewing chart data in a table
Each chart has an icon in its top-right corner that opens the chart's data as a table, with options to copy or export it.
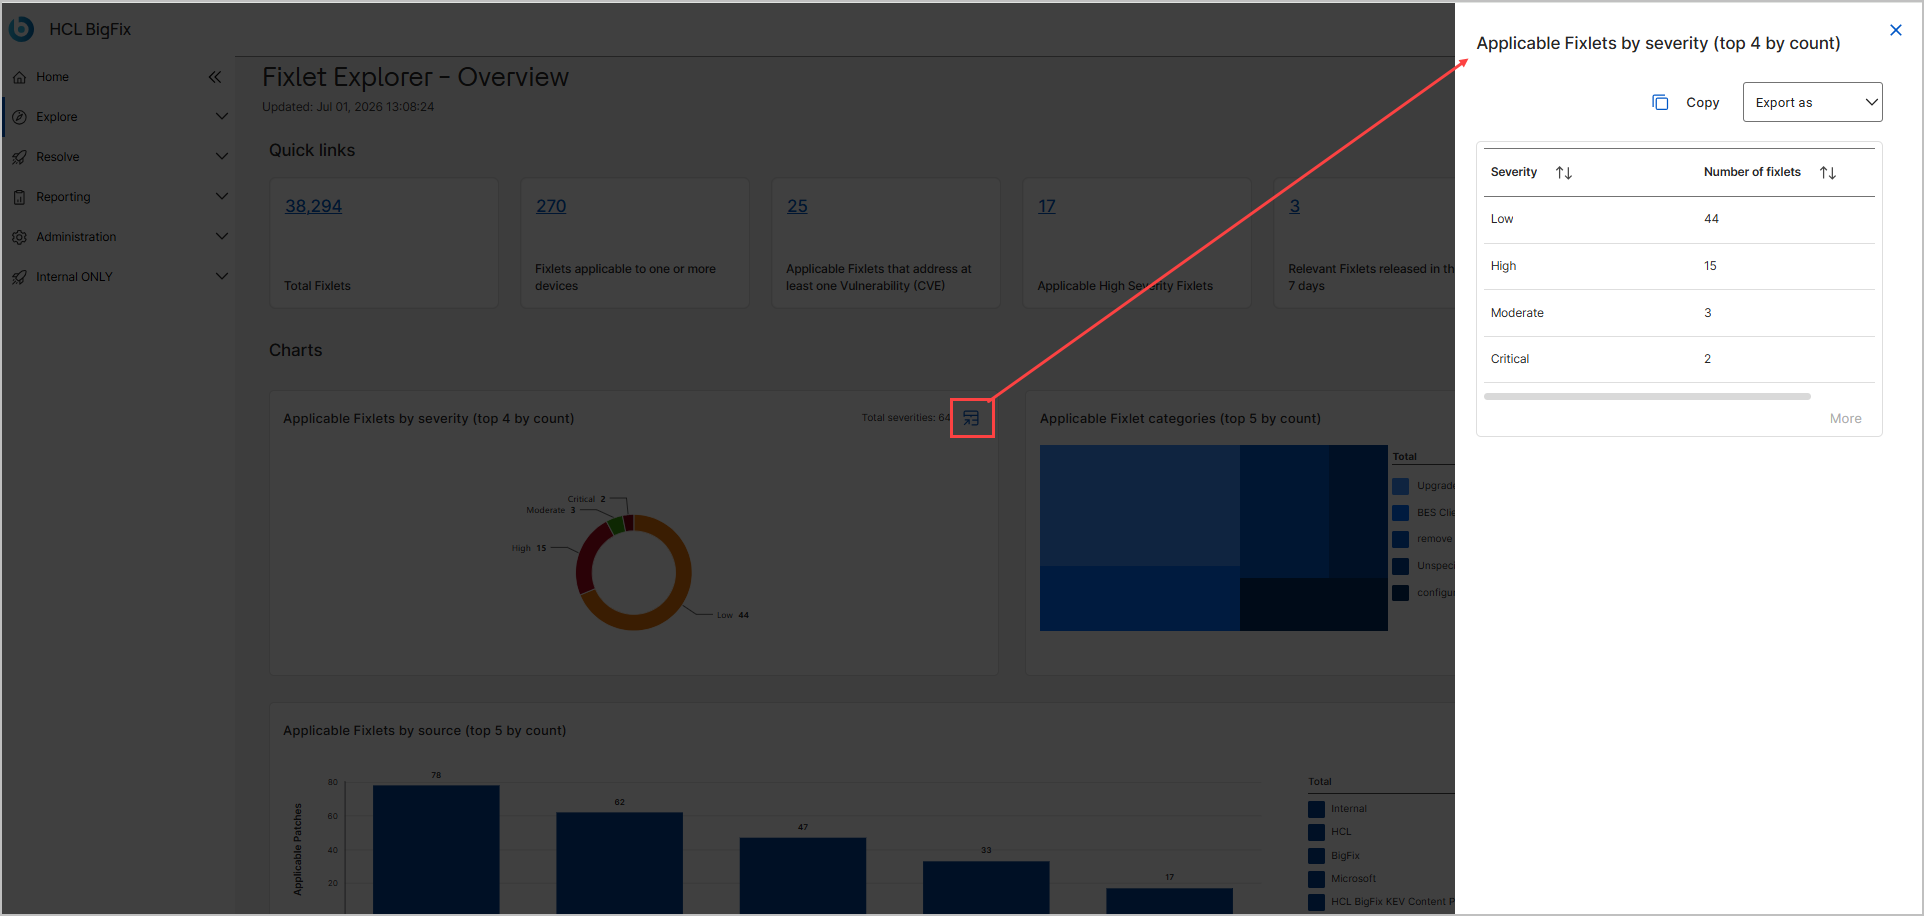
Each chart can display its data as a table that you can copy or export
- Locate the chart that you want, such as Applicable Fixlets by severity (top 4 by count).
- In the chart's top-right corner, select the See data in data table format with download options icon. The chart's data panel opens and displays the data as a table, such as Severity and Number of fixlets.
- Optional: To sort the table, select the sort icon in a column header.
- Optional: If a More link appears, select it to load additional rows.
- To copy the table to the clipboard, select Copy.
- To download the data, select Export as and choose a format.
- To close the panel, select Close (X).
Tags
Tags are custom labels that you attach to Fixlets, deployments, reports, and analyses so that you can group, filter, and track related content across BigFix UI. You create tags as you need them and reuse them across objects.
You assign tags from the list view of an application, from an object's detail page, or from the Summary step of a remediation flow. The Tags column in a data table shows the tags on each row, and you can sort and filter on that column to gather every object that carries the same tag.
For the objects that support tags, the assignment steps, and the permissions that apply, see Managing Tags.
Prescriptive Guidance
Prescriptive Guidance provides actionable recommendations that are based on best practices, industry standards, and your organizational policies. It identifies devices in your environment that are vulnerable and have no scheduled remediation action, so that you can address the highest risks first.
The feature is available in the Devices, Fixlets, and CyberFOCUS applications. Select the Prescriptive Guidance icon, or select Prescriptive Guidance from the More options menu, to open the panel. When the panel detects vulnerabilities, the Remediate button opens the remediation workflow with the applicable Fixlets and devices already selected.
For the key benefits, use cases, and access steps, see Prescriptive Guidance.
Help Center
The Help Center provides quick access to support and documentation resources directly from the BigFix UI. You can open it by clicking the ? icon located in the upper-right corner of the screen.
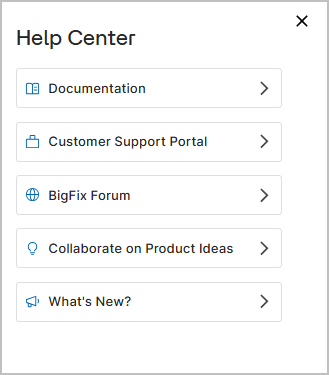
The Help Center panel slides out from the right side and includes the following options:
- Documentation – Opens the BigFix product documentation site for detailed feature and usage guidance.
- Customer Support Portal – Navigates to the official BigFix support site where users can raise tickets or review existing cases.
- BigFix Forum – Redirects to the BigFix community discussion forum for peer assistance and technical insights.
- Collaborate on Product Ideas – Opens the BigFix idea portal where users can share feature suggestions and vote on proposed enhancements.
- What’s New? – Displays information about recent updates, new features, and product release notes.
Each option launches an external site in a new browser tab, allowing users to seamlessly access the latest information and resources without leaving the BigFix UI.