Managing Roles
Create, edit, and manage user roles with customizable access to applications, devices, sites, and permissions in the BigFix UI environment. You can customize each role by specifying app-level permissions, ensuring users have secure and appropriate access based on their responsibilities.
Roles
Roles are user-defined in BigFix UI and allow administrators to tailor permissions and access based on specific organizational requirements. Each role controls which applications, devices, and sites are accessible, and which operational permissions are granted. Roles can be edited, assigned to users, or deleted (if no users are assigned).
Roles are BigFix platform roles. The BigFix platform is the single source of truth for role definitions: roles that you create, edit, or delete in BigFix UI are created, edited, or deleted on the platform, and roles created on the BigFix Console are automatically discovered and listed in BigFix UI. Role assignment works through the BigFix operator that each user is bound to.
Administrator access is not a role. You define a user as Administrator or Non Administrator when you create the user. See Creating a new user.
A user can have multiple roles. The user's effective permissions combine all assigned roles by taking the most permissive setting for each platform permission and the highest access level for each application. See Permissions reference.
Default and Non-Removable Applications
Certain applications are marked as Default app and are automatically assigned to every role with view access. These apps cannot be unselected during role creation or editing. By default, all new roles have view access to:
- Analyses
- Deployment Manager (expand Explore and select Deployments)
- Device Explorer (expand Explore and select Devices)
- Fixlet Explorer (expand Explore and select Fixlets)
- My Dashboard (home screen)
- Site Management
Creating a new role
Follow these steps to create a role that defines the devices, applications, permissions, and sites available to the users assigned to it:
- Expand Administration, select Identity
Management, select the User & Role
Management card, and then select the Roles
tab.
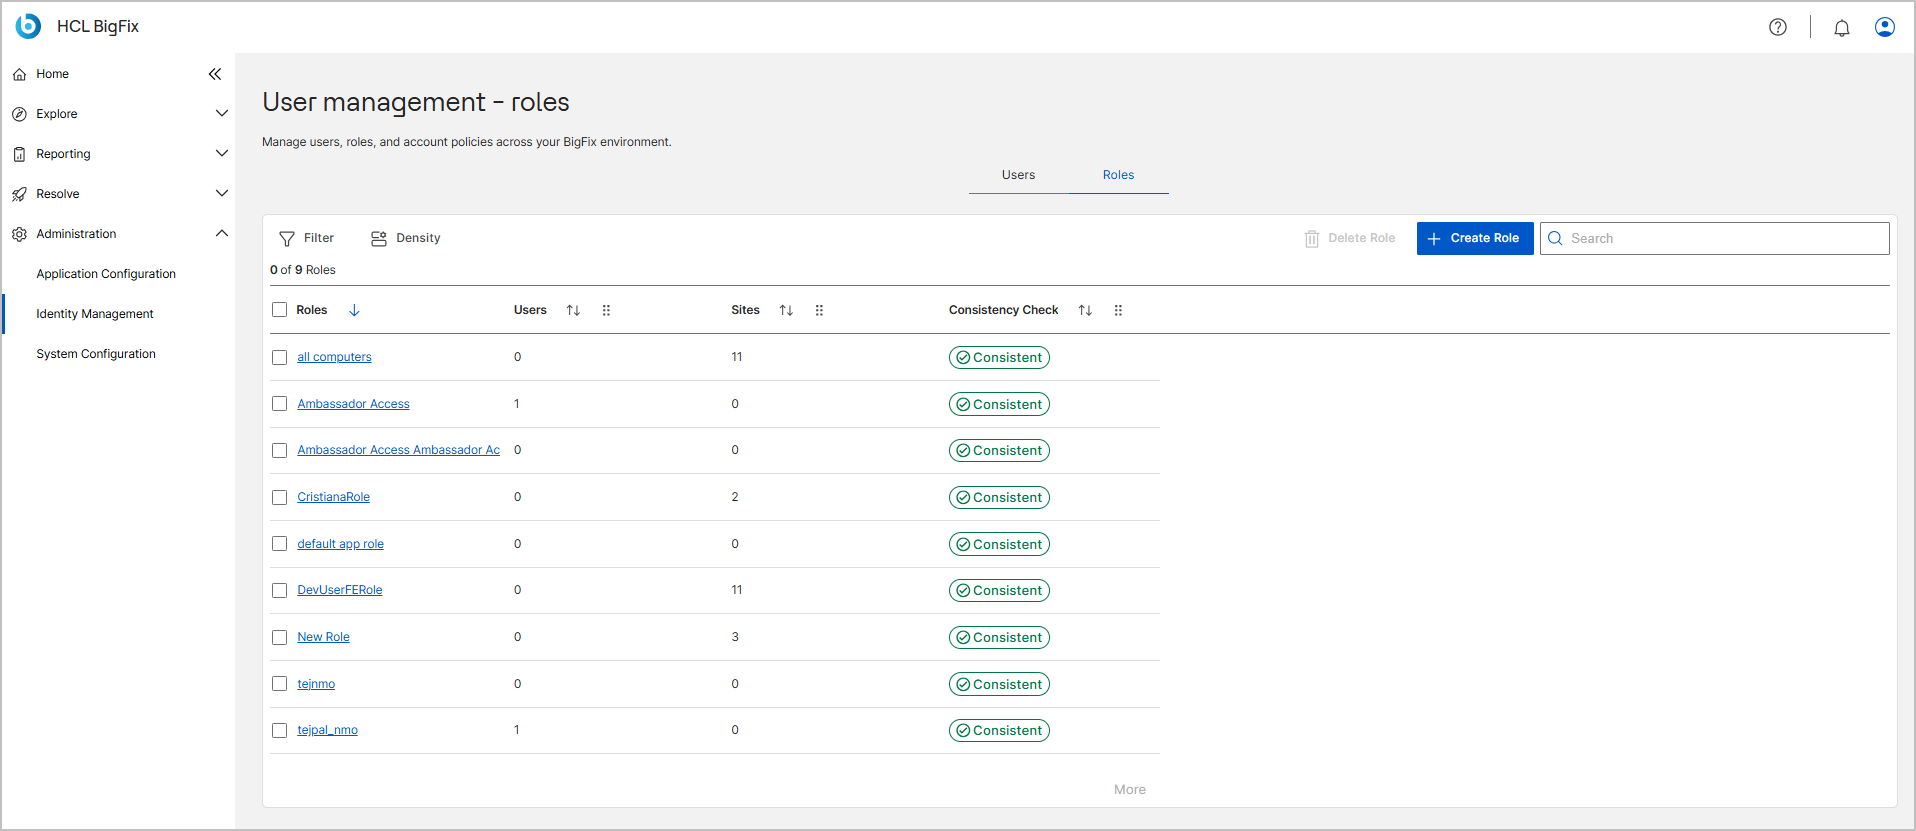
- Click Create Role. The Create new role wizard opens with five steps: Devices, Applications, Permissions, Sites, and Summary.
- Devices: Under Define the device scope for this
role, select the devices the role can manage.
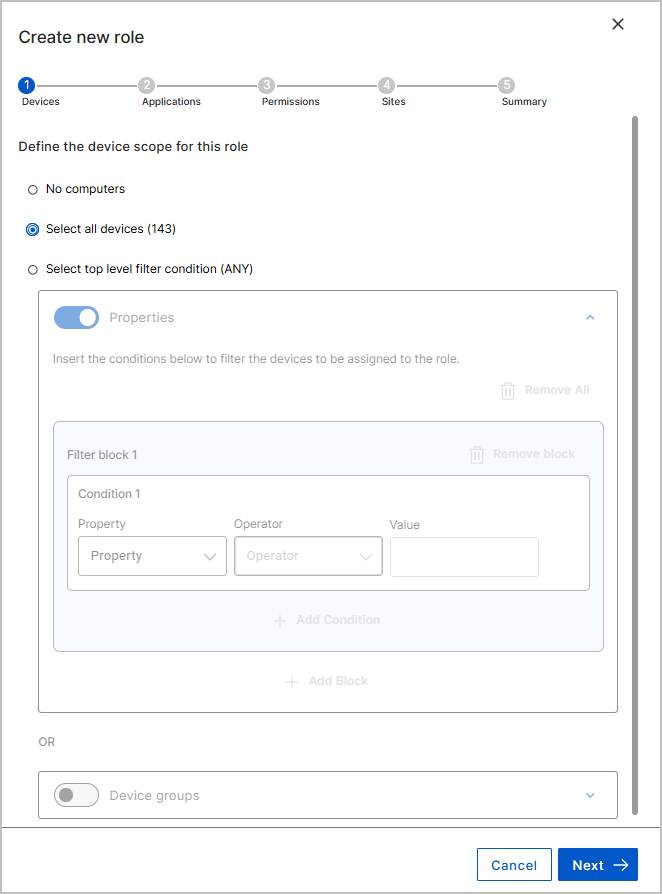
Select one of the following options:
- No computers: The role manages no devices.
- Select all devices: The role manages every device in the environment. The option shows the current device count in brackets, for example Select all devices (143).
- Select top level filter condition (ANY): The role manages the devices that match the filter you build. A device qualifies if it matches any of the sources you define.
If you select Select top level filter condition (ANY), build the filter with the Properties and Device groups sources. The two sources combine with OR logic.
- Turn on Properties to filter by device property. For each condition, select a Property and an Operator, and then enter a Value. Click Add Condition to add another condition to the block, or Add Block to add another filter block. To delete a single block, click Remove block. To delete every block, click Remove All.
- Turn on Device groups to filter by existing device group, and then expand the section to select the groups.
For more information about building filter conditions, see Filter by query.
Click Next.
- Applications: Under What applications should this role
access?, turn on the toggle for each application the role should
access.
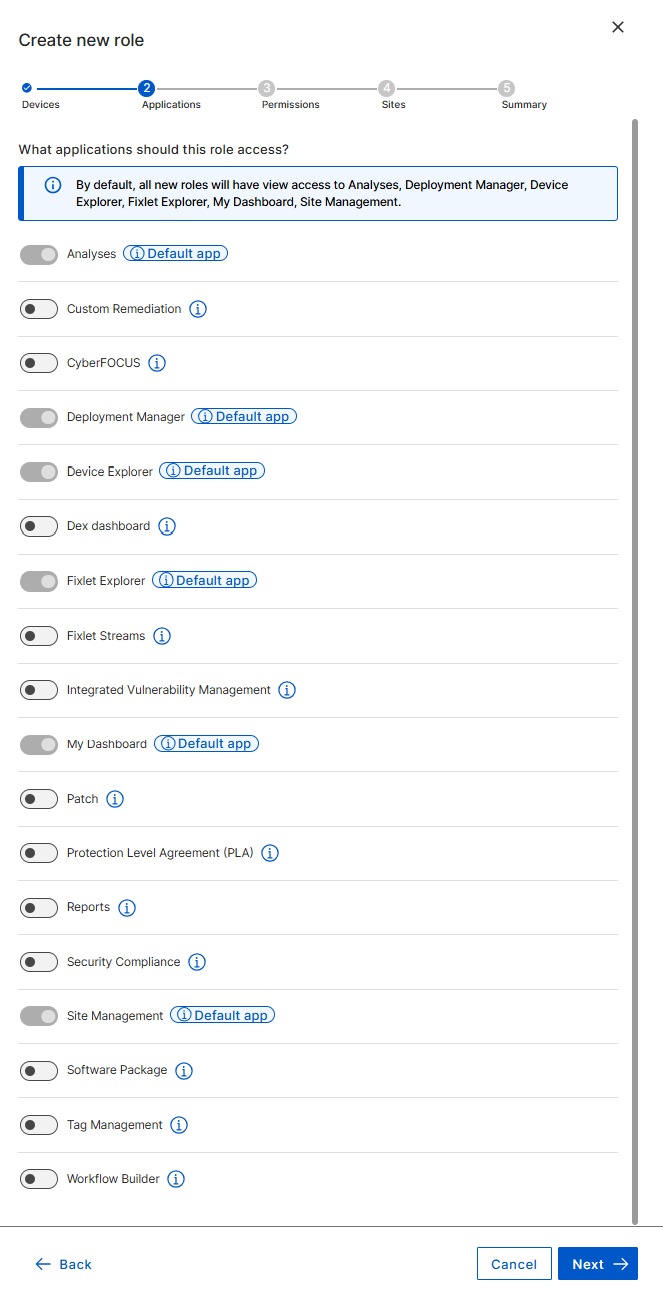 Note:By default, all new roles have view access to Analyses, Deployment Manager, Device Explorer, Fixlet Explorer, My Dashboard, and Site Management. The wizard repeats this information in a banner at the top of the step. The toggle for each default app is dimmed, so you cannot turn it off.
The following applications are available:
Table 1. Applications available in the role wizard Application Access Analyses Default app. Cannot be turned off. Custom Remediation Optional CyberFOCUS Optional Deployment Manager Default app. Cannot be turned off. Device Explorer Default app. Cannot be turned off. Dex dashboard Optional Fixlet Explorer Default app. Cannot be turned off. Fixlet Streams Optional. Users also need access to at least one external patch content site, which you grant on the Sites step. Otherwise, they cannot create a Fixlet Stream. Integrated Vulnerability Management Optional My Dashboard Default app. Cannot be turned off. Patch Optional Protection Level Agreement (PLA) Optional Reports Optional. When turned on, select an access level: Admin, Users, or Read only. Select Can use scripted reports to grant access to custom scripted reports. Security Compliance Optional Site Management Default app. Cannot be turned off. Software Package Optional Tag Management Optional Workflow Builder Optional Each default app carries a Default app label. Hover over the information icon next to an application to read its description. Click Next.
- Permissions: Under Define permissions for this
role, configure the operational permissions this role has within
the platform.
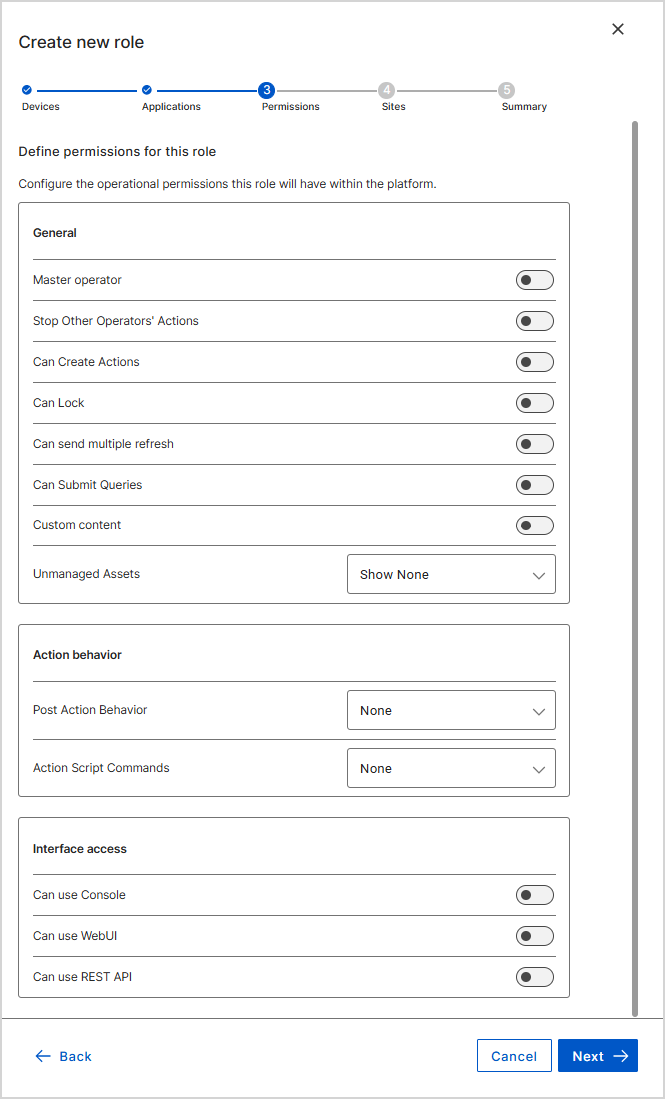
The permissions are grouped in three sections.
- General: Turn on the toggle for each permission to grant: Master operator, Stop Other Operators' Actions, Can Create Actions, Can Lock, Can send multiple refresh, Can Submit Queries, and Custom content. From the Unmanaged Assets list, select By Scan Point, Show All, or Show None.
- Action behavior: From the Post Action Behavior list, select Allow Restart and Shutdown, Allow Restart Only, or None. From the Action Script Commands list, select the level of script command access to grant.
- Interface access: Turn on the toggle for each interface the role can use: Can use Console, Can use WebUI, and Can use REST API.
All toggles are off and both lists are set to None by default, except Unmanaged Assets, which is set to Show None.
For a description of each permission, see Permissions reference. Click Next.
- Sites: Select the sites this role has access to and define the permission
level.
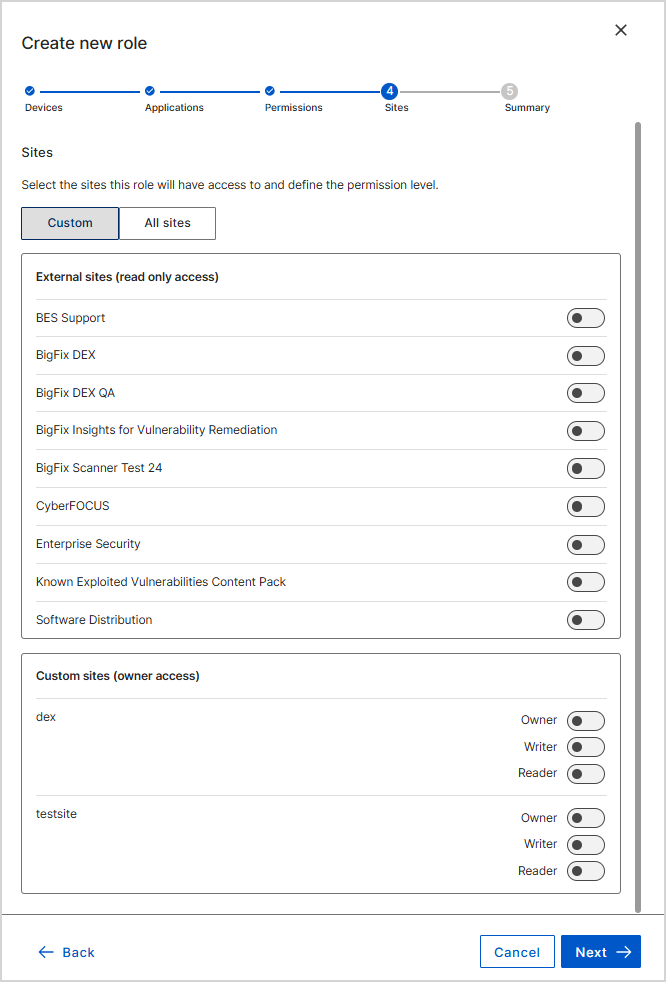
- Select All sites to grant access to every site, or Custom to choose sites individually. Custom is selected by default.
- Under External sites (read only access), turn on the toggle for each external site the role can read.
- Under Custom sites (owner access), for each custom site turn on Owner, Writer, or Reader to set the permission level.
Click Next.
- On the Summary step, enter a Role name
(required) and review the configuration.
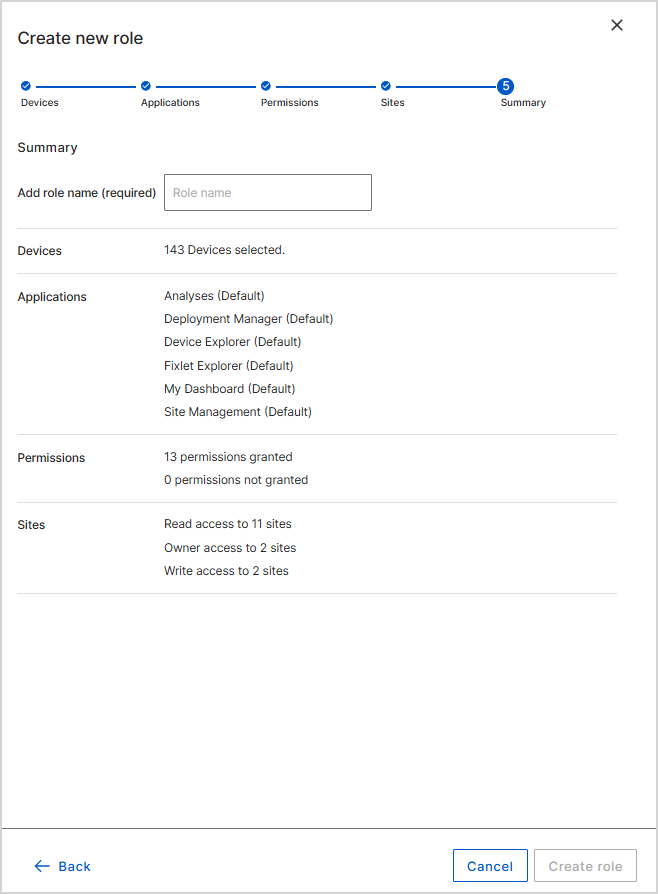
The summary reports the number of devices selected, the applications the role can access with their default status, the count of permissions granted and not granted, and the site access by permission level.
To correct any setting, click Back to return to the relevant step.
Note:Provide a unique name for the role. You cannot edit the role name once it is created. - Click Create role. The button stays disabled until you
enter a role name.
Result: The new role appears on the Roles tab. Click the role to view its details.
Viewing role details
Follow these steps to view the users, devices, applications, permissions, and sites associated with a specific role:
-
Open User & Role Management and select the Roles tab.
-
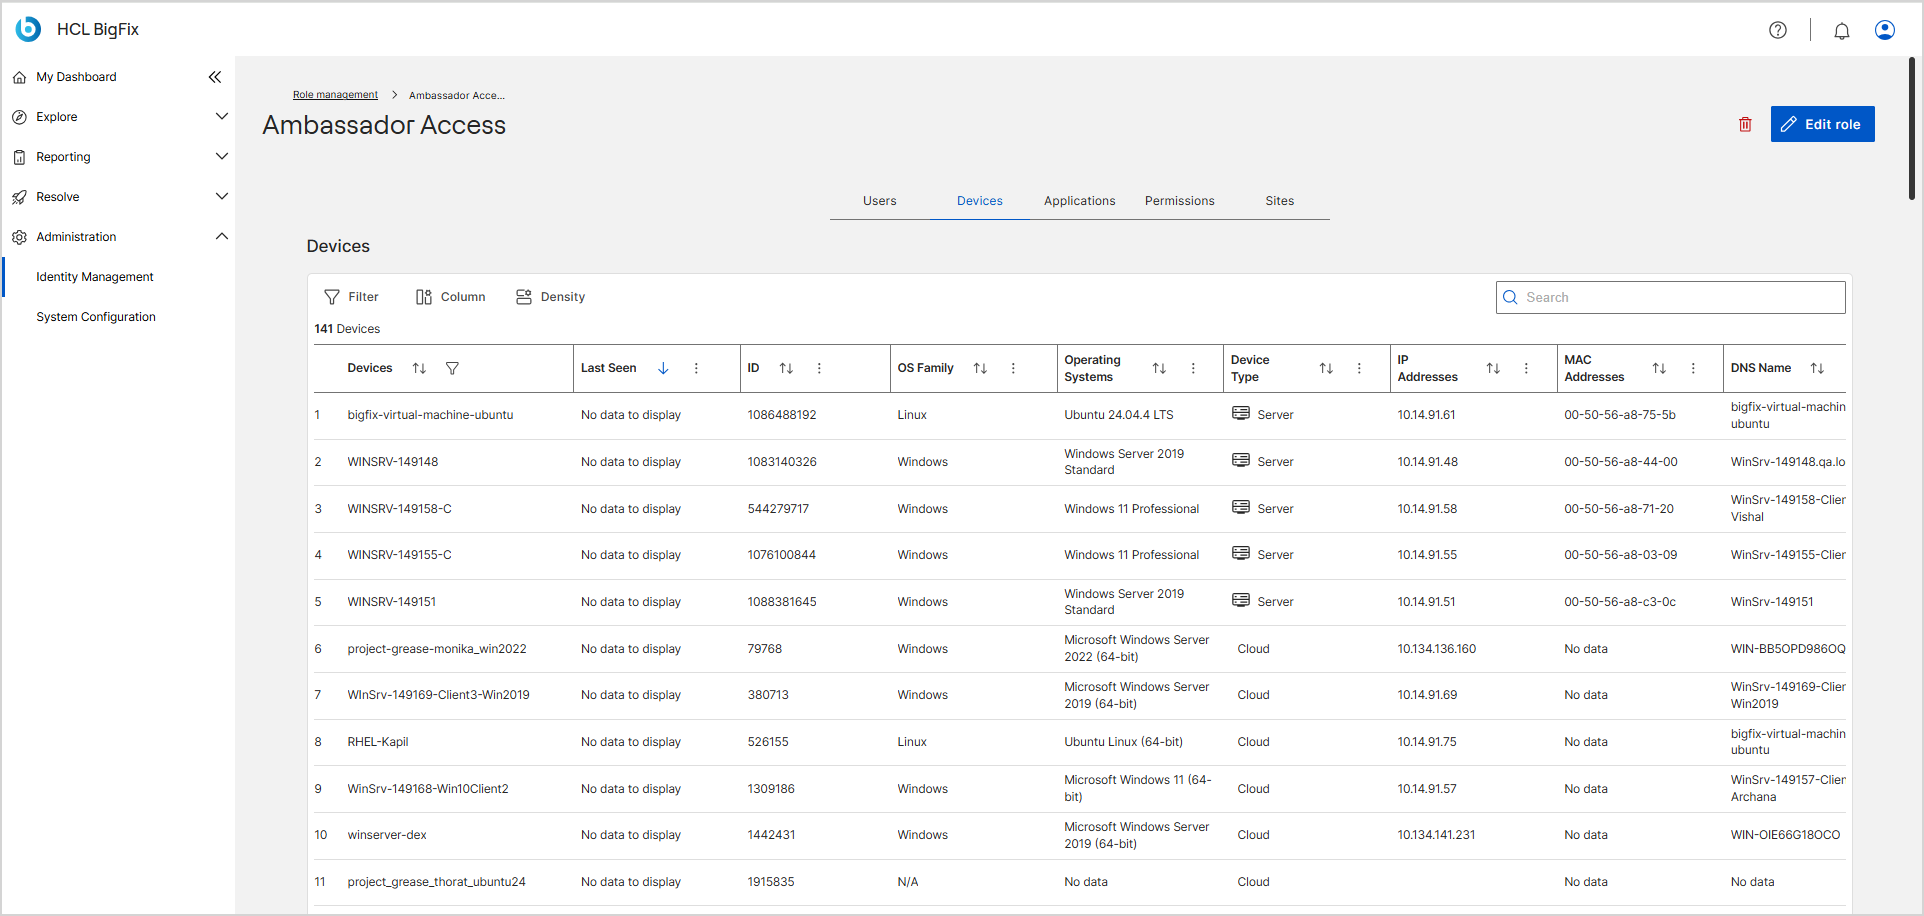
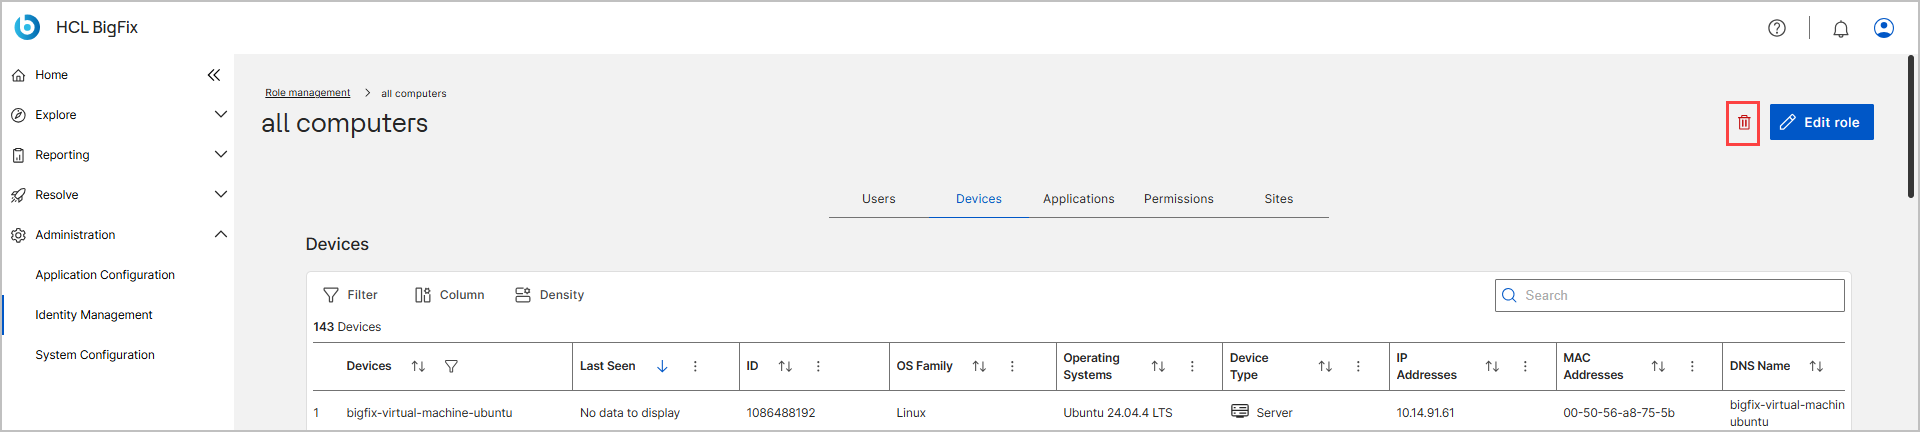
Click a role name from the Roles column. The role details page appears.
-
Select a tab to view the corresponding information.
Table 2. Role details tabs Tab Description Users Lists the users assigned to the role. Use Filter, Density, and Search to locate a user. For more information, see Table filter. Devices Lists the devices the role can manage, with Last Seen, ID, OS Family, Operating Systems, Device Type, IP Addresses, MAC Addresses, and DNS Name. Use Filter, Column, Density, and Search to refine the list. Applications Lists each application the role can access, its Version, and the Access level (for example, Full access, or user for Reports). Permissions Shows the Permissions details for the role, grouped as General, Action behavior, and Interface access. A Granted badge marks each permission the role grants. See Permissions reference. Sites Lists the sites the role has access to.
Editing a role
Follow these steps to modify the device scope, applications, permissions, and sites for an existing role:
byActiveDirectory. BigFix UI does not
support this computer assignment type and cannot change it. Use the BigFix Console
to edit them.-
Open User & Role Management and select the Roles tab.
-
Click the name of the role you want to edit.
- Click Edit role in the top right corner. The
Edit role wizard appears with the same
Devices, Applications,
Permissions, Sites, and
Summary steps as the Create Role wizard.

-
Update the device scope, applications, permissions, and sites as described in Creating a new role. The wizard opens with the current settings of the role. Click Next to move forward and Back to return to an earlier step.
-
On the Summary step, review your changes and confirm to apply the new configuration. The role name is read-only.
The role permissions update immediately. Assigned users will experience the modified access levels upon their next action.
Deleting a role
You can delete a role using either of the following methods:
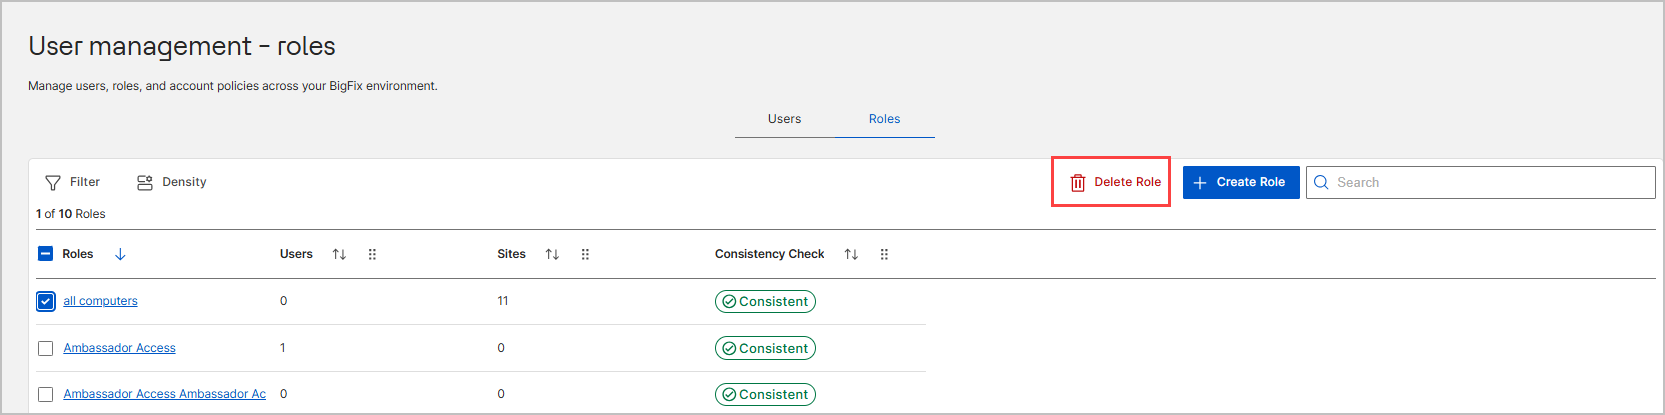
- Method 1: Delete from the Roles list
- Open User & Role Management and select the Roles tab.
- Select the check box next to the role or roles you want to delete.
- Click Delete Role at the top right of the
table.
- Method 2: Delete from the role details page
-
Open User & Role Management and select the Roles tab.
-
Click the name of the role you want to delete.
-
Click the Delete (trash can) icon in the top right corner.
-
Assigning roles to users
As an administrator, when creating a new user, you assign one or more roles to ensure they have the appropriate level of access from their first login. You can add roles to an existing user at any time to adapt to organizational changes, evolving operational needs, and updated security policies.
To add a role to an existing user:
- Open User & Role Management. On the Users tab, click the login name of the user.
- On the user details page, under Roles, click
Add Role and select the role.
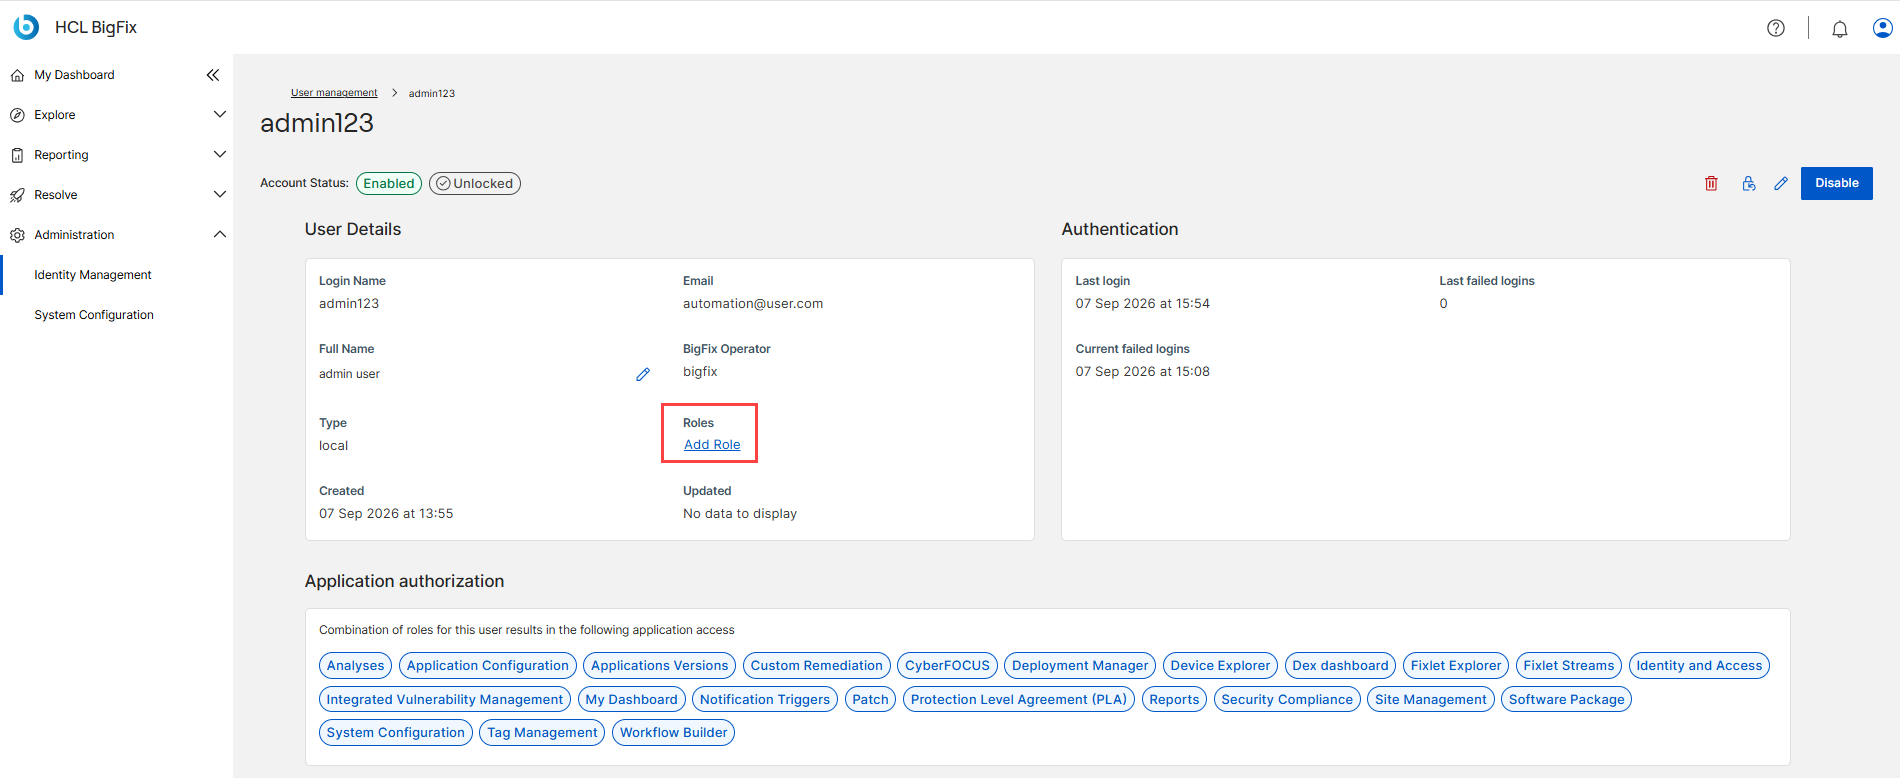
- Verify the change in the Application authorization section of the user details page and in the Roles column of the Users grid.