Reimaging Windows Systems
You can specify different options which will affect the reimaging process on the target.
The reimaging process on Windows systems does not re-partition the disk on the target system. To reimage a computer successfully, ensure that on the target machine the available free disk space is at least equal to or greater than the Size on disk of the image you are deploying.
Before deploying Windows 11, check the system requirements at https://www.microsoft.com/en-us/windows/windows-11-specifications.
You can reimage Windows targets in multicast, using either captured images or ISO images. To complete this task see Reimaging Windows Systems in multicast.
- Edit an image that was previously imported, and deploy it to one or more targets.
- Deploy an image that you previously captured from a reference machine. In this case, if you have saved the user state on the captured system, you can restore it on the system you are reimaging.
- Deploy an image that was created from installation media (ISO image).
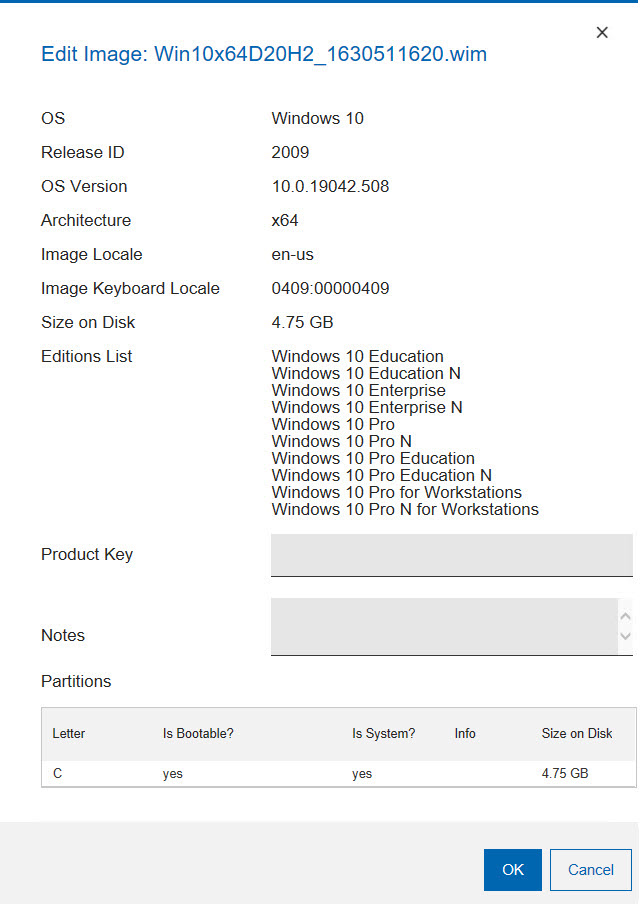
Editing an image

- The drive letter of the partition.
- If the partition is bootable.
- If the partition is a system partition.
- Additional information about the partition, for example if it is a recovery partition.
- The size of the partition.
Managing multiple partitions for captured images
- Capture multiple partitions in a single .WIM file to enable the support of multi-partition master images.
- During a reimage, map the captured partitions into existing partitions and decide which target partitions to overwrite and which ones to keep.
- During a bare metal deployment, decide how many partitions to create and how to map them into partitions of the reference image.
- During a bare metal deployment, allow the administrator to decide if the disk must be cleaned and repartitioned or simply if some partitions must be reformatted, while others must be kept, (for example data partitions).
Choosing a source image
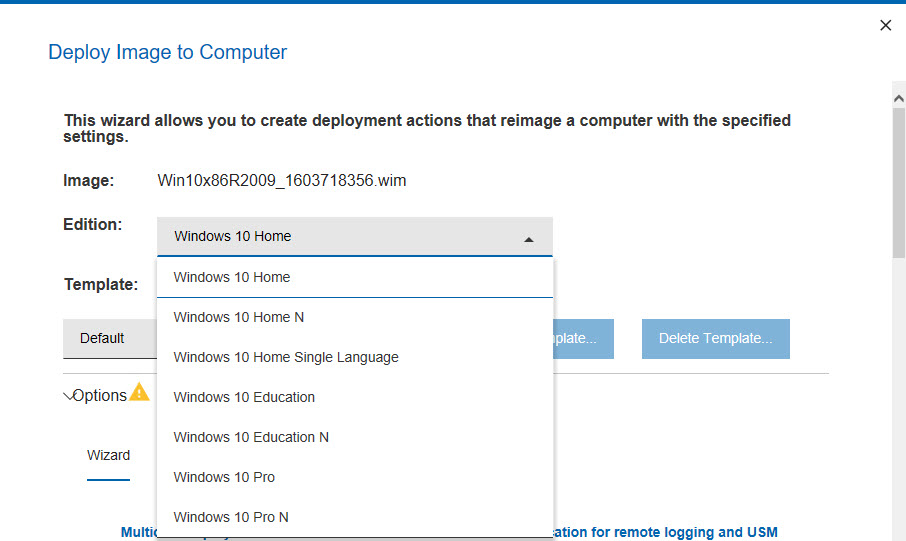
Select a Windows image from the Image Name list and click Deploy to computer to open the wizard.
If you choose an image that was created from installation media (ISO images), you can also select the operating system type that you want to deploy, if more than one is available in the image. Expand Edition, and make your selection.

In addition to the wizard, you can also use the Manual tab to edit the CustomSettings.ini file to be used for the reimaging.