Reimaging Windows Systems in multicast
You can reimage your targets by using multicast communication, if your network infrastructure supports it.
- Your Bare Metal Server component must be at version 7.1.1.19 or later, and must be installed and running on the relays to which the targets are connected. To use a different relay from the one to which the target is connected, you can add a custom client setting as described in Adding a custom setting to connect a target to a specific relay. During the reimaging deployment, the target dynamically connects to the relay specified in the setting.
- You must create at least one reimage profile for each image that you want to deploy in multicast and precache it on one or more Bare Metal servers that manage the multicast deployment.
Multicast is implemented as a group-based deployment so that computers can be installed in batches. The Bare Metal Server splits the profiles into blocks that are sent to all targets that belong to the same multicast group. Before sending each block, the server sends a packet called TOC, that describes the content of the block.
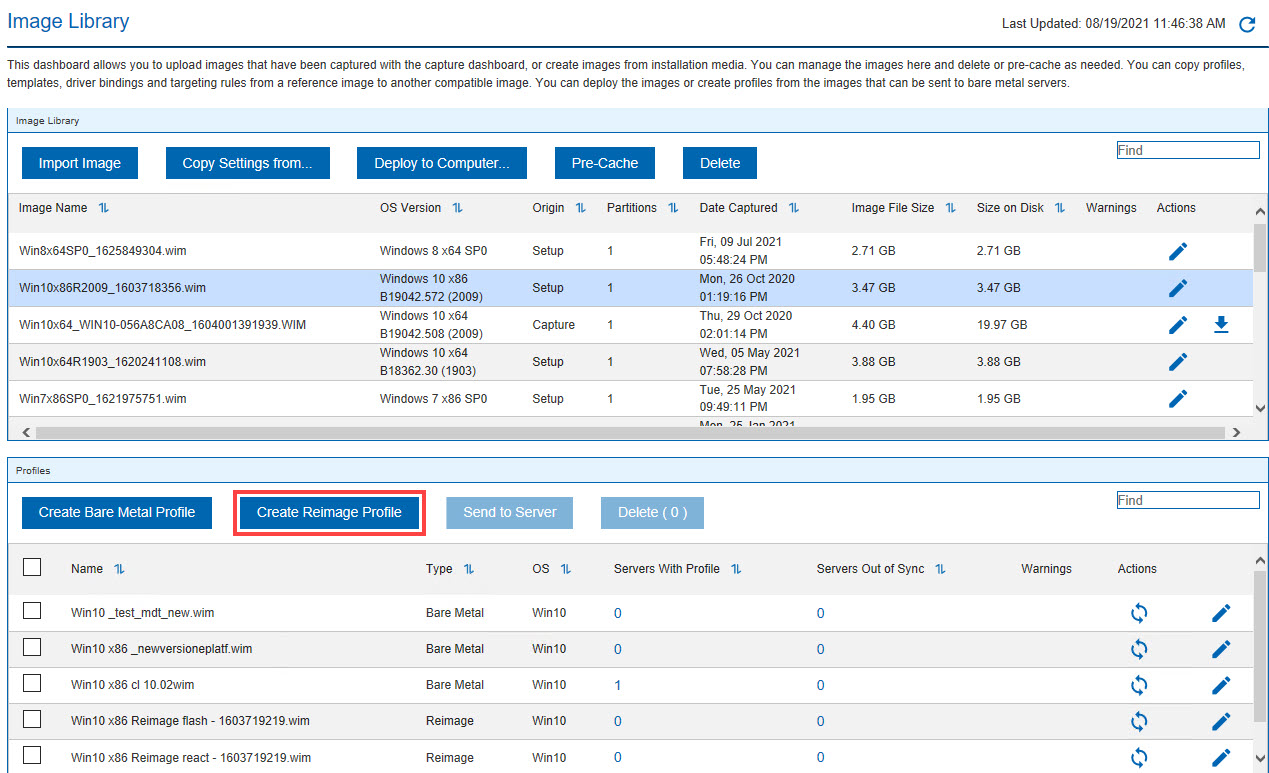
- From the Image Library select a Windows image that you want to deploy in multicast.
- Click Create Reimage Profile.

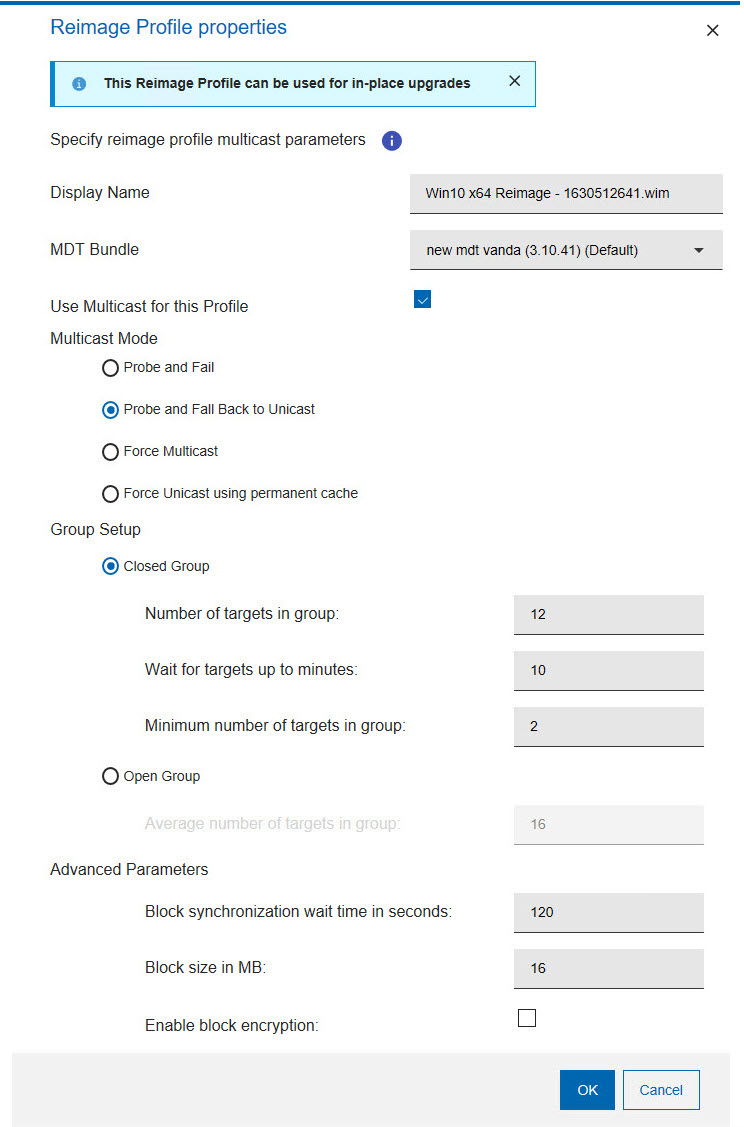
- The Reimage Profile properties window is displayed.
 To enable multicast for the profile, select the corresponding option. Default values for multicast deployment are provided. You can accept or change them, depending on the characteristics of your network:
- Display Name
- The name of the profile. By default, the name is derived from the associated image and the type of profile (in this case, Reimage). You can specify a different name, with a maximum length of 70 alphanumeric characters.
- Windows Bundle
- The Windows Bundle to be used for the deployment. You can choose a different one from the list of compatible bundles for the selected image.
- Multicast Mode
- Defines how the multicast distribution is managed on the targets
at deployment time for the profile:
- Probe and Fail
- If the probe on the target fails, the deployment task also fails.
- Probe and Fall back to Unicast
- If the probe on the target is successful, deployment occurs in multicast. If the probe fails, deployment of the profile occurs in unicast, using the Bare Metal Server cache, instead of the relay cache.
- Force Multicast
- Deployment on the target is forced to multicast regardless of probe results.
- Force Unicast using permanent cache
- Deployment on the target is completed in unicast using the Bare Metal Server cache. This option is useful when you want to ensure that all necessary files are available at deployment time.
Important: If the image you selected is larger than 16 gigabytes in size, and you have enabled multicast, the options "Probe and Fall Back to Unicast and "Force Unicast using permanent cache" are disabled.- Group Setup
- Select the type of multicast group that is used for the
deployment. You can accept or change the associated parameters.
- Closed Group
- Targets join the group as they are ready. When the
following criteria are satisfied, the group is
closed and distribution begins. This is the default.
- Number of targets in group
- Specify the maximum number of targets allowed in the group. The default value is 12.
- Wait for targets up to minutes
- Specify the maximum number of minutes to wait for targets before starting the multicast deployment. The default value is 10 minutes.
- Minimum number of targets in group
- Specify the minimum number of targets that must join for a multicast deployment. If the specified value is not reached, deployment is completed in unicast. The default value is 2.
- Open Group
- Targets can join the group as they are ready, at any
time during deployment. You can change the
associated parameter.
- Average number of targets in group
- Specify the average number of targets expected in the group. This value is used to optimize block synchronization. The closer the number of actual targets is to this value, the more efficient the multicast deployment. The default value is 16.
- Advanced Parameters
- Multicast advanced customization and tuning options that apply
to both multicast group types.
- Block synchronization wait time in seconds
- Specify how many seconds the server must wait before sending the next block. This value is preset to 120 seconds. If you specify a value less than 5 seconds, the block synchronization wait time is forced to 5.
- Block size in MB
- The image is divided into blocks that are sent to the targets. This parameter sets the maximum size of the data blocks (in megabytes) sent in each transmission packet. The default value is 16 Megabytes.
- Enable block encryption
- Specify if the blocks must be encrypted during transmission.
- Click OK to save the profile.
- Select the profile from the list, and click Send to Server. If you select multiple profiles and more than one server, the send operation might take some time.

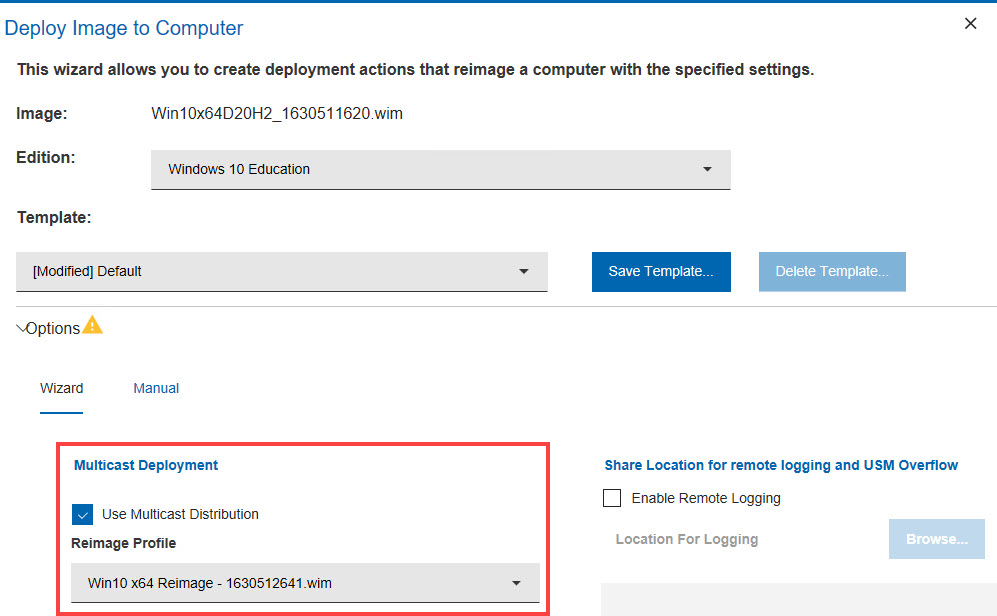
Check the multicast distribution option and select the reimage profile. Specify the other parameters as needed. For a detailed explanation of the parameters see Deploying an image to a target computer.
Probing targets before a multicast deployment
Before
deploying images in multicast, you can check if targets in your network
can receive multicast deployments by running the Probe
Clients for Multicast Deployment task (80). The task checks
that the client can accept incoming multicast packets. The probe uses
an incremental TTL (Time to Live) value up to a maximum default of
5. If you want to change the maximum TTL value that the Bare Metal
server uses to check if the target is able to receive multicast packets,
edit the computer settings of the Bare Metal server and create a new
client setting OSD_MaximumTTL_MCastProbe.
To successfully deploy images in multicast, you must ensure that the needed ports are available on the Bare Metal Server and on the targets connected to them. For more information about the ports that are used for multicast distribution, see Listening ports used for OS Deployment tasks, media creation and reimaging deployments in multicast..
Adding a custom setting to connect a target to a specific relay
From the Subscribed computers view, highlight the target computer and
click Edit Settings. Click Add to
define the new setting with name BMServerOverride. Set the value to
the hostname or IP address of the relay with the Bare Metal Server component to
which the target must connect for the reimaging deployment, then click
OK to save.