Direct zero-touch configuration
Before you begin
About this task
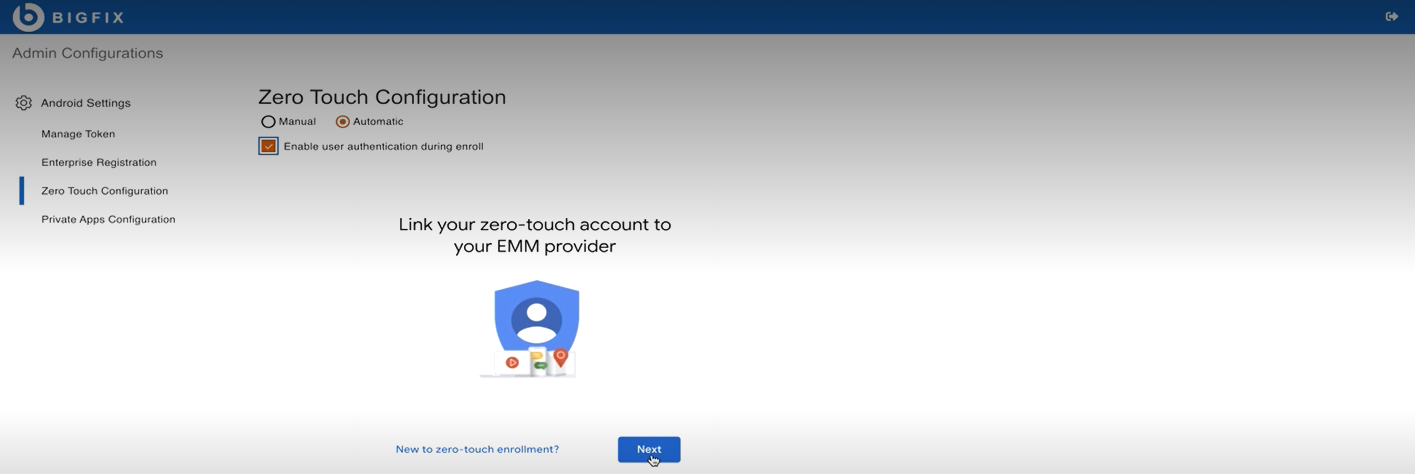
- Log in to Admin Configuration and select Zero Touch Configuration.
- From the Zero Touch Configuration window, do the following:

- Select Manual or Automatic.
- To authenticate the user during enrollment, select Enable user authentication during enroll.
- Click Next.
- On the next screen, select your zero-touch account. The selected zero-touch account is listed under Choose accounts to link (within Google iFrame). It displays the account ID and the number of associated devices.
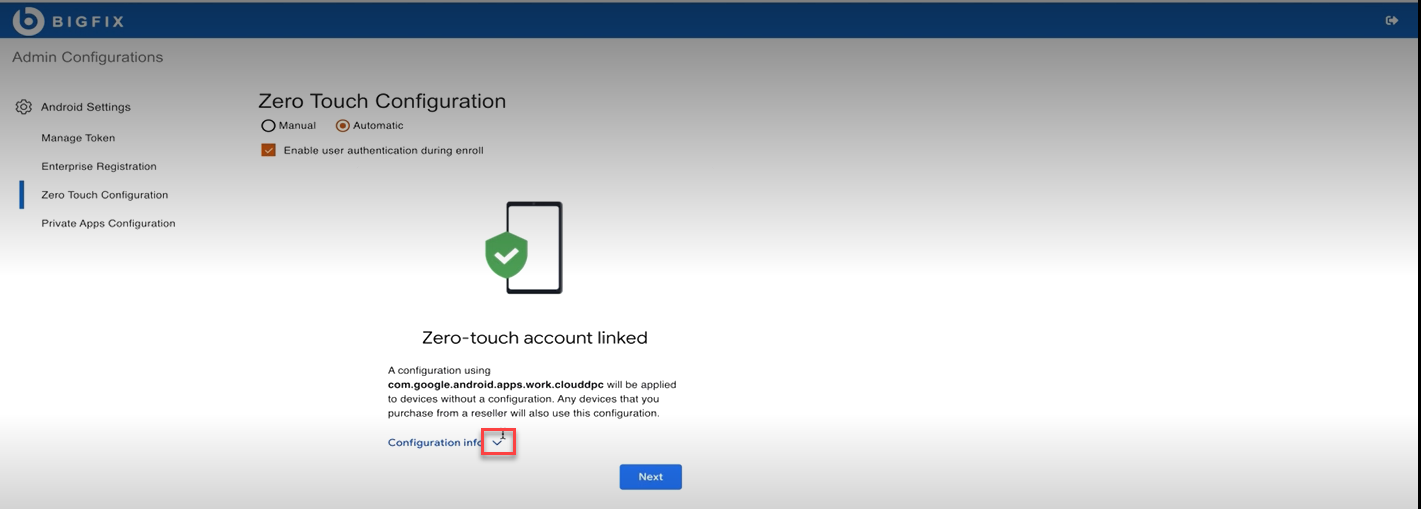
- To link your zero-touch account to BigFix Mobile, select the account
and click Link. After successfully linking the account,
the following screen is displayed. Click Configuration
Info to verify the configuration details.

- Click Next.
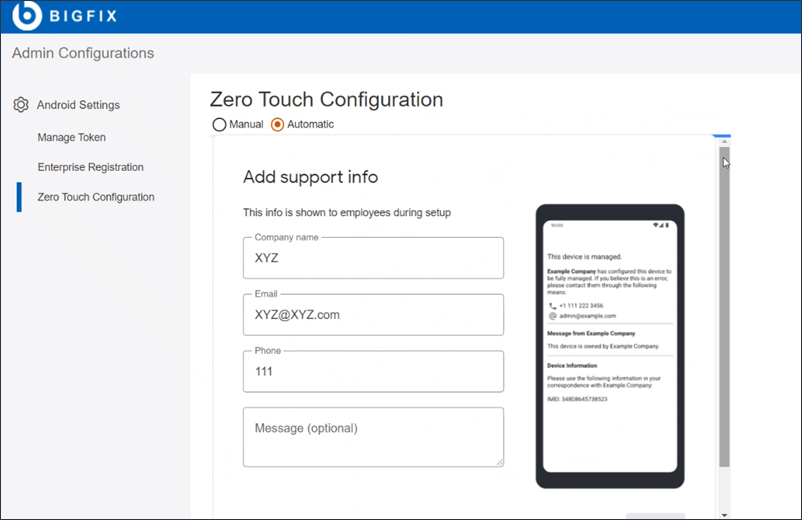
- Enter the support information; company name, Email, Phone, and custom message.
The information provided here is displayed on the device on enrollment.

- Click Save.

Results
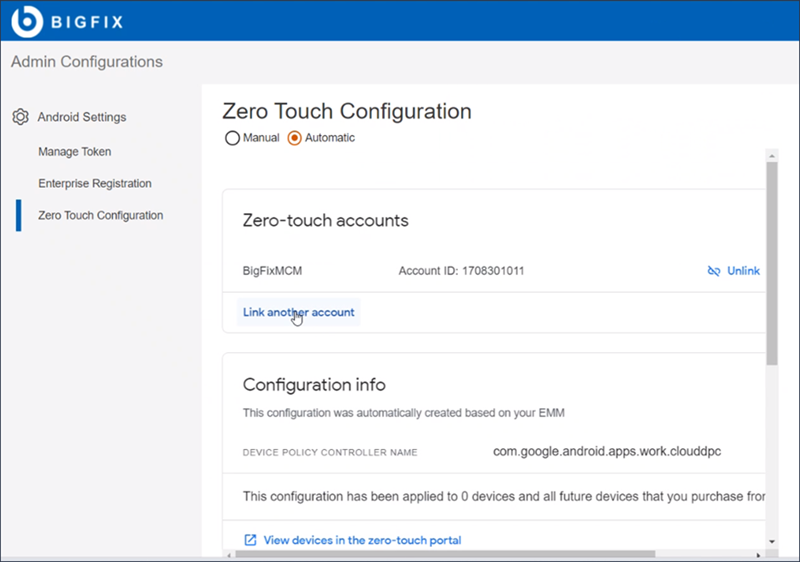
Note: Click Unlink to
unlink the devices. Once the account is unlinked, the zero-touch profile is removed.
Click Link another account to link more
accounts.
What to do next
- The user is guided through initial enrollment setup.
- The support information and the custom message are displayed on the device screen while progressing with the enrollment process.
- Google Chrome Terms and Conditions are displayed. Device user needs to accept them to open the Sign-in URL.
- Device user needs to authenticate the sign-in URL with valid credentials and click Enroll.
- Once authenticated successfully, the device user can proceed with the rest of the zero-touch enrollment process.
- After the enrollment process is complete, a work profile in the device is created. Overall, the enrollment experience is same as the normal zero-touch enrollment except that the user is authenticated via the sign-in URL.