BYOD Android devices - provisioning with the enrollment URL
This page explains provisioning BYOD Android devices with the enrollment URL.
About this task
Procedure
- On an Android device, open a web browser and enter the MDM server URL (for example www.mdm.bigfix.com\enroll).
-
Enter an email address and password that is associated with a valid AD set of credentials (If LDAP
authentication is configured for the MDM server).
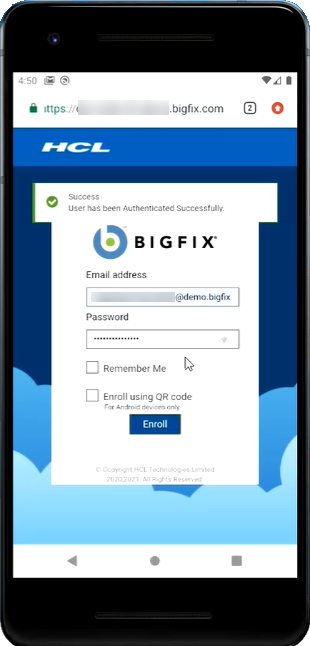 After authenticated successfully, user can see a success message. At this point, the user is redirected to the enrollment URL.
 - Click Enroll.
-
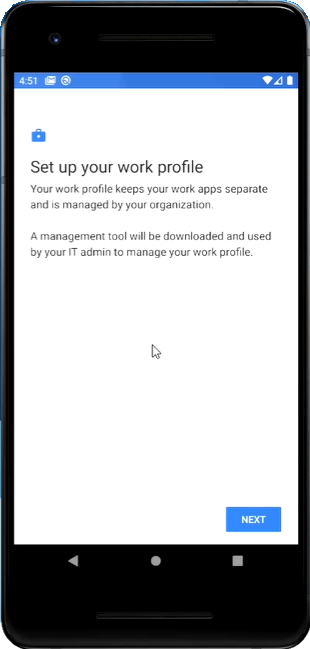
In the following screen, click NEXT
-
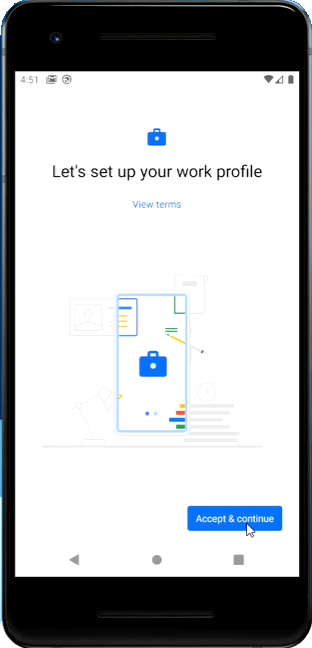
In the next screen, to start setting up your work profile, click
Accept & Continue. Based on the associated policy
group, work applications and data are gathered in the device.
-
Wait for few seconds until the NEXT button appears on the screen and then click
NEXT to continue. Wait for few minutes until the
profile gets registered and enrollment is completed.
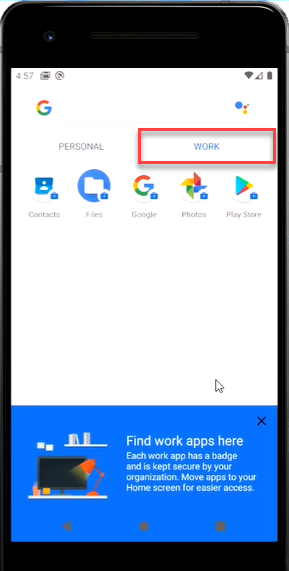
- After successful installation of MDM on the BYOD devices, navigate to , where you can see two profiles namely Personal and Work.
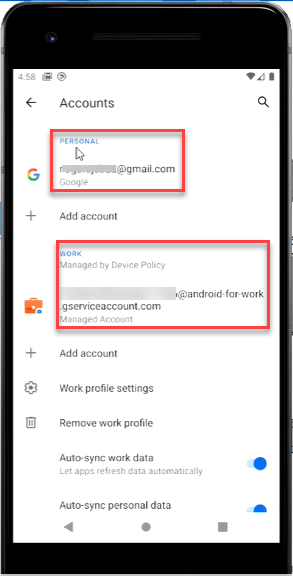
- Also, you can see two tabs, one for personal and one for work. Under
Work profile, you can see only the applications as per the associated
policy group.
- In the notification bar, if a policy group was configured to install Appstore apps, you can see “Installing apps from your organization”.
- In the Work profile, if you go to Google Play store, you can see only the apps that are allowed as per the policy, if a policy group was configured to install Appstore apps.
- After successful installation of MDM on the BYOD devices, navigate to , where you can see two profiles namely Personal and Work.