Dedicated Android devices - QR code enrollment
Read this page to learn provisioning company-owned Android devices with dedicated device mode using a QR code.
Before you begin
About this task
Procedure
-
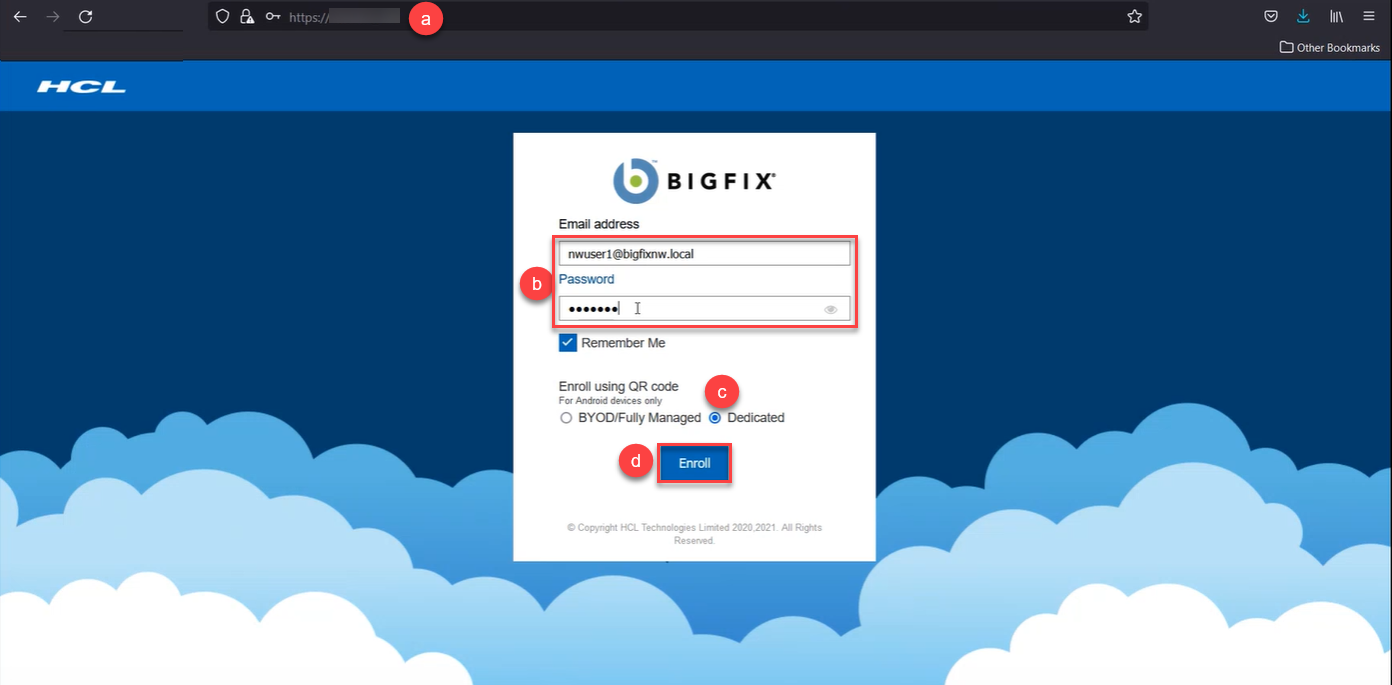
Login to the BigFix enrolment URL from another device (other than the Android
device that you want to enroll) to generate QR code.
Note: You can generate QR code from a Windows, Apple, or Android device.

- Open the enrollment page where you can see the option to select QR enrollment.
- Enter Email address and password associated with Active Directory.
- To enroll as a dedicated device, select Dedicated.
- Click Enroll.
After successful authentication, you are redirected to the page where QR code is displayed. This QR code is used for enrollment.Note: This QR code expires after 15 minutes. If the QR code expires, you cannot enroll your device with that QR code; therefore, you need to regenerate another one. -
Scan the QR code on the Android device that you want to enroll and complete the
enrollment.
- To open the QR scanner, tap six times on the initial screen of the company-owned, factory-reset Android device.
- Scan the QR code. When prompted, Select Wi-Fi, connect to Internet, and tap NEXT.
- On the Set up your device screen, tap ACCEPT AND CONTINUE.
- Wait for few seconds until the set up completes. Based on the deployed policy group associated with the dedicated device enrollment, work applications and data are gathered in the device.
Results
What to do next
In WebUI, the device document of the enrolled device shows the Enrollment Type as DEDICATED_DEVICE.