Issue information pane
The Issue information pane shows all content available for the issue.
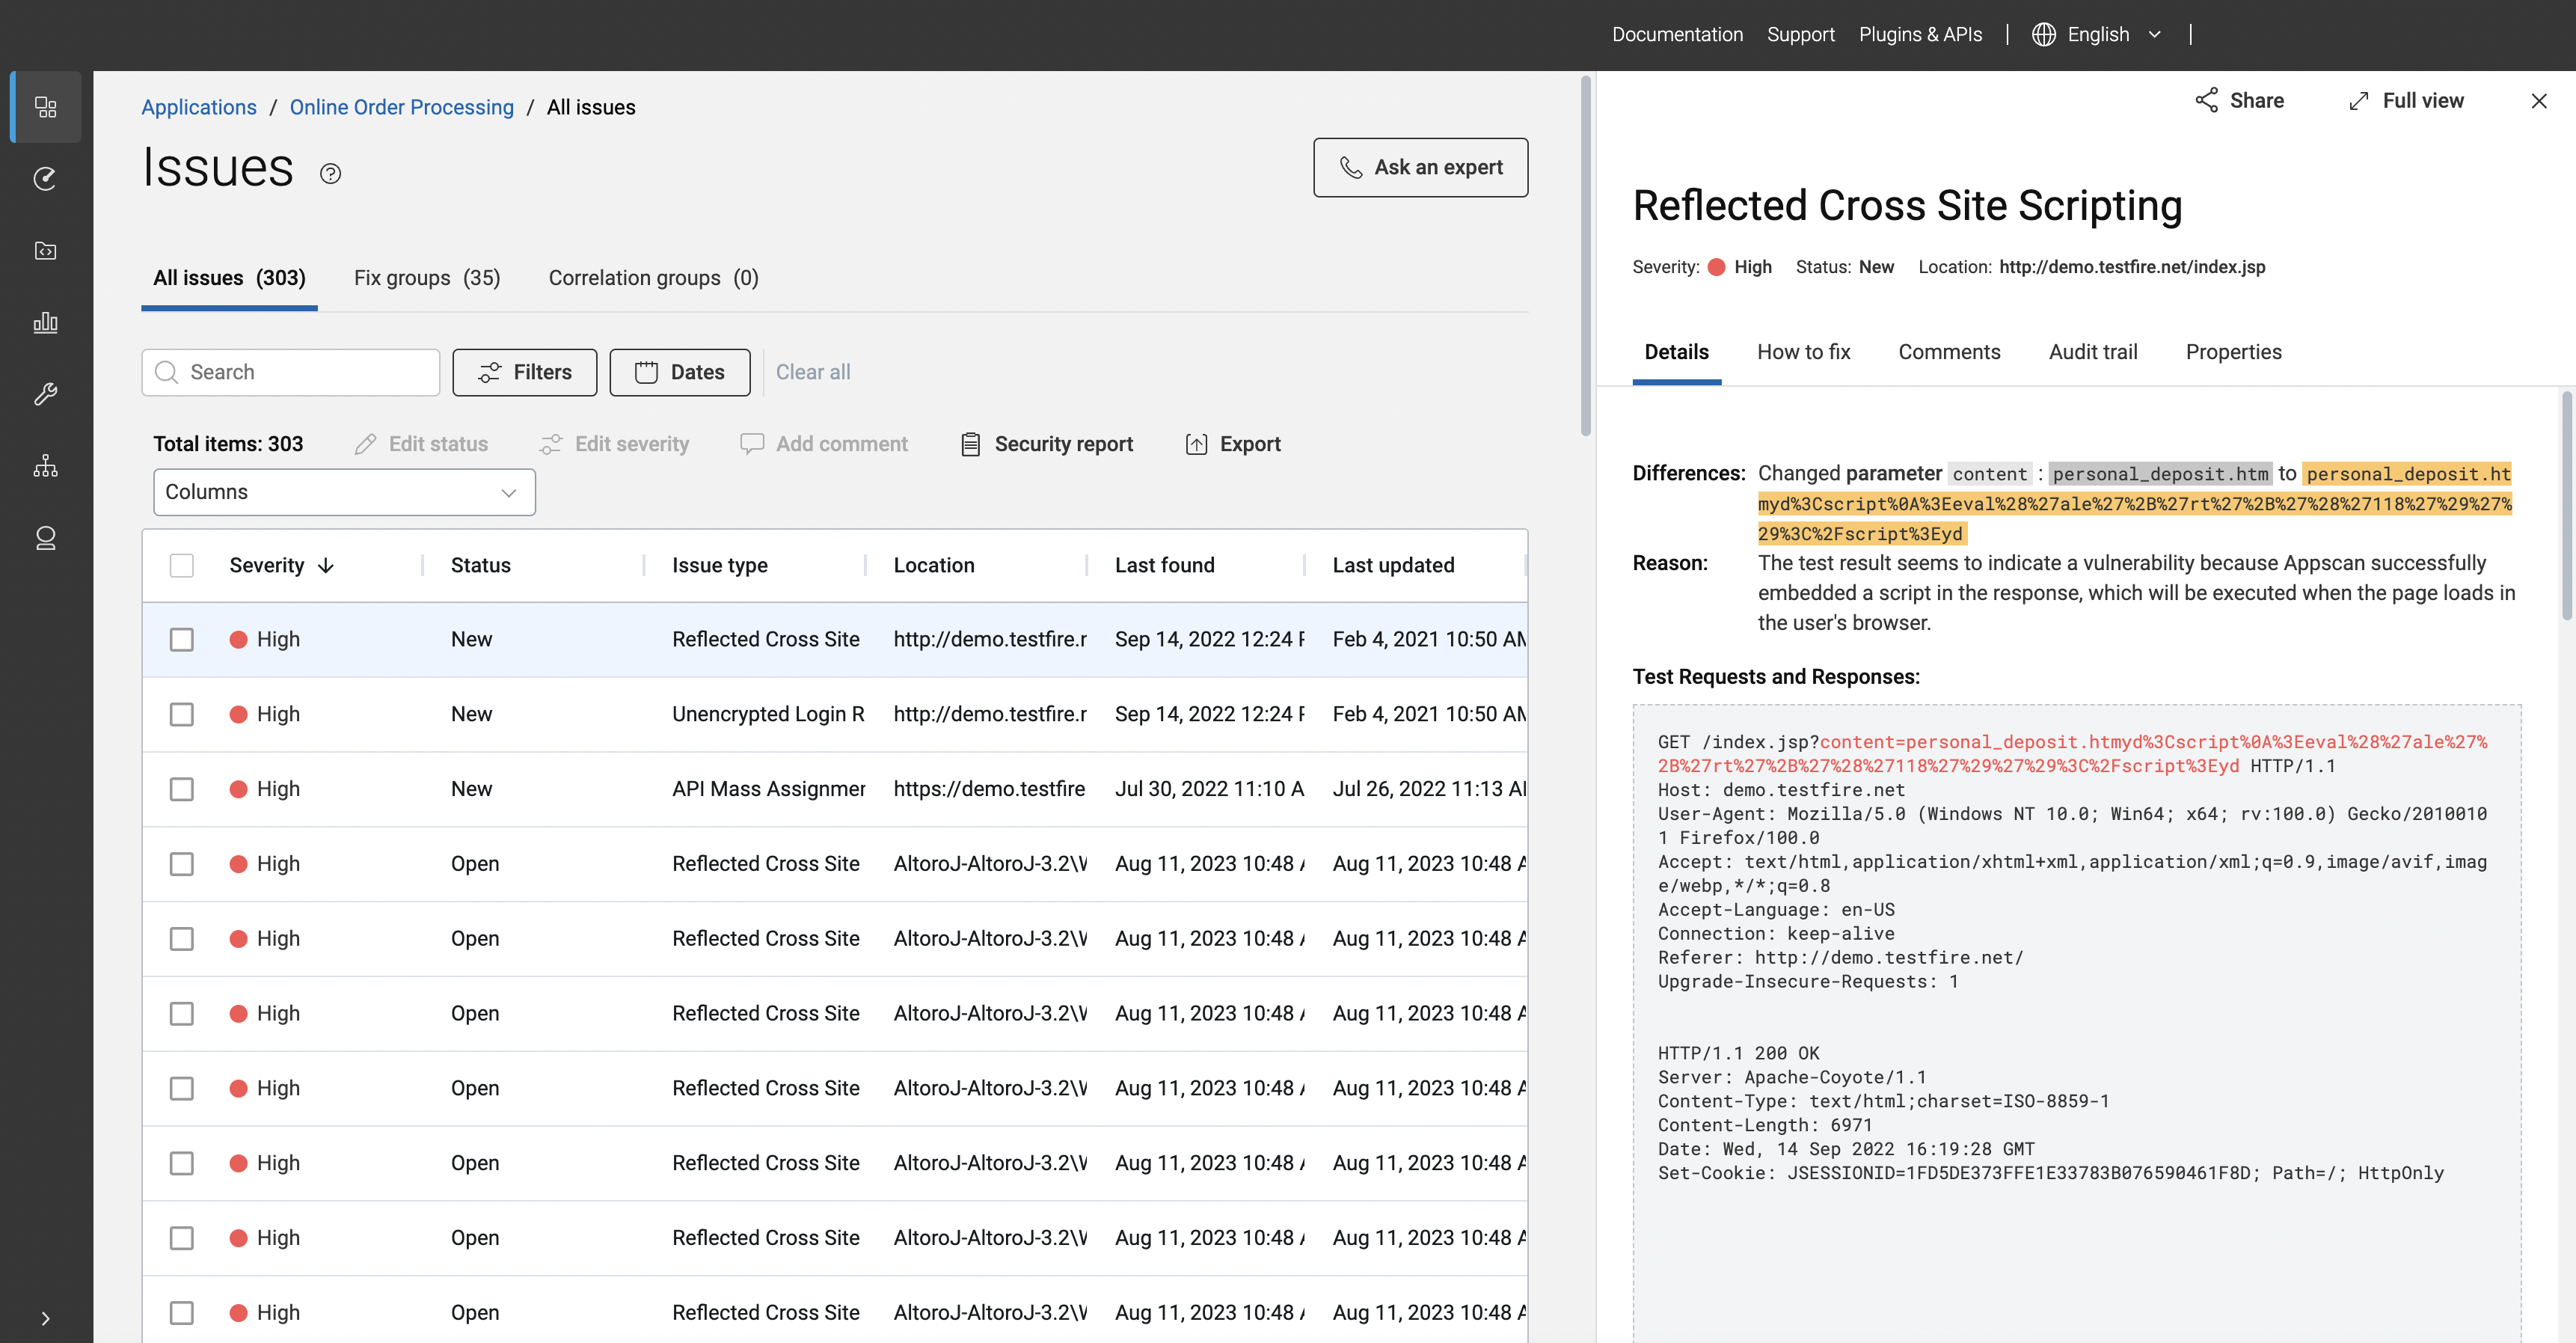
- On the Issues page, click a specific issue.The Issue information pane opens to the right of the screen.Tip:You can toggle between issues and issue information by selecting different issues on the main page with the information pane open. The Issue information pane refreshes when you select different issues.
- Details
- Library (SCA only)
- Source code (SAST only)
- How to fix
- Comments
- Audit trail
- Properties
Header
Visible from every tab, the header notes the vulnerability type, issue severity, status, and location. It also includes the following actions:
- Click Share to share an issue either by link or by Issue ID.
- Click Full view to open full issue details in a new browser tab.
- Based on the status of an issue, buttons are displayed to update the status of the selected issue. For example, Mark in progress, Close issue.
- Click the ellipsis icon to:
- Update the severity of the selected issue.
- Update the custom fields for the selected issue.
Details tab
The Details tab displays an summary of issues details in sections, including, where possible, the part of the code where the vulnerability is contained or shown. Details vary according to scanning technology.
When appropriate, issue details include a copy icon (![]() ) to copy the
information to the clipboard.
) to copy the
information to the clipboard.
| Scanner technology | Details | Description |
|---|---|---|
| DAST | Differences | The parameters that were changed from the original request that resulted in identification of an issue. The different call also is shown in red in the Test Requests and Responses section. |
| Reason | Why ASoC flagged this as an issue. | |
| Fix verification | Developers can test the fix by copying the script into their browser console while logged into the application and running it. Alternatively, they can download the script to their IDE, make necessary adjustments as per the included instructions, and execute it to validate the fix. | |
| Test Requests and Responses | Information about the tests, and their specific variants,
that were sent to your web application to discover where it has
weaknesses. Strings in red indicate the different request used
by the test (noted by Difference); strings highlighted in yellow
indicate input changes as part of the test. Note: For LLM issues, the LLM test
interaction section is displayed, showing the
conversation that led AppScan to flag the
vulnerability. |
|
| SCA | Main details | The relative path location of the issue in code and the library name. |
| CVE | The common vulnerablity and exposure (CVE) associated with
the library in the issue, and related content including CVE
name, description, publishing date, a link to a specific page at
cve.org for more information, and
EPSS (Exploit Prediction Scoring
System) score and percentile. Note: EPSS
is dynamic: values can change day-to-day as the model
ingests new data. EPSS score and percentile update upon a
scan/rescan. |
|
| Related | If the issue belongs to a fix group, a link to the associated fix group. | |
| SAST | Location | The location of the issue in code. Depending on issue type, location information may also include the API from which the issue originated, or the source (where data originates) and sink (where data ends) information for the issue. |
| Call trace | The context of the issue, or the flow of tainted data through a section of an application that contains an the vulnerability. The Call trace section includes a legend to help you understand the different areas of the code, including best fix point, alternate fix points, source, sink, and the taint flow. | |
| Autofix | If an autofix is available for the issue, it is displayed here. A diff is shown with the original code in red and the fixed code in green. Click Copy to copy the fixed code. | |
| Related | If the issue belongs to a fix group, a link to the associated fix group. |
Library tab (SCA only)
The Library tab contains summary details about the library associated with the issue, specifically the full library name and version found in the scan. For additional library information, search for an open source library to view library details. A library may have more than one license.
Source code tab (SAST only)
The Source code tab displays code associated with the issue for faster and more efficient issue triage.
- Click Add directory to associate a local root source code directory with the issue.
- Hover over highlighted vulnerabilities in source code for remediation suggestions.
- Source code viewed through the Issues detail pane remains private. It is not uploaded to ASoC.
- Ensure that the last commit available during the scan is also available on the GitHub server.
- Click Open file on GitHub to open the file in the GitHub web interface in a new browser tab.
- Remediate the code in GitHub.
In either instance, the connection to source code is not persistent; reconnect to source code each browser session as needed during for triage and remediation.
How to fix tab
The How to fix tab offers detailed information on cause, risk, exploit example, fix recommendation, CWE, related articles and external references. Click the > next to each section to expand the information
Where possible, a large selection of code-specific information is available by clicking the relevant code name (.Net, Angular, Apex and so on) directly underneath the issue name, and in the drop-down at the right of the pane.
Comments tab
Use this tab to add your own comments visible to you and other users, and included in reports.
Audit trail tab
The Audit trail tab notes change details for the issue. A row for each change notes change date and time, the entity that made the change, and the details of how the issue changed. For example, a change in issue type or severity will be noted in Audit trail tab entries.
Properties tab
The Properties tab lists expanded issue details, including how and when the issue was found, type, status, severity, scanner technology, location, including issue ID, and custom properties.
- Click the issue ID to open full issue details in the current browser tab.
- Click the Repository URL to go to the repository location of the issue in a new browser tab.
- Click the copy icon (
 ) to copy a specific property to the
system clipboard for pasting to other applications.
) to copy a specific property to the
system clipboard for pasting to other applications. - Click Copy properties to copy all listed properties to the system clipboard for pasting to other applications, such as a Jira item.