Configuring a Private Site Server proxy for the Presence
If your private network requires the Private Site Server to use a proxy to connect with the web application or back-end server (internal proxy), or with the Internet (outgoing proxy), configure it as follows.
About this task
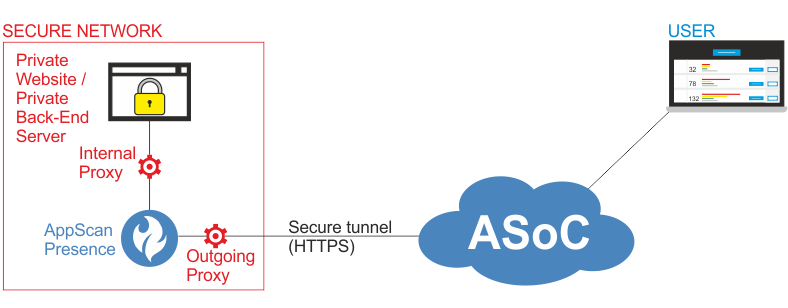
For details of how private site scanning works "under the hood," refer to Understanding Private Site Scanning
Procedure
-
In the root folder of the presence, locate
appsettings.jsonand open it with a text editor. -
Add the relevant settings by removing the
//at the start of each relevant line, and save the file."Host"can be a name or an IP address.For example, to configure internal proxy IP 192.168.1.100, and port 3128, edit:
to//"InternalProxyEndpoint": { // "Host": "localhost", // "Port": 8899 //},"InternalProxyEndpoint": { "Host": "192.168.1.100", "Port": 3128 },Note:Configuring both an internal proxy and a PAC file is not supported. - If the Presence is running, terminate it (Ctrl + C) for the changes to take effect.
- Start the Presence or, if the Presence is running as a service, stop and start the service.