Screen Trace Control (Web-only)
Users can use the Screen Trace Control option to control the printing of screen contents in the trace/log files, which occurs in certain incidents. For instance, during a macro failure, the application automatically logs the screen contents by dumping them into the message logs, and when the trace settings are enabled, the screen contents are also automatically dumped into the trace file.
- Create a ZIETrans project.
- Navigate to Project Settings ( application.hap file)-> Rendering -> Screen Trace Control.
- Select the Allow Screen Trace Control checkbox to avoid screen prints into logs.
- Now, either select Apply to all screens checkbox or the required list of screens
from the table.
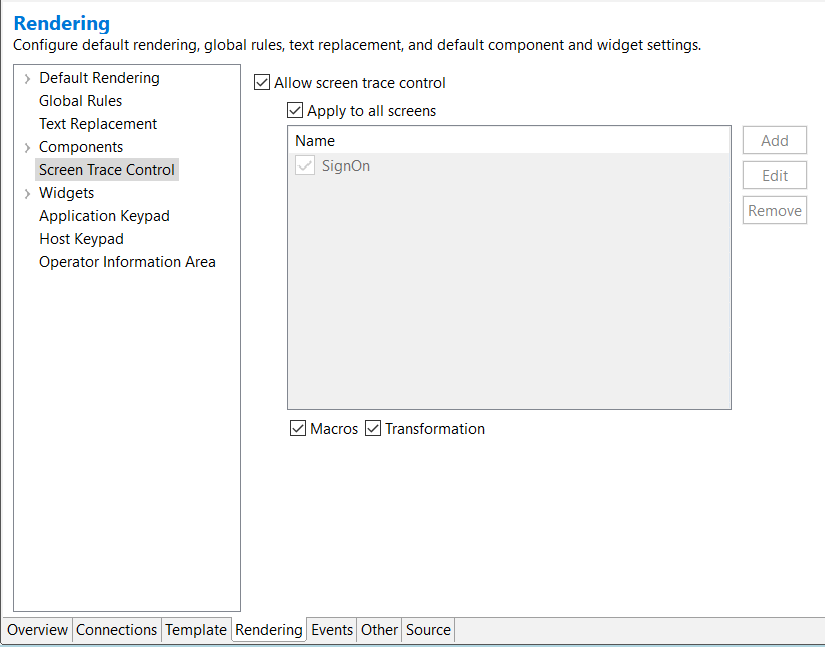 Note: If the user fails to select either Apply to all screens checkbox or the required screens from the table, an error message appears, and the user has to select either Apply to all screens or the required screens from the table.
 - Select the Apply to all screens checkbox to include all screens for exclusion
from being dumped in the traces.Note: If the user selects Apply to all screens checkbox, the screens in the table and the Add button get disabled.
- To register the required screens into the table, clear the Apply to all screens
checkbox and click the Add Button.
- About Screen Trace control: Enter the name you want to use for this screen trace control. This is the name that will appear in the list of screens in the screen trace control table.
-
About Screen Recognition Criteria: Choose the host screen upon which this screen trace control will be based. The choice will default to the location (host terminal or screen capture) from which you started.
Select the screen you want to work with for this screen trace control. The recognition criteria here is similar to the screen customization recognition criteria explained in Create a Screen Customization wizard.
- About Recognition Criteria for Screen: User can also specify recognition criteria for the screens. For instructions on how to define screen recognition criteria, see Screen Recognition Criteria or Begin Screen.
Note: An error message will appear if no screen capture is available in the project. - Next, the host terminal opens, and a wizard appears to name the screen.
- The user is prompted to choose whether to use the live terminal or screen capture. If applicable, users can select a specific screen capture. Following that, the user can specify the screen recognition criteria they would like to match for recognizing the screen.
- Repeat the above three steps (6 to 8) for dumping additional screens into the table.
- Next, the user must either select Macros or Transformation, or both
to control the printing of the screens into the trace file or message logs.Note: If the user fails to select either Macros or Transformation, an error message appears, and the user must select either option or both.