Managing Support
If you’re having trouble while working with BigFix AEX, you can create a support ticket.
This section will guide you through the process of creating new tickets and announcements and managing the existing tickets and announcements.
To manage support,
- On the left navigation bar, click Support.
- The screen displays the list of all pending support tickets under the Support section.
Figure 1. Manage Support 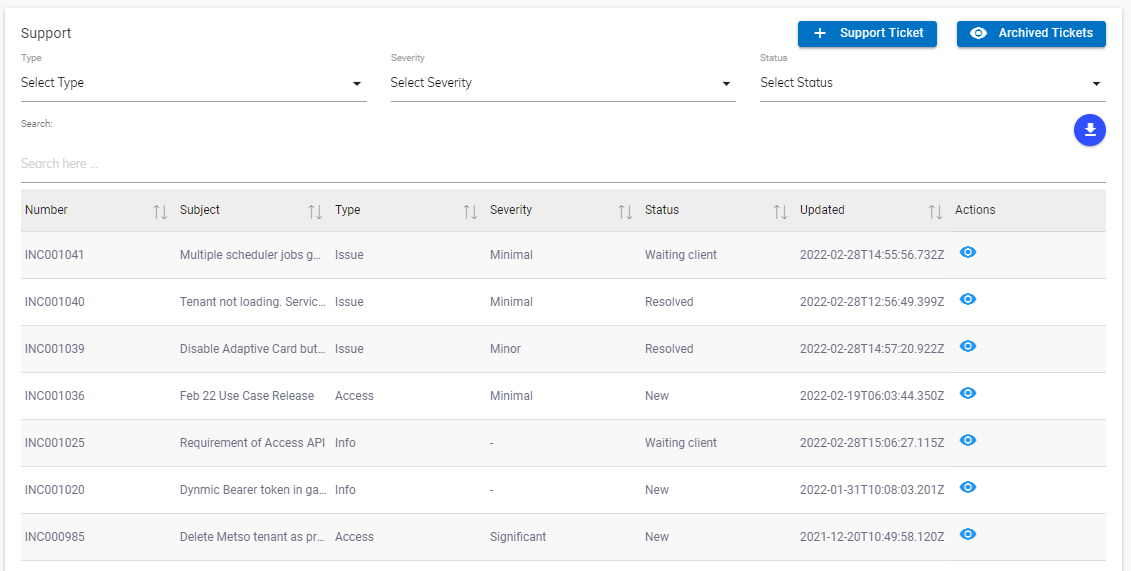
Listed below are the details of the columns of Support section displayed in the figure – Manage Support.
- Number: A unique identifier of a ticket created for support in the BigFix AEX global admin console. It starts with the prefix INC.
- Subject: A brief detail about the ticket.
- Type: Information about the ticket.
- Severity: The severity of the issue on the scale of 1 to 4, 4 being the highest.
- Status: Status of the current action on the support ticket.
- Updated: No. of days since the last update.
- Action: Option to view or edit the tickets.
Listed below are the details of the columns of the Announcement section displayed in Figure – Manage Support.
- Subject: Name of the notification.
- Description: A brief detail about the notification.
- Announced On: Date of broadcasting.
- Action: View or edit the existing announcements.
Using this screen, a user can create new tickets and announcements and edit or view the existing tickets or announcements.
Create Support Ticket
To create a support ticket,
- Click
 button as shown in figure – Manage Support. The Support screen opens.
Figure 2. Create Support Tickets 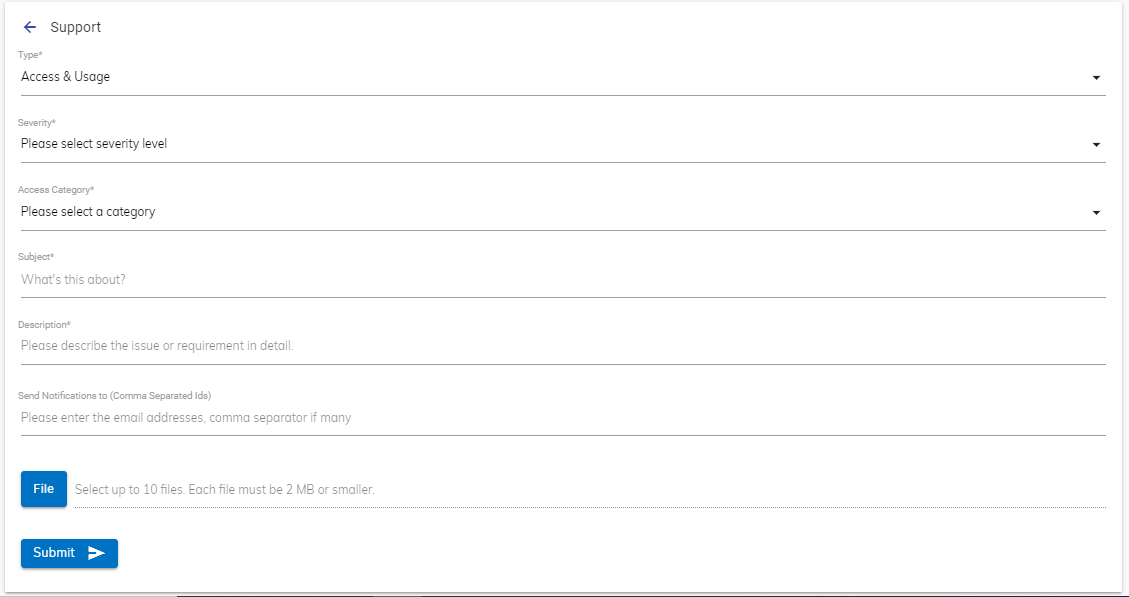
- Fill in the following details to create a support ticket.
Table 1. Support Ticket Details Field Description Support Type Select the support category from the following options:
- Issue
- Billing and Usage
- Informational
- Access and Usage
- Sales
Impact Type Select the severity of the impact on the user’s performance from the following options:
- Minimal
- Minor
- Significant
- Critical
Note:This field is not applicable where the Support Type field selected is Informational.Subject Enter the purpose of the ticket Description Write brief details about the ticket Type Select the status of the ticket from the following options:
- New
- In-Progress
- Waiting with Client
- Resolved
- Closed
Assigned To Enter the email ID of the super user assigned for the ticket - Click Submit to create a ticket.
The new ticket is listed in the list of support tickets under the Support section as shown in figure – Manage Support. A user can search for an existing ticket from the Search bar given above the list of existing tickets.
Editing Ticket
Using this section, a user can view and edit the details of the existing ticket.
To edit a ticket,
- Click
 under the Action column next to the ticket
that you want to modify as shown in the figure– Manage
Support.
under the Action column next to the ticket
that you want to modify as shown in the figure– Manage
Support. - The screen shows the details of the current ticket, and any comment on it.
Figure 3. Edit Support Tickets 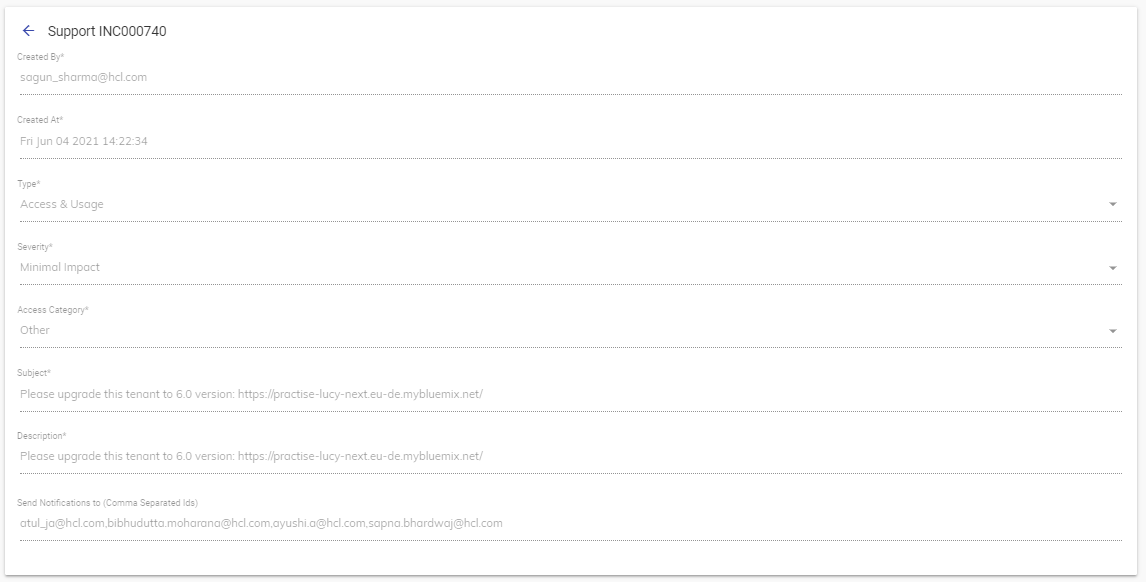
- Update the details and click Submit to commit the changes.
Announcements
To view announcements,
- Click Announcements link from the left panel. This will open the Announcements &
Changelog Page that contains the list of announcements.
Figure 4. Announcements & Changelog List Page 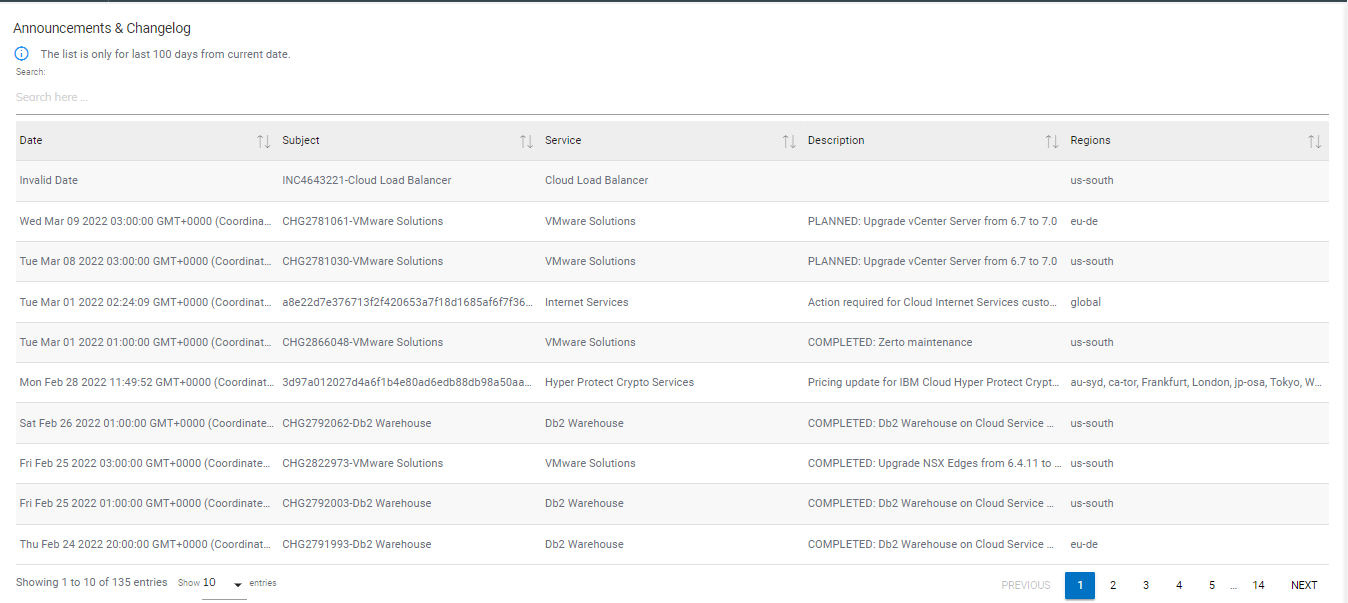
- The following details will be displayed on the announcement list page.
| Field | Description |
| Date | Date for which announcement is created. |
| Subject | Type/Purpose of the announcement |
| Service | Impacted Service for which announcement is created. |
| Description | Details about the announcement. |
| Region | Region of impact. |
User can search for an existing announcement from the Search bar given above the list of announcements.