Installing MinIO
This section provides a step-by-step guide to installing MinIO.
MinIO is an object storage solution that provides an Amazon Web Services S3-compatible API and supports all core S3 features. MinIO is built to deploy anywhere - public or private cloud, bare metal infrastructure, orchestrated environments, and edge infrastructure.
To install the MinIO, follow the steps below:
- Add the MinIO Operator repositories to helm
configuration.
helm repo add minio-operator https://operator.min.io helm repo update - Validate the repositories contents using helm
search.
As a result, the output will be as shown below.helm search repo minio-operatorNAME CHART VERSION APP VERSION DESCRIPTION minio-operator/minio-operator 4.3.7 v4.3.7 A Helm chart for MinIO Operator minio-operator/operator 5.0.10 v5.0.10 A Helm chart for MinIO Operator minio-operator/tenant 5.0.10 v5.0.10 A Helm chart for MinIO Operator - Download the MinIO Operator Helm chart from github to your
local.
curl -O https://raw.githubusercontent.com/minio/operator/master/helm-releases/operator-5.0.15.tgz - After downloading the tar file, extract the
chart.
tar -xvf operator-5.0.15.tgz - Create a minio operator
namespace.
kubectl create namespace minio-operator -- - Update the values.yaml file within the extracted chart directory, and comment out the
seccompProfile values.
containerSecurityContext: runAsUser: 1000 runAsGroup: 1000 runAsNonRoot: true allowPrivilegeEscalation: false capabilities: drop: - ALL # seccompProfile: # type: RuntimeDefault - Similarly, update the Ingress details of config and host
values.
### # Configures `Ingress <https://kubernetes.io/docs/concepts/services-networking/ingress/>`__ for the Operator Console. # # Set the keys to conform to the Ingress controller and configuration of your choice. # Set console.ingress.number to any port. For example: # You may choose port number 9443 for HTTPS or 9090 for HTTP, as desired. ingress: enabled: true #false ingressClassName: "" labels: { } annotations: { } tls: [ ] host: console.minio-operator.apps.ocp415.manishkr.nonprod.hclpnp.com #console.local path: / pathType: Prefix number: 9090 ### - Now, navigate to the template folder in the extracted file, and open minio.min.io_tenants.yaml for editing.
- Remove all the seccompProfile sections, and Install the chart using below
command.
helm install --namespace minio-operator <chart-name> <chart-path> - After installation, you can verify the
operator.
As a result, the output will be as shown below.kubectl get all -n minio-operatorNAME READY STATUS RESTARTS AGE pod/console-68d955874d-vxlzm 1/1 Running 0 25h pod/minio-operator-699f797b8b-th5bk 1/1 Running 0 25h pod/minio-operator-699f797b8b-nkrn9 1/1 Running 0 25h NAME TYPE CLUSTER-IP EXTERNAL-IP PORT(S) AGE service/console ClusterIP 10.43.195.224 <none> 9090/TCP,9443/TCP 25h service/operator ClusterIP 10.43.44.204 <none> 4221/TCP 25h service/sts ClusterIP 10.43.70.4 <none> 4223/TCP 25h NAME READY UP-TO-DATE AVAILABLE AGE deployment.apps/console 1/1 1 1 25h deployment.apps/minio-operator 2/2 2 2 25h NAME DESIRED CURRENT READY AGE replicaset.apps/console-68d955874d 1 1 1 25h replicaset.apps/minio-operator-699f797b8b 2 2 2 25h - Now, retrieve the console access
token.
As a result, the output will be shown as below:kubectl get secret/console-sa-secret -n minio-operator -o json | jq -r ".data.token" | base64 -deyJhbGciOiJSUzI1NiIsImtpZCI6IlRtV2x3Z1RILVREaThhQm9iemFfLW95NHFHT0ZZOHFBRjlZalBRcWZiSDgifQ.eyJpc3MiOiJrdWJlcm5ldGVzL3NlcnZpY2VhY2NvdW50Iiwia3ViZXJuZXRlcy5pby9zZXJ2aWNlYWNjb3VudC9uYW1lc3BhY2UiOiJtaW5pby1vcGVyYXRvciIsImt1YmVybmV0ZXMuaW8vc2VydmljZWFjY291bnQvc2VjcmV0Lm5hbWUiOiJjb25zb2xlLXNhLXNlY3JldCIsImt1YmVybmV0ZXMuaW8vc2VydmljZWFjY291bnQvc2VydmljZS1hY2NvdW50Lm5hbWUiOiJjb25zb2xlLXNhIiwia3ViZXJuZXRlcy5pby9zZXJ2aWNlYWNjb3VudC9zZXJ2aWNlLWFjY291bnQudWlkIjoiY2M1ZjEwYzktYzU1ZC00MjNiLTgxM2MtNmU5ZDY2ZGI5NDYyIiwic3ViIjoic3lzdGVtOnNlcnZpY2VhY2NvdW50Om1pbmlvLW9wZXJhdG9yOmNvbnNvbGUtc2EifQ.F-Pt5nU9xaugjRksWAOTShBW_eNTf8UwXvLfGxEK6l3_41NYsLgvTg5m0hYLUiYr6v2HwkEu0XzqTJbPoeSrFds8BOjeiCoP2Lmw4tRPo9tSXhAq-_elWt83YpJl-zjUpna5nVSWJWXKgj1Iga-9gw-Q63UygEcyTJ9_AwCNU9T0HdPzqccS9XrEUdsXFQxR9RwZY4TGC8K7cD9sc_OmfEiuyilRgyC_gFRvtCQfFv1DP0GKyjMGo2ffu-2Tq2U7zK5epWdqmNSvbIa0ZRoPlPedZ6nYY935lNgTIIW1oykRYrgwZZiv4CzfTH2gPswjtPc5ICtDDRUjYEhdTq3gtw - If you configured the svc/console service for access through ingress, a cluster load
balancer, you can access the console using the configured hostname and port. Once you
access the console, use the Console JWT to log
in.
oc expose svc/console -n minio-operator
Creating and configuring Tenant
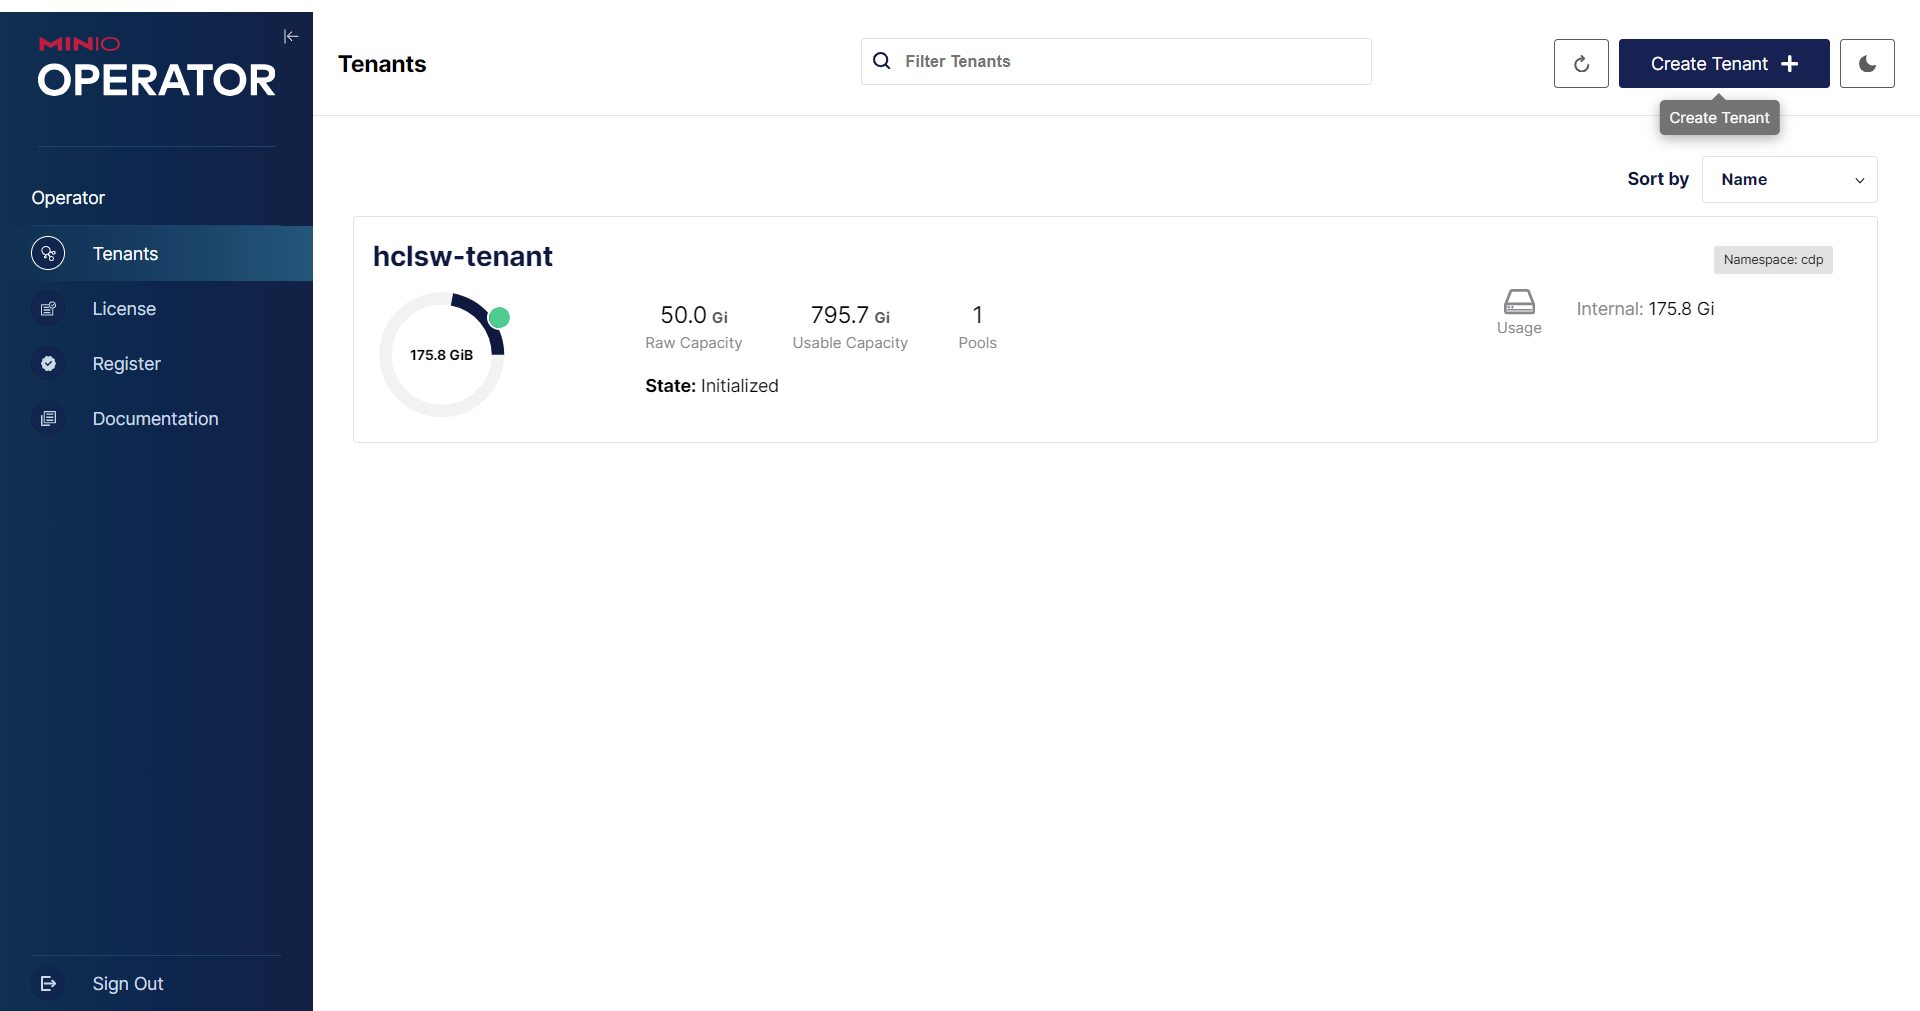
- In the MinIO portal, select Tenant, and click Create Tenant.
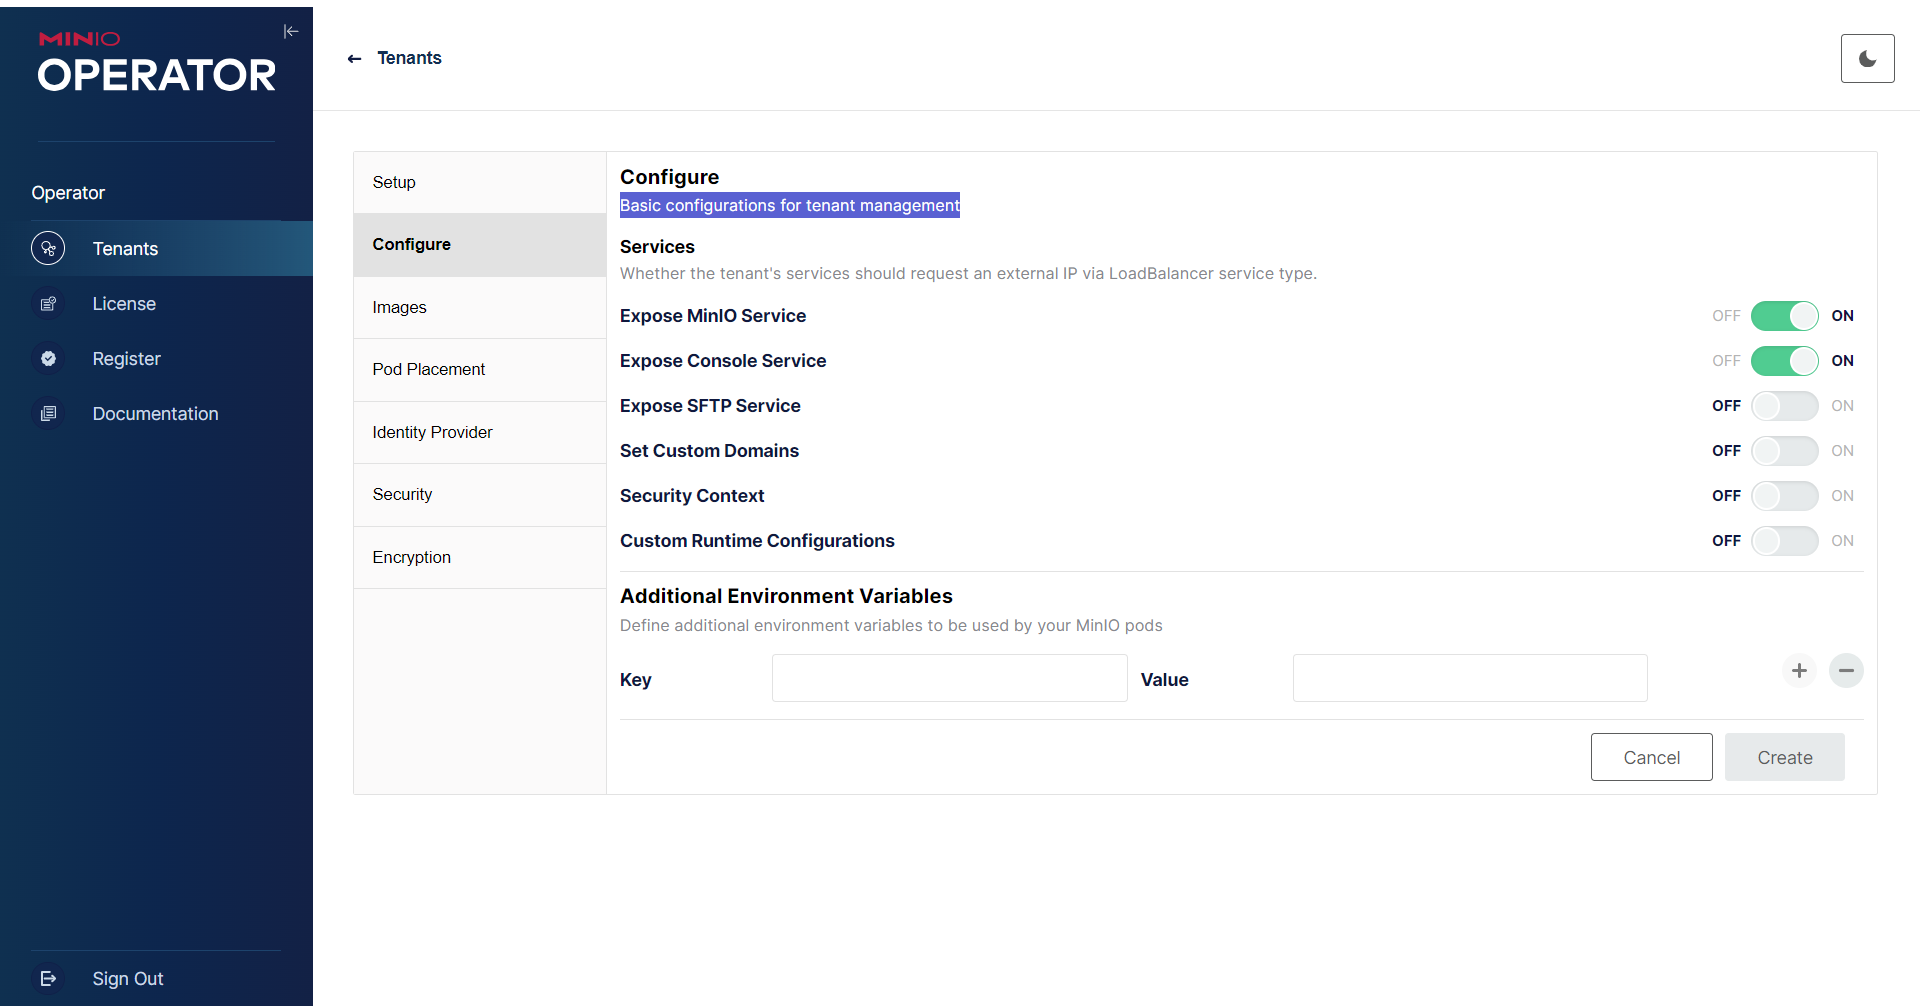
- In the Tenants page, click Setup, and enter tenant name and other
details.

- Now, click Configure, and set the basic configurations.
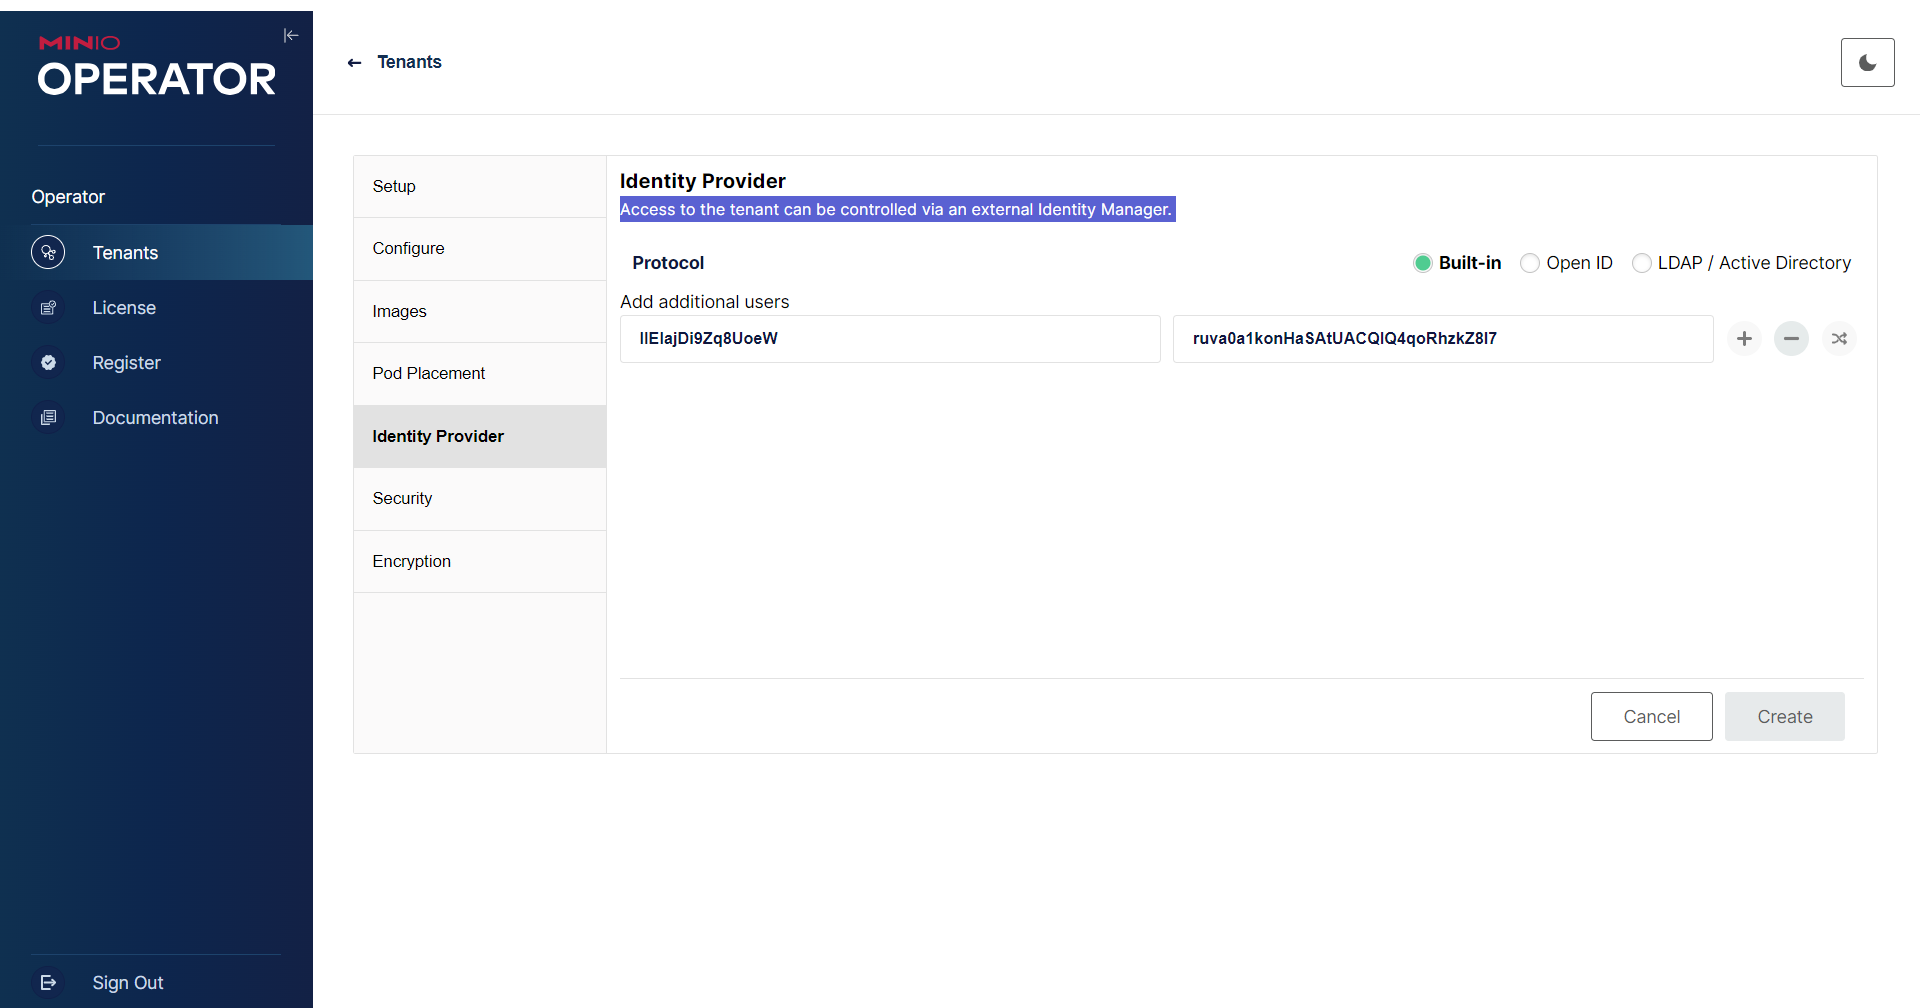
- Similarly, configure Identity Provider, Security and Encryption.
- Store the MinIO credentials.json for Tenant Management, and verify the Tenant resources
created under specified namespace -
cdp.
[root@cdpsvc01 ~]# oc get svc -n cdp NAME TYPE CLUSTER-IP EXTERNAL-IP PORT(S) AGE hclsw-tenant-console LoadBalancer 172.30.90.139 <pending> 9090:32037/TCP 17d hclsw-tenant-hl ClusterIP None <none> 9000/TCP 17d minio LoadBalancer 172.30.43.239 <pending> 80:32045/TCP 17d [root@cdpsvc01 ~]# oc get pods -n cdp | grep tenant hclsw-tenant-pool-0-0 2/2 Running 0 17d hclsw-tenant-pool-0-1 2/2 Running 0 6d2h [root@cdpsvc01 ~]# oc get sts -n cdp | grep tenant hclsw-tenant-pool-0 2/2 17d [root@cdpsvc01 ~]# - Expose MinIO service for bucket
creation.
[root@cdpsvc01 ~]# oc get routes -n cdp | grep minio minio minio-cdp.apps.ocp415.manishkr.nonprod.hclpnp.com minio http-minio None - Verify MinIO Client
commands.
sh-5.1$ mc alias set test http://minio-cdp.apps.ocp415.manishkr.nonprod.hclpnp.com  rAtUbaYVYdtkrRBo etFo134HCqcPs5yJzWn0WjA6E61vsEHG --api s3v4 --path auto
Added `test` successfully.
sh-5.1$ mc ls test
[2024-06-08 06:49:17 UTC]     0B hclsw-2/
[2024-06-08 07:05:52 UTC]     0B hclsw-3/
[2024-06-08 07:08:51 UTC]     0B hclsw-4/
sh-5.1$ mc mb test/test-bkt
Bucket created successfully `test/test-bkt`.
sh-5.1$ mc ls test

[2024-06-08 06:49:17 UTC]     0B hclsw-2/
[2024-06-08 07:05:52 UTC]     0B hclsw-3/
[2024-06-08 07:08:51 UTC]     0B hclsw-4/
[2024-06-25 09:55:42 UTC]     0B test-bkt/
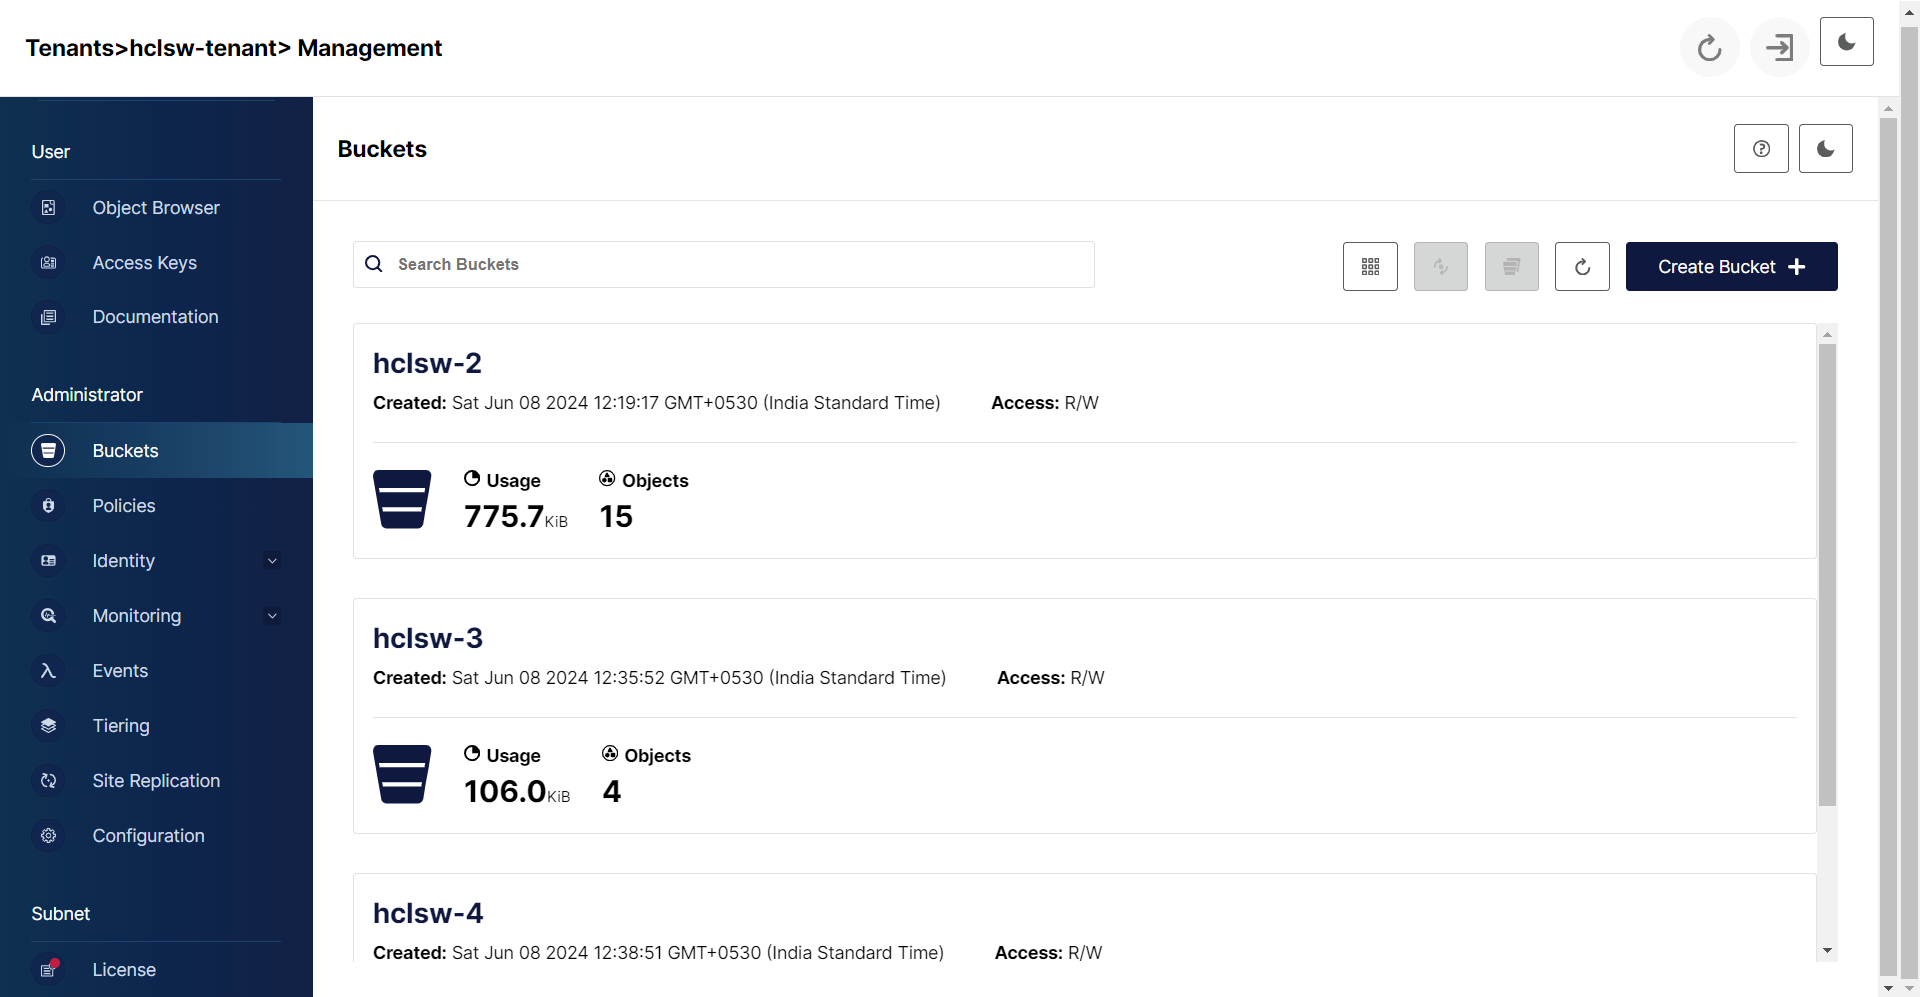
Creating Bucket in Management Console
- Open the Management console using console URL.
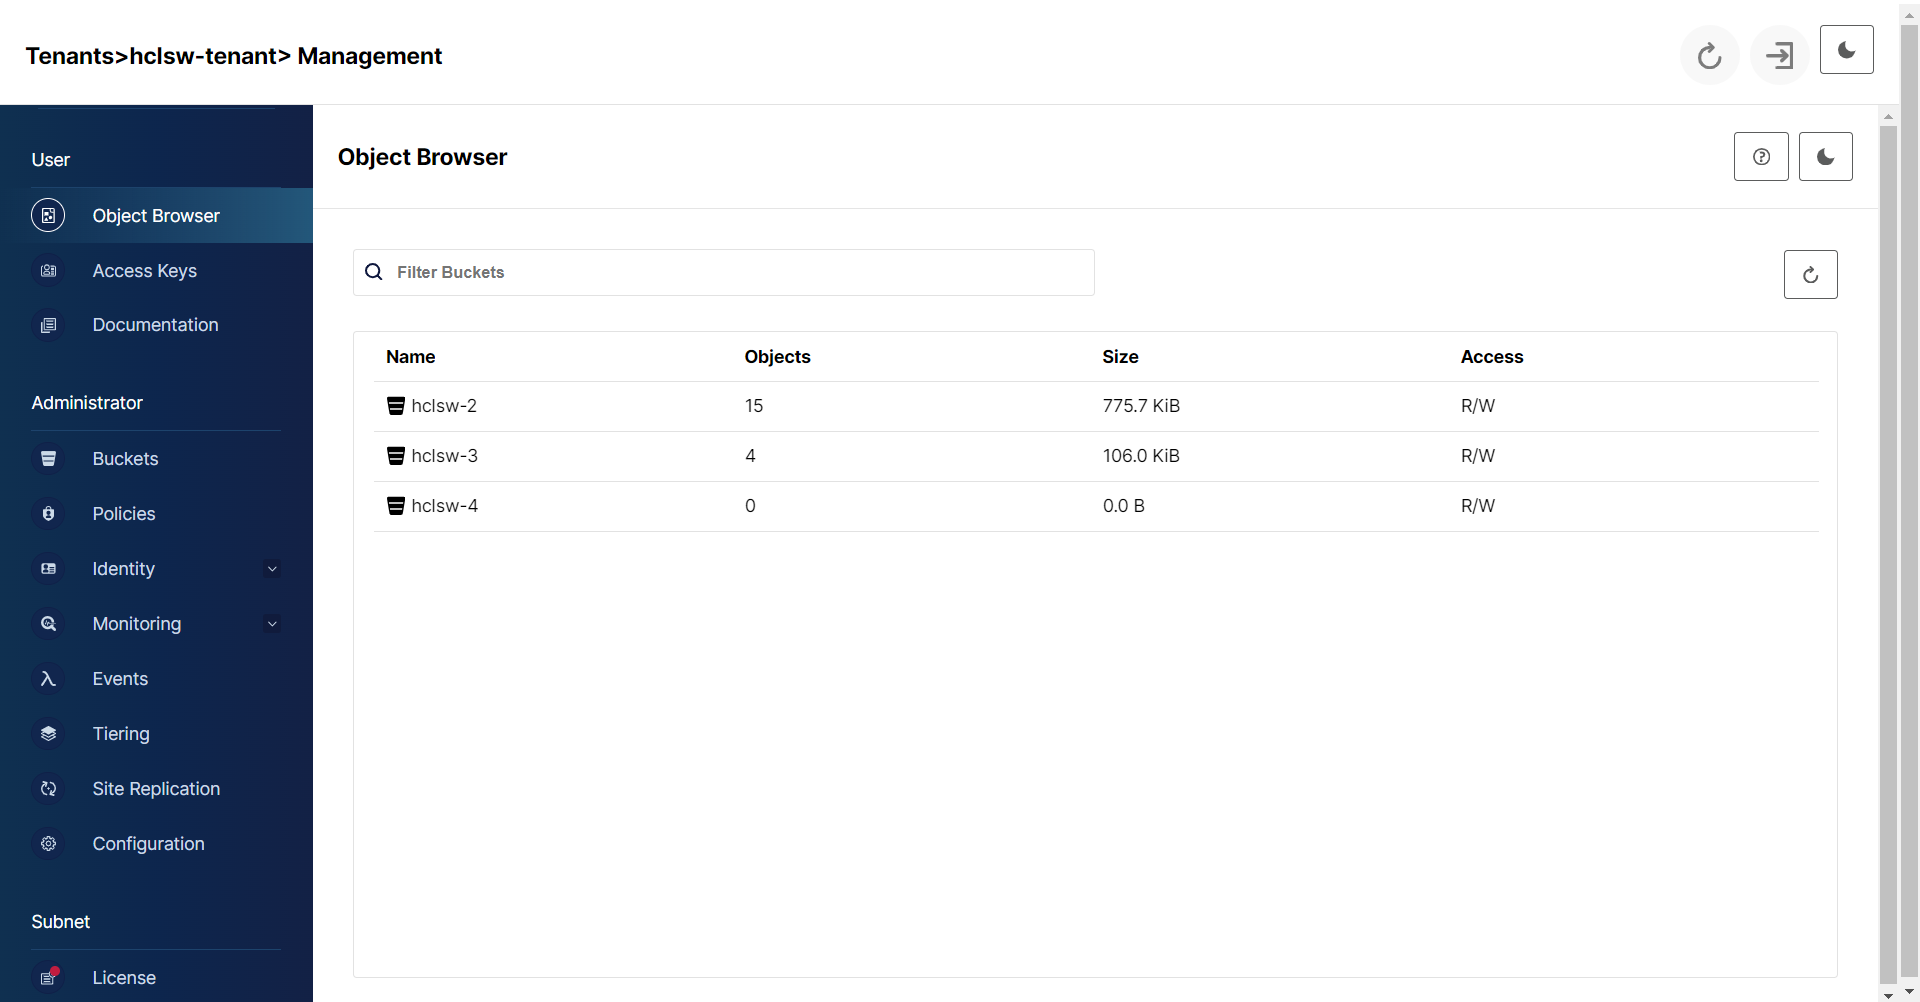
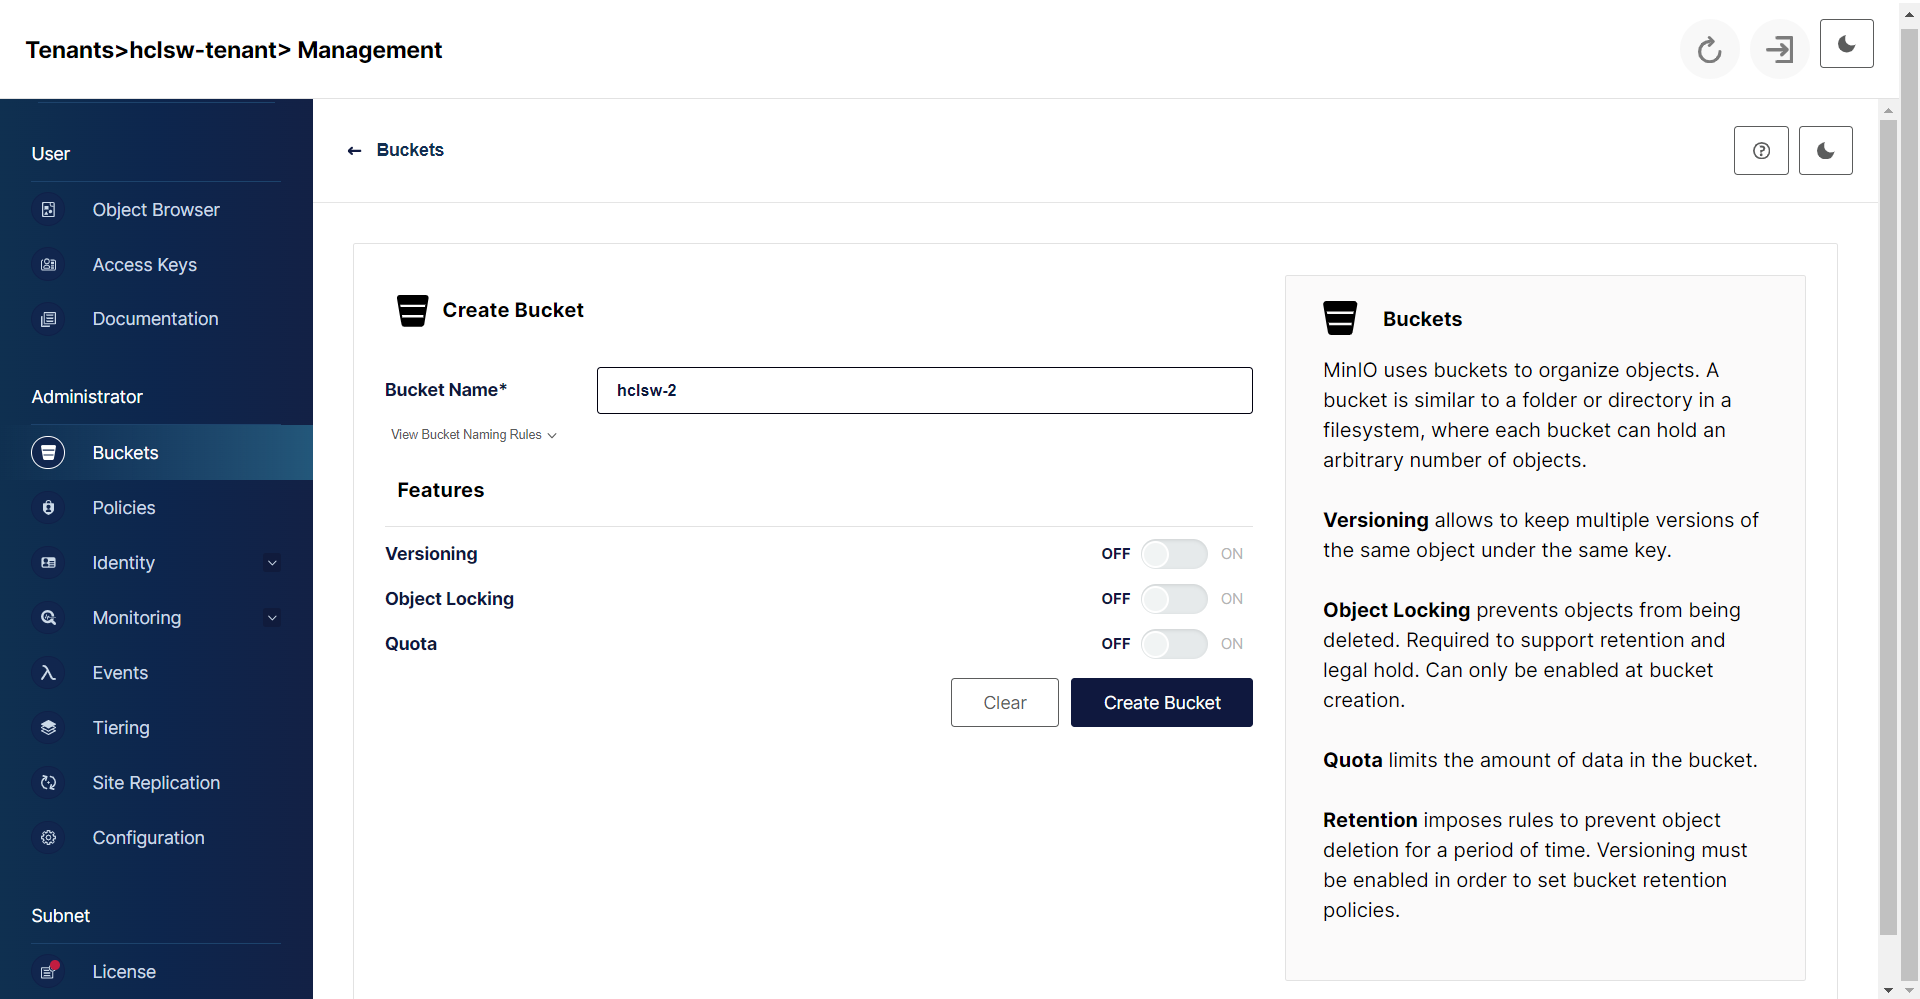
- In the console, Under Administrator section, click Buckets and enter bucket details.
Click Create Bucket to create the new bucket.
- You search for the existing buckets in the search bucket option as shown below.