
Managing API-driven pipelines
API-driven pipeline applications
Before you begin
- Create a value stream and its pipeline. See Creating a value stream and Managing pipelines.
- Configure a Jenkins integration and create a Jenkins build job. See Configuring Jenkins integrations.
- Create a user access key with permission to upload build and deployment information. See Managing user access keys.
- Ensure that the Jenkins agent can access the Velocity server.
About this task
API-driven pipeline applications enable you to effectively populate the pipeline and move dots through the system solely through build and deployment uploads. The create build and upload deployment API commands are displayed in the UI and can be executed in a command terminal. These APIs provide simplified endpoints for loading data and allow you to integrate the pipeline with unsupported tools. You can run the API commands manually for testing or add them to a Jenkins job to automate build and deployment status updates. The relationship between the APIs and the pipeline phases that they populate is detailed in the following table.
| API | Pipeline phases |
|---|---|
| builds/apiDriven | Input |
| deployments/apiDriven | DEV, QA, PROD, and any environments in the pipeline. |
Procedure
-
To map an application environment to the pipeline on the Pipeline page,
complete the following steps:
-
For the environment where you want to add the application, click
 Add app.
-
For the environment where you want to add the application, click
-
To upload a build that will create a new version for the application, complete
the following steps:
-
Click under the
Input stage of the pipeline for the
TEST API-driven Application application, used
as an example and shown in the figure below.
 The Create version modal displays a curl command, shown in the figure below, to interact with the TEST API-driven Application REST API.
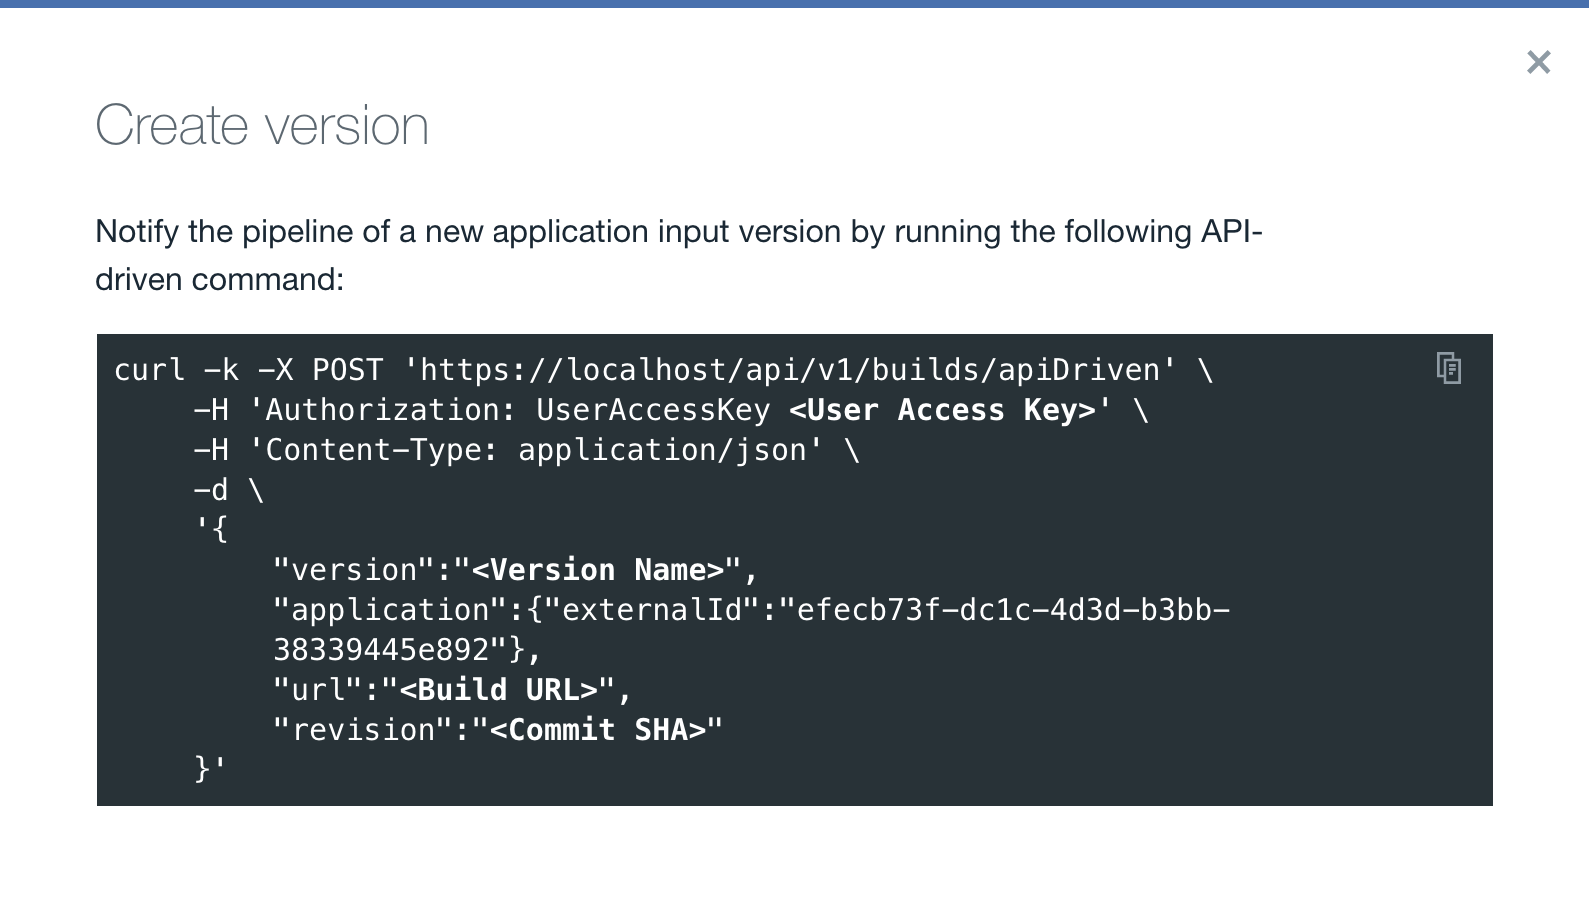 Note: The Application name entered previously in the Add apps - Choose the apps window is displayed in the Create version modal window above the
curlcommand. Refer to this page for more details on the builds/apiDriven API. -
Click
 to copy
the curl command.
to copy
the curl command.
-
Click
-
Notify the pipeline of an Input version deployment by
completing the following steps:
-
Click under the
DEV stage of the pipeline for the
TEST API-driven Application application, used
as an example and shown in the figure of the previous step.
The Create a deployment through the API (DEV) modal window will display a curl command, shown in the figure below, to interact with the TEST API-driven Application REST API to upload a deployment to the aforementioned application.
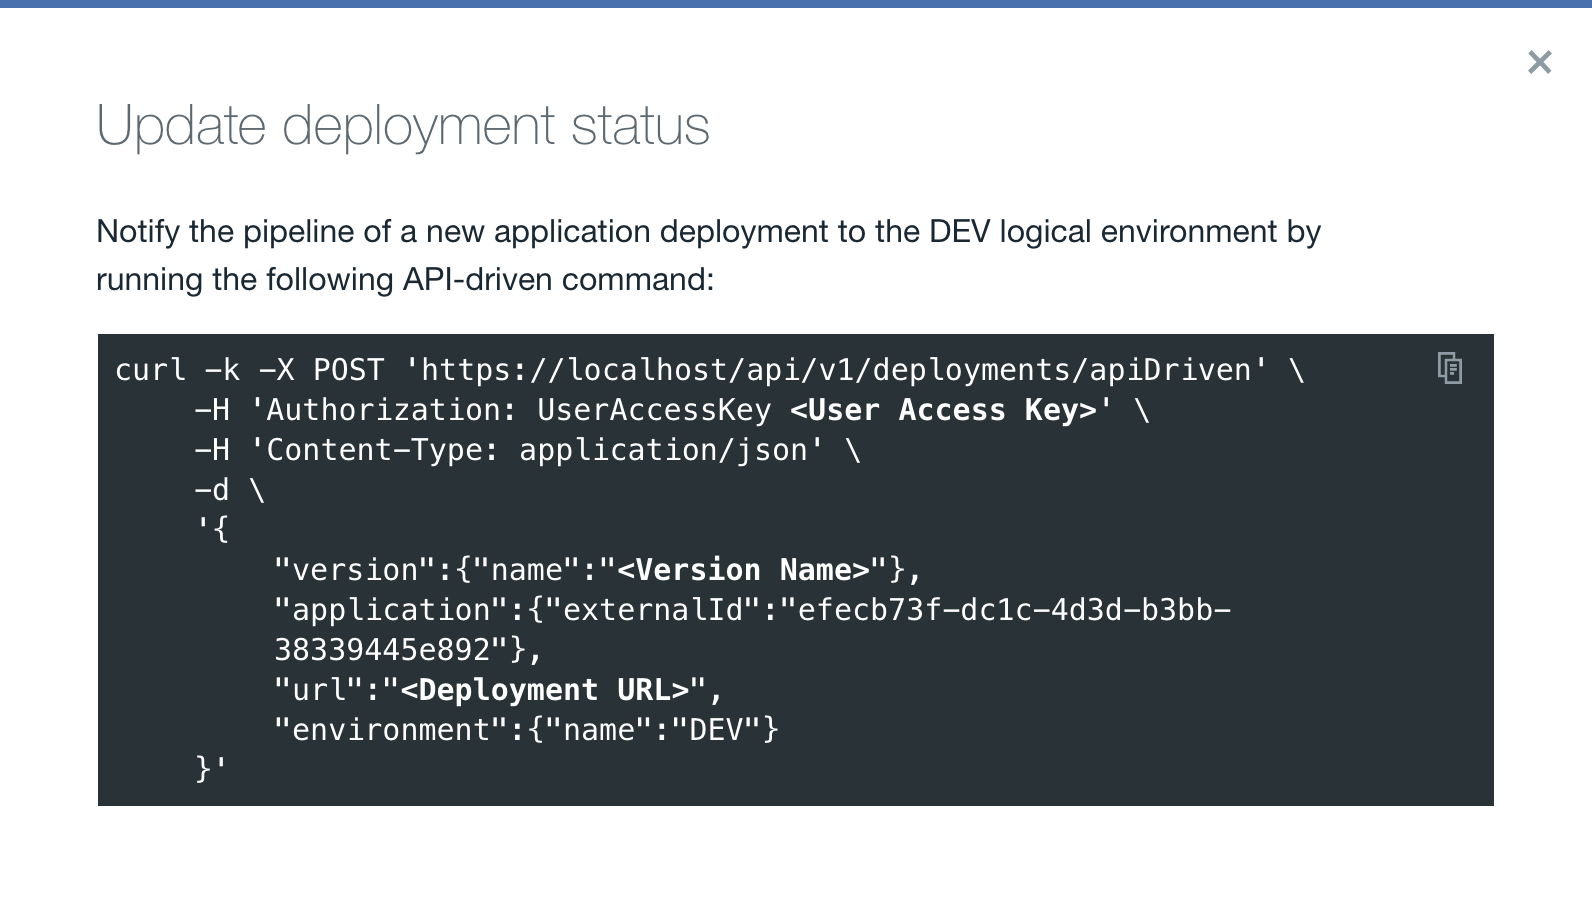 Note: The Application name entered previously in the Add apps - Choose the apps window is displayed in the Upload deployment status modal window above the
curlcommand. Refer to this page for more details on the deployments/apiDriven API. -
Click to copy
the curl command.
-
Click
-
To automate build and deployment status updates with Jenkins, add the API commands to the
build steps of the Jenkins job.
- Perform the same for any required environments.